The summer update of the Zoner Studio photo-editing software is stacked (literally!) with new features with the spotlight on image merging skills
Sponsored. Zoner Studio is a popular and richly featured raw editing software for Windows. Among its long list of attractions is the promise of two big updates every year for its subscribers and Zoner Studio has delivered in spades.
Last autumn, we saw faster selections and features to speed up workflow; in spring 2025 it was the arrival of powerful, single click AI masking; and a year earlier Zoner Studio added true HDR capability.
This latest update brings a raft of exciting features that enhances its appeal to photographers including a re-engineered search system, Smart Healing and a Remove Objects Tool. However, headlining the 2026 summer update is the emphasis on stacking and merging.
The ability to create panoramas, merge exposure brackets and handle focus bracketed sequences means Zoner Studio is a complete editing package and it’s these features we concentrate on in this overview.
Zoner Studio summer 2026 update: new features at a glance
- Focus stacking
- Panorama merging
- Exposure bracket merging
- Autostack and Detect Stack
- Long exposure merging
- Animation
- Remove moving objects
- Redesigned search system working across all metadata
- Smart healing
Zoner Studio: Panorama
Taking the panoramic option is a great pictorial technique and wonderful results can be produced without any special kit. What you do need, though, is an app with a talent for panorama stitching and now you have that power within Zoner Studio.
To test Zoner Studio’s merging skills I used panoramas shot handheld and, as you can see from the results here, it turned in excellent results. Clearly, it helps that you have images that are capable of being stitched in the first place, so it all starts with the shooting.
For a panorama sequence start shooting from left to right, allowing some degree of overlap from image to image – by around one quarter of the frame is enough. Vertical or horizontal format works but I prefer upright images because you get a wider or deeper result, so less of a letter-box, and of course you can use a tripod if you prefer.
For frame-to-frame consistency use manual exposure and a white-balance preset and don’t use a polariser because that can cause issues of unevenness across the sky. Exposure can be tricky if you’re covering a very wide field-of-view so take a manual meter reading, take a test shot of the most important area, usually the centre, and make sure that it’s correctly exposed.
With wide-angle lenses a dedicated panoramic tripod head will help achieve successful results but for handheld panos use a moderate wide, standard or even short telephoto lens and minimise how much detailed foreground you have in the composition.
Obviously don’t make any focal length changes and keep the camera level during the sequence. The process takes a little practice, but it isn’t difficult.
Once you have the shots, take them into Zoner Studio and start in the Develop module and under the camera icon apply camera and lens profiles and make any essential edits such as highlight control across the set. This step applies to the other merge modes too.
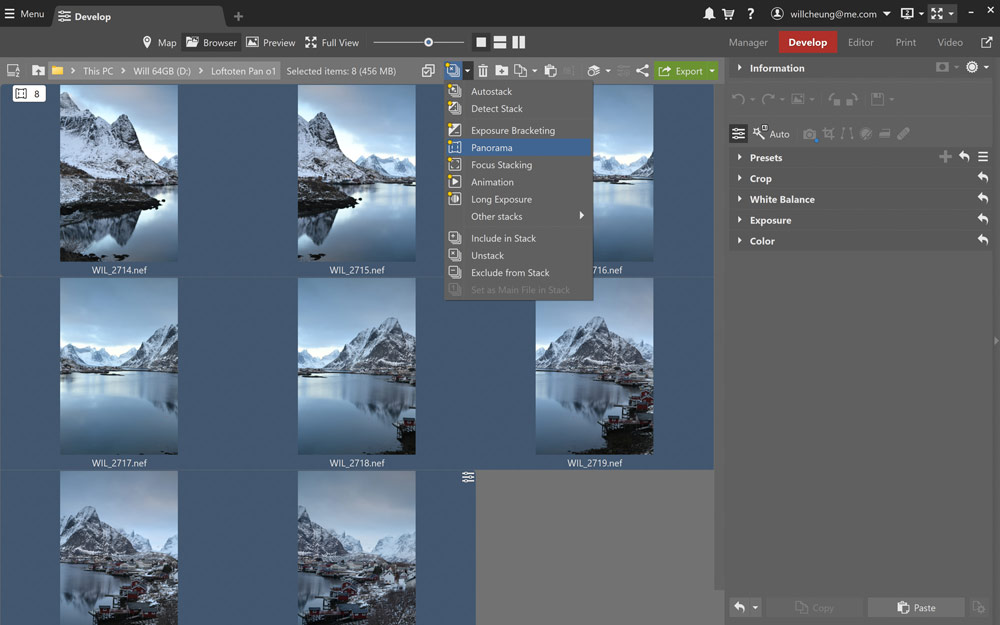
Select the images in the film strip or group them together first in a separate folder. The summer update has Autostack and Zoner Studio can recognise and group together sequences shot for panoramas, focus stacking and so on.
Watch your Stack
Next, hit the Detect Stack icon in the Navigator and Toolbar and select Panorama in the drop-down menu which also lists the Focus Stacking and Exposure Bracketing options.
Give the software a short while and you’ll see a preview. How long this takes depends on how many shots you have. In the 12-shot Siena pano shown below it took around a minute for a preview to be generated.
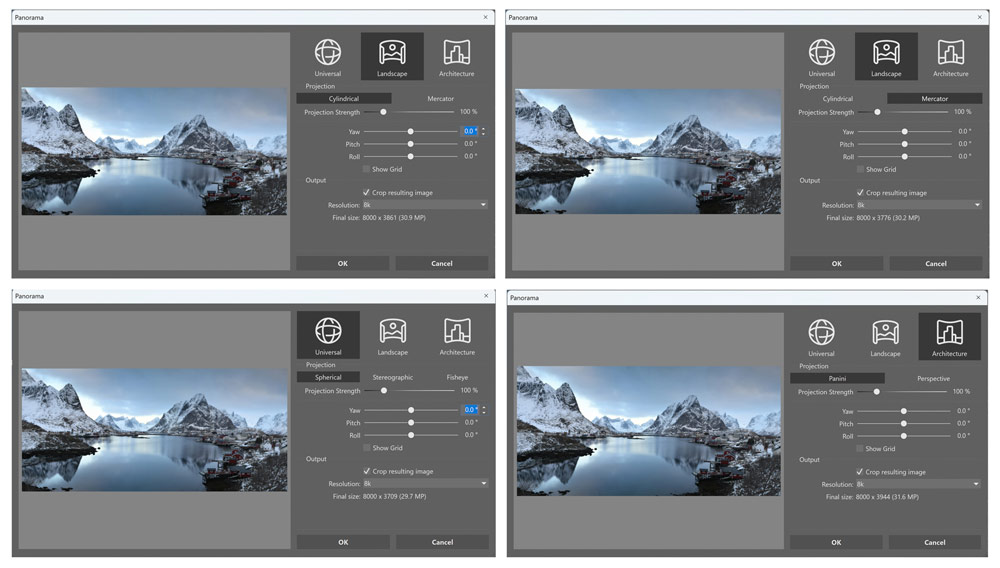
There are three modes. Landscape and Architecture are self-explanatory while Universal suits multi-row panos but I found all three can work fine across different genres.
There are different projection modes within each of these options, with the software offering the default first. With the preview updating quite quickly it’s worth trying different modes and don’t assume that Architecture, for example, is best with buildings. It can be, but in the Siena example below Landscape Cylindrical suited the image best.
Also try varying the Projection Strength and using the Yaw, Pitch and Roll sliders to fine-tune the preview which takes a few seconds to refresh. When you’re ready, choose an output resolution.
There is a broad selection, but the Final size figure will help with your decision and bear in mind that the higher the resolution the longer the pano will take to be generated.
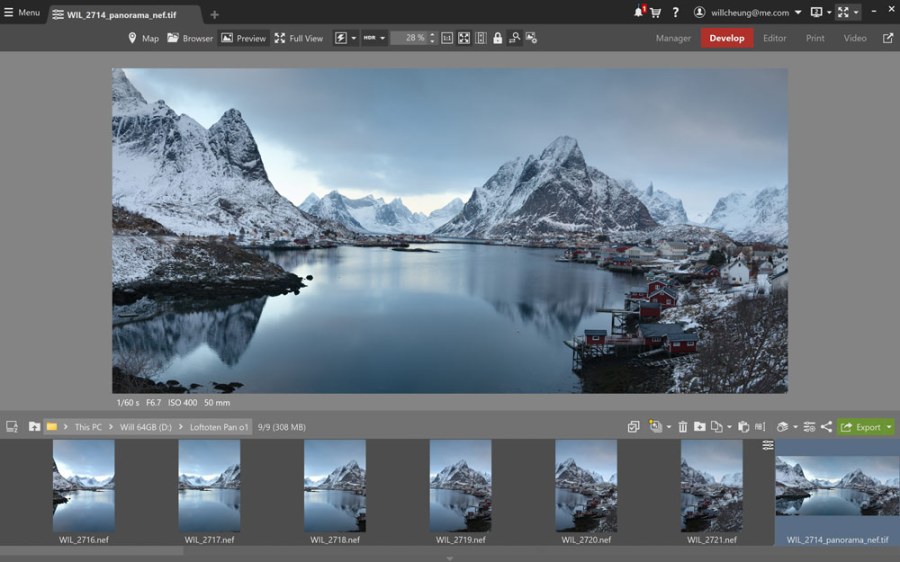
The eight-frame Reine in the Lofoten Islands pano below was shot n a 50mm lens on full-frame. Outputting it at 300MP would give an image measuring a massive 16,157x7800pixels. That’s huge so I went for a more modest 25MP resolution and this was saved as a 16-bit TIFF file.
Zoner Studio: Focus stacking
Focus bracketing is a long-established camera technique. It’s now more widely accessible thanks to mirrorless cameras with automatic focus bracketing skills to help produce images with the required depth-of-field.
Having the camera on a tripod and a static subject are crucial to avoid any strange artefacts in focus bracketing. When setting the feature in the camera, having more shots is better and start with the default focus differential. Consistent exposure and white-balance are key too so manual exposure and a pre-set white-balance are also advised.
Focus carefully on the closest part of the scene that you want sharp and use the self-timer start the sequence. Once done, carefully check the first and last frames and make sure you have the closest and furthest part of the scene sharp. If not, increase the number of shots or the focus differential. There’s a select few models that can merge focus bracketed shots in-camera but in most cases, the merging must be performed in software.
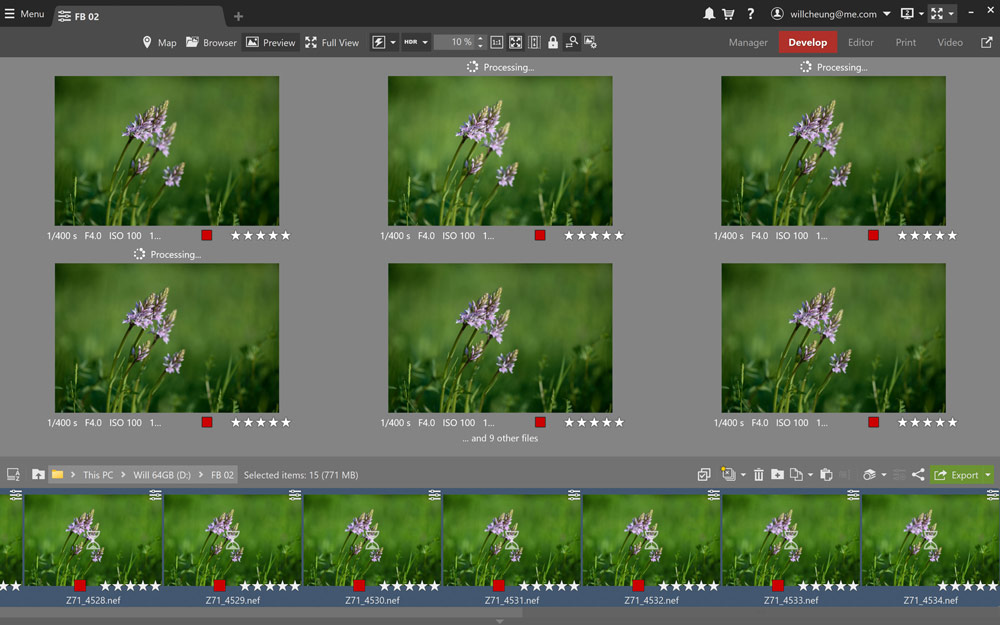
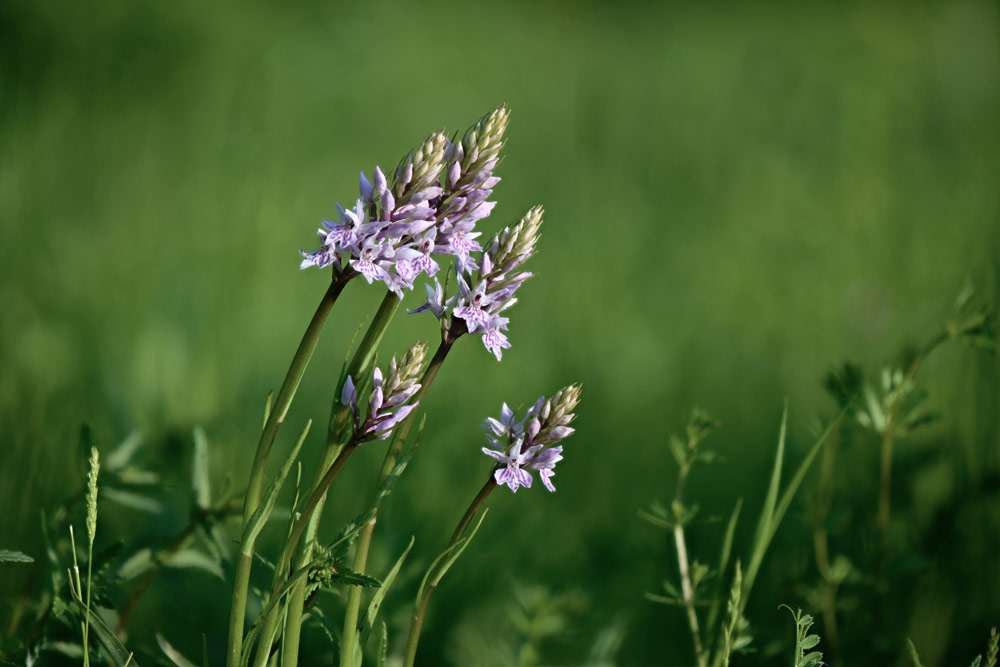
For this look at Zoner Studio’s focus stacking skills I used a 15-frame Raw format bracket of a clump of common spotted orchids shot with a Nikon Z7 camera fitted with a 105mm macro lens.
My aim was to have the orchids sharp with the background smoothly blurred, which is why I focus bracketed at f/4 rather than stopping down to f/16 which would have made the flowers sharp, but the background more obtrusive.
With the images imported into Zoner Studio and basic corrections made, all you have to is select them and go to Focus Stacking in the drop-down Detect Stack menu. It took several minutes for a preview to appear but 15 45-megapixel Raws is a great deal of data to handle on my laptop so having a more powerful PC is an advantage. In short, Zoner Studio did a great job with my test images without haloes or focusing artefacts.
Zoner Studio: Exposure bracketing
Awkward, contrasty lighting means exposure bracketing is an essential technique. It means you get at least one perfect exposure, but it also gives a set of images that can be merged in software to give fully-toned results.
Virtually every camera has autoexposure bracketing (AEB) but there is also the option of bracketing manually either using exposure compensation or by shooting manual exposure mode and varying the camera settings.
Exposure bracketing can be done on a tripod so the resulting images merge with perfect registration but handheld shooting works perfectly well. Just make sure the bracket is shot in continuous shooting mode so it’s done quickly to lower the risk of any camera movement.
If your goal is to merge images, use an appropriate white-balance preset rather than auto white-balance for the sake of consistency. Of course, shoot raw format and you can fine-tune the files but getting consistent images to start with saves time.
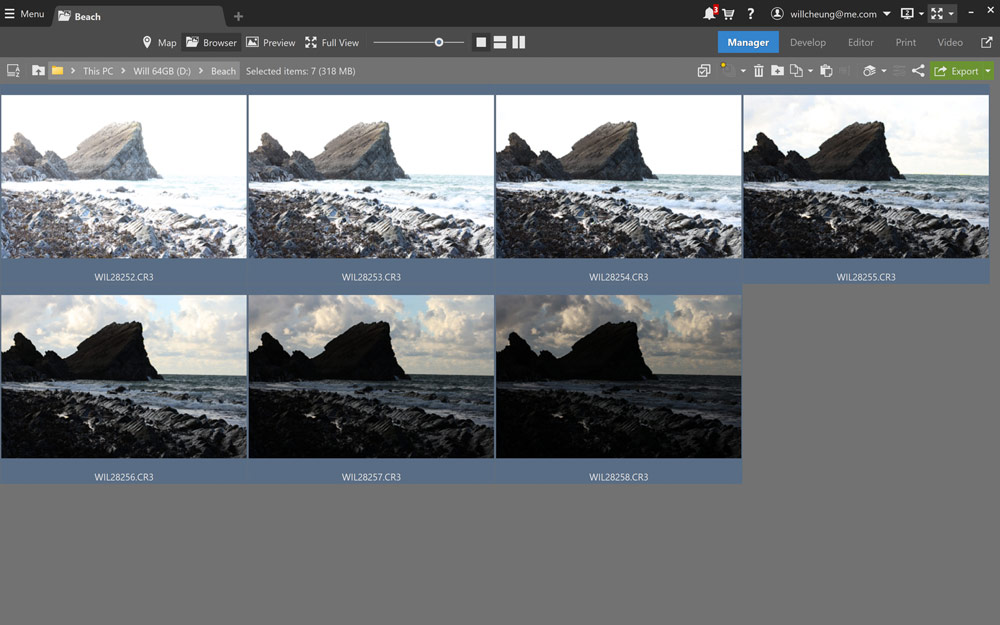
Zoner Studio used to have the ability to merge three bracketed shots, but the Summer update has been redesigned and can deal with even nine shot brackets.
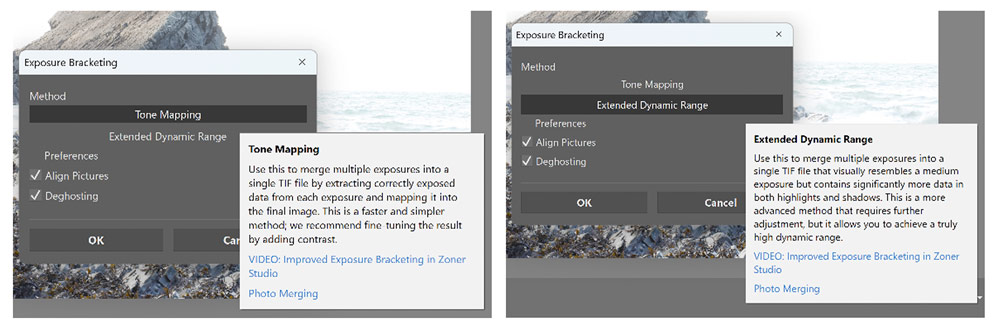
With the bracket loaded into Zoner Studio, apply any lens corrections and check the white-balance value and tint to make sure the images are consistent in colour. Use the Exposure Bracket option in the Detect Stack menu and a dialogue box appears with the option of Tone Mapping or Extended Dynamic Range.
The former maps all the data from each image quickly for a balanced result which needs editing afterwards for greater contrast and deeper blacks. With Extended Dynamic Range you end up with a darker result but there’s more detail in the shadows and highlights for editing.
In preferences, select Align Pictures for a handheld bracket and Deghosting helps resolve any movement such as branches moving in the wind.
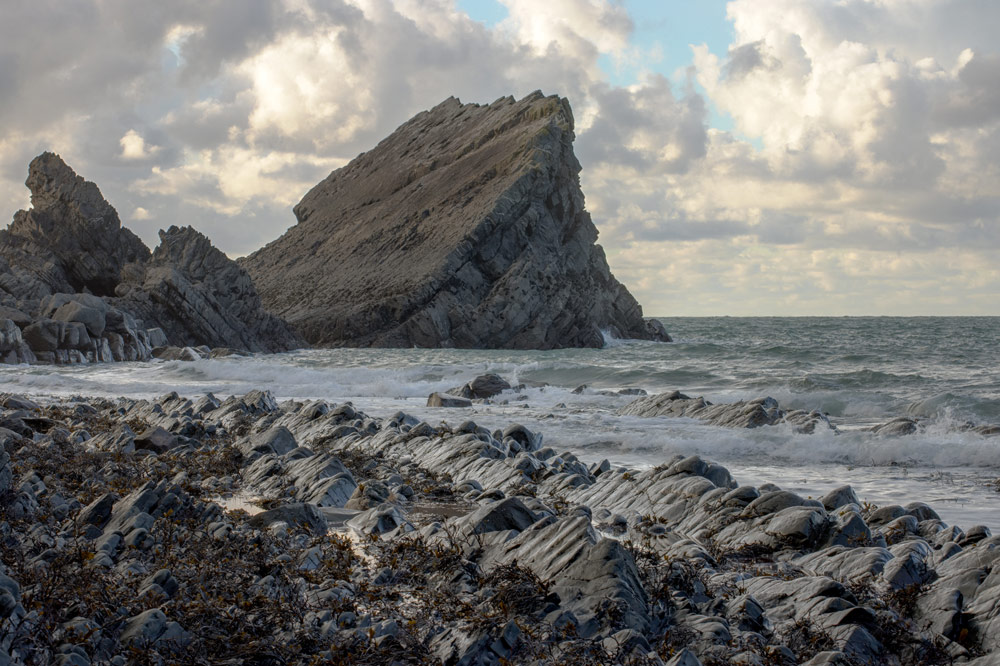
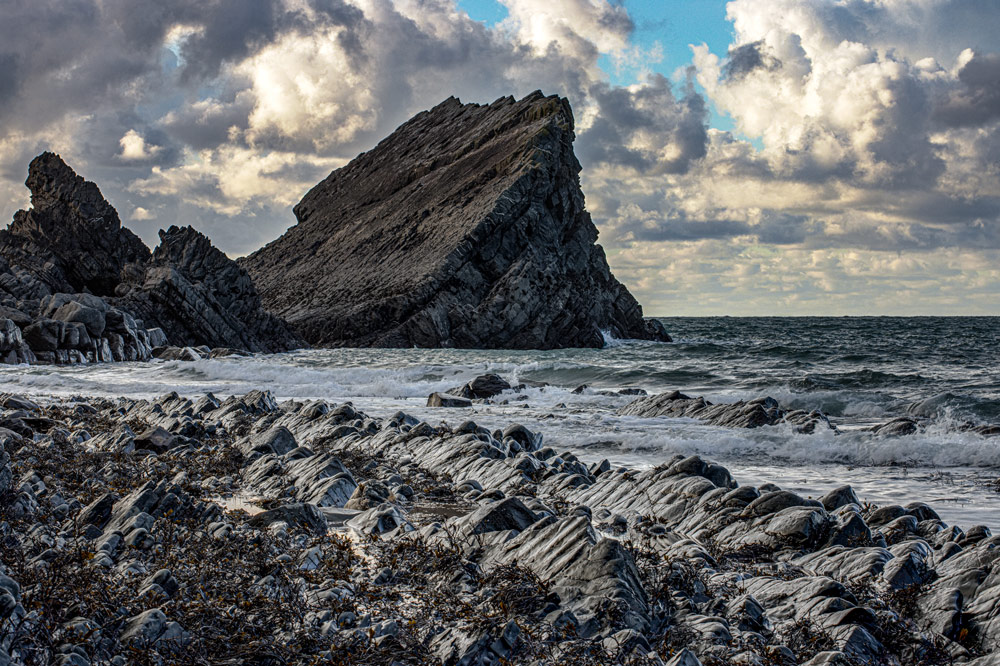
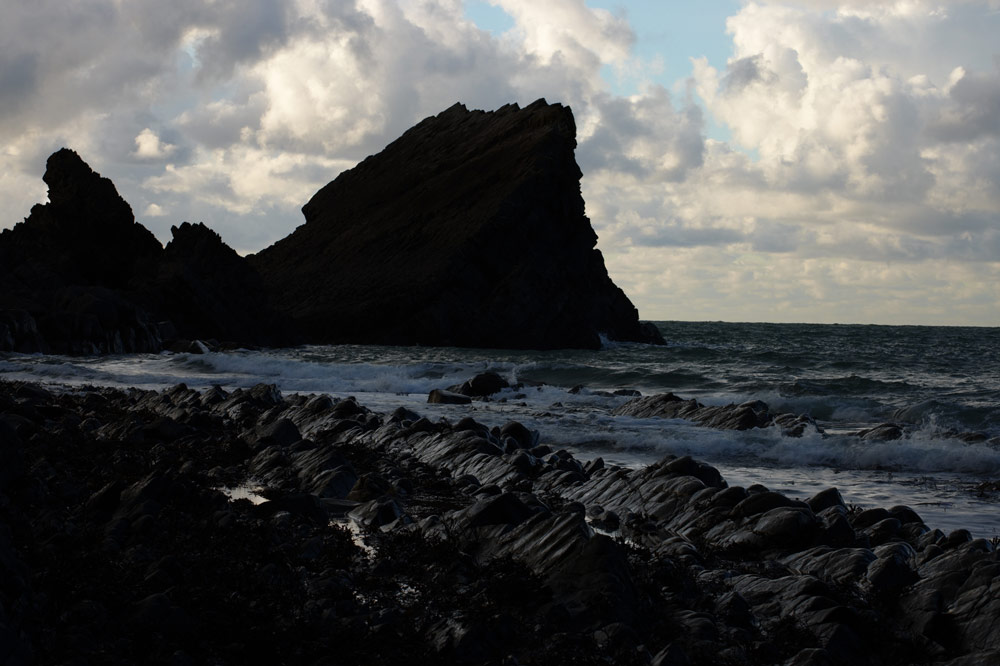
The resulting 16-bit TIF is a large file with plenty of potential for fine-tuning. In the coastal image shown below, the tone mapped file was 306MB and a few pixels smaller than the camera’s native raw format.
Zoner Studio summer update: summary
Yet again, Zoner Studio’s latest update doesn’t disappoint and its array of photo stacking and merging tools enhances its already compelling credentials as a powerful, top-value image editor.
Its new Autostack and Detect Stack with their ability to recognise related sets of images saves time manually sorting them while the merging tools work well. I was especially impressed with Focus Stacking and Panorama stitching because they are functions I use often and Zoner’s implementation of them is first-rate.
That’s not to say that Exposure Bracketing, Long Exposure, Animation and Remove Moving Objects were disappointing because they weren’t and the full set added to the overall attraction of Zoner Studio and at $5.99 a month or $59 a year it’s very good value too.
Try the demo version of Zoner Studio here; it’s free for seven days and fully functional.
Follow AP on Facebook, Instagram, YouTube, TikTok and Irys.