The rendering of out-of-focus areas in a picture should be more than just an afterthought. Tracy Calder asked two full-time photographers to share their tips on achieving beautiful bokeh
The word ‘bokeh’ can cause some photographers to become irrationally irritable. It’s not just the definition that bothers them, it’s also the pronunciation. Over the years I’ve heard this five-letter word spoken as ‘boo-kay’, boh-kuh’ and ‘boh-key’– sometimes all in the same sentence.
I’ll hold my hands up and admit that I’m a repeat offender. To settle the argument, or at least move on, I would like to propose ‘boh-keh’, as suggested by one of Canon’s Japanese-speaking product managers (although he did go on to explain that bokeh is pronounced differently in different areas of Japan!).
With that (kind of) settled, we can move on to what bokeh actually means. Most people use it as a term to describe the rendering of out-of-focus areas in an image – it’s frequently used when talking about backgrounds, but it can also be applied to foreground ‘blur’ too. Generally speaking, bokeh is categorised as either ‘good’ or ‘bad’ but, as with most things, what one person loves another person hates, so it’s pretty subjective.
Photographers use a whole host of adjectives to describe the quality of bokeh including smooth, creamy, beautiful, sweet and silky (feel free to add your own). Again, what attracts one is sure to repel another, and there are no clear definitions.
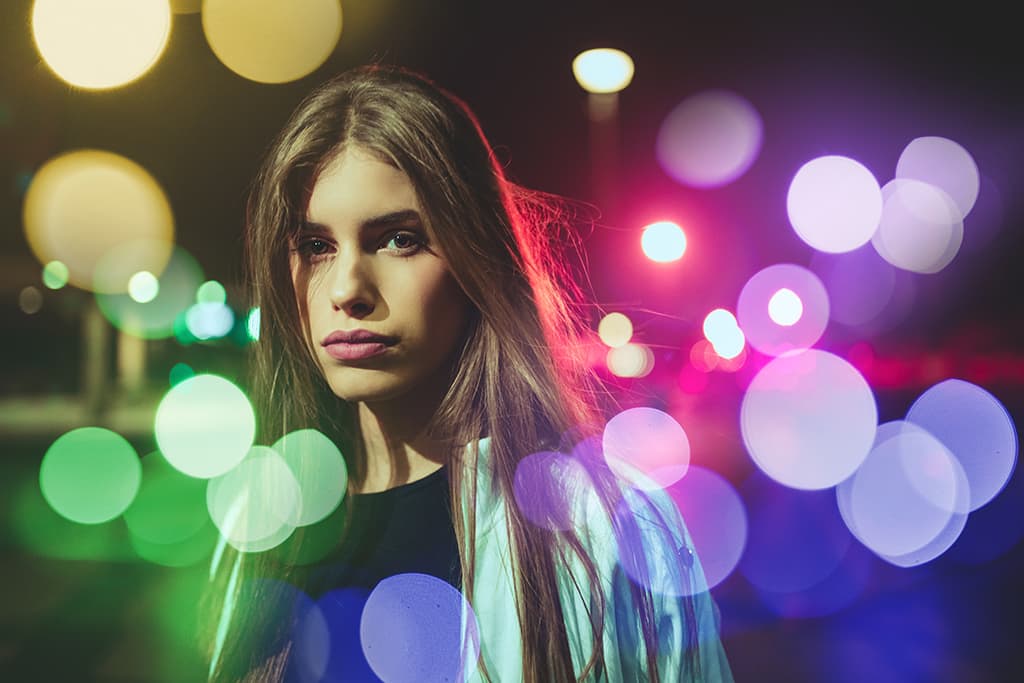
Bokeh can be used by portrait photographers to add a touch of sparkle and energy to a scene. © getty images
The quality of the bokeh you achieve depends on a number of things: the lens you use, the distance between the subject and the background, and the aperture you select. For great bokeh you need a fast lens (something that will open to f/2.8 or more is ideal). Many bokeh fans swear by fast primes, but only trial and error will determine what works best for you.
Crucially, the lens you use (or more accurately the shape created by the aperture blades) will determine the size and shape of the bokeh that you obtain in the final image. An aperture that is circular will, naturally, create rounder bokeh than an aperture that is more hexagonal. (The shape of the bokeh is most noticeable in the highlights).
If you don’t own a super-fast prime, but still want to create beautiful bokeh, you have other options. You can use the lens you own and increase the distance between the subject and the background – this will throw the background out of focus and make the bokeh more visible. Alternatively you can invest in a vintage lens (see below).
Or you can attempt to mimic the effects using editing software (Skylum recently updated its image-editing package to include Portrait Bokeh AI, while Adobe, Affinity and some high-end smartphones now have the facility to add ‘instant bokeh’ to pictures.) Regardless of your choice of lens, set your camera to aperture priority (or to manual mode) and select the widest aperture available (or a few stops down).
The power of bokeh is frequently harnessed by portrait and macro photographers. We’ve all seen images of models with beautiful circular bokeh behind them, adding a touch of sparkle and energy to a scene, and insects surrounded by orbs of light that draw you into their magical world.
It comes as no surprise, then, to learn that photographers working in these genres are among the most likely to experiment with bokeh created by vintage lenses. Popular choices include the Trioplan 100mm (which delivers bokeh shaped like soap bubbles), the Helios 85mm (which offers swirly bokeh) and the Minolta MC Rokker PG 58mm (which promises creamy bokeh).
To understand why bokeh is so important to portrait and macro photographers I asked two full-time professionals – Perdita Petzl and Neil van Niekerk – to share their secrets with us.
Close-up and Macro
Perdita Petzl
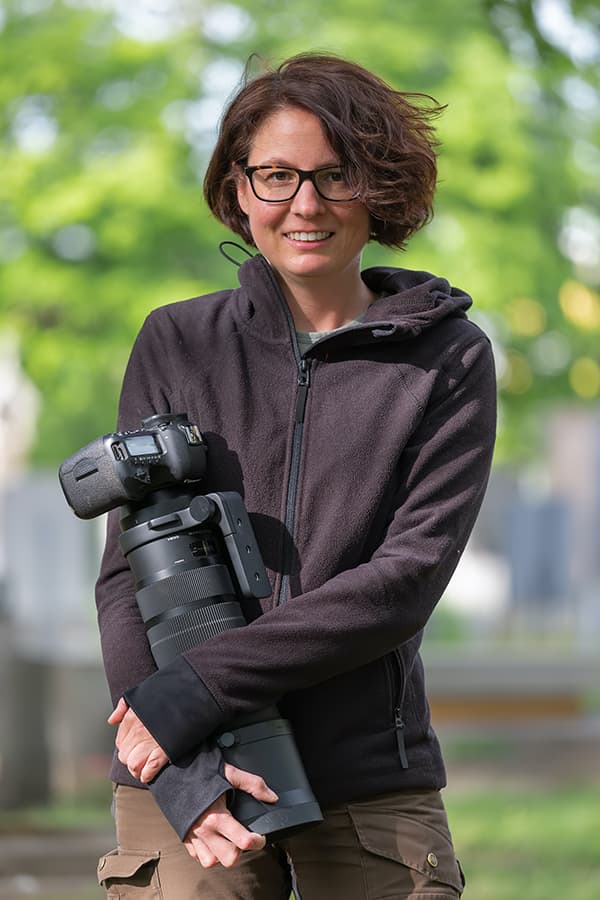
Perdita specialises in macro images that show a plant or animal in its natural environment. She leads photography workshops, writes features and lectures on photography. Visit www.perditapetzl.at, Instagram: perdita_petzl, Facebook: NaturfotografiePetzl.
For many people the word bokeh describes the quality of out-of-focus areas in the foreground and background of an image, but to me it means much more than that. Bokeh is part of the composition and managing it well can lead to interesting and eye-catching effects in the negative space around a subject.
Interesting bokeh brings more liveliness and dreaminess to a picture, which is exactly what I like! It’s a common misconception that shooting wide open automatically produces attractive bokeh, but that isn’t always the case.
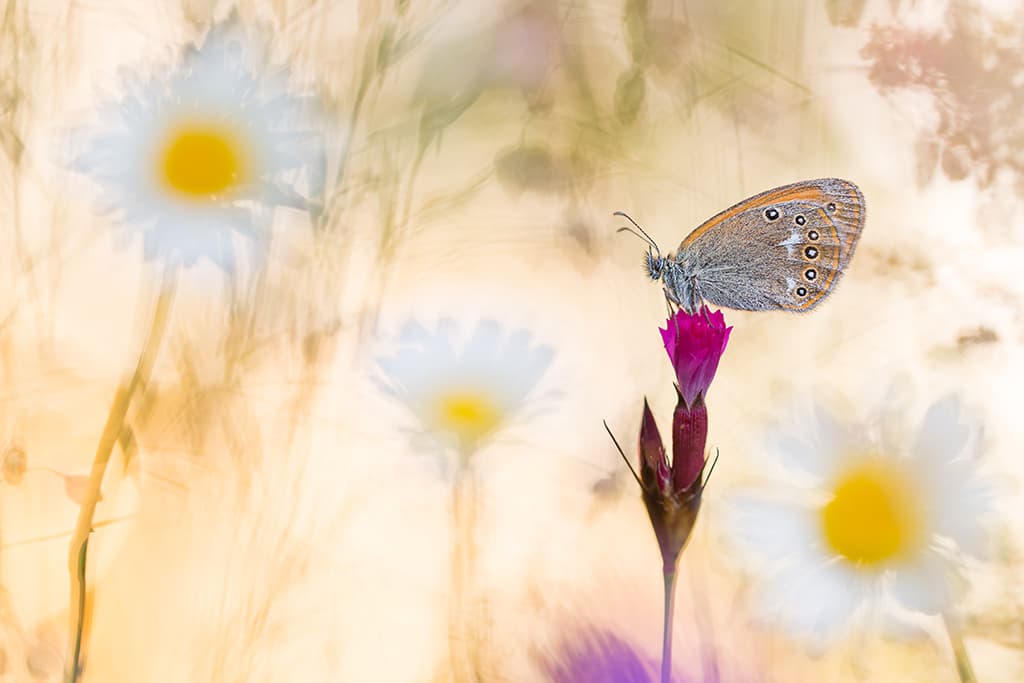
Photo: Perdita Petzl. Here the subject was in shade and the background in the sun – the result is a very bright and light-flooded image Canon EOS 5D Mk III, 150mm, 1/125sec at f/4, ISO 200
With macro photography, shooting wide open can sometimes lead to monochromatic (arguably sterile and boring) backgrounds. In my images I try to include some of the natural habitat, structures and colours surrounding my subject.
People often talk about ‘good’ or ‘creamy’ bokeh, but this can mean different things to different people. To me, ‘good’ bokeh is made up of natural structures (shapes and forms in the surrounding environment), soft colours and background highlights or reflections. Whereas my understanding of ‘creamy’ bokeh is soft bokeh without any disturbing elements.
On the flip side, ‘bad’ or ‘ugly’ bokeh is usually caused by annoying elements becoming too dominant in the frame – this happens when a photographer has failed to notice beforehand which elements will add to a picture and which will be distracting, or which perspective is the most appropriate given the situation.
When shooting close up, blades of grass that cut across the picture or interfere with the subject in some way are common offenders, as are plants cut off by the edges of the frame.
While shooting wide open can help to create striking bokeh, the level and quality of this bokeh can be affected by the setting or location you find yourself in. Before I release the shutter, I ask myself the following questions: how can I integrate the surroundings into my photograph? How can I use the light to my advantage? How strongly should natural structures be rendered in my photograph?
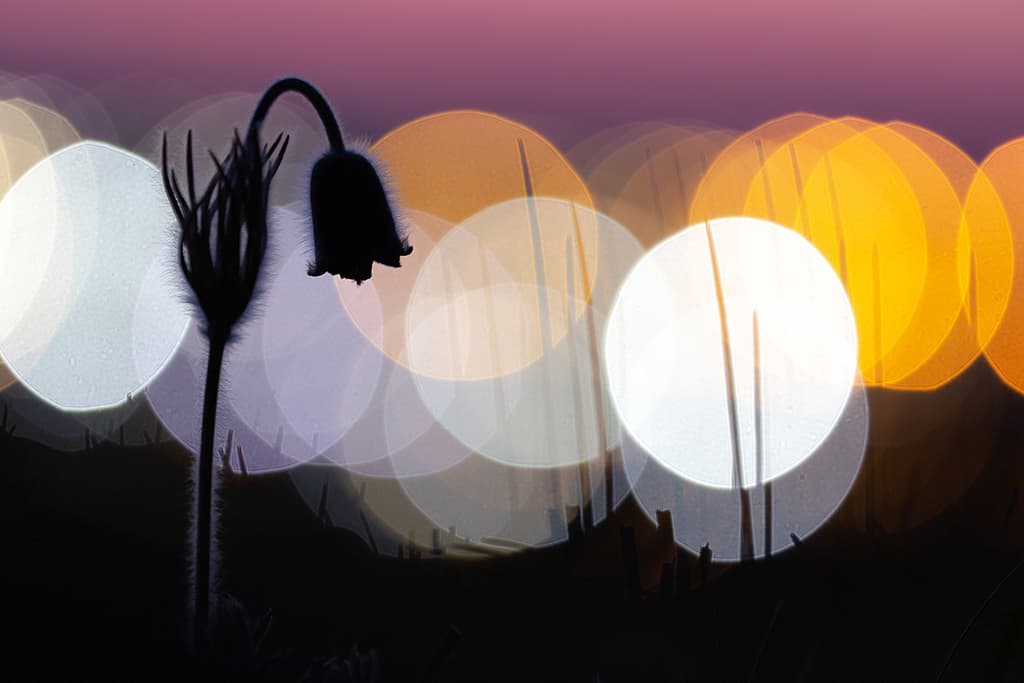
Photo: Perdita Petzl. The focal length and an open aperture help to render the city lights as large as possible Canon EOS 5D Mk III, 150mm, 1/4sec at f/2.8, ISO 400
Considering these things makes you slow down and concentrate, which is never a bad thing. It also helps if you have an idea or vision in your mind before you begin. I work in live view, because it gives me a good idea of how the final image will look, and I can also see if there are any unwanted or disturbing elements in the frame before I commit myself.
When it comes to creating beautiful bokeh it’s worth mentioning that moving the camera a few centimetres left or right, up or down, can make a big difference. You need to consider how distance will affect the level and quality of the bokeh too: think camera/foreground/subject/background, as well as the focal length you use and the choice of aperture.
If blades of grass are close to the subject, for example, they will appear sharper and more dominant in the picture. If structures or plants are further away, they will appear softer and less dominant. I tend to play around with the aperture until the bokeh looks right, but I don’t tend to stop down beyond f/4. I check the depth of field repeatedly to ensure the bokeh matches what I had in my mind’s eye.
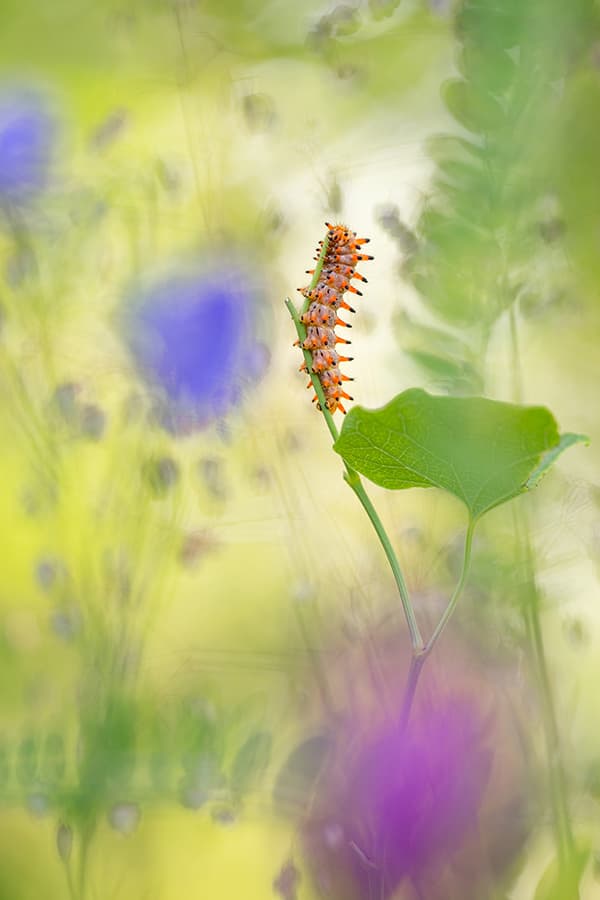
Photo: Perdita Petzl. To show the natural structures in the bokeh even more clearly, the aperture was stopped down a bit Canon EOS 5D Mk III, 150mm, 1/180sec at f/3.5, ISO 400
My favourite equipment for macro work is a Canon EOS 5D Mark III with a Sigma 150mm f/2.8 APO Macro EX DG OS HSM lens – I love the combination of a full-frame camera and a long focal length. In the past I’ve used a vintage Trioplan 100mm lens, which is well known for its unusual soap bubble bokeh.
Of course, the sharpness of this lens cannot be compared to a modern lens, but sometimes it’s not sharpness but atmosphere that counts. Unfortunately, vintage lenses can be more difficult to use in backlight – they are often uncoated, which can lead to disturbing reflections.
On the plus side, vintage lenses tend to have more aperture blades than modern lenses (my Trioplan 100mm has 15), which results in nice blur – even when you stop down, the bokeh bubbles remain circular.
I aim to capture attractive bokeh in-camera rather than after the event so, for me, using post-processing to mimic the effect is not an option.
I carry out minor edits – sharpening, noise reduction and tweaks to white balance etc – in post-processing, but that’s about it. Occasionally I shoot short films of my subjects, having taken my pictures first.
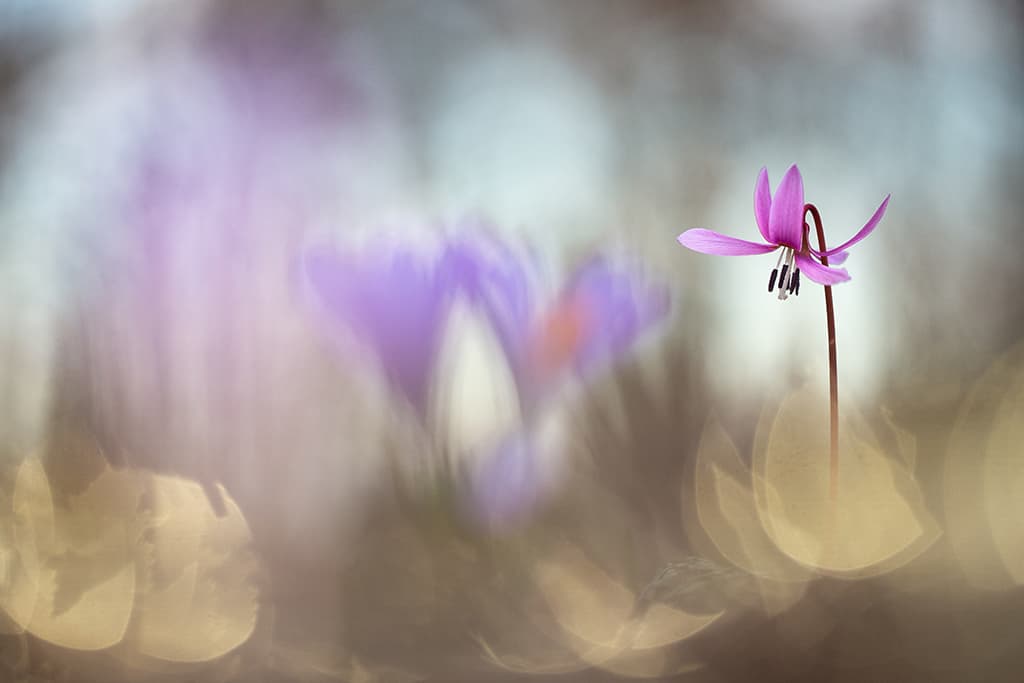
Photo: Perdita Petzl. Canon EOS 5D Mk III, 150mm, 1/500 sec at f/2.8, ISO 400
In such instances I don’t change the perspective or anything else, so I have the same level and quality of bokeh in both film and stills. I love having video clips with dreamy bokeh! There are so many ways to use bokeh creatively. Walk the world with your eyes wide open and never be afraid to experiment.’
Bokeh in Portraits
Neil van Niekerk
Based in New Jersey, Neil works across a range of fields. He maintains Tangents www.neilvn.com/tangents, has produced books on flash photography and received an Emmy for his time-lapse photography. Visit www.neilvn.com, Instagram: neilvn, YouTube: NeilvanNiekerk.
Bokeh is a term used to describe the rendering of out-of-focus areas (usually in the background) of an image. Depending on the optical design of a lens, the out-of-focus elements can be smooth or the highlights can have a kind of double edge due to over-correction of spherical aberrations.
Many people think bokeh is the same as shallow depth of field (and use the terms interchangeably), but this isn’t the case. You can turn the background into a smooth mush using shallow depth of field, but bokeh is different. Generally, a lens that delivers ‘good’ bokeh will render the highlights and out-of-focus areas as attractively smooth – some people use the word ‘creamy’, which is a good description.
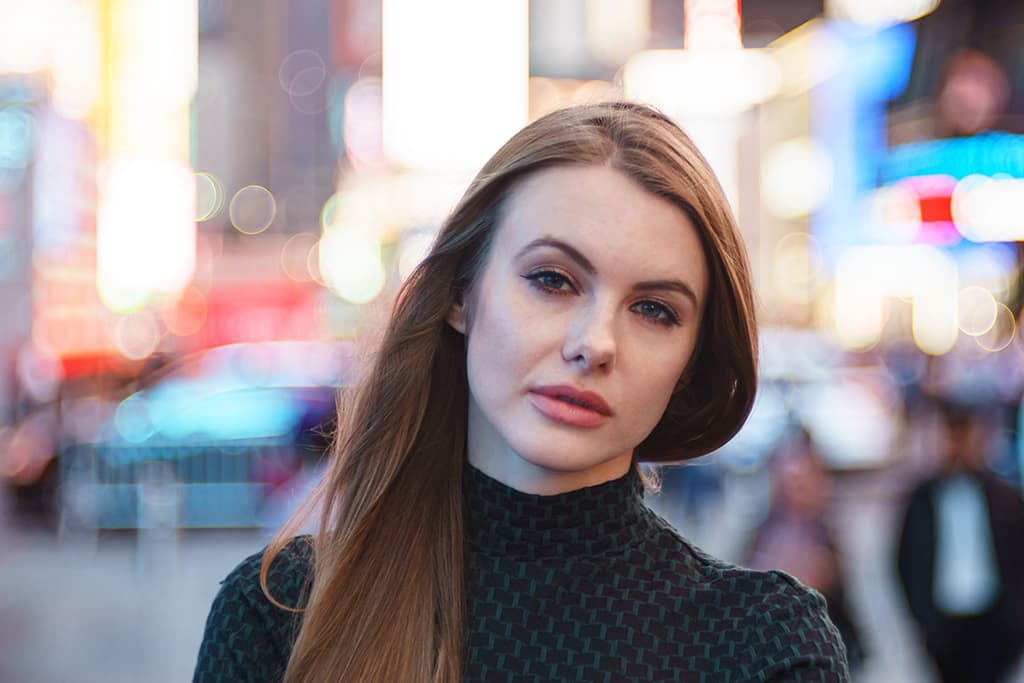
Photo: Neil van Niekerk. Vintage lenses, like the Trioplan 100mm f/2.8 used here, can give painterly background bokeh Sony A7 II, 100mm, 1/200sec at f/2.8, ISO 800
‘Bad’ or ‘poor’ bokeh, on the other hand, is where the highlights become intrusive and lead to a background that feels overly busy. An example of ‘poor’ bokeh can be seen in the image here (far left), captured with a Nikon 50mm f/1.4D lens. The model was photographed at f/1.4, resulting in super-shallow depth of field.
This particular lens delivers poor bokeh, so the background looks busy and distracting. The out-of-focus leaves don’t appear smooth, instead there’s a double edge to the highlights.
It’s obvious that shallow depth of field hasn’t helped to create ‘good’ bokeh here! How far you are from the subject, and how far your subject is from the background will affect how the background is rendered, but this relates more to how shallow depth of field appears.
If you look at the shot taken with the Nikon 50mm f/1.4D again, you’ll see that the background would have been distracting regardless of how close the trees were to the model.
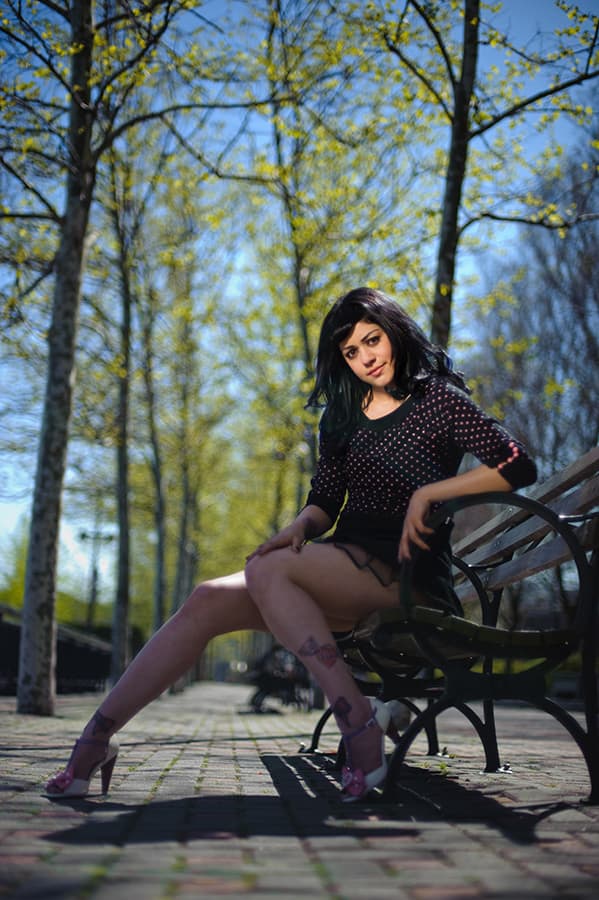
Photo: Neil van Niekerk. Shallow depth of field does not always equate to ‘good’ bokeh. The bokeh here is harsh and too busy. Nikon D3, 50mm, 1/4000sec at f/1.4, ISO 200
Some backgrounds don’t contain distinguishable elements (such as trees) and in these instances the quality of the bokeh can’t really be defined. But when there are highlights or details in the background that might add to the design of the image, ‘good’ bokeh can really help to elevate a picture. The effect might be slight, even subliminal, but it’s still significant.
In terms of bokeh, my favourite lens is the Sony 100mm f/2.8 STF. The team responsible for its optical design created something magical – backgrounds are even smoother and more out of focus than you’d expect from a lens with a T-stop of 5.6. Of course, deciding whether bokeh is ‘good’ or ‘bad’ can be a matter of taste.
I’ll always prefer less-distracting backgrounds, but whether something is distracting or interesting can also be subjective! Vintage lenses come into their own here. These often have interesting ways of rendering out-of-focus areas – again, whether this appeals to you is a matter of taste. If you like flare, you’re in luck, because vintage lenses flare in beautiful ways.

Photo: Neil van Niekerk. The dream bokeh of the Mitakon Zhongyi 50mm f/0.95, Sony A7 II, 50mm, 1/1000sec at f/0.95, ISO 100
Thinking about some of my favourite vintage lenses, the Helios 85mm f/1.5 deserves a mention. The picture of the model with the leafy backdrop (seen here, bottom left middle) displays the typical swirly effect created by the Helios 85mm.
I think the swirl helps to draw attention to the centre of the frame, containing the subject. I love that look, but some people might hate it. Again, it’s down to personal taste. I used the same lens for another shot of the model with the city lights of Manhattan in the background – the effect was more subdued, proving how the mood of an image can change depending on the colours and shapes in the background.
I also have a soft spot for the Trioplan 100mm f/2.8 (originally made by Meyer-Optik Görlitz). This lens is famous for its perfectly round soap bubble highlights. The effect is beautiful. It’s often used for semi-macro photography as it’s designed for close distances, but in the picture on the left I used it to photograph a model in Manhattan.
In this instance the lens gives a kind of structure to the background elements – instead of a smooth or ‘poor’ rendering of out-of-focus areas the bokeh is much more interesting. To my mind this gives the picture a painterly feel. Some might find the background distracting, but I like it.
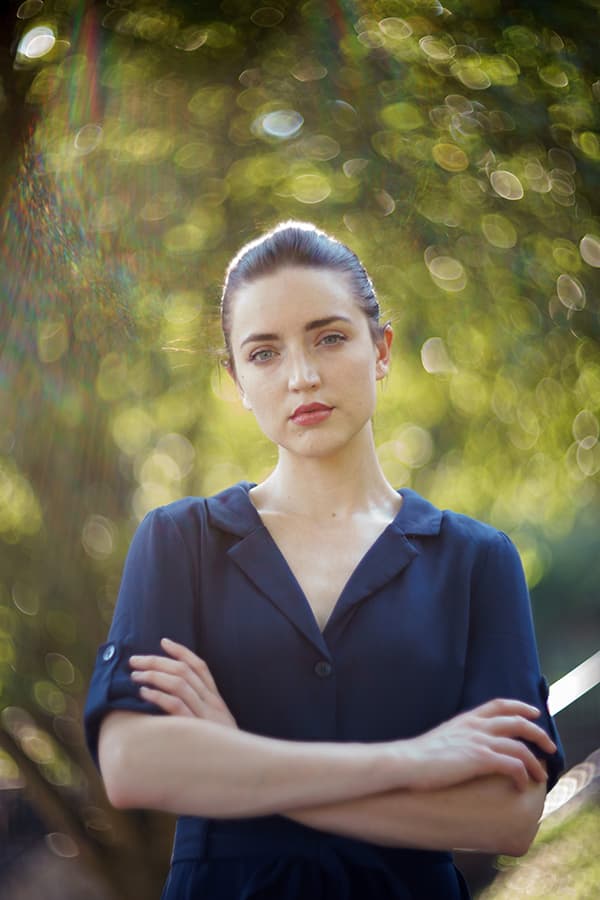
Photo: Neil van Niekerk. The bokeh is quite busy but its swirliness, and the way the lens flares, results in an unusual portrait, Sony A7 II, 85mm, 1/400sec at f/1.5, ISO 500
Another unusual lens is the Mitakon Zhongyi 50mm f/0.95, an unusually fast optic. In the image below we see a very shallow depth of field combined with the bokeh unique to this lens. The bokeh produced could easily be described as smooth or ‘creamy’ but, again, the use of shallow depth of field per se does not necessarily make for good or pleasing bokeh.
I’m sure some software programs will enable you to mimic some aspects of ‘good’ bokeh’ but there is only one way to get the real deal, and that’s through the lenses you choose to use.
10 tips to achieve stunning bokeh
1. Think about how the distance between subject and background affects the level of bokeh.
2. Don’t allow the highlights to become intrusive, resulting in a background that’s too busy.
3. Look for background elements that might add to the design of your image.
4. If you don’t own a fast prime, try mimicking bokeh with editing software.
5. Look for colours and structures in the background of your scene that will help you to create good bokeh.
6. Be aware of elements that might be a visual distraction before you release the shutter button.
7. Play around with vintage lenses – you’ll find plenty of options via various online auction sites.
8. Don’t let bokeh be an afterthought – make it an important part of the composition.
9. Work in live view and constantly check what’s happening in the background.
10. Remember that whether bokeh is considered ‘good’ or ‘bad’ is often a matter of personal taste.
Further reading
How to take really beautiful portraits