
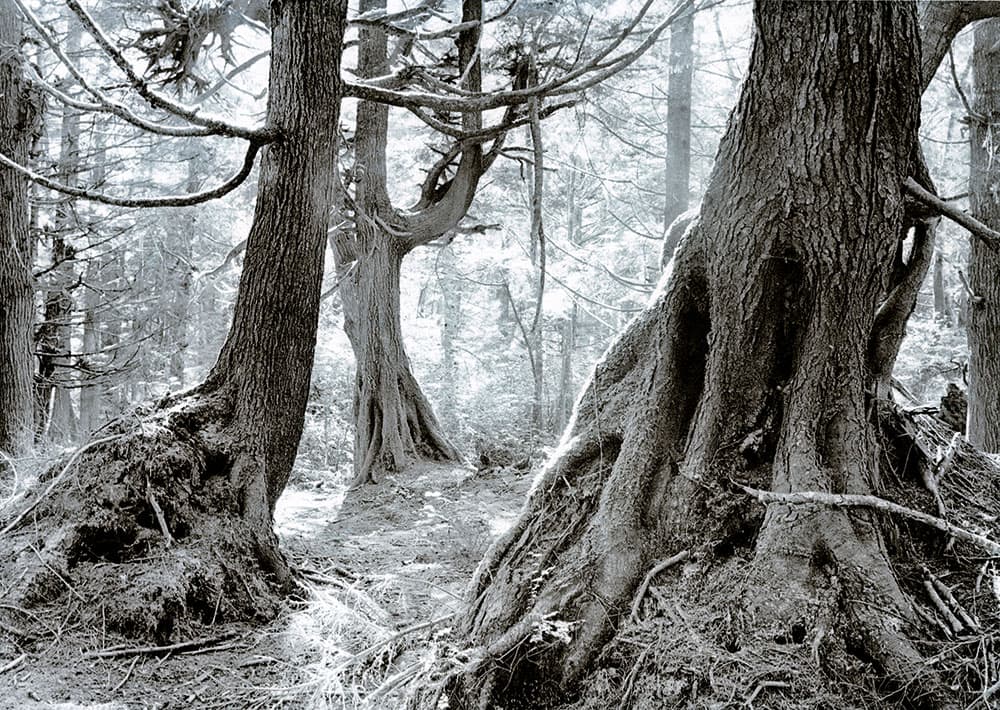
Read Tim Rudman’s darkroom toning tips. ‘Old Forest’. Gold and selenium toned amidol – lith two-bath print. The mix of rich browns and cold blues partner well to bring out textures and add depth. Credit: Tim Rudman
Toning has much to offer the film photographer who wants outstanding prints. Longer-lasting prints and deeper, more luminous tones are worthy goals, but the optional introduction of false colour alters perceptions of reality – enabling a more personal interpretation by the viewer. It also boosts mood and atmosphere on the finished results. Using colour contrast can also enhance tonal separation and aerial perspective.
We consider selenium, gold and sepia toners, while in a future article we will take a look at the more colourful copper and iron blue toners.
Darkroom toning tips: Selenium toning
Readily available and easy to use, selenium toner is a single solution for dilution with water. As it smells of ammonia good ventilation is advised. Label the diluted solutions for reuse until they are exhausted. Often the only toner used by the black and white masters of the past, selenium typically was diluted 1:20 as a 2-minute final processing stage to increase print Dmax (the maximum depth of black yielded by a paper). This added luminosity and depth to a print and also imparted some archival protection without significant colour shifts on their coldtone papers. Today it is also used for its colour shifting properties, mostly with warmtone papers and lith prints.
There is no ‘correct’ dilution for selenium. The figures ‘1:20 or weaker for Dmax and 1:10 or stronger for colour’ are sometimes quoted, but it depends on the make of solution and the paper. Be aware that strong solutions can be pungent.
Darkroom toning tips: Colour
Selenium toner converts image silver to orange silver selenide, which resists chemical attack by atmospheric pollutants and almost any chemical used in processing – a fact we take advantage of with duo toning. However, its colour is heavily but variably masked by surrounding black silver grains, so warmtone papers may initially ‘cool off’ and then reveal a shift to reddish browns. Coldtone papers respond slower and can shift to aubergine or purply blacks. Lith prints respond with great enthusiasm.
Darkroom toning tips: Split toning
Selenium toner acts ‘bottom up’ from darkest tones, to mid and eventually lightest tones. This is fantastically useful as it allows us to snatch the print from the toner at a given point on the tonal scale by moving the print swiftly into running water. This leaves the untoned silver uncoloured and available, if required, for another toner – duo toning. Selenium will irretrievably stain dishes and worktops, so be sure to mop spillages up immediately. It can also stain prints if poorly fixed or in acid environments. If using acid fixer, wash well or dip in hypoclear before selenium toning.
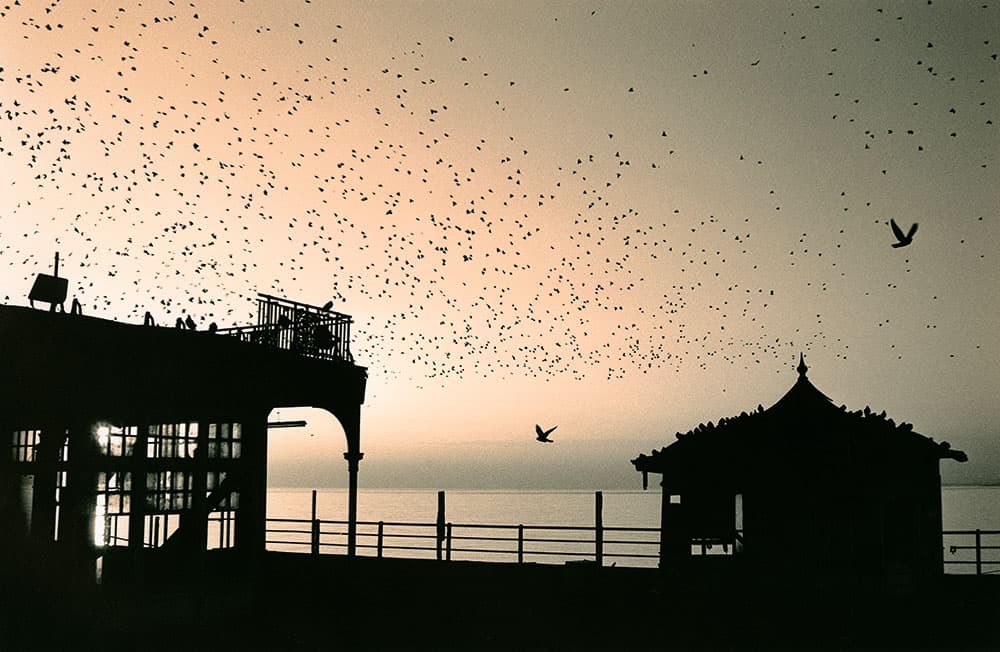
‘The old West Pier, Brighton’. Selenium, sepia and gold tri-toned multigrade print. The effect of gold after sepia is to produce a range of orange to red hues, depending on the amount of sepia additive used. Credit: Tim Rudman
Darkroom toning tips: Gold toning
Direct gold toner is simplicity itself. Colourless, odourless, archival and non-staining, use it straight from the bottle and rebottle for re-use. Slide the print in, watch for colour change and remove when satisfied. Gold is beautiful but expensive.
Darkroom toning tips: Colour
Coldtone prints will turn a colder blue- black. Warmtone prints give a stronger blue shift and warmtone lith prints much more so. These may even show an initial red flush that can be arrested before it quickly moves through purple, mauve and lilac hues, finishing a delicate sky blue with white highlights.
Darkroom toning tips: Split toning
Gold toner works ‘top down’, so watch the light tones and pull early when you like what you see. A word of warning – with fibre papers the blue intensifies on drydown, so pull early and assess when it’s dry. It’s easy to put it back in if necessary. Split-toning warmtone and lith prints produces a blue on warm-brown split. Pretty, but also useful for colour contrast, directing the eye and creating impressions of depth as the blue is visually recessive, and always in the lighter tones.
Darkroom toning tips: Duo toning
After split-selenium, gold tones the untoned (lighter) silver giving blue on brown. Selenium after split-gold gives the same colours; however gold toner works largely by coating the silver grains with colloidal gold, rather than converting them into something else. Selenium penetrates this envelope eventually turning that silver brown and irreversibly displacing the blue colour. This cannot happen if gold toning follows selenium. Gold toners are usually acidic, so selenium after gold will instantly stain a poorly washed print. Duo toning after sepia however, turns the sepia colour to an attractive range of red or orange tones – this of course depends on the paper and the sepia colour used.
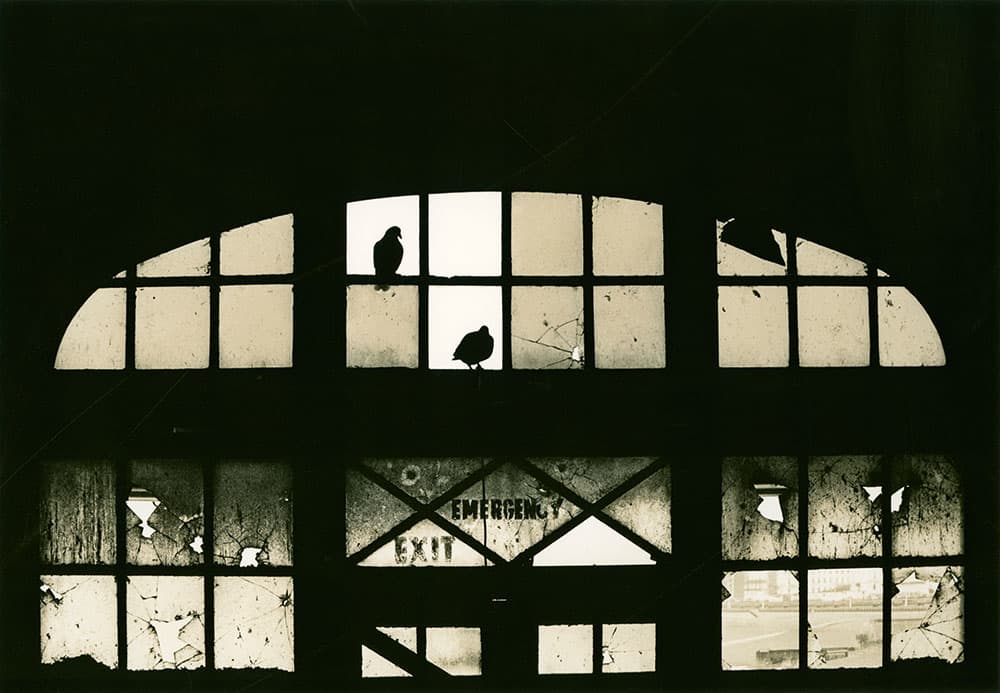
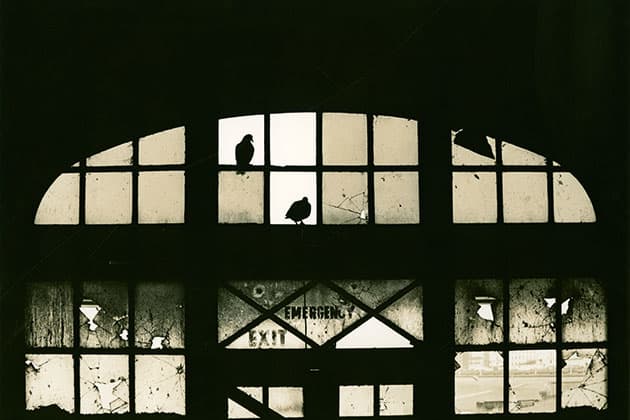
‘Emergency exit’. Multigrade warmtone paper, selenium-sepia duotone with short bleach bath. Despite being a warmtone paper, a colder colour is achieved by extending the selenium time to affect some silver grains in the mid-tones and by using more alkali additive in the sepia bath. Credit: Tim Rudman
Darkroom toning tips: Sepia toning
Sepia toners vary from the older ‘rotten- egg’ smelling type to more versatile odourless variable ‘thiourea’ sepia kits such as Fotospeed ST20. These consist of three concentrates – bleach, toner and an additive that changes the colour produced by the toner. They are archival and easy to use. Unlike ‘direct’ selenium and gold toners this ‘indirect’ toner requires an initial bleach stage. This changes the silver into pale yellow silver ferrocyanide, which the toner then converts to stable brown silver sulphide.
To control colour the toner requires the addition of an alkali – ‘solution C’. This colour is variable from yellow-brown, sepia, mid-brown to dark brown. Few paper/developer combinations give that complete range, but it may be achieved by changing the developer and/or paper.
Darkroom toning tips: Full vs split toning
The bleach works ‘top down’ from highlights towards shadows, and can be interrupted for split-toning at the light or midtones, or be allowed to proceed through to the blacks for a nostalgic- looking all-brown print with brown ‘blacks’. Slow coldtone papers need stronger bleach for this, with a longer wash before toning.
Split-toning is achieved with shorter bleach times. The effect may be obvious when toning to midtones, or just the subtlest hint of warmth in the highlights, in which case it helps to dilute the bleach further for better control. These need only short washes before toning. Whilst you can snatch from the bleach early, you should never snatch early from the toner before the less-stable ferrocyanide is all converted. The ‘split’ is controlled in the bleach, never the toner, which only tones the bleached silver, leaving the remaining silver still available for another toner if desired.
There is always some highlight density loss with sepia toning. This is greater with a low-alkali yellow-sepia mix than with a high-alkali dark-brown combination. Anticipate this when printing.
Dos and don’ts
- Do ensure good ventilation.
- Do keep everything clean and avoid cross contamination. Do keep chemicals away from food and drink.
- Do have several back-up prints if possible. Also try different papers and/or developers.
- Don’t smoke.
- Don’t use metal trays or tongs unless stainless steel.
- Don’t mix chemicals from different brands of a toner. They are not always the same or compatible.
- Don’t use underdeveloped, poorly fixed or under-washed prints.
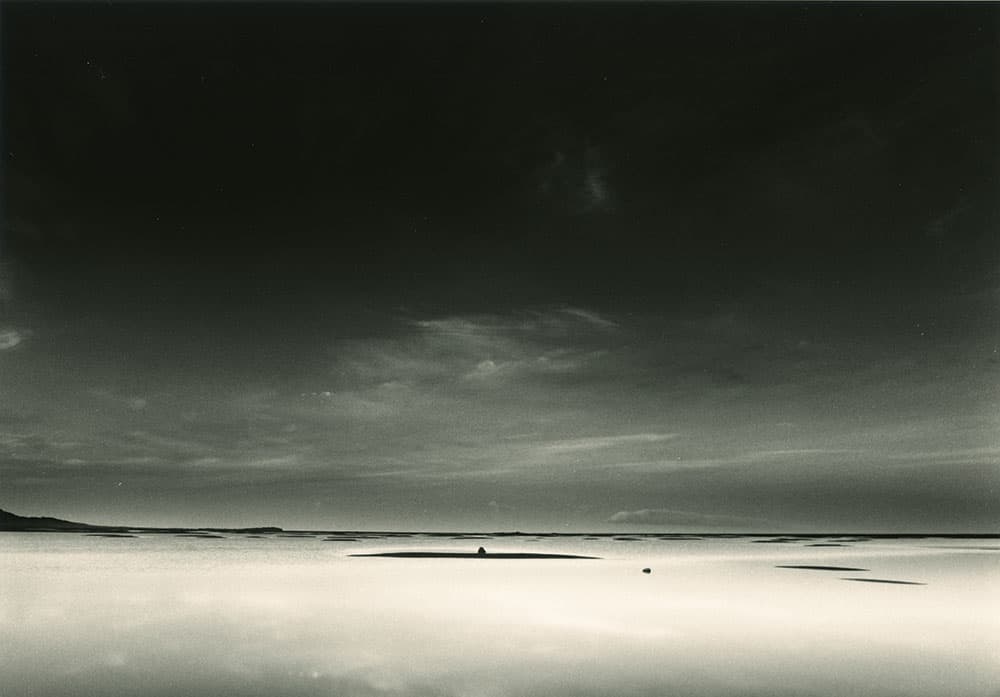
‘Hornsvik at night. Iceland’. Multigrade warmtone paper, selenium-sepia duotone with dilute bleach bath and low-alkali sepia mixture. Credit: Tim Rudman
Kit list
-
Toners
Most are readymade products. Some are a single solution that may need diluting, whilst others consist of two or more concentrates to be diluted and used either in sequence or mixed together immediately before use.
-
Trays
Use separate trays for each chemical stage as contamination can easily ruin your prints – especially fibre-based (FB) prints. A separate water-bath is useful to slow steps down for finer control.
-
Tongs or nitrile gloves
These keep chemicals off your skin, and fingerprints off your prints. Use soft-tip tongs, as hard tips can damage the softened emulsions. Rinse clean tongs and gloves between stages, and handle prints by their borders.
-
Measuring beakers/graduates
Don’t use your kitchen graduates for chemicals and don’t try to use large-volume graduates for small volumes of chemical concentrates, keep two or three appropriate sizes.
-
Timer and notepad
A timer is really valuable for predictable and repeatable results. As is a notepad and pencil. Number your prints and keep notes of times. Use a waterproof run-free marker pen on the reverse of resin coated (RC) prints.
-
Running water
Although it is possible to do many toning processes without it, the availability of running water is a huge bonus, as is a short tap hose to rinse prints off fast and to avoid staining from any spillages.
 Tim Rudman works exclusively with film and darkroom printing processes. He has taught printing workshops around the world and his books include The Master Photographer’s Toning Book. His latest book is Iceland, An Uneasy Calm and the accompanying exhibition is touring the UK. See www.timrudman.com.


