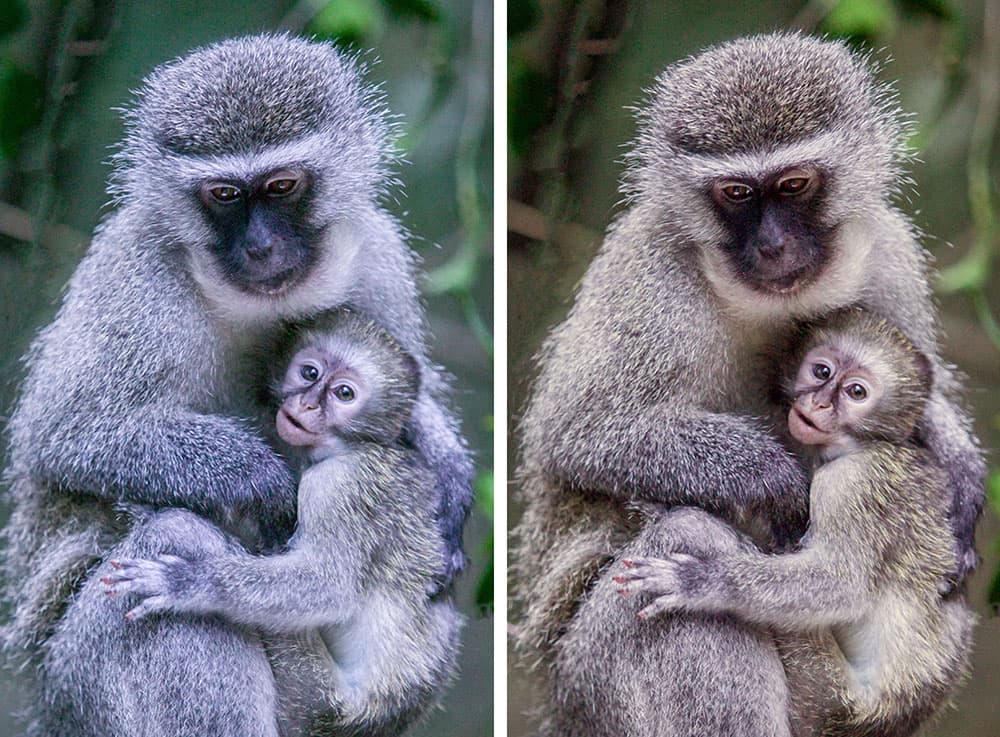
Before (left), After (right): By shooting in raw it’s easy to correct colour casts in Photoshop. Credit: Martin Evening
Computer colour expert, the late Bruce Fraser once commented that Photoshop’s colour management was ‘push button simple’ so long as you know which of the 26 buttons you had to press and in which order. Thankfully, the colour-management system in Adobe programs is now much easier to work with. Even so, successful colour management will always be dependent on the quality of the viewing hardware. As with most things in life, you get what you pay for. Therefore, the choice of display is important, as cheaper monitors won’t help you to accurately judge the colours you see on the screen.
On a good-quality, well-calibrated display what you see should be what you get, which means whites and greys should appear neutral. But if in doubt there is a simple way to confirm and that is to check the numbers. Regardless of the RGB colour space you are working in, even Red, Green and Blue values will always equal grey. It does not matter if the whites appear to have a bluish tint on the screen. If the numbers are the same, you’ll know they are neutral white really. Therefore, the best way to colour correct any photograph is to look for areas of neutral colour and ensure the numbers confirm this. For example, when working in Camera Raw the White Balance tool can be used to define the white balance based on a sampled colour. Do that and all the other colours will fall into place to display a colour-correct image on the screen. The reason why this works so well is because the Camera Raw database is able to calculate the spectral response for all supported cameras at any white balance setting.
If working in Photoshop with a non-raw file, such as a scanned TIFF or JPEG, you are best off using a Curves adjustment to adjust the highlights, shadows and midtones accurately. In the step-by-step example described further on I made use of the Color sampler tool to measure the shadow and highlight values, and then proceeded to edit the individual curve channels to get the Red, Green and Blue number values to match. You’ll find the Color sampler tool next to the Eyedropper tool in the Tools panel. However, before clicking to record a new measurement I advise you to go to the Options bar and check the Sample Size menu, which by default will be set to Point Sample. The problem here is that you can easily click on a single outlying pixel that is unrepresentative of the neighbouring pixels. Therefore, I suggest you increase this to say, an 11 by 11 average. By increasing the sample area you’ll average out the sampled pixels to achieve a more representative sample value.
Trust the numbers
In an ideal situation the image appearance on screen and the numbers should both be correct. But if in doubt, always go by the numbers to confirm that what you see on the screen is indeed neutral. You can use this knowledge to test a printer is working correctly. If the numbers are even but the greys in the print appear to have a colour cast then you’ll know the fault lies somewhere in the print process. Either you selected a wrong printer profile, or the printer head needs cleaning. Even with proper calibration and regular printer maintenance your prints may not always exactly match what you see on screen. A lot of photographers get frustrated by this because they believe they have done everything right (and indeed they have), but they have unrealistic expectations of just how far colour management can go in reproducing what they see on an LCD display as ink droplets on paper. They are two completely different mediums, which means some colours you see on screen can’t be reproduced in print, while there are also some colours you can’t see on the display that will reproduce in print. For this reason, don’t be too surprised if brightly coloured images don’t always print as you expected. It doesn’t necessarily mean the system is broken. When in doubt, trust the numbers.
Colour corrections in Camera Raw
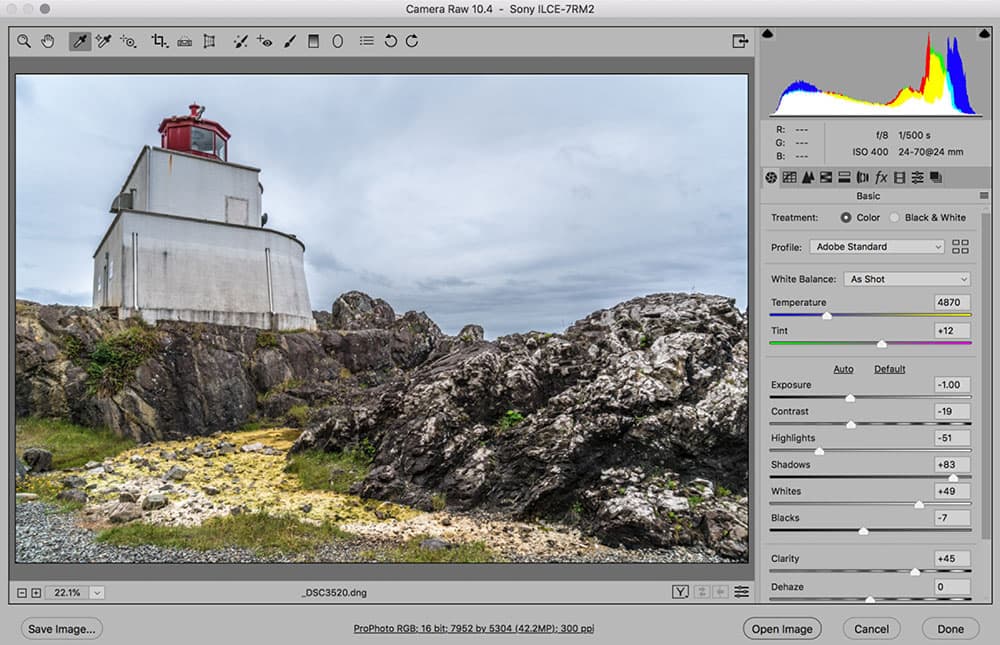
Before: It’s best to correct colour casts at the raw-editing stage in Photoshop. Credit: Martin Evening
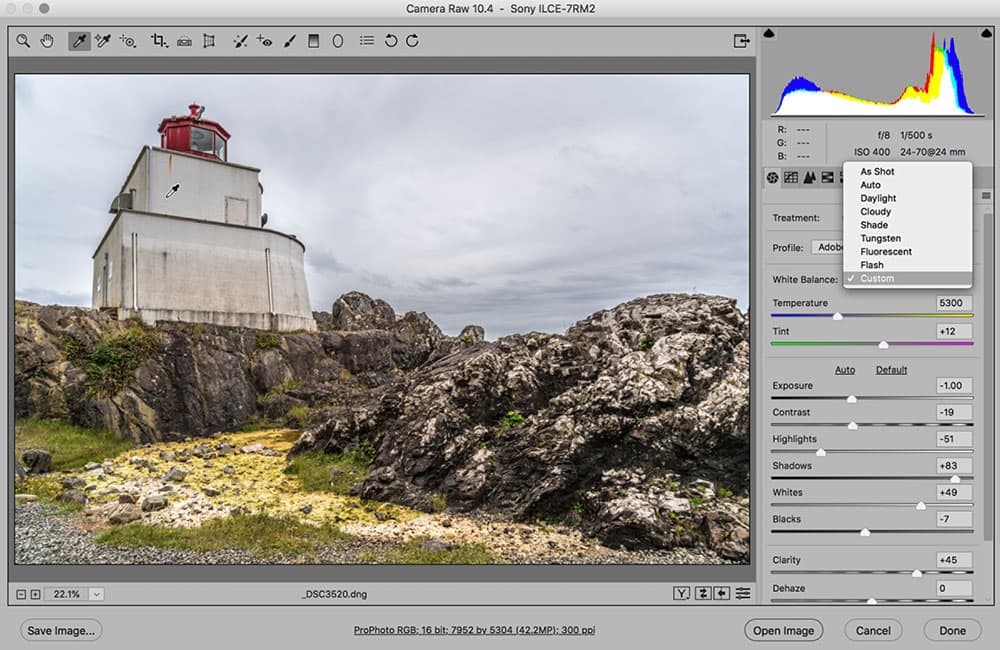
After: Use the White Balance tool or the Basic panel White Balance menu. Credit: Martin Evening
It goes without saying that shooting raw image files makes it much easier to carry out adjustments in post-production and this is the same for colour correction. If you edit your raw files in Camera Raw or Lightroom you can select the White balance tool and click in the image to set the white point. Once you have done this all the other colours should fall into place. What you need to do is to select a sample area in the image that you wish to be neutral in colour. It is important not to select a tone that is too bright in case one or more of the colour channels are clipped in the highlights.
Alternatively, you can use the Basic panel White Balance menu to choose a preset setting. This will normally say ‘As Shot’, but you can choose any of the available presets to apply an instant white balance adjustment. Or, you can select the ‘Auto’ option to let Camera Raw apply an auto-calculated white balance adjustment.
Auto options in Photoshop
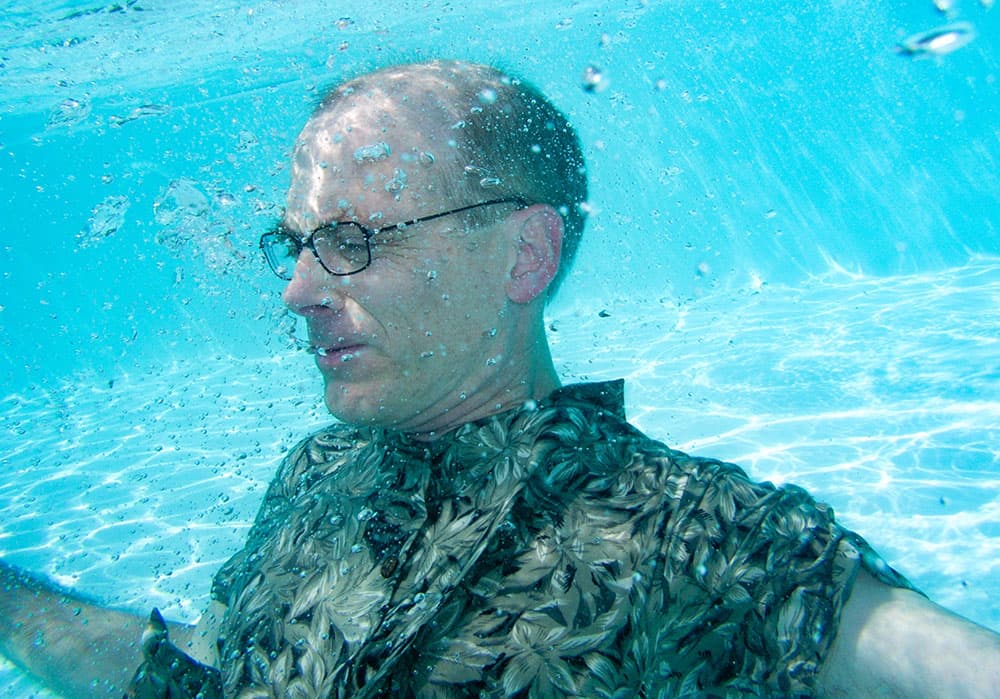
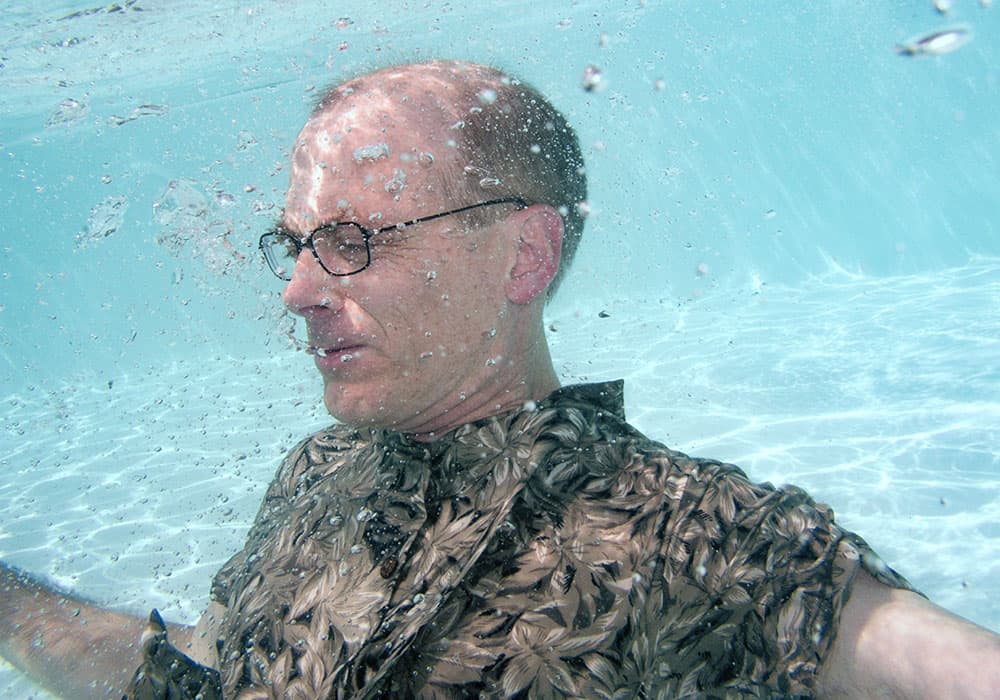
Before (top), After (bottom). Credit: Martin Evening
If the manual Curves editing approach appears too fiddly there are automated tools in Photoshop you can use to colour-correct an image. For example in the Curves and Levels dialogs you will notice the three eyedropper tools on the left. These can be used to set the highlight, grey and shadow points. The highlights and shadows eyedroppers are rather blunt instruments to use, but the Set grey point tool is a great tool to use to apply an instant and reliable colour correction for the midtones.
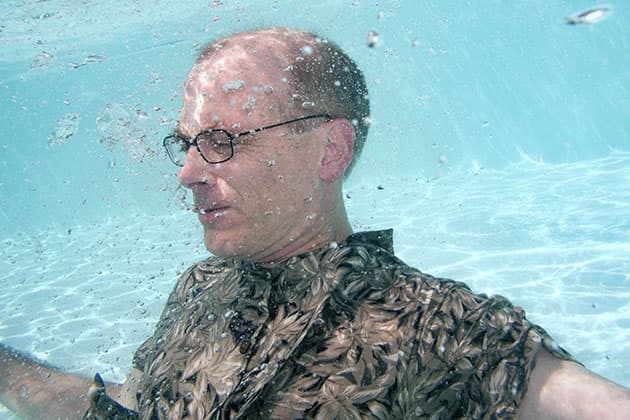
For speedy editing you can use the Auto Color command, which is located under Photoshop’s Image menu. (Command + Shift + B [Mac], Control + Shift + B [PC]). This applies a combination of auto contrast combined with an auto colour correction that maps the darkest colours to black and the lightest colours to white and also aims to neutralise the midtones. Although Auto Color works well most of the time, there is an even more effective auto colour correction tool that’s hidden away in the Image > Adjustments > Match Color dialog. Match Color is primarily designed to match the colour appearance between two images. But if you look closely you’ll see a Neutralize checkbox. This can work wonders on images with heavy colour casts, such as underwater shots.
Colour correction by numbers
Credit: Martin Evening
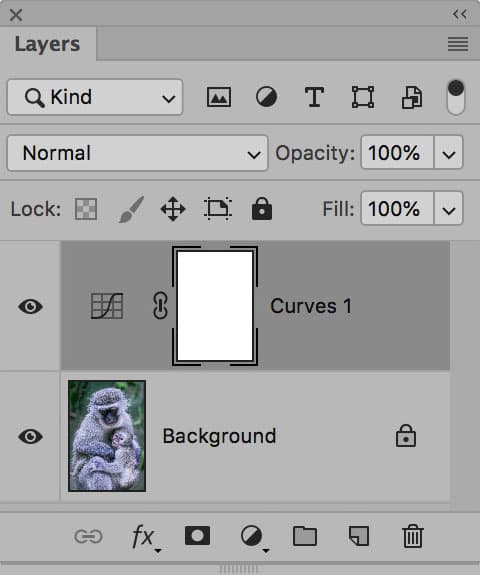
1. Curves adjustment
As you can see, this photograph has a noticeable blue cast in the midtone to highlight regions. To prepare the image to be colour corrected the first thing I did was to add a Curves adjustment layer, above the Background layer, and set this to the Normal blend mode.
Credit: Martin Evening
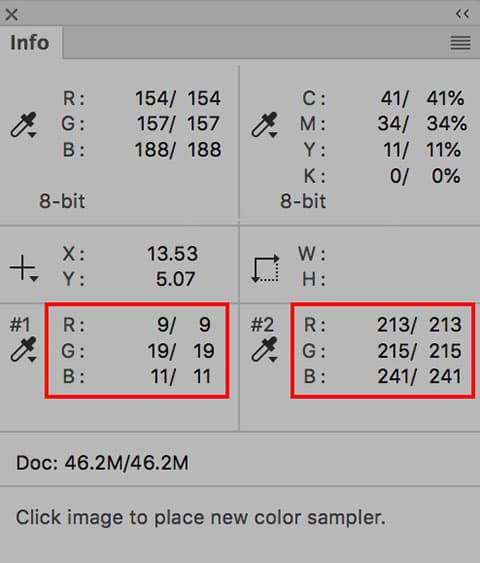
2. Colour sampling
Next, I selected the Color sampler tool from the Tools panel. As I rolled the cursor over the image I referenced the Info panel to check the levels for the individual RGB channels. I clicked once in the shadows to add a Color sample point for the shadows and again in the highlights.
Credit: Martin Evening
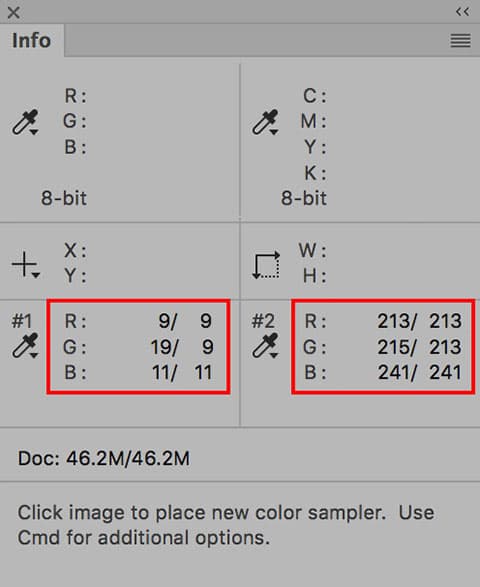
3. Channel adjustments
By referencing the RGB readouts for the Color sample points #1 and #2, I was able to adjust the Curves for the Red, Green and Blue channels to get these to be balanced. In this step I adjusted the Green channel black point so that it matched the Red and Blue shadow values.
Credit: Martin Evening
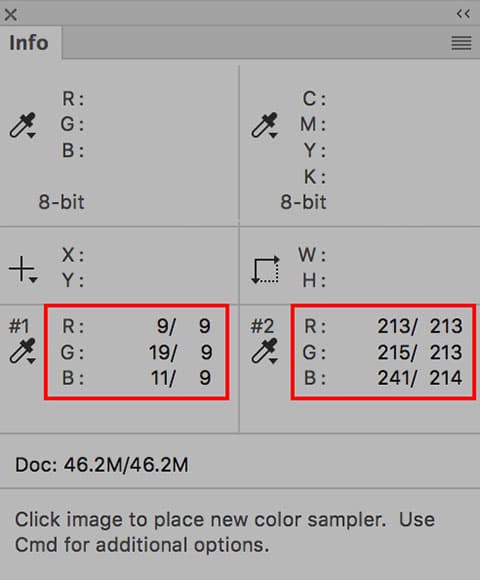
4. Neutralise highlights/shadows
I then selected the Blue channel and dragged the white point downwards so that all the (highlight) sample point #2 values near enough matched. At this stage the shadows and highlights were neutralised. However, a blueish cast remained in the midtones.

Credit: Martin Evening
5. Neutralise midtones
To complete the colour correction I clicked midway on the Blue channel curve and dragged the added curve point to the right to reduce the amount of blue to make the midtones more yellow.