
In 1889, artist Georges Demenÿ created the first known light-painting photograph, ‘Pathological Walk from in Front,’ by securing incandescent bulbs to his assistants’ clothing before asking them to move in front of a camera during a long exposure. Little did he know at the time, this groundbreaking discovery of the way light is recorded as it moves through the frame would turn into one of the most popular techniques ever attempted by photographers. Over the past 125 years or so, we’ve seen many famous photographers try their hand at painting with light. Some of the best known include Man Ray, Gjon Mili and Henri Matisse, all of whom experimented with light and long exposures in various ways between 1930 and 1940. Light painting has advanced a long way since then, and today we find ourselves living in a world where there’s no shortage of light sources available to illuminate subjects.
In the past decade, we’ve seen some intriguing lighting devices enter the market. Some of these have been specially made with photography in mind, while others have been modified or adapted for the purpose of photography to create striking imagery and mesmerising results. Today’s era of LED light panels have been a game changer in the way we illuminate our subjects and paint with light, not only in terms of their high power output, but also in their energy efficiency. To tie in with this week’s topic of light painting, we’ve got our hands on three different light sources to give you an insight into how they work, why you might want to consider them and the type of effects you can expect from using them. If you’re after some inspiration to get out with your camera under the cover of darkness, want to explore its true potential, and create some spectacular imagery to be proud of, you’ll be glad to know you’re in the right place.
Westcott Ice Light 2
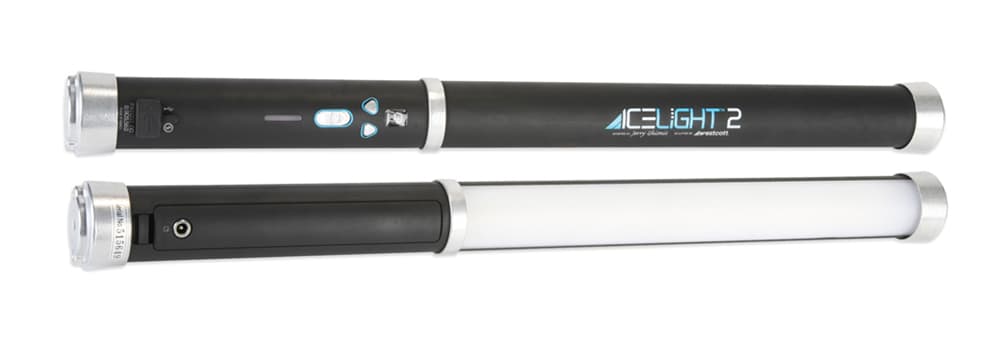
Westcott Ice Light 2 at a glance:
- 1740-lumen output with 96 CRI
- Colour temperature (5500K)
- 18-step dimming from 5% to 100%
- 1⁄4in-20 threads for easy mounting
- Supports Bluetooth control
- Price: £549
- Website: www.fjwestcott.com
The light source you choose to illuminate your subject during the hours of darkness is completely up to you, and it all depends on the type of effect you’re trying to create. If you fancy illuminating a large-scale subject, you might think that a torch with a high power output might be best; however, one problem you may encounter is that the beam of light is too directional. The trouble with torches is that they usually create a spotlight rather than a nicely diffused spill of light. You’re often better off using an LED panel to create a large pool of evenly distributed light across a wide area.
One such product that enables you to do this is Westcott’s Ice Light 2. Unlike large and bulky LED panels that can be unwieldy to transport and difficult to set up in situ, the Ice Light 2 squeezes 1740 lumens of daylight-balanced (5500K) light into a compact and portable cylindrical housing. To save the hassle of trying to find a mains socket in a remote location and run out endless extension leads, it’s powered by a removable lithium-ion battery that provides enough stamina for an hour of constant, flicker-free light when it’s set to full power. If an hour’s battery life sounds a little short, there’s the option to drop in spare batteries (£70) as and when required. When you’re working in areas where there’s a mains supply close by, there’s nothing to prevent you using it for longer periods while it’s plugged in to the charger, and for peace of mind, the daylight-balanced LEDs are tested and rated for 50,000 hours of use, which equates to a life expectancy of more than 17 years if it were to be used eight hours every day.
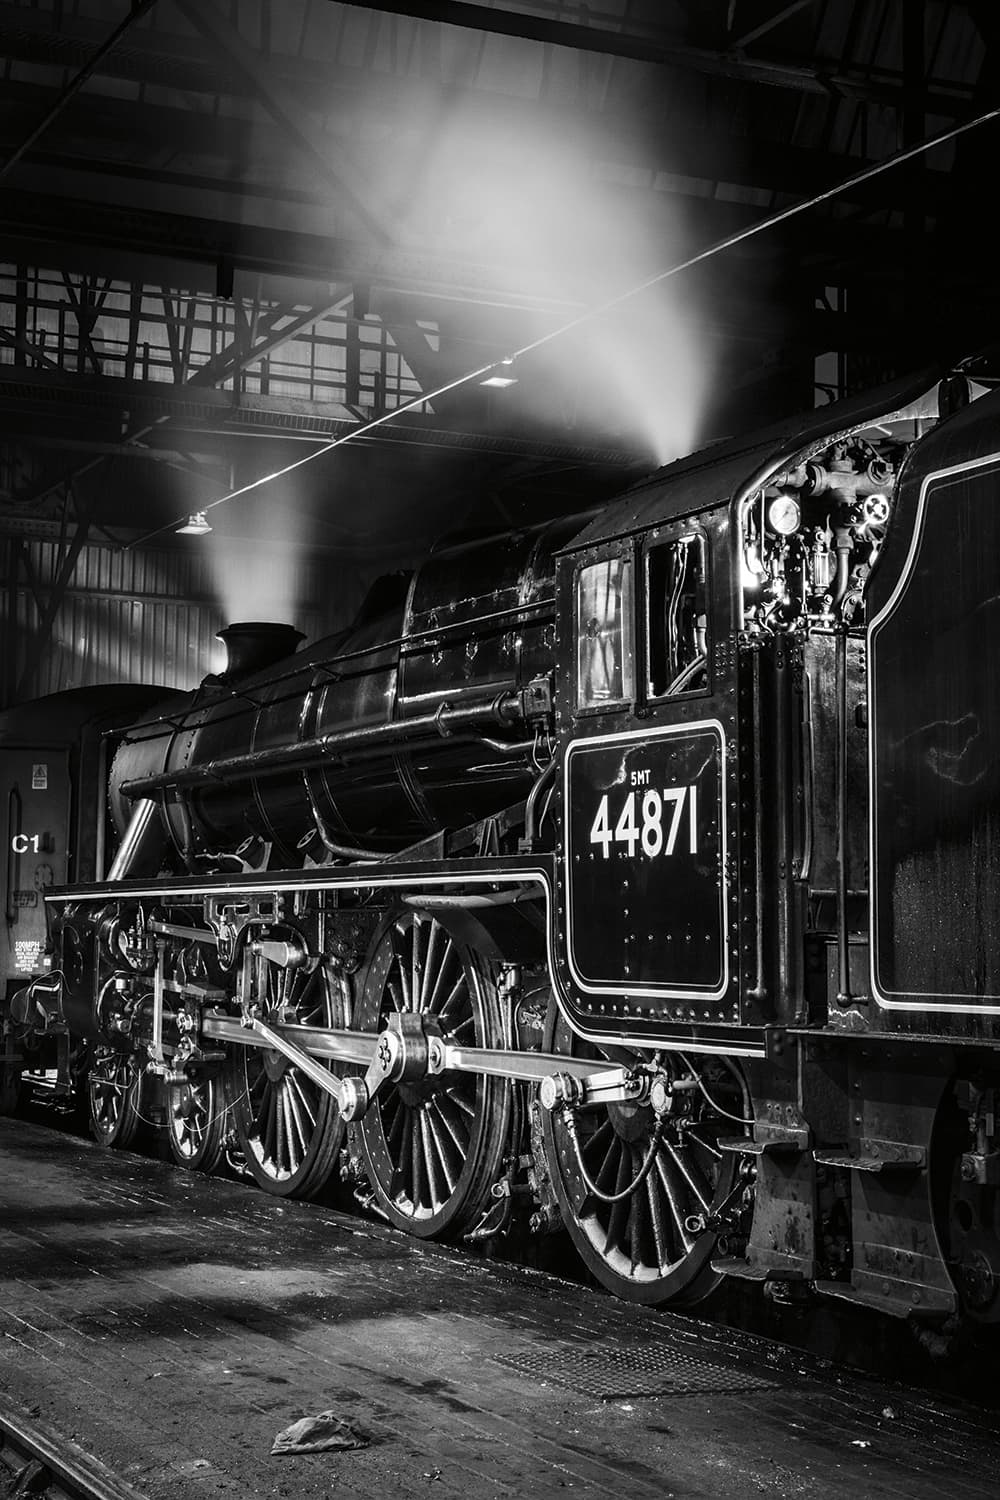
For this shot, one Ice Light was used to paint the wheels of the steam locomotive, while another was set up to illuminate the cab’s controls
Design and handling
To ensure the Ice Light provides evenly distributed light, it features a built-in diffuser with a matte-black casing at the rear of the tube to prevent any unwanted light being traced during long exposures. The long handle gives you plenty to wrap your hand around to get secure grip and its simple layout of buttons lets you easily find the controls you need to increase or decrease the intensity of the light in the dark. The spongy up/down buttons click as they’re depressed, so you know when the power has been adjusted, and there’s a bright- blue power output indicator above that clearly displays the power setting you have it set to. In total, you’re given 18 levels of power adjustment and it takes a fraction over two seconds to get from its dimmest setting to its brightest, or vice versa. One of the most useful features is its automatic power output memory function. When the Ice Light is turned off, it’s programmed to remember the last power setting you had it set to before returning it to the same power setting when it’s switched on again. This is very useful and helps to maintain consistent results in a series of shots when you frequently switch it on and off to conserve battery power. At the base of the Ice Light 2 you’ll come across a 1/4in tripod thread. It’s useful having the option to mount it to a tripod, such as when you’re working in complete darkness and need to position the Ice Light next to an area of your subject to give your camera a fighting chance of acquiring focus. Another option that some users may wish to explore is the option to join a pair of Ice Lights together using the two-way connector plate that’s supplied as part of the optional accessory kit (£149). This can create a longer beam of light that’s complementary to large-scale subjects. The only disadvantage of this set-up is the huge expense – a pair of Ice Light 2s with the accessory kit will set you back over £1,200!
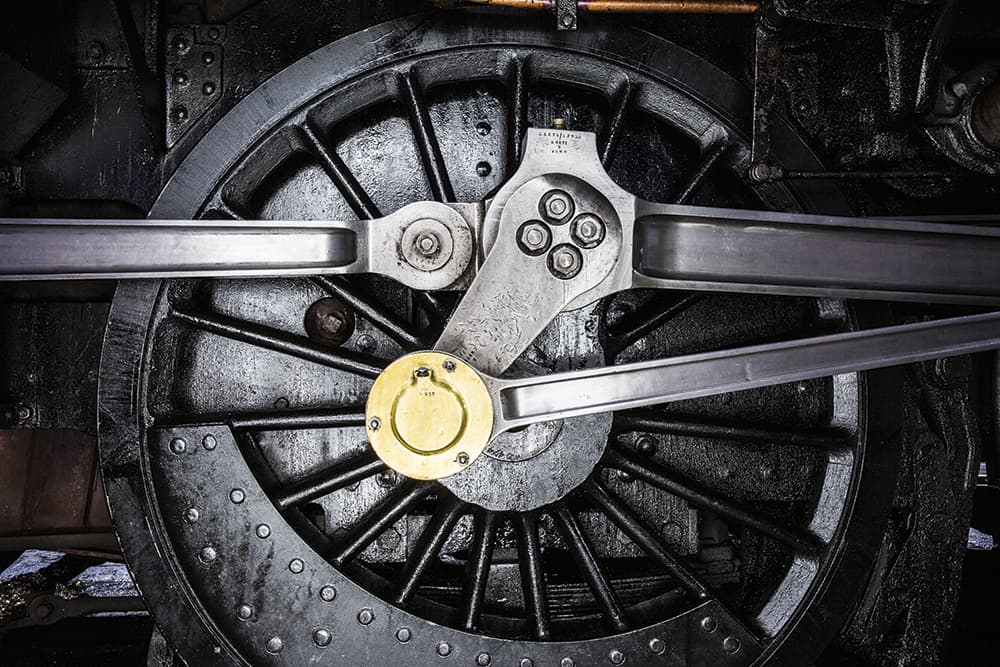
The Ice Light creates a beautifully diffused light that’s ideal for illuminating both large and small subjects
Multiple uses
The Ice Light 2 is an extremely versatile light source that’s effective at illuminating a wide variety of outdoor subjects as well as smaller items in the studio. It shouldn’t be disregarded for portraiture, either, and the diffused light it gives off straight out of the box is one alternative to using flash. At full power, it can be used to highlight a newly-wed couple having their first dance on a poorly lit dance floor, or it can be used at reduced power to fill in shadows when shooting close- ups. Used as a continuous light source, it offers a live preview of the effect it has on your subject before you fire the shutter, which avoids the trial and error approach of using wireless flash.
Although the controls are simple enough to use, there are a few things to be wary of. The first is that the on/off switch is very sensitive, so you’ll want to avoid switching it on accidentally and draining
the battery. Secondly, when it’s being used for light painting, you’ll need to add black tape over the bright-blue power output and battery- level indicators on the handle to prevent long exposure shots suffering from unwanted blue light trails. I was a little surprised to find that there’s no way of switching these off in use. While using the Ice Light 2 to paint a steam locomotive with light at night, I found it all too easy to accidentally twist the unit in my hand, which would result in unsightly light streaks through my images. To prevent this from happening, I attached the all-metal barn doors that can be purchased individually for £50 or as part of an accessory kit (£149). These act as a great way of narrowing the spill of the light.
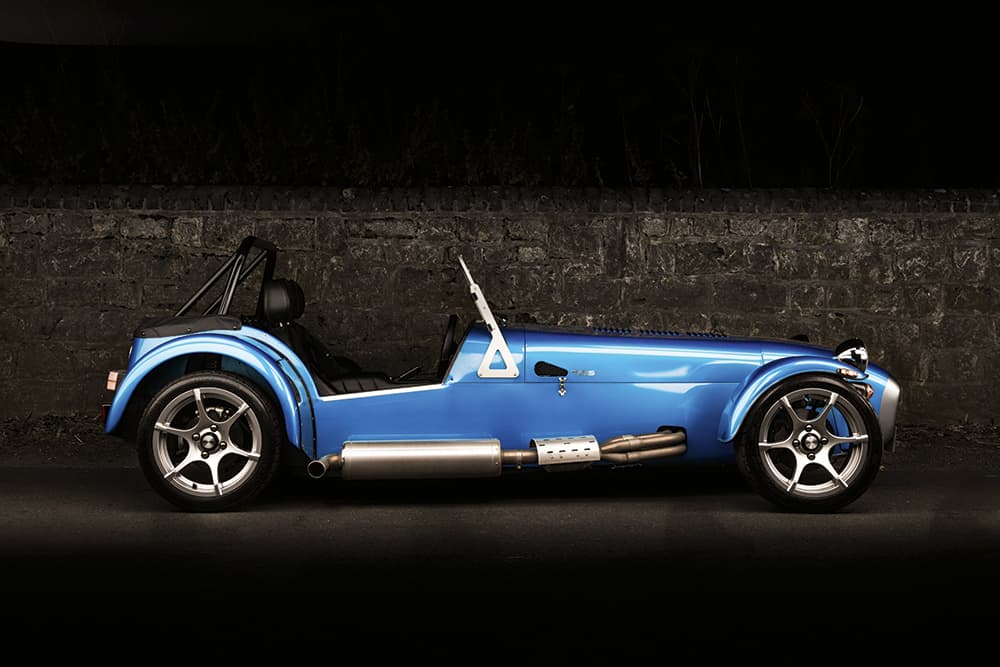
The Ice Light 2 is particularly effective for painting cars at night with a long exposure
It’s worth pointing out that when it’s used for this purpose there’s a wafer-thin gap between the doors and the cylindrical matte-black casing. To prevent light leaking through this gap, I added a strip of black electrical tape down either side, which solved the issue.
When I was illuminating large subjects, such as the steam train, I found myself using the Ice Light set to its highest ‘H’ power setting for maximum impact. For smaller subjects or studio set-ups, I found that a power setting of around 4-5 was adequate and bright enough most of the time.

To control the spill of the light, you may wish to attach the optional barndoors, just as I did to light this model out on location
Bluetooth control
Although you don’t get a remote control like you do with some similar products on the market, such as the Gloxy Power Blade (£130), the Ice Light 2 features Bluetooth connectivity, meaning you can control it wirelessly from reasonably close range via an app. At present, the Westcott app is only available for iOS users, and those with an iPhone or iPad can adjust the brightness and switch between multiple Ice Lights to vary the power output accordingly. The app also reveals a four-bar battery-level status that can save you glancing at the battery-level indicator beneath the on/ off switch, which changes from blue to orange when the battery level is running low and then to red moments before it runs out completely.
Pixelstick
Fully assembled, the Pixelstick measures 187cm from top to bottom
Pixelstick at a glance:
- 200 RGB LEDs for more than 16 million colours
- Compatible with SD and SDHC memory cards (32GB max)
- Supports 24-bit BMP files
- Price: £399
- Website: www.thepixelstick.com
The Pixelstick was created off the back of a successful Kickstarter campaign, where more than 2,000 backers pledged over $600,000 to bring the project to life. If you haven’t heard of the Pixelstick before and aren’t familiar with the concept, it’s a device that’s made up of more than 200 programmable LEDs that are arranged vertically on a matte- black anodised aluminium bar. The type of results you can get from using it can be mesmerising and the way it works is rather simple. Each one of the Pixelstick’s 200 full-colour RGB LEDs acts like a pixel on a screen and it’s these LEDs that can display an image, graphic, coloured pattern or shape as you hold and walk with it through the frame during a long exposure. The vertical lines it displays combine to create an unusual and entirely unique way of painting with light in mid-air. There’s nothing else quite like it for photographers who’d like to get super creative with painting with light during the hours of darkness.
Experimentation is the key to success with the Pixelstick and it offers endless creative possibilities
Constructing the kit
The Pixelstick is different to the Ice Light in that it’s supplied as a kit of parts and requires you to build it. The metal bar containing the 200 LEDs is split into two panels for ease of transportation and these are paired by joining electronic contacts and tightening a pair of screws. After this, you can attach the handle. This features a foam grip for added comfort in the hand and a spin sleeve that, as its name suggests, lets you spin the Pixelstick freely to create abstract circular effects. Next, you’re required to load eight AA batteries before connecting the battery pack to the controller with the supplied cable. To prevent this cable getting caught or damaged in use, the kit provides a series of clips to ensure it’s kept parallel to the rear of the LED panel at all times. When fully assembled, the Pixelstick is over 2m tall, so to prevent damage or any difficulties you might face transporting it you need to disassemble it and pack it up in its carry case each time. It only takes a minute or two to build after a few attempts and you can leave items like the battery holder and controller attached for faster set-up in the future.
Next comes the fun part, where you have to think about what type of light painting effect you’d like to create. Stripes and volumetric ribbons can be downloaded from Pixelstick’s website to create abstract patterns, which work particularly well in woods, urban landscapes or as backdrops behind a subject. Alternatively, you may wish to experiment with other image packs that give you the opportunity to create rainbow patterns, paint animal shapes or experiment with ready-made fire and flames. If you have a particular pattern or idea in mind that’s not available for free download, there’s also the option to create your own – something that’s easy enough to do in Photoshop and is explained on the opposite page. After downloading or creating the .bmp files you’d like to try, you’re simply required to save these onto an empty SD card before inserting it into the side of the controller. As you flick the small switch on the controller to on, the LEDs should illuminate briefly, telling you all is well and it’s ready to be used.
Keeping the handle at chest height prevents scraping the bottom panel on the ground
Practice makes perfect
Like anything new, it takes a few attempts before you feel up to speed with how it works. The good news is, it’s not as complicated or as difficult to use as it’s made out. It’s important not to be extravagant too early, so mastering how to use it in a large open space before venturing off to a location you have in mind is time well spent.
Once you have locked your camera off on a tripod, refined the exposure and ensured the shutter speed is long enough to give you ample time to walk through the frame, you’re ready to get creative. The controller used to select the file and alter the way your file is displayed is quick to master and you’re given a full list of options to take control of brightness, speed, countdown, direction, vertical
flip and the increment. There’s even the option to repeat a file or pattern you select up to as many as 99 times.
There’s an element of trial and error before you achieve the result you envisage, but the more you use it, the better understanding you have of what speed it needs to be set to, to match the pace you walk at. For some patterns I found it best to walk slowly through the frame with the speed of around 35-50%. Having the option to set a countdown means you’re given plenty of time to get into position before your chosen file illuminates and the controller’s LCD panel is programmed to switch off prior to it firing, ensuring no orange light trails appear in the final image. The yellow button on the controller is used to start the LED sequence and it’s great fun swirling the Pixelstick around behind subjects and through the frame, knowing that with each exposure the result will always be slightly different.
As you get more accustomed to using it, you’ll realise the battery- level status gets low fairly quickly, so using it with rechargeable batteries can cut costs. It’s also worth mentioning that there are two additional lenses available for Pixelstick – a clear lens for maximum brightness and a milky rounded diffuser that creates a buttery ‘no scanline’ effect.
The Pixelstick is a great tool for creating unusual and artistic backgrounds behind different subjects
Creating your own pattern
Pictures and patterns are displayed through the 200 LED lights one vertical line at a time, with each LED corresponding to a single pixel. To prepare your own examples for use with the Pixelstick, the width dimension of the flipped picture or pattern must be no larger than 200 pixels, whatever the aspect ratio of the picture. For example, a panoramic pattern might have a height of 750 pixels or more, but the width must not exceed 200 pixels. If it does, you run the risk of some pixels of the image or pattern not being displayed. There’s a handy image converter over at www.thepixelstick.com/convert.php that can convert your images and patterns into the correct format for use with the Pixelstick without the need to break out Photoshop. It automatically saves images and patterns as a .bmp (bitmap) file, which after saving onto an SD card can be read by the Pixelstick when it is inserted into the controller.
Lowel GL-1 Power LED
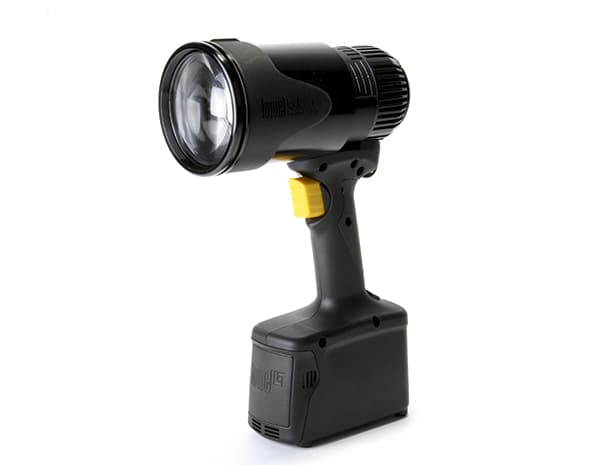
Lowel GL-1 Power LED at a glance:
- 24v LED lamp
- Colour temperature (3300K)
- 1⁄4in-20 threads for easy mounting
- Price: £550
- Website: www.lowel.tiffen.com
Lighting manufacturer Lowel produces a wide range of tungsten, fluorescent and studio lights for photographers. The GL-1 Power LED falls into the company’s line-up of LED lighting systems and is made for photographers who fancy owning a portable light source that’s far more sophisticated than your average torch. Although it was originally designed for wedding, event and portrait photographers, its dimming and focusing versatility helps give it much wider appeal. Powerful enough to illuminate buildings and large-scale subjects at night, it’s a handy tool that’s been known to fall into the hands of architectural photographers and those who’d like to add some extra warmth or fill-in within a scene.
Unlike the Ice Light 2 and Pixelstick, which both provide a wide spill of light, the Lowel GL-1 Power LED creates a circular beam that’s more directional. It provides the equivalent of around 100 watts of tungsten output from the ‘Power LED’, which you’re given the option to control using an adjustable Fresnel lens lamphead. Extending the Fresnel lens from its retracted position to its fully extended position effectively narrows the beam of light, transforming it from a floodlight to much more directional spotlight. Markings from 1-8 are printed on each side of the barrel too should you wish to reset the position of the Fresnel head to a similar position as used before to create consistent results.
There are two ways of dimming the light – a variable trigger that’s used to gradually increase the intensity when it’s squeezed, or there’s the option to squeeze the trigger all the way in and leave the light permanently on. In its ‘always on’ mode, the power output is adjusted using the yellow scroll dial at the rear. Depressing the trigger fully to switch between the two dimming modes wasn’t obvious straight out of the box and it’s something I discovered by reading the manual. In use, it’s useful having the option to leave the light permanently switched on, especially when it’s positioned at distance from the camera and you don’t have an assistant to help.
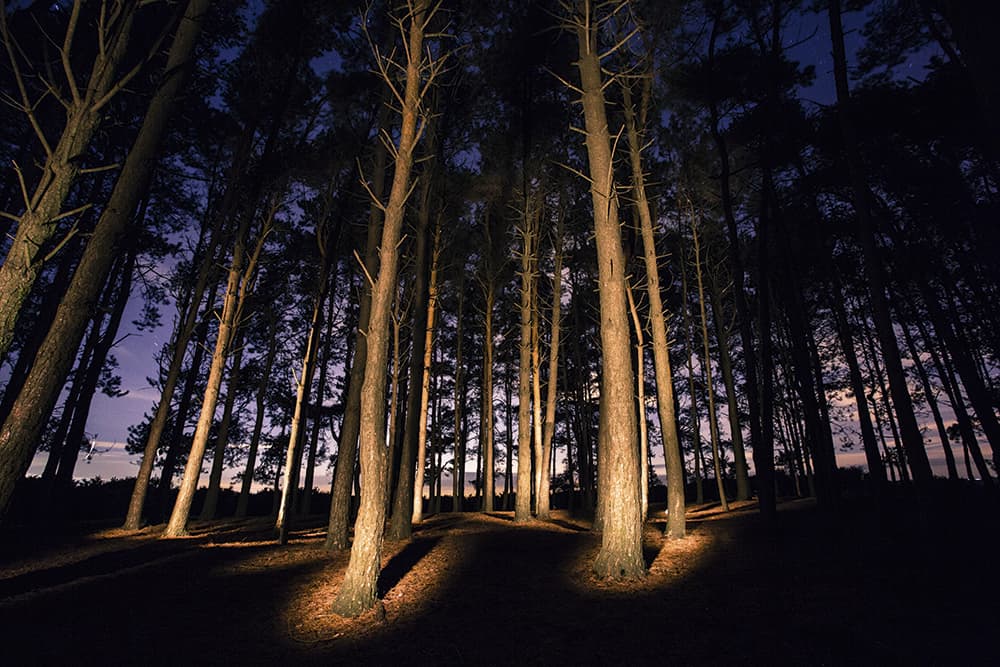
The GL-1 has enough power to pick out details in a dark forest or illuminate large buildings at night
Design and handling
The design of the GL-1’s trigger control and large battery pack isn’t unlike that of a power drill. The handgrip is rubberised, which gives it a pleasing feel in your hand, and your index finger rests comfortably on the yellow trigger. It does feel rather heavy (1.7kg) with its large removable battery located beneath, but this does allow it to stand upright when not in use. On the underside there’s a 1/4in-20 thread for mounting it to a tripod and its small on/off switch springs the light, and its audible cooling fan, into life instantaneously.
Despite reports from other users of the battery pack falling out, no such problems were encountered with our review sample and the battery pack offered a reassuring click each time it was loaded after it was charged. If you’d prefer to charge the battery while it’s inserted, you can use the mains power supply supplied, which also features a light to tell you when it’s fully charged. It must be said that the build quality is rather plasticky in places, but despite this it proved robust enough to survive heavy-duty use during our tests.
The GL-1’s Fresnel lens can be extended, helping to narrow the beam of light
What’s it like to use?
The Lowel GL-1 Power LED produces different results to those you’ll create using the Ice Light 2 or Pixelstick. For starters, the light it emits is more intense due to the fact it isn’t diffused as much. The colour temperature of the light is a constant 3200K, but again this differs to the Ice Light 2, which produces a cooler and more neutral feel to its images. The warm tungsten light the GL-1 produces might not be to everyone’s taste, but of course there is the option of adjusting the colour temperature at a later stage in post processing, or you could look to buy the Tiffen 80B daylight correction filter that screws into the 82mm filter thread at the front of the Fresnel head, but this does come with additional expense ($219). Lowel makes other accessories for the GL-1, too, including two-way barndoors ($40) that attach to the front lens ring as well as a screw-in rubber shade that’s designed to prevent light spills into a camera’s lens when it’s being used to paint subjects with light at night.
As light sources for painting subjects at night go, the Lowel GL-1 is capable and very powerful. The battery lasts for more than an hour set to full power, but the head and handle do get quite warm over
prolonged spells of use. The cooling can also be heard most of the time, but isn’t too distracting. In use, it’s a simple yet effective light source. Although it won’t be a replacement for a Speedlight, for arty shots in low light, or even for a hint of warm fill in overcast or dull daylight, it’s a useful tool to have at your disposal. The only thing that’s lacking is the option to take control of the power output and dimming control from afar. Other light sources get around this by issuing a remote control or featuring Wi-Fi or Bluetooth connectivity.

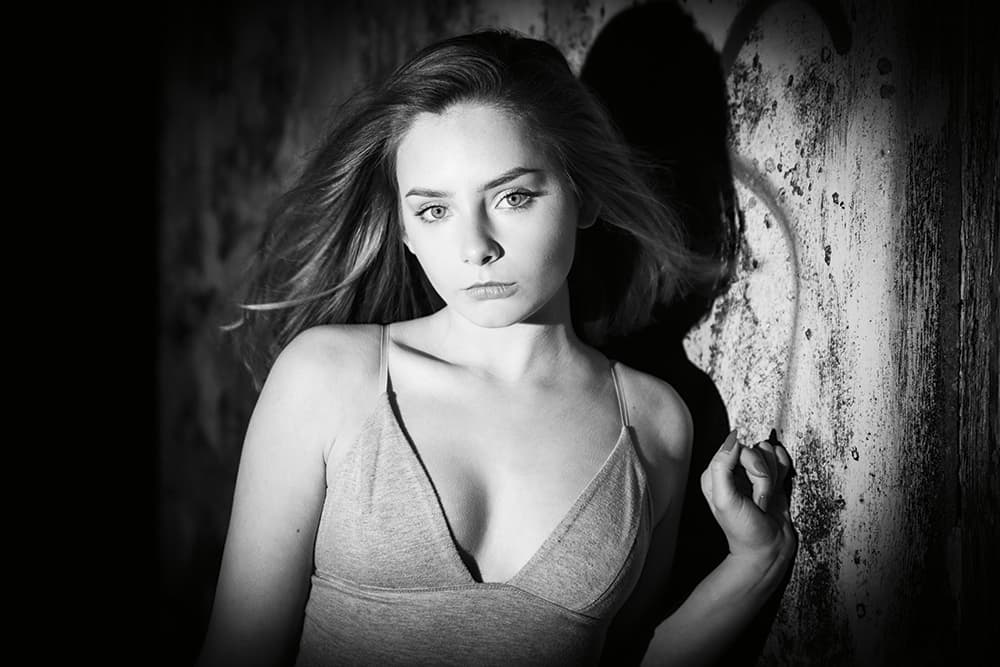
The colour temperature of the GL-1 (3300K) creates quite a warm feel to its images
Our verdict
Although the three lights we’ve looked at are all very different, the one thing they have in common is that they’re not cheap and require you to delve deep in your pocket. The most affordable of the three is the one that’s the most fun to use. Although the Pixelstick might not be the best option for painting a subject with light, the results that can be achieved from swirling it through the frame and using it to create eye-catching backdrops are mesmerising. The fact each LED is spaced apart by 5mm and the file or image it displays is only 200px wide means the painted result is far from high resolution, but we shouldn’t grumble too much as at present there’s nothing else quite like it on the market. If you’re in need of a portable and powerful light that’s capable of illuminating large subjects at night, the Lowel GL-1 Power LED is worth a look. It does feel rather expensive for what it is, but it could just be what some photographers are calling out for when flash or a mains-powered light isn’t a viable option. A remote control or Wi-Fi would be the icing on the cake.
As for the Westcott Ice Light 2, it’s a continuous light that diffuses its light beautifully and works well for light painting. The all-metal barn doors aren’t essential, but they’re certainly worth having if you know you’d like to take precise control of the spill of light. There are many third-party devices available for less, the Gloxy Power Blade (£130) being one example, and while these can create a similar type of effect to the Ice Light 2, they’re not all as easy to control and don’t offer as many advanced features. Personally, if I had to choose to buy one of these three light sources, I’d save up and spend my money on the Ice Light 2. It’s versatile, highly portable and it gives you reason to get out there in the dark to create unique shots of subjects you may have only photographed in daylight before.


