What are picture styles?
If you own a Canon DSLR then chances are you’ll have access to a selection of useful presets known as Picture Styles. If you haven’t come across these before, and are oblivious to what they are, they refer to a selection of presets that determine how your EOS DSLR goes about processing and rendering your images. If you’d like your images to be sharper, feature more contrast or benefit from increased saturation you’ll want to know how these picture styles work. Before we get stuck into the finer details and reveal the different styles on offer, how they change the appearance of your photographs and the way they can be refined to your personal preference, it’s important to understand how picture styles
are applied to your images.
Does picture style matter when shooting raw?
There’s a misconception that picture styles only affect JPEG files, but they also have relevance to Raw files, both during and after an exposure. One of the key things to understand if you’re shooting JPEGs is that once a picture style has been selected and an image taken, the effect of the picture style is irreversible, meaning you’re stuck with the outcome if you don’t like it. For Raw files the picture style you choose only affects how images are rendered on the camera’s LED display. For example, if you intend to convert Raw images to black and white, the monochrome picture style will provide a preview of the image in black and white while retaining all original colour information in the Raw file. It’s also important to note that monochrome JPEG images cannot be reconverted back to colour so if you have any doubt it’s always best to protect yourself by selecting Raw + JPEG.
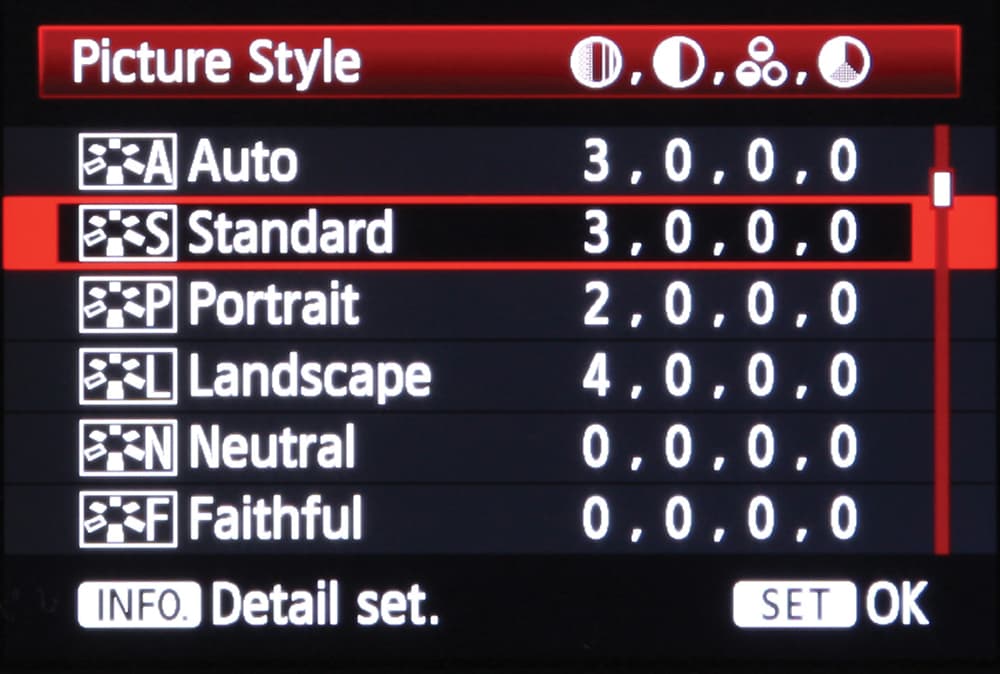
The list of common picture styles as you’ll find them presented in the menu
The different Canon Picture Styles
Locating picture styles on your DSLR couldn’t be easier. Simply head into the main menu, select the picture styles option and you’ll be greeted by a list of picture style choices. The likelihood is your picture style will be set to the standard default setting. Below it are portrait, landscape, neutral, faithful and monochrome options.
Starting with the basics, the auto picture style (introduced into the EOS 600D and after) analyses your shooting conditions looking at parameters such as a subject’s face, colour, brightness, movement, contrast and focus distance. It’ll create what it thinks is the best result for any given scene, however it’s not the best choice if you’re looking to create a consistent style to a set of images. The standard style provides crisp, vivid images with increased saturation, contrast and sharpening applied. This differs from the portrait style, which optimises skin colour tones and saturation while reducing the sharpness of edges to create smoother skin texture. If you’d like to produce punchier greens and blues in your images with a stronger sharpening effect to accentuate mountain edges, trees or building outlines then the landscape picture style is the one for you. Select the neutral picture style and you’ll find your images have a lower contrast and saturation than the standard picture style. Those who prefer to selectively adjust colour, saturation, contrast and sharpening themselves during post processing often use it. This brings us to the last colour picture style, which is faithful. This is similar to the neutral style but produces images that are almost identical to the actual colours when shot under standard daylight conditions.
If you’d like your image to reflect the scene as you see with your eyes, faithful is a great place to start. Towards the bottom of the styles list is monochrome. This is great to use for an instant preview of what an image, or series of shots will look like in black and white.
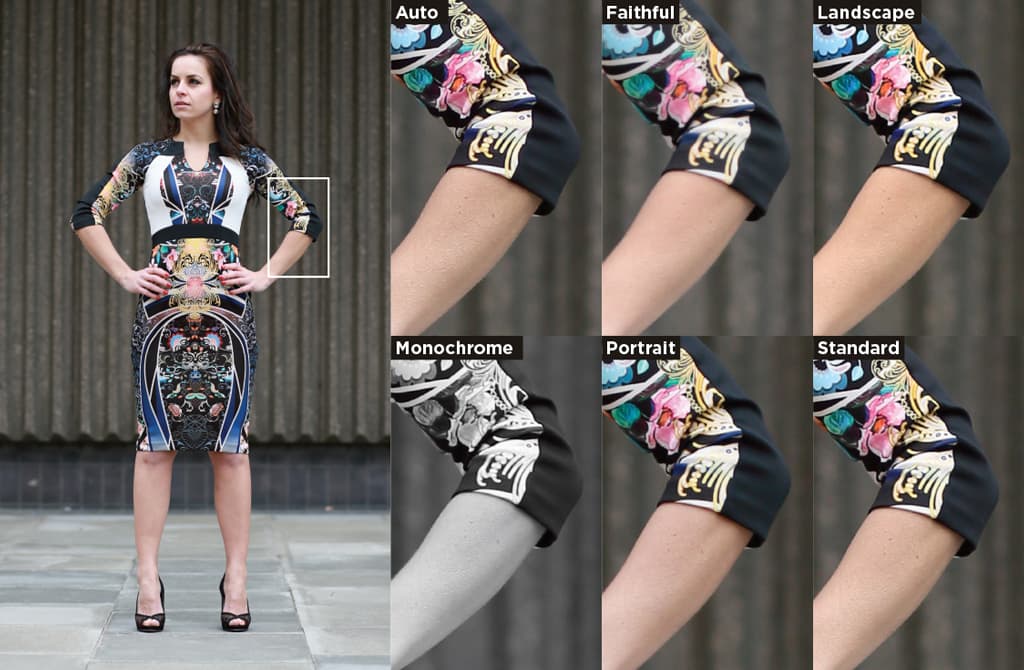
It’s worth experimenting with the different picture styles to find out which you like best. There are subtle differences in the way each picture style renders sharpness, contrast, saturation and colour tone
How to adjust Canon Picture Styles
The great thing about picture styles is that they’re not set in stone, meaning if you’d like to alter or adjust them manually you can do so easily. Say you like the effect the landscape picture file offers but you’d like to refine the sharpness, contrast, saturation or colour tone a little. To do this simply select the landscape style from the list, hit the info button on your camera and you’ll be given the option to increase or decrease the effect of each parameter. When you adjust a parameter the white point reveals the new parameter setting whereas the grey point signifies the original setting. To quickly return to the original picture style settings, simply select the Default set option.
How to create your own Picture Styles
The alternative to using and adjusting the default picture styles is to create your own. At the bottom of the picture styles list you’ll find three user-defined settings – User Def. 1, User Def. 2 and User Def. 3. Here, you can create your own style by adjusting the sharpness, contrast, saturation and colour tone parameters on the camera (via the Picture Style menu option), or alternatively you may want to visit Canon’s dedicated Picture Style website where a selection of other styles are made available ready to download onto your DSLR.
There’s a good selection of additional styles available. Examples include Autumn Hues, which emphasises the reds and browns of autumnal scenes, and Nostalgia, which reduces blue and green saturation to give the impression of an old photograph. Adding a new picture style file (.pf2) to your camera involves installing Canon’s EOS Utility software (Version 2.6 or later) onto your computer. From here you can download the new picture style then transfer it onto your camera via a USB cable. You’ll find a full breakdown of how to install a new picture style onto your DSLR from Canon’s Picture Style website and we recommend visiting https://web.canon.jp/imaging/ picturestyle/file/eos-utility.html
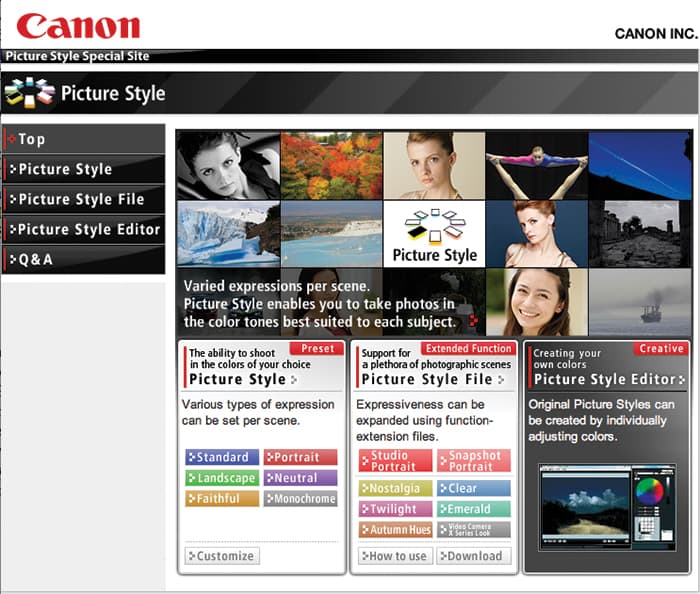
In addition to the common picture styles on your camera, you’ll find there are a number of extra styles available to download from Canon’s Picture Style website
Applying Canon Picture Styles post capture
If you like the sound of applying picture styles to your images but are under the impression you can’t because you only shoot in the Raw format you’re mistaken. Picture styles can be applied post-exposure using the latest version of Digital Photo Professional (DPP) that’s supplied as part of the software package with the camera.
It is worth bearing in mind however that Picture Style files downloaded from the Canon Picture Style website which have the .pse extension cannot be used with DPP version 3.0 or later. You’ll need to return to the website and download the latest file, with the .pf2 extension. The latest version of the files is also needed for EOS Utility version 2.1 or later.
Best Canon Picture Style for sharpness – Fine detail Picture Style
There have been six picture styles in the menu of Canon EOS DSLRs for as long as we can remember, but now there’s a seventh style that’s starting to appear on Canon’s latest DSLRs. The Fine Detail picture style was first introduced on the Canon EOS 5Ds and EOS 5DS R and differs from the other picture styles in the way it’s designed to maximise the level of detail that can be achieved from the sensor. It does so by prioritising the gradation of tones and detail, enabling advanced sharpness adjustment without the need for editing software. Those who’d like to clearly define edges of thin lines and minute details are the most likely to use this picture style. The fact we’ve seen it rolled out across other DSLRs in the EOS line-up such as the Canon EOS 80D suggests it’s a picture style that has a long-term future and is here to stay.
How to select, use and refine picture styles on your Canon DSLR
Step 1 – Decide which file format to shoot in
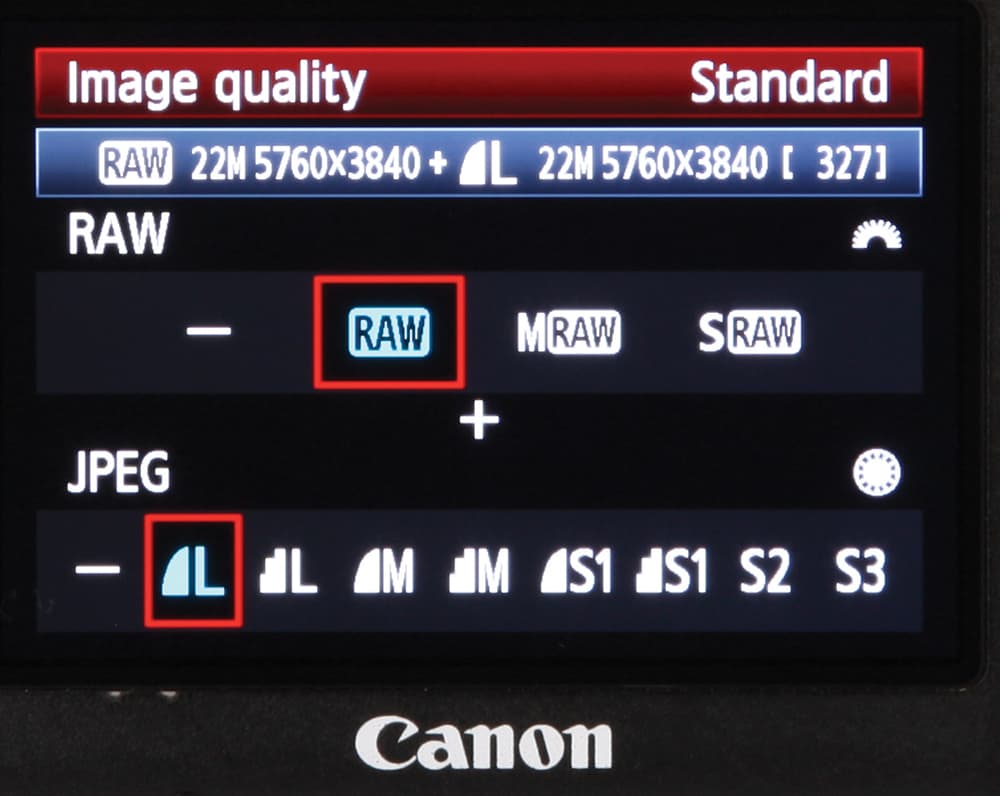
Before experimenting with picture styles, you’ll want to carefully consider which file format you’re shooting in. Remember if you shoot in the JPEG format, the effect of the picture style is irreversible. If you shoot in Raw the picture style will affect the image as you see it on the rear screen, however it won’t affect the colour information in the Raw file. It’s always good to get into the habit of selecting RAW+JPEG so you can always revert to the original Raw file later down the line if you need to.
Step 2 – Find picture styles from the menu
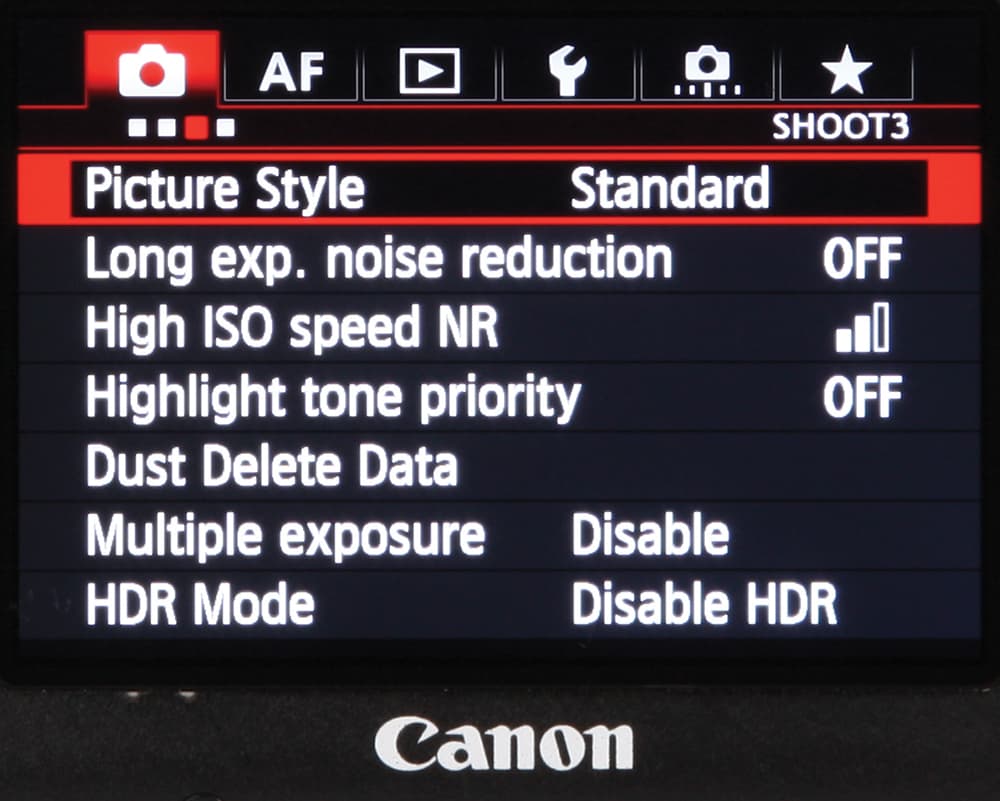
Hit the menu button on your Canon DSLR and navigate your way to the picture styles heading. Use the Set button to select picture styles and load the list of different styles on screen. You’ll find the picture style is set to Standard. If you’d like the camera to automatically analyse the shooting conditions, use your rear scroll dial or upwards directional button to select it and confirm your selection by hitting the Set button. Auto should be avoided if you want the look of your images to be consistent between a series of shots.
Step 3 – Refine your favourite picture style
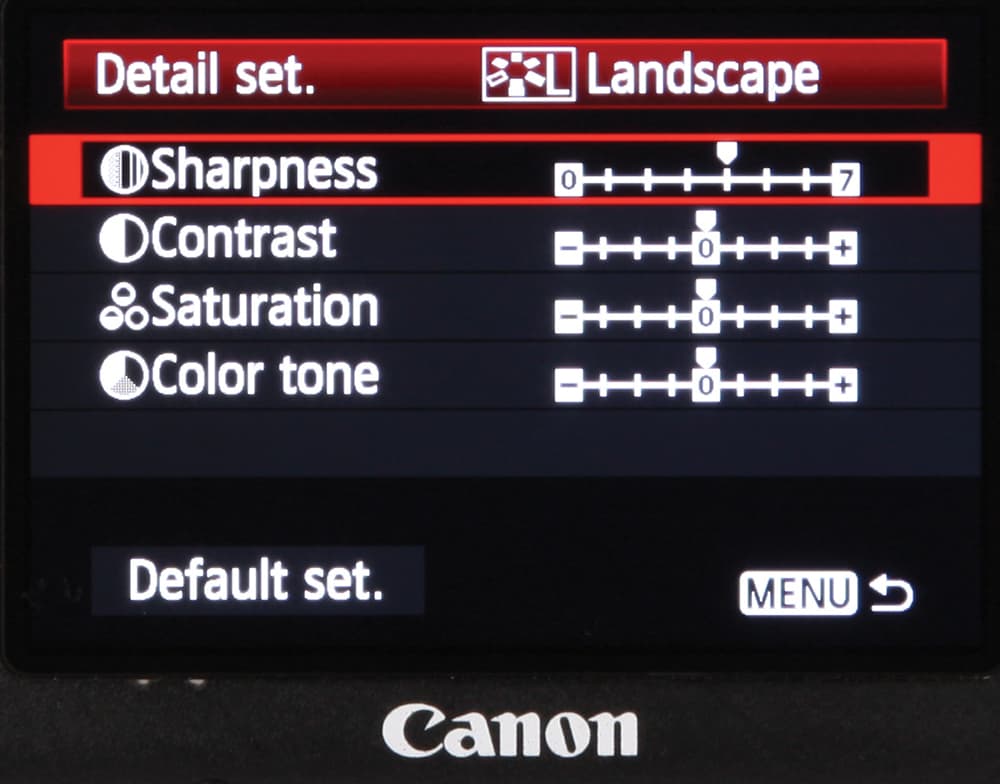
After experimenting with the different picture styles you’ll probably find a favourite, but you may wish to tweak the effect to suit your requirements. With your favourite picture style selected, hit the info button on your DSLR. From here you can navigate between sharpness, contrast, saturation and colour tone. To adjust any of these parameters simply use the Set button followed by the scroll dial or directional buttons to increase or decrease the effect. To apply the change hit the Set button once again.
Step 4 – Reverting to the default settings
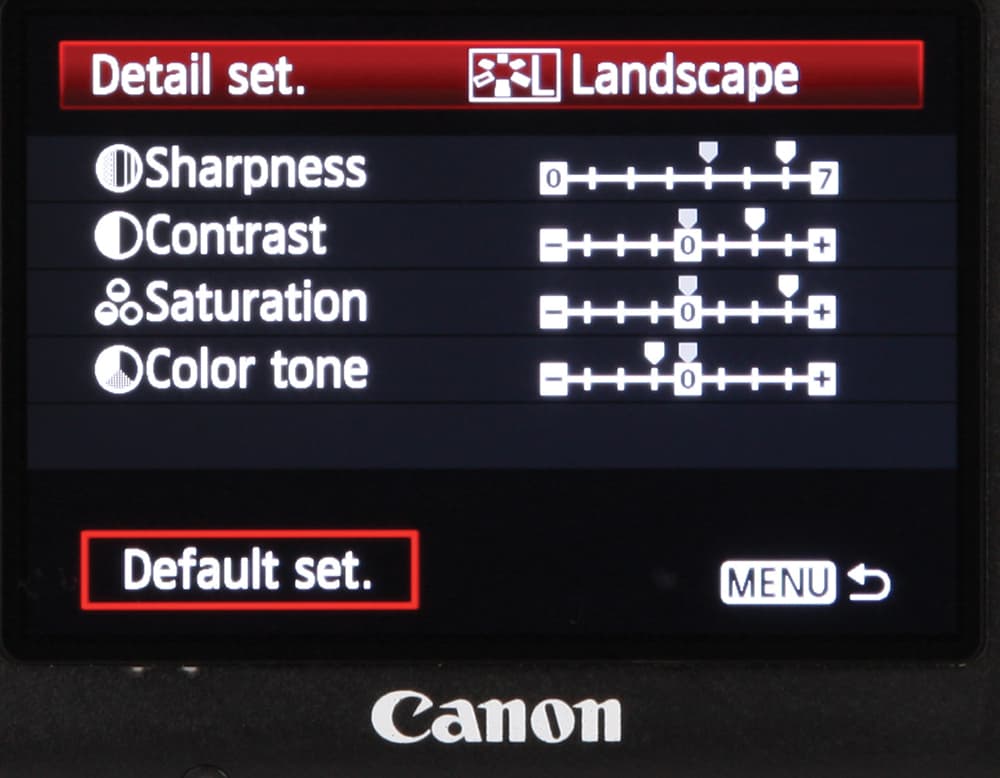
If you adjust a picture style and later find you’re not entirely happy with the result, you can return to the default settings of that picture style very easily. With the picture style selected simply hit the info button again to load the sharpness, contrast, saturation and colour tone parameters. You can return each parameter back to its default setting (indicated with a grey pointer) manually, or quicker still, head down and select the Default set option.
Step 5 – Set up a user-defined setting
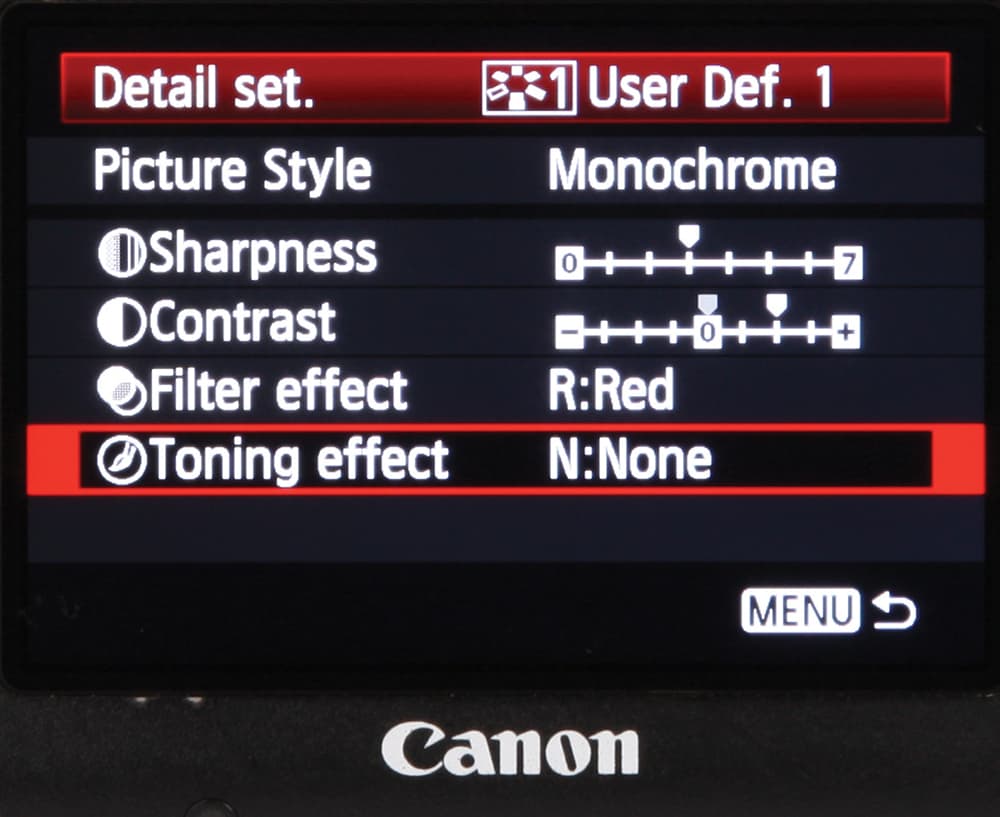
Setting up your own custom-made picture style is easy to do thanks to the user-defined settings. You’ll find these towards the bottom of the picture styles list. To create your own picture style simply find User Def.1, User Def.2 or User Def.3, then hit the info button. From here you can adjust the sharpness, contrast, saturation or colour tone to your liking. Alternatively you can download a new picture style from Canon’s Picture Style website and assign it to any one of these user-defined settings for instant access in the future.

