Image-editing software can help you boost saturation, increase contrast and clone out unwanted details – and that’s just for starters. Photo by Michael Topham
If you want to maximise your photographic potential and create the best images you possibly can, then you really need to think about digital photography as a two-step process. First of all, there’s the moment of capture, where the camera settings you apply will play a big part in how the image looks. And second, there’s the question of what you do with that captured image afterwards, and the extent to which you choose to enhance it using bespoke image editing software. This is especially true for landscape, portrait and fine-art photography where subtle changes to colours and tones can often make or break an image, but also applies equally to other genres – such as reportage and street photography – where pressing the shutter at the optimal moment is usually held up as the single most important aspect of producing a great photo.
While the most basic digital cameras are JPEG only, virtually all enthusiast-level digital cameras will allow you to record images as either compressed JPEGs or lossless Raw files.
The main difference between the two is that JPEG images are processed in-camera with any excess data discarded so as to make the resulting image file smaller, whereas Raw files don’t apply any in-camera processing yet retain all of the data captured by the sensor, which results in a much larger file.
The additional data that a Raw image retains greatly enhances its processing potential, and for this reason most professional photographers only ever shoot Raw so that they can apply their own unique look and feel to the images afterwards. If you want to get serious about your image processing, ultimately you’ll need to do likewise.
Of course, there are occasions when shooting JPEGs is simply more convenient. The good news here is that you can still enhance your images to a degree, only not as much as if you were shooting in Raw. Deciding which format you want to shoot is entirely up to you, of course, and if you do decide to shoot JPEGs there are still plenty of image editors available that can help you to further enhance your images.
We take a closer look at what these applications can offer you and what you should look out for when deciding which one to use. On the final spread we’ve even collected together just under a dozen applications – from simple-to-use image editors that can be used for free, to much more costly and powerful applications that are routinely used by professional photographers.
 Freeware vs paid-for applications
Image-editing applications come in many different guises and prices. And while some of the most powerful and advanced applications are undoubtedly quite costly, most manufacturers offer a free trial whereby you can download and use the application for a limited period of time, usually for around 30 days. This gives you time to evaluate the software, and to compare competing applications to see which one you find the easiest to work with and which is best suited to your needs. This applies to all the main professional-grade applications including Adobe Lightroom and Photoshop, DxO Optics Pro 10 and Phase One Capture Pro 8. It’s definitely worth making use of these free trials before committing to a particular one.
It’s also worth noting that Adobe no longer sells boxed copies of its flagship application, Photoshop, instead requiring you to pay a monthly subscription to use it. While there was a fair amount of disquiet at the time the company announced its plans in 2013, monthly prices have since fallen to a much more reasonable level.
If your budget won’t stretch to a paid-for application, then the good news is that there are plenty of open-source image editing applications that are free to download and use. While these ‘freeware’ applications aren’t generally as powerful or as advanced as their paid-for counterparts, you may well find them to be sufficient for your needs.
Ultimately, it all depends on what you want to do with your images. If you’re only looking to make a few basic adjustments to JPEGs, for example cropping and minor exposure tweaks, then virtually all of the free applications will allow you to do this. Likewise, if you’re simply looking to apply an Instagram style filter effect to your image, then there are hundreds of applications dedicated precisely to this, many of which are available for free.
On the other hand if you’re looking to process large batches of Raw files, work in layers or make advanced colour profile changes, then you will almost certainly find a paid-for application a much better investment in the long run. As with all freeware, you should also exercise due diligence in what you download and where you download it from. Be especially wary of any freeware that requires you to download other applications as part of a bundle, as some of these may contain malicious code such as spyware or worse.
In addition to freeware applications, an increasing number of online editing applications – such as Fotor.com and Pixlr.com – have sprung up in recent years. Unlike regular applications that need to be downloaded to your computer’s hard drive, online editors don’t require you to install any software at all. Instead you simply upload the image you want to process to the host application’s server and then edit it online through your internet browser, downloading the finished result to your computer once you’re done. For the time being, online editors can only be used to edit JPEGs and often place a cap on maximum file size, too.
While they’re not ideal for large batches of images, they do offer a relatively quick and easy solution if you only have one or two images that need a simple tweak. Of course, uploading your images to a remote server on the internet is not entirely without risk, and while most of the bigger and more established online editors explicitly state that they don’t store any copies of your images, you should always read the terms and conditions and FAQs of any online image editor before hitting the ‘upload’ button.
See What Digital Camera’s round up of the best photo editing software
Or if you’re short on chash see their round up of the best free photo editing software
Basic and advanced adjustments
All image-editing applications will allow you to make a range of basic adjustments to your image. These are likely to include simple tasks such as cropping the image or applying a different aspect ratio to it, altering the overall exposure, boosting highlights, recovering shadow detail, or making changes to contrast, brightness and saturation levels. Most applications will use intuitive slider controls for this. Depending on how advanced the application is, you may also be able to alter the tone curve or make localised adjustments such as dodging (darkening) or burning (lightening), or even removing dust spots and skin blemishes.
Ultimately, though, you can expect to get what you pay for, and while some freeware applications (such as GIMP) are impressively powerful, they are generally no match for the advanced features and expansive toolsets found in professional-grade applications such as Lightroom CC, DxO Optics Pro and Phase One Capture Pro 9. Of course, given the more advanced nature of such applications, you can expect to spend quite a lot of time learning how to use them to their full potential, whereas for a simpler image-editing application the learning curve is far less steep.
More advanced applications usually come with the ability to apply masks or to work in layers, allowing you to isolate certain parts of the image and make adjustments without affecting the unmasked areas.
This can be especially useful if you want to change backgrounds or help your foreground subjects to stand out from the background more. In addition, most of the advanced image editors will also allow you to make non-destructive edits to your images, which is to say you can make and save changes without affecting the original image. This is especially useful if you make mistakes or want to discard certain changes without discarding others.
Raw conversion
If you’re planning to invest in any of the more advanced paid-for image editing applications, then you really need to be shooting in Raw. This ensures that all of the data recorded by your camera’s sensor is retained, providing you with much more scope to process the image as you would like to. This is especially true when it comes to enhancing shadow detail or recovering highlights, both of which are notoriously difficult with JPEGs that have already been processed in-camera. The flipside to this is that most basic image editors are JPEG-only, which is to say they won’t recognise Raw files at all. For this reason, if you’re planning to get serious about your image processing then you’ll need to invest in an application that supports Raw.
As you might expect, there are some pretty big differences between the results each of the applications can produce, with some being slightly better at certain tasks than others. It’s worth noting, however, that in such a competitive market, all of the manufacturers are constantly upgrading and improving their software and while DxO is generally regarded as being slightly ahead of the pack when it comes to the specific task of reducing luminance noise without sacrificing fine detail, that’s not to say that next year’s Lightroom or Capture One release will feature a big upgrade that makes it the class-leading application in relation to that same specific task.
There are many reasons – overall cost, ease of use, output options, catalogueing capabilities and suchlike – to choose one specific application over another, however it’s much harder to definitively say that one application is the overall winner and streets ahead of the others. Indeed, it’s fair to say that the image-editing software market has evolved to the point where all of the key players excel at what they do. In addition, there are now many more companies producing excellent software that costs a fraction of their more established rivals.
Also, be aware that Raw files are proprietary in nature, which is to say they differ dramatically between the various manufacturers – a Nikon .NEF file, for example, is not the same as a Canon .CR2 file. In addition, Raw files often differ slightly between various camera models made by the same manufacturer, and for this reason there is often a short gap between a new camera’s release and the ability of the main image editing applications to recognise the Raw files it produces. Some applications allow you to convert proprietary Raw file types to more universal Raw file types such as Adobe’s .DNG format. There are many arguments both for and against this process and ultimately it’s your choice whether to do so or not.
Plug-ins
Another thing to consider when choosing image-editing software is its ability to support third-party plug-ins. Plug-ins come in many guises, although the most common types tend to provide digital filter effects, image upscaling and noise-reduction duties – all within the framework of your main image-editing application.
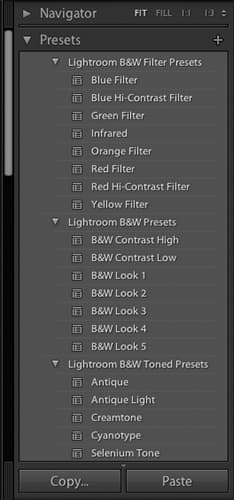
Plug-ins can be extremely useful in that they enable you to give your images a certain look with only a couple of mouse clicks, potentially saving you hours of fiddling about in Photoshop or suchlike. Others often handle specific tasks such as noise reduction or image upscaling better than their host application does. Numerous companies specialise in providing image enhancing plug-ins; however not all plug-ins are compatible with all image-editing applications. Lightroom though, has free presets that will help you speed up your digital darkroom workflow.
Cataloguing

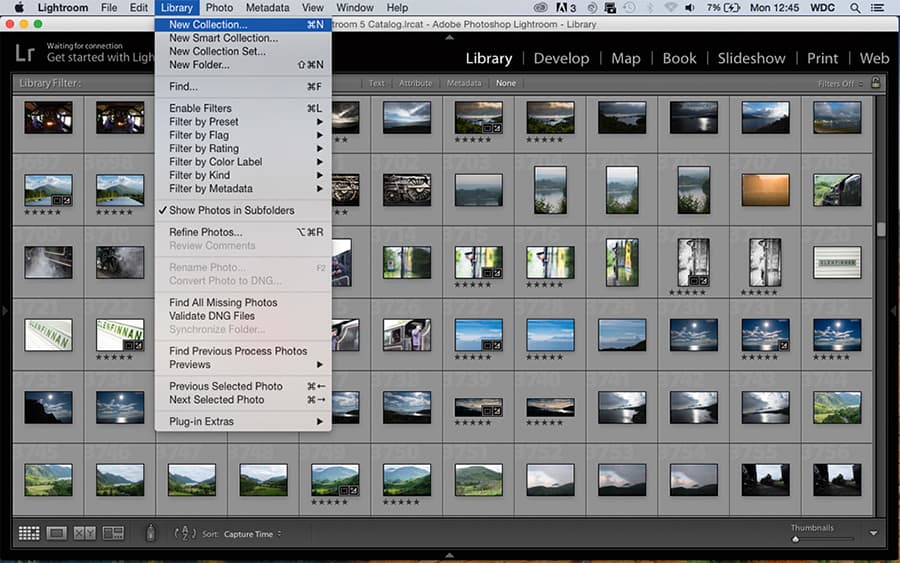
While this guide is primarily concerned with applications that can be used to process, edit and enhance your images, one last feature we’d like to touch on that’s well worth looking out for, but which doesn’t necessarily come with all image-editing applications, is the ability to catalogue your images. This essentially allows you to organise and access them directly from within the image-editing application itself, rather than having to open other applications or search through multiple folders on your hard drive. This can greatly simplify the workflow process, making the most of your valuable processing time.
Lightroom CC and Phase One Capture Pro 9 both offer pretty comprehensive image cataloguing features, including the ability to tag images with your own unique descriptions.
Screen calibration

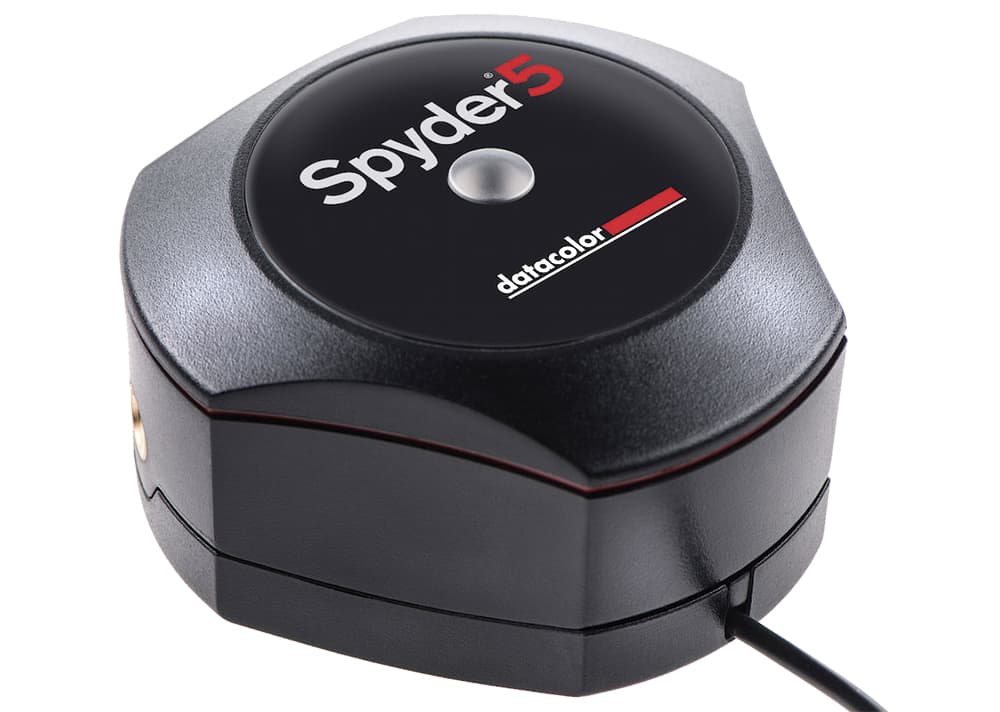
If you’re going to get serious with processing your images, then it makes sense to ensure that your monitor is correctly calibrated. If not, then the colours you see on screen won’t necessarily look the same in print. There are many products on the market to ensure that you don’t fall into this trap.
Among the market leaders are companies like Spyder, who make a range of screen calibration tools. The Datacolor Spyder 5 (£130) can be used to ensure that the colours you see on your display are the same that you will see in a print.


