Difficult, complex lighting situations can be daunting to the inexperienced photographer. If you’re facing a high-contrast situation, with bright highlights and dark shadows, it can be challenging to work out how to expose for a balanced image.
This is where the Nikon Active D-Lighting system comes in handy. It’s a function that works in-camera to balance the shadows and highlights for a more pleasing exposure. It adjusts exposures by varying degrees depending on the situation, with the aim of avoiding blown highlights and lightening shadow areas.
Ever used an S-curve in Photoshop, dragging up the highlights and down the shadows to make an image pop with contrast? With Active D-Lighting, you’re essentially using a reverse S-curve to solve an opposite problem – dragging highlights and shadows down to rescue detail. Take a look at the two images above. The one on the right was taken with Active D-Lighting turned on, the one on the left with it turned off. What Active D-Lighting has done is balance the lighting in the image. Notice in the image on the right that the dark areas have been reduced, while detail has been retained in the bright areas of the image.
Active D-Lighting is an in-camera function, meaning its adjustments take place at the moment the photo is taken. It only applies processing to the areas of the image that require it. This enables you to photograph subjects with a wide dynamic range and still produce an image that has a natural-appearing level of contrast. In low contrast situations, Active D-Lighting uses localised tone control technology to prevent images from looking flat. It’s important to note, though, that terms such as ‘flat’ and ‘contrasty’ are subjective – I have seen threads on the internet complaining that Active D-Lighting left images a little flat through evening out the exposure a little over-zealously. I should point out that it has never, ever been a problem for me, but every photographer is different. Experiment with it!
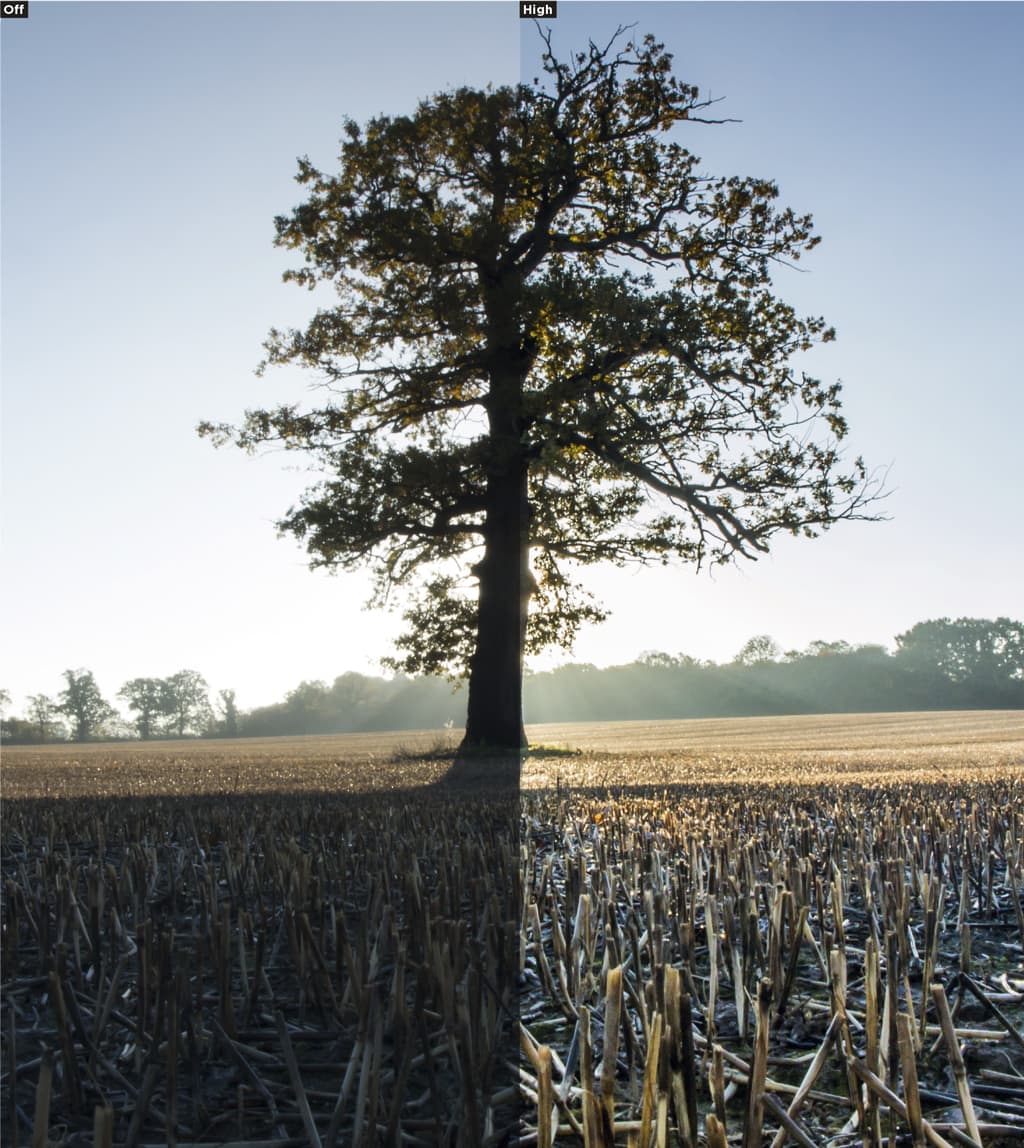
Above we see an image with detail being lost in the bright sky and shadowy foreground. Active D-Lighting allows us to rescue that detail in both instances
Using Nikon Active D-Lighting
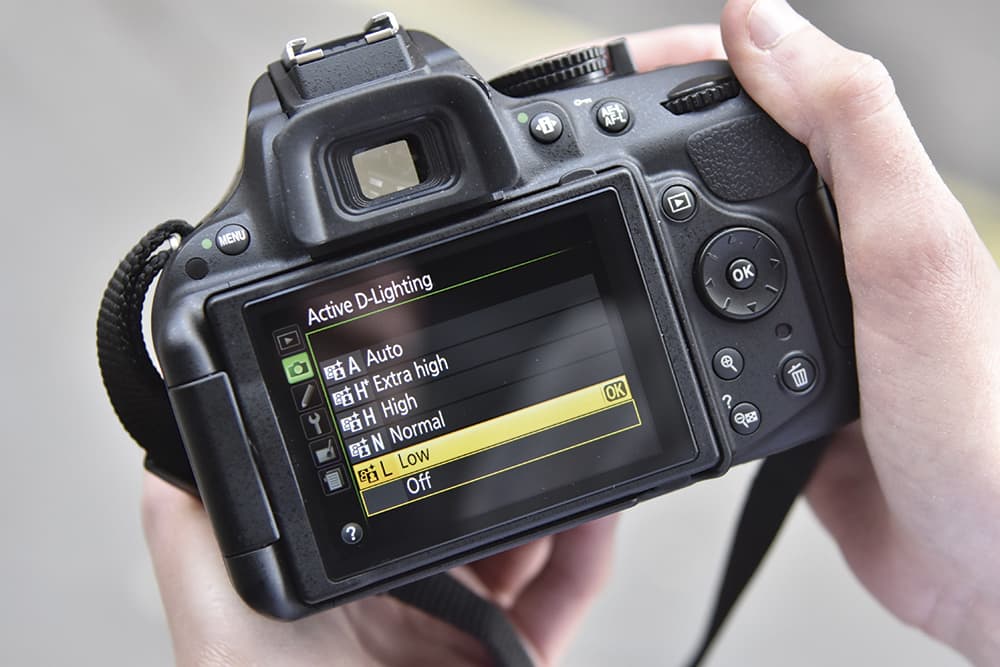
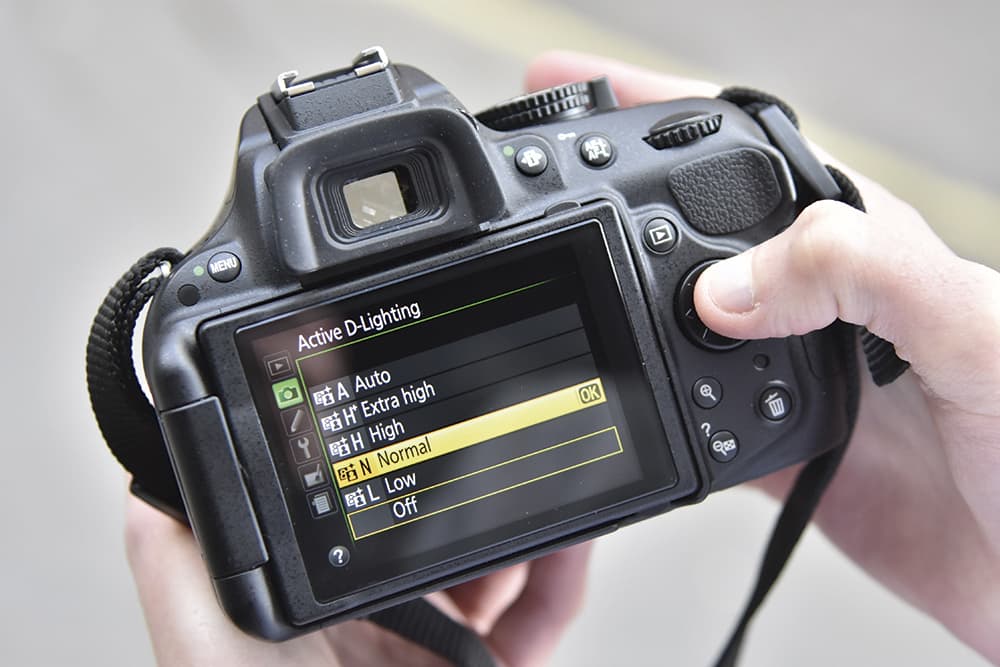
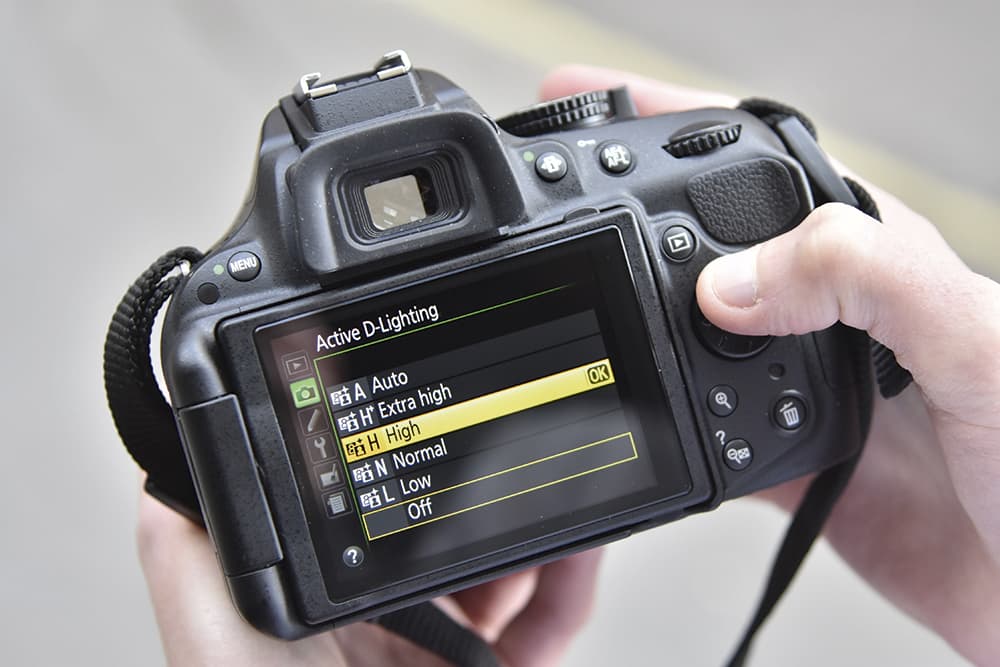
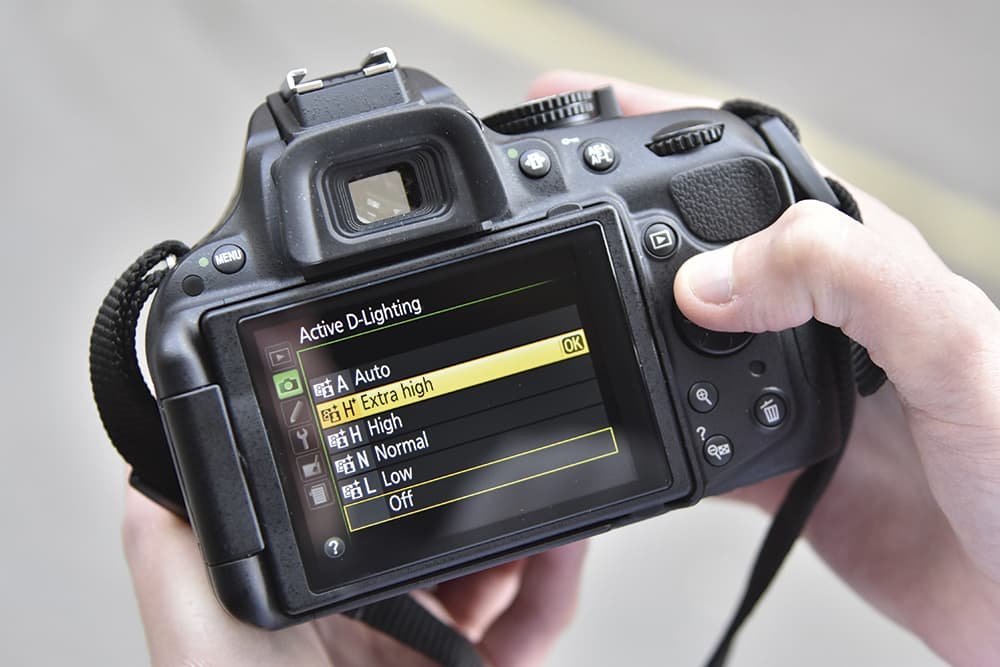
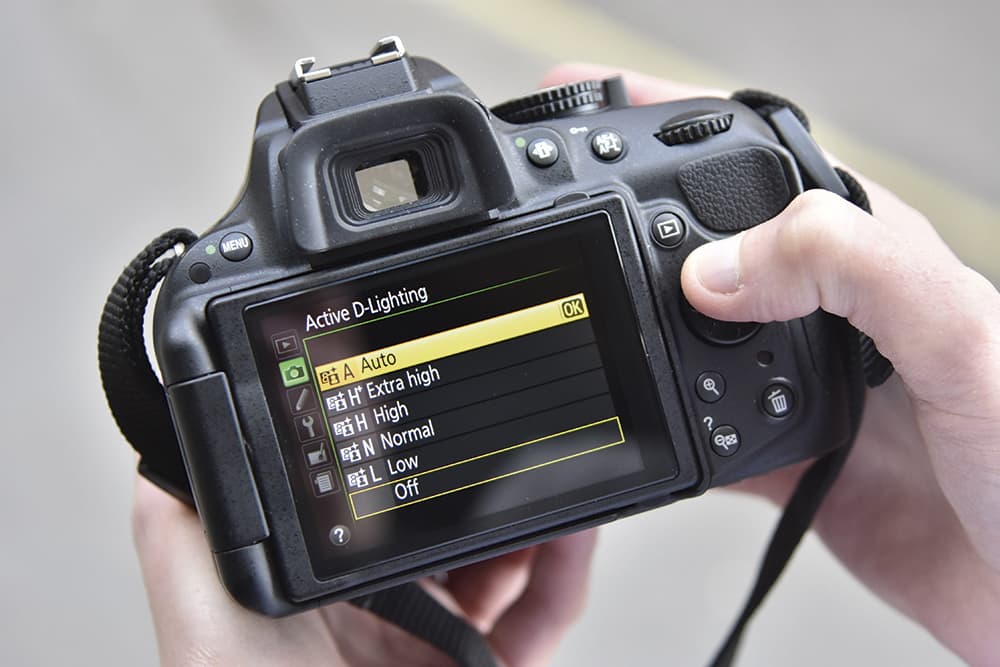
The Active D-Lighting options available to you will depend on which Nikon camera you own. Some cameras will only let you turn it on or off, while others are more sophisticated. More advanced Nikon cameras offer an Auto setting, as well as different intensities with which Active D-Lighting can be applied, ranging from Low to Extra High.
Though auto modes are generally regarded among photographers as something to avoid, I use Auto Active D-Lighting often and have never known it to let me down. To put it as simply as I can, it just works. If you’re concerned, though, some Nikon cameras allow you to set up a bracketing system that will produce one image with Active D-Lighting and one without.
When to use Nikon Active D-Lighting
Selecting the right amount of Active D-Lighting to apply is relative to the lighting conditions you are shooting in. In general, the stronger the contrast of the light you are photographing with, the higher the Active D-Lighting setting you will need to use. Don’t worry if you’re not sure – as I said earlier, this is one instance when you can trust your camera’s Auto mode to use good judgement.
Active D-Lighting will prove most effective in complex lighting situations, and this isn’t just limited to bright-sky landscapes. Take, for an example, sports photography. Imagine a stadium with the sun on one side, casting half the pitch in bright light and the other half in shadow. What Active D-Lighting will do is bring the exposure on the bright side of the pitch down, and lift it up in the areas that are in shadow. Once you start thinking about the possibilities of Active D-Lighting, you realise that it really can have its uses everywhere.
Nikon Active D-Lighting and D-Lighting: two different things
Even though their names may be similar, in fact, Active D-Lighting and D-Lighting are two very different things. Active D-Lighting is applied at the point of exposure, so it takes account of the camera settings used. D-Lighting, on the other hand, is only applied after an image is captured in post-production software, therefore it doesn’t use the camera’s exposure information in order to apply the correction.
An important point to note, though, is that D-Lighting is really designed for use with Nikon’s own post-processing software – and as a realist, I know most of you are probably using Lightroom! You won’t be able to take full advantage of D-Lighting features with Adobe software, which is why it’s best to use Active D-Lighting to achieve the effect in-camera.
Nikon Active D-Lighting and D-Lighting differences
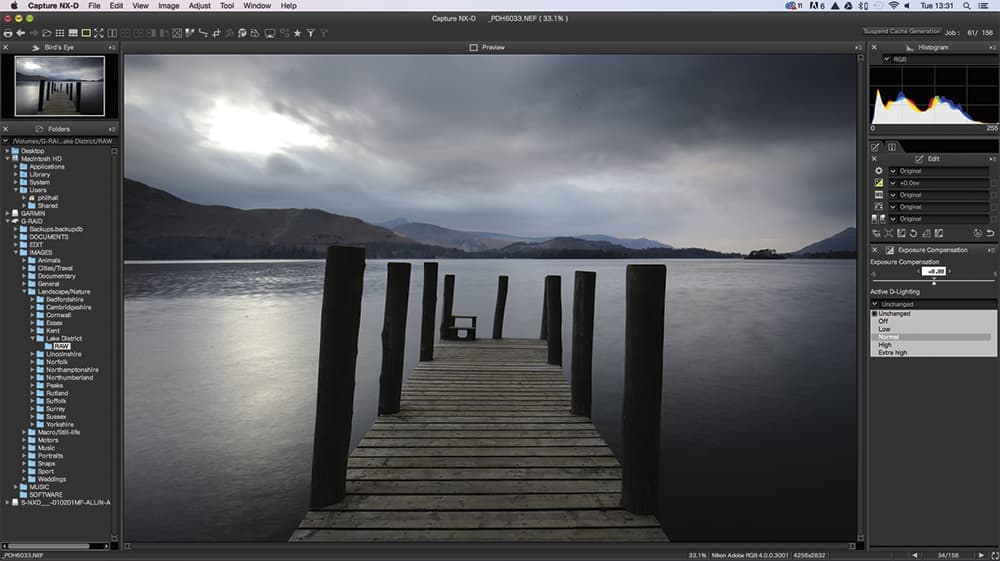
Don’t be fooled by the similarity of their names – Active D-Lighting and D-Lighting are two very different things.
Nikon Active D-Lighting is applied at the point of exposure and therefore takes account of camera settings to produce the final image. D-Lighting is applied after an image is taken, and does not use information from the camera’s exposure to apply the correction.
In my opinion, this makes it invariably the less effective option when used in-camera – the results from Active D-Lighting will be smoother and more natural.
D-Lighting is available from the in-camera retouch menu and can be applied to individual images after they are saved. It will automatically correct contrast and brightness across the whole image, and is useful for balancing out the light and dark areas.
If you load it up in Nikon’s Capture NX software, however, D-lighting does open up a number of additional options, such as allowing you to apply the D-Lighting effect just to specific sections of an image using a Selection Control Point.
It’s worth noting that if you choose to activate D-Lighting with the retouch menu in-camera, then it will save a new copy of the altered image and leave your original untouched (this is the case with all features in the in-camera retouch menu).
While this means you’re never in danger of accidentally ruining or overwriting your images, it is worth keeping an eye on the amount of card space you’re taking up.
Backlit exposures
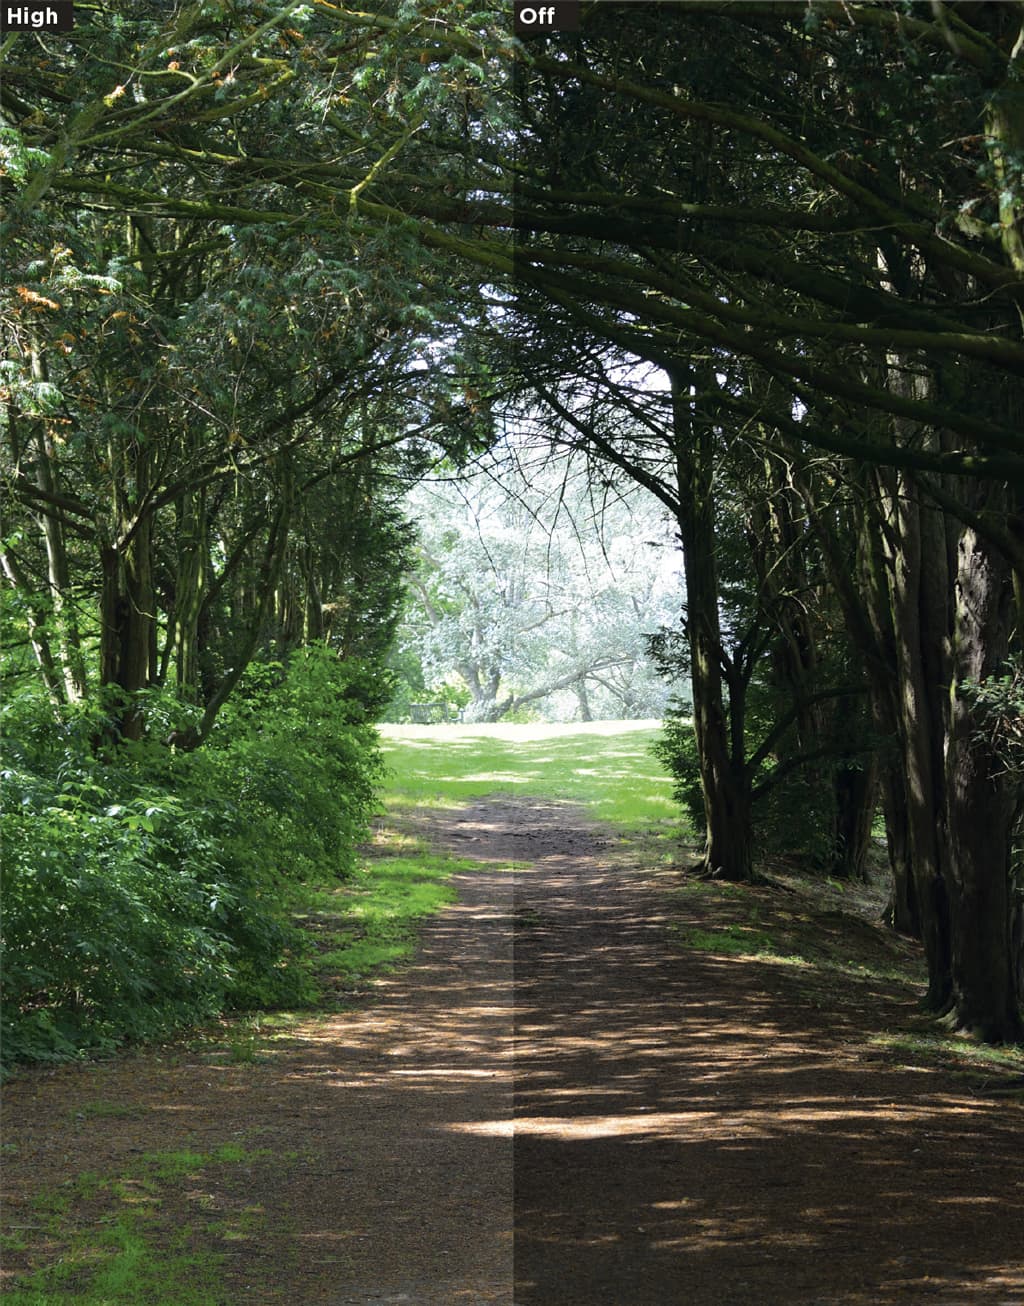
When you photograph a subject that is heavily backlit, you often end up with poorly exposed images. This is common in sunny, high-contrast situations, where you might encounter strong background sunlight causing foreground objects to be in deep shadow. An attempt at a balanced exposure results in the sunny highlights being too strong and detail being lost in the shadows.
A venerable solution to this problem is fill-flash – firing a sharp burst of flash at the foreground shadows in order to resuscitate the detail; however, not everyone has the know-how or equipment to achieve this.
This is where Active D-Lighting comes into its own, addressing the issue by reducing the loss of detail in highlights and shadow areas. As a result, the lost highlights and shadows are restored, while still maintaining correct contrast.
Step by step to setting up your Nikon Active D-Lighting
Setting it up is simple. Access the Shooting menu (the one represented by a camera) on your Nikon DSLR, and scroll down until you reach Active D-Lighting. Highlight this, press OK, and you’ll be presented with a menu of Active D-Lighting options. Select your preference, then hit OK again.

