Back in the days of film, shooting monochrome was a very specific choice. You loaded your camera up with a roll of black & white film, and for the next 24 or 36 exposures had no choice but to run with it. Of course, you couldn’t see how your pictures were coming out while you were shooting, so you had to try to learn how the colourful world in front of you would translate into greyscale.
If you were really serious about the process, you’d carry around a set of colour lens filters for contrast control. You’d probably also set up your own darkroom for developing and printing your film. Indeed, to get best results, you’d spend hours under a dim red safelight, dodging and burning your prints until they were just so.
These days, of course, times have changed. Shooting monochome on almost any digital camera is as simple as switching colour modes, which you can do on a shot-by-shot basis almost as easily as changing the aperture or ISO. But when you do this, you may well find that the mono output is disappointing, and lacking in impact and punch. Chances are you might try it once when you first get the camera, but never again.
Of course. it’s also simple to convert your pictures to monochrome in post-processing, with essentially the same control over how the final image will look as you’d get in the darkroom. This means that actually switching your camera to mono can appear pointless, especially if you shoot raw. Why shoot black & white photos in-camera when you can do it all later at your leisure, with more control?
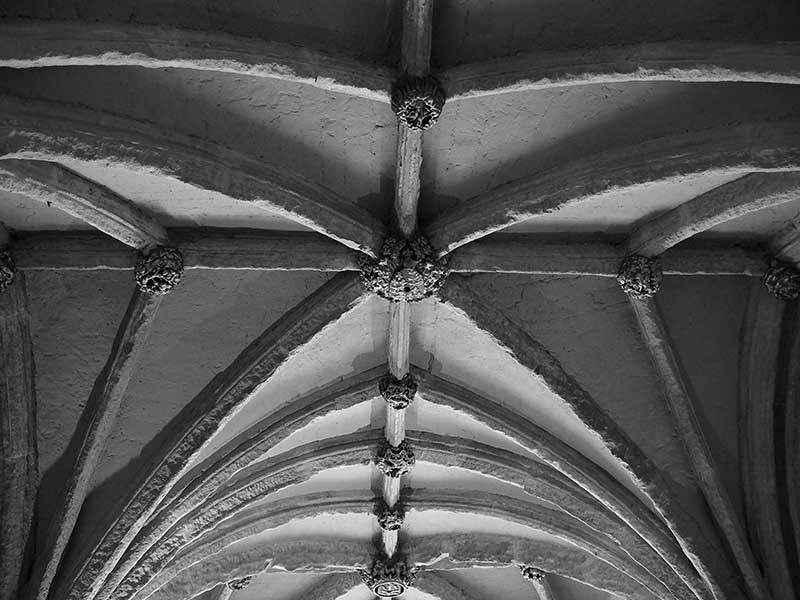
Shooting in mono allows you to draw attention to lines, shapes and textures
In fact, there are some perfectly good reasons why you might decide to shoot mono in-camera. Firstly, not everyone wants to shoot raw all the time and post-process every shot – it’s a time-consuming business. Secondly, even if you are planning on post-processing, there can be real value in using your camera’s mono mode to give an initial idea of how well your shots will work out, to help fine-tune your compositions. Finally, with the in-camera processing controls now available, and some of the more attractive ‘filter’ modes, it’s entirely possibly to get attractive results out of the camera with no further manipulation.
What’s more, if you shoot monochrome using either a compact camera or a compact system camera that uses electronic viewing, it’s possible to see exactly how your pictures will turn out before you press the shutter button. This can be really useful, as it helps you ignore the distraction of strong colours when composing your images. You can also see more easily how different processing settings will impact your image. Much the same can be achieved by shooting with a DSLR in live view, as opposed to using the optical viewfinder.
In this article we’ll look in detail at shooting in monochrome mode, exploring the options available and offering some tips on how to get best results.
How to shoot black and white photos in-camera
Setting your camera to shoot in black & white is usually very straightforward. Simply locate the camera’s colour mode setting, and change the output to monochrome. Different manufacturers call these settings by different names, though, and some also have several different variants of their black & white mode. If in doubt, check your manual (as always).
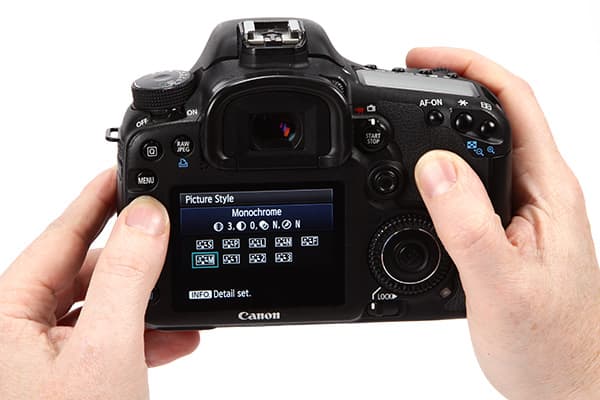
With most cameras, setting monochrome mode is very easy
It’s important to understand that, unlike with film, switching the camera to monochrome is purely a processing setting. The sensor is still recording images with full colour information, and if you record raw files alongside your JPEGs, they’ll still include all of it. It’s just the JPEG output that’s monochrome.
The manufacturer’s own raw processing software will normally recognise your intention to shoot in black & white, and display the images accordingly. But if you’d rather have a colour version of the shot, it just requires changing the setting back. Third-party processing software will most likely display your files in colour, but will happily process them into black & white anyway.
When to shoot mono?
One question that beginners often ask is when to use black & white, rather than colour. The simple answer is ‘whenever you like’ – there are no hard and fast rules. But it’s important to understand that shooting in monochrome is a rather different art to working in colour; some shots that look great in colour look dull in black & white, and vice versa. Indeed, getting effective results in mono often requires a fair bit of practice to understand the medium’s distinct characteristics.
Shooting monochrome removes the distraction of colour from your photographs, reducing them to the essentials of light and shade, composition and form. This means that it’s naturally better suited to some subjects rather than others – obviously if colour is important to an image, such as red flowers against green foliage, then removing it can destroy the picture’s impact. But likewise, when colour distracts attention from the main subject, shooting in black & white can be a real improvement.
There are, however, some situations to which monochrome is particularly suited. For example, in dull weather where the light isn’t bringing much to the party, then switching to black & white mode can give better results by emphasising the shape and form of your subjects. In strong, bright light, it can emphasise the interplay of light and shade.
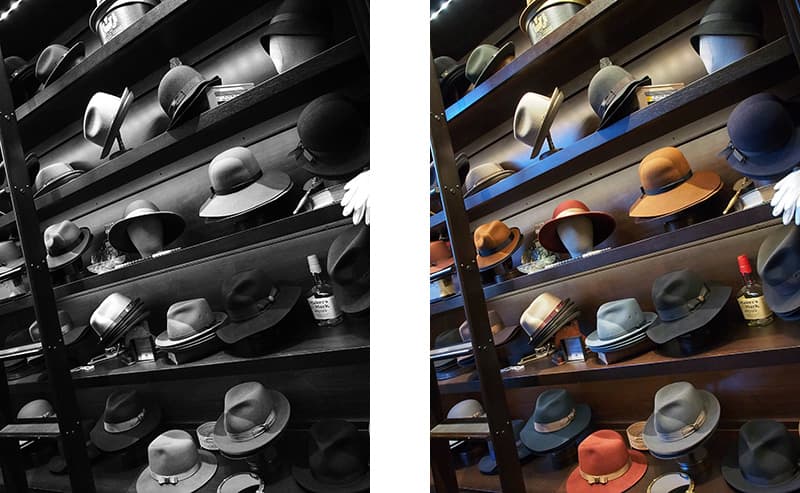
Shooting in monochrome can remove the distraction of strong colours, and neutralise the effects of mixed lighting
Another situation where monochrome can come in handy is under mixed lighting. If you have both natural and artificial light illuminating different parts of the scene, or different types of artificial light, then those areas of the image will show ugly colour casts. This is something that our eyes and brains simply don’t perceive, so it looks particularly unattractive. In some cases it can be fixed in post-processing, using local corrections to remove the strongest colour casts. But often a simpler and more effective solution is simply to convert to black & white, which removes the distractions of mixed lighting completely.
Switching to monochrome can also be useful when shooting under artificial light at high ISOs, particularly with low colour temperature sources such as tungsten bulbs. Such light is strongly biased towards the yellow end of the spectrum, and lacking in green and blue in particular. The result is that, when trying to make a correctly balanced colour image, the green and blue channels have to be strongly amplified, resulting in an unpleasant increase in image noise. But if you deliberately set the ‘wrong’ white balance and shoot in black & white, this can reduce such problems with noise.
Color modes vs processing filters
Alongside their standard monochrome modes, many recent cameras also offer a couple of black & white options as processing filters – known by such diverse names as Creative Controls or Art Filters.
Where normal mono modes use the camera’s standard image processing in terms of contrast and detail rendition, filter modes are much more stylised. They’ll often use exaggerated contrast and tonality, and perhaps add in film grain effects, soft focus, vignetting, and so on.
Because of this, processing filters are generally best seen as an end in themselves – giving finished pictures in their own right, rather than as a guide to how post-processed raw images will turn out.
Examples of in-camera processing filters:
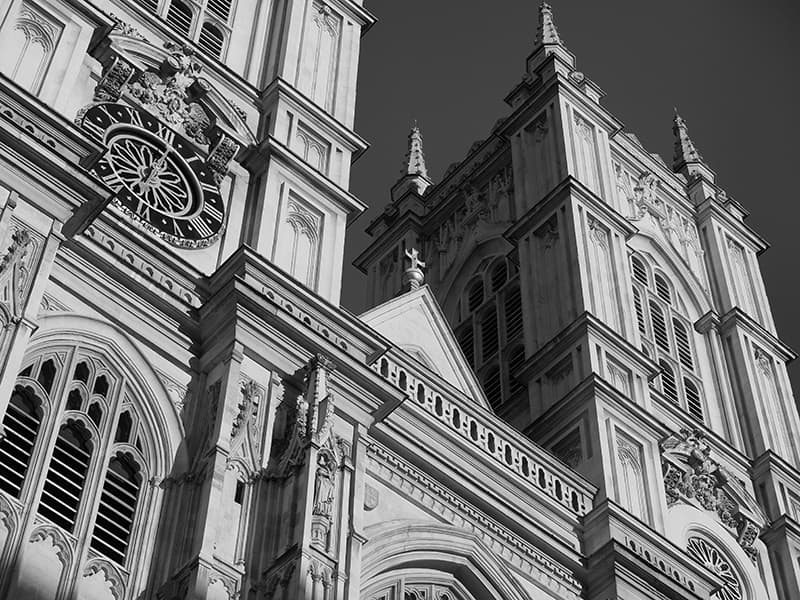
Conventional monochrome mode
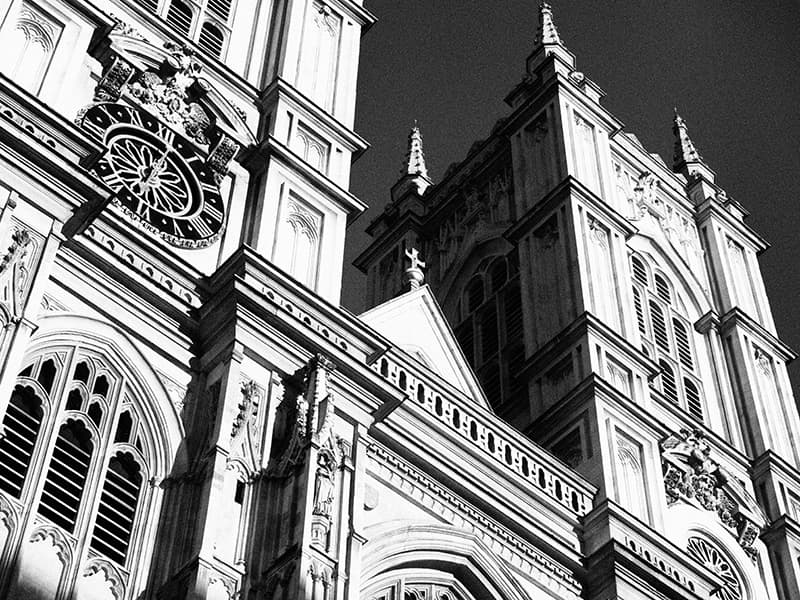
Grainy Film Mode
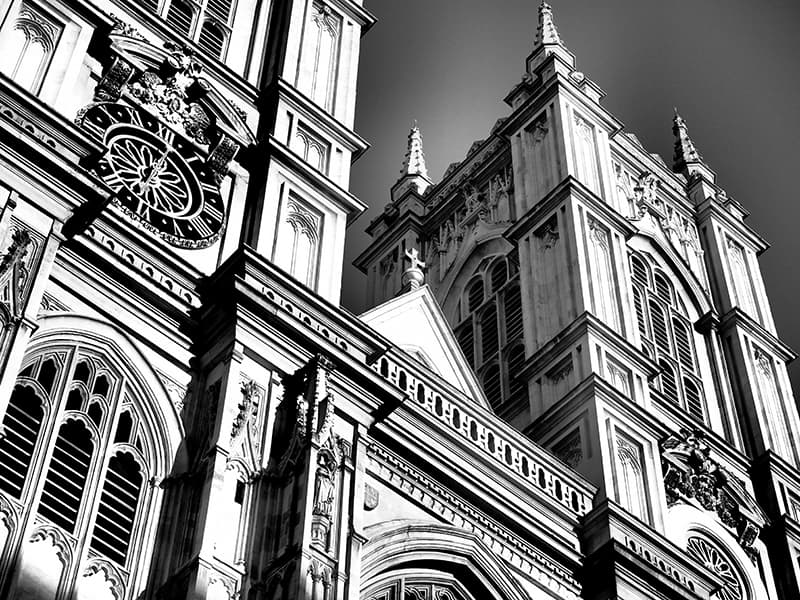
Dramatic Tone mode
One important point to note is that not all brands will allow you to shoot raw files alongside processing filters anyway, although some will. If not, you may wish to think twice about using them – it can be pretty galling to find out that you’ve taken a great shot in the wrong mode.
In-camera monochrome processing settings
Most cameras these days have plenty of settings for tweaking the look of your monochrome images, and while they give lots of control over how your images will turn out, they can equally look daunting for new users. Here we’ll take a look a look at what they do, and offer tips and recommendations on how to use them.
Contrast
Most in-camera black & white modes are based directly on the standard colour processing, just with the colour desaturated. While this is a perfectly sensible thing to do from the manufacturers’ point of view, it can often leave monochrome images looking a little flat. This can be addressed by increasing the contrast setting to give the image a bit more impact, as shown:
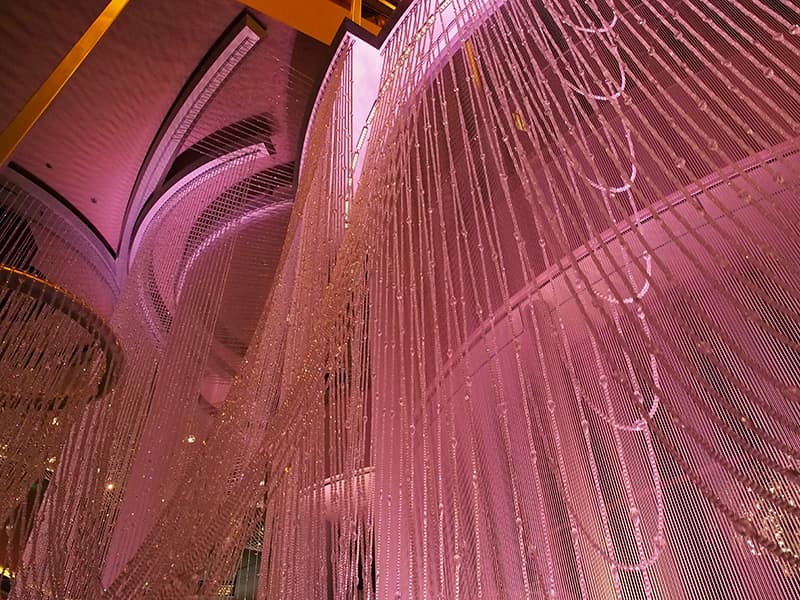
The original colour shot
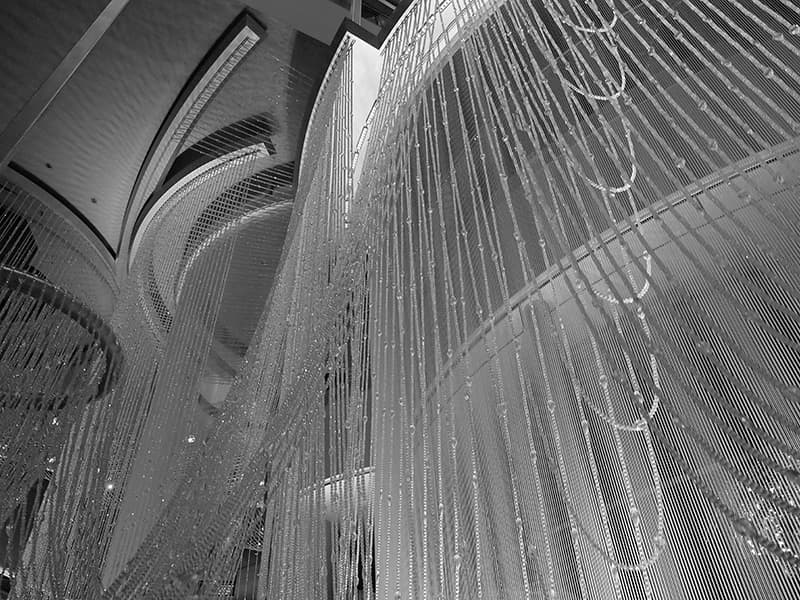
The normal contrast monochrome conversion
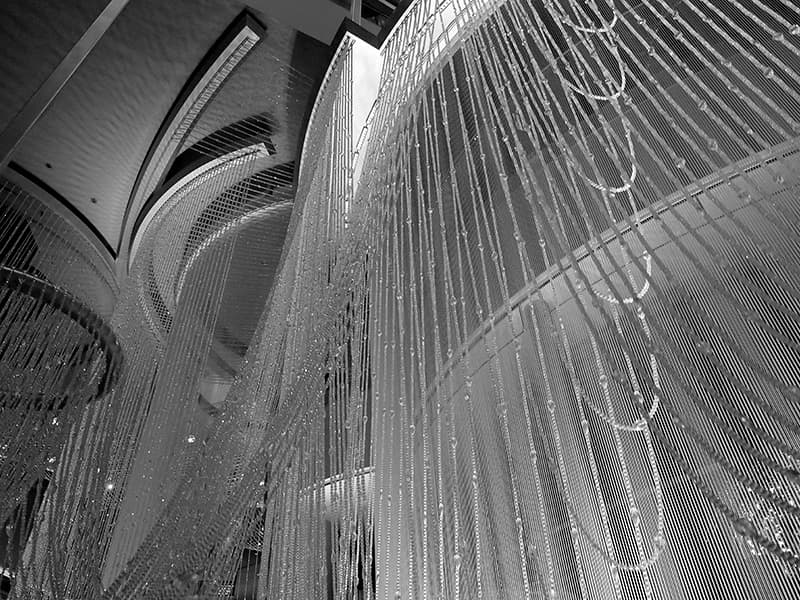
The high-contrast monochrome conversion
In this example, the colour version is dominated by one shade, but with small yellow areas distracting the eye. Converting to monochrome turns the shot into a study in geometry, and boosting the contrast significantly improves the shot.
Toning
Toning refers to colourising a monochrome image so it takes on a single overall tint. Historically, this comes from the practice of treating a silver-based print in the darkroom, normally to make it last longer without fading.
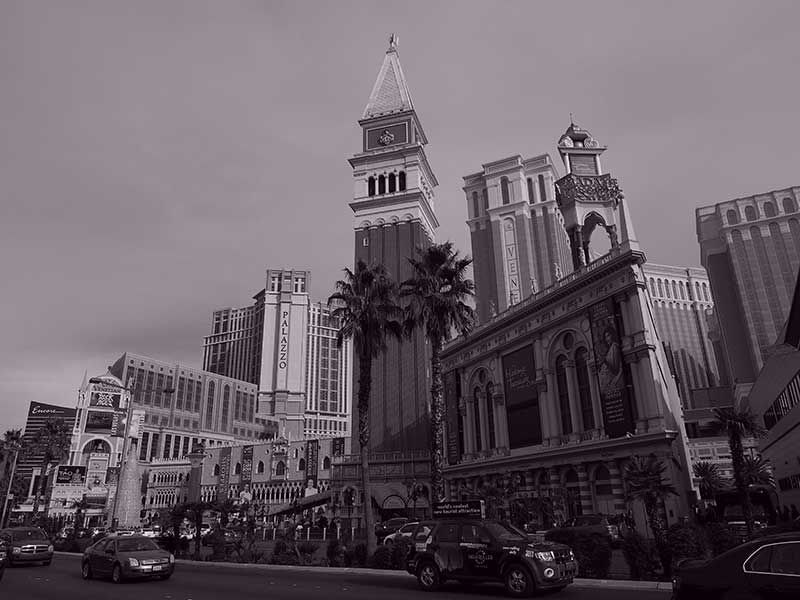
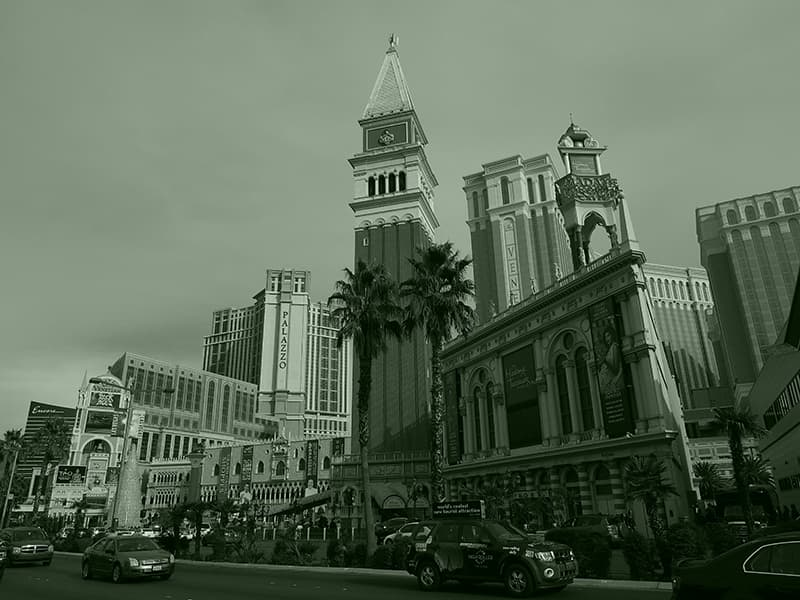
Almost all cameras offer the option to produce sepia-toned images – the kind of yellow-brown tint that’s become synonymous with old prints. Most also give a blue-toned mode, which can be very effective for some images, giving a cool effect in contrast to the warm tones of sepia. Often these settings are a little overblown, but some brands such as Panasonic allow you to adjust the intensity of the toning to give a more subtle look.
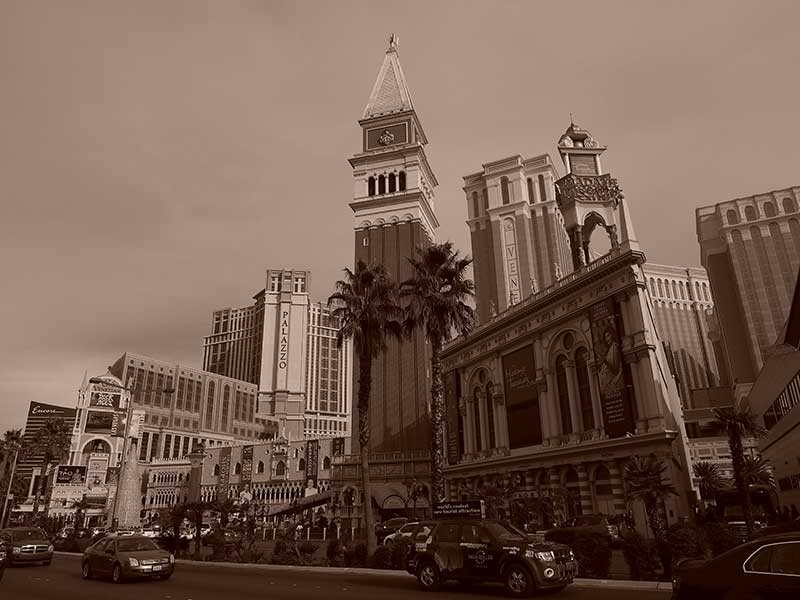
Sepia tone

Blue tone
Purple tone
Green tone
Aside from sepia and blue, a couple of camera manufacturers also offer green and purple toning settings. These are both less obviously related to darkroom techniques, and less likely to give attractive images – especially green. On the whole, I think it’s usually best to stick with blue and sepia.
If you’re printing at home, then toning can help overcome one common problem with inkjet printers, which often struggle to maintain neutral tones throughout the greyscale from white to black. High-end printers overcome this by using one or more grey inks, but this option isn’t available for many users. However, adding an overall colour tone can help mask any colour casts in the midtones.
Colour filters
Some brands include filter settings that mimic the tonality-controlling effects of using coloured lens filters with black & white film. They’re usually named after the most popular filters that were used: yellow, orange, red and green. They’ll probably be pretty baffling to anyone who started photography in the digital age, and isn’t familiar with the concepts involved.
These filter effects allow the user to manipulate how light or dark objects of different colours are rendered in the monochrome image. Items of the filter colour are lightened relative to their surroundings, while those of the complementary colour are darkened. So, for example, if you select an orange filter, then orange objects will be rendered lighter, while blue ones will be darkened. One common use of such filter effects is to enhance blue skies.
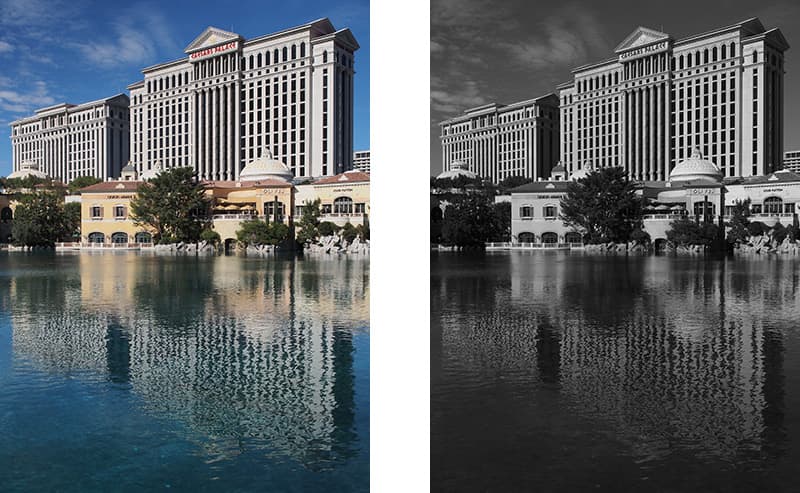
Here’s the shot in colour for reference, and the unfiltered monochrome version.
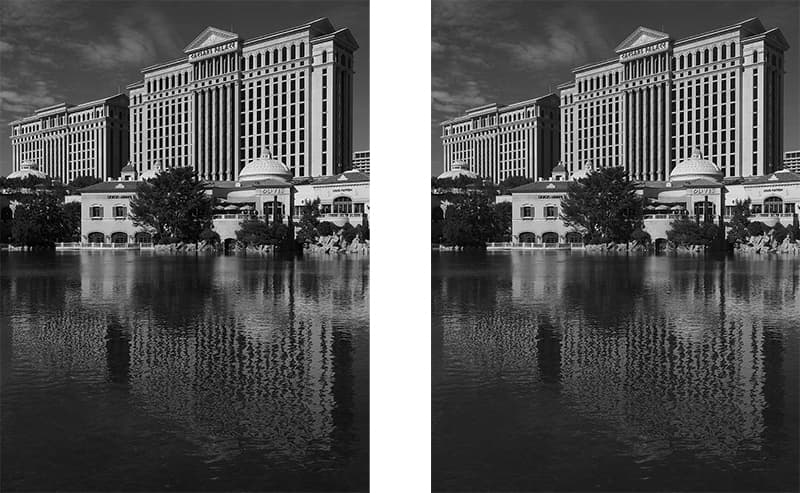
A yellow filter (left) will slightly darken a blue sky relative to any clouds, while an orange filter (right) will do something similar, but with a stronger effect
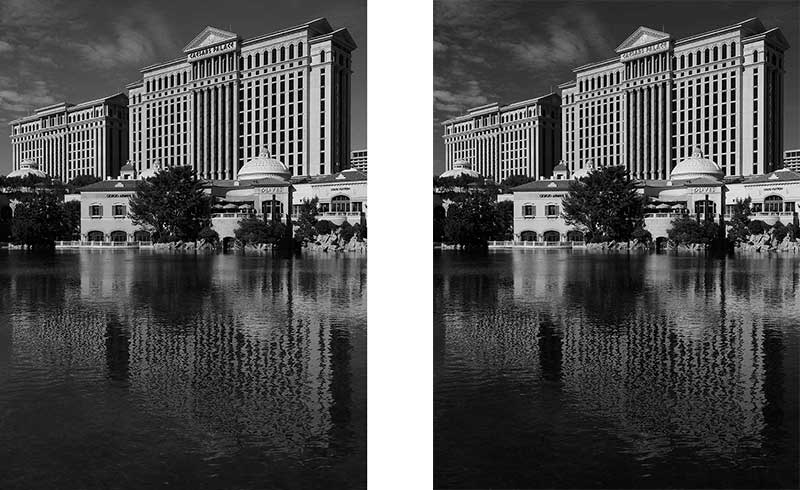
Green filters (left) will lighten foliage, while red filters (right) deepen sky tones more than orange or yellow, further enhancing contrast against white skies
These filter effects can all be particularly useful when shooting landscapes. Technically it’s usually better to use in-camera processing for this, rather than use coloured lens filters, if you still have some lying around from shooting black and white film.
Partial colour
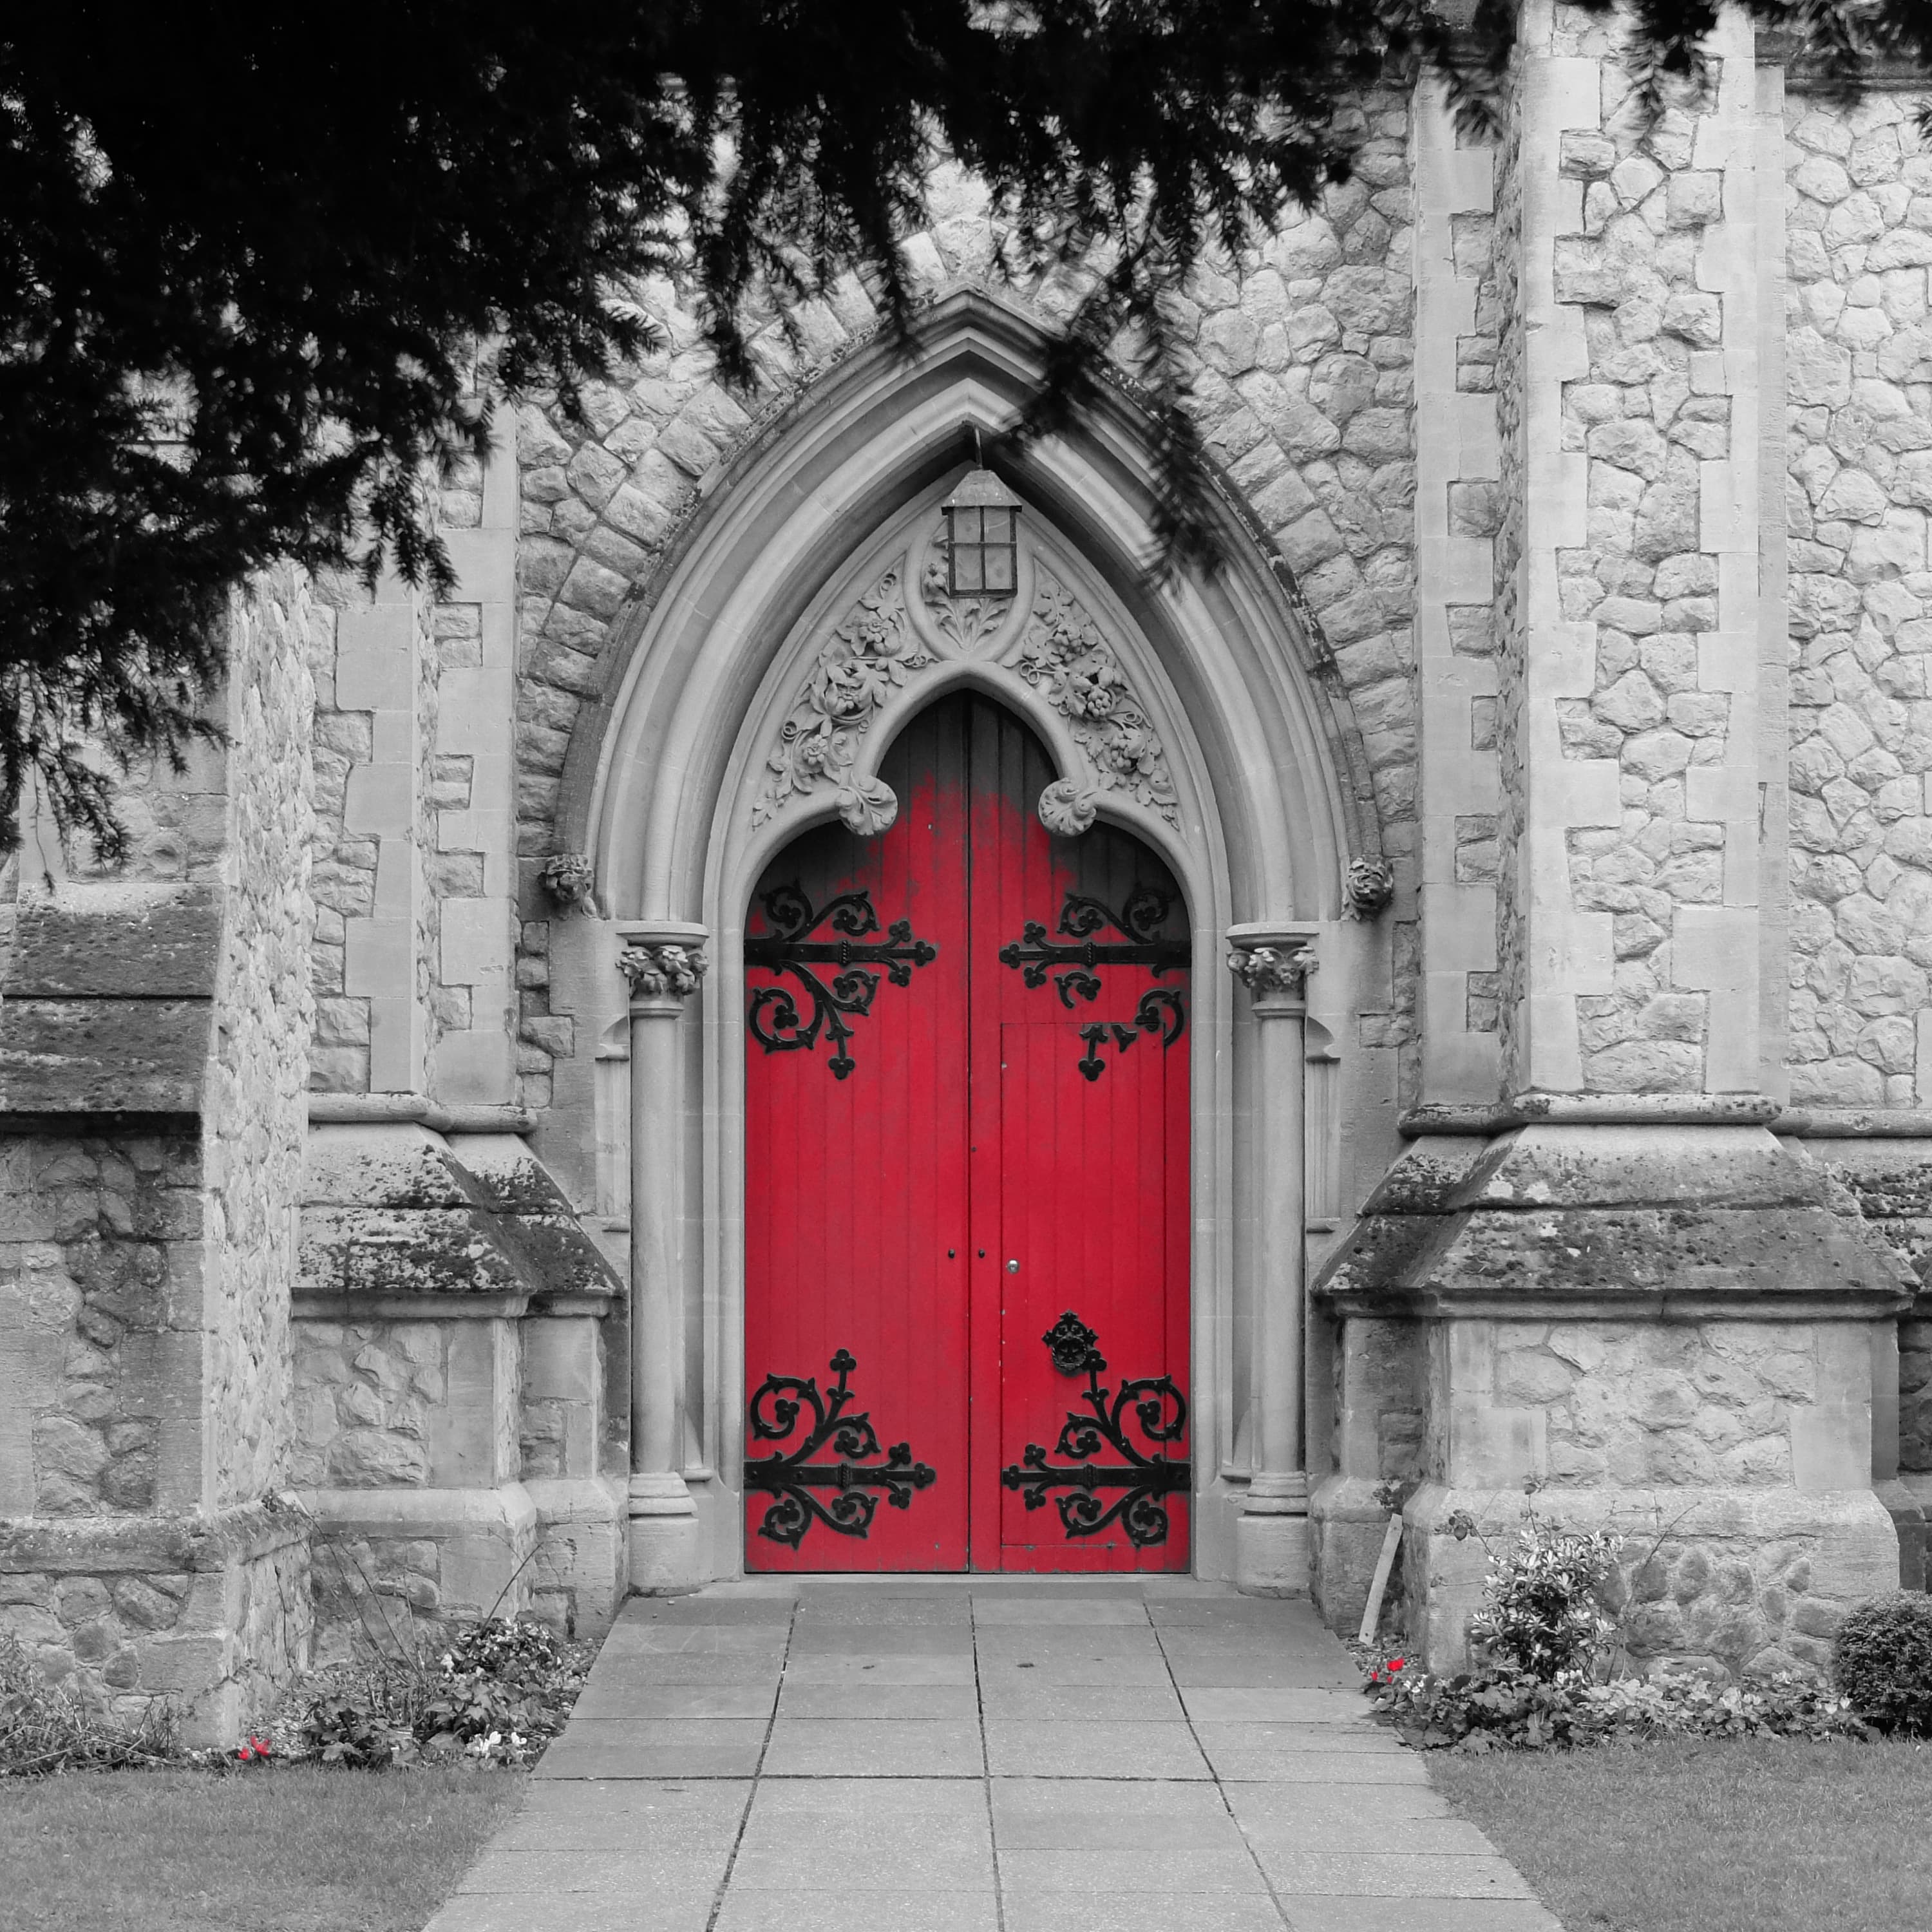
Image: A splash of colour in an otherwise monochrome shot can be effective, though some photographers consider it tacky
Partial colour modes are a variant on black & white, where everything in the image is rendered in monochrome aside from a specific colour – usually a primary such as red, green or blue. There’s no doubt that this can be effective for some images, but it’s also all too easy to slip into the realms of cliché (red buses or telephone boxes spring to mind). When done well, this approach can be very effective, but it’s best used sparingly.
Using lens filters for in-camera black-and-white
As I mentioned above, it’s normally best not to use the coloured lens filters that were commonly-employed with black & white film – this is because the sensor is still recording full colour information (unless you happen to be shooting with a Leica M Monochrom). But some lens filters are still very useful, essentially the same ones as you’d use when shooting colour. Perhaps most useful of all are polarising filters, which can suppress reflections and darken blue skies.
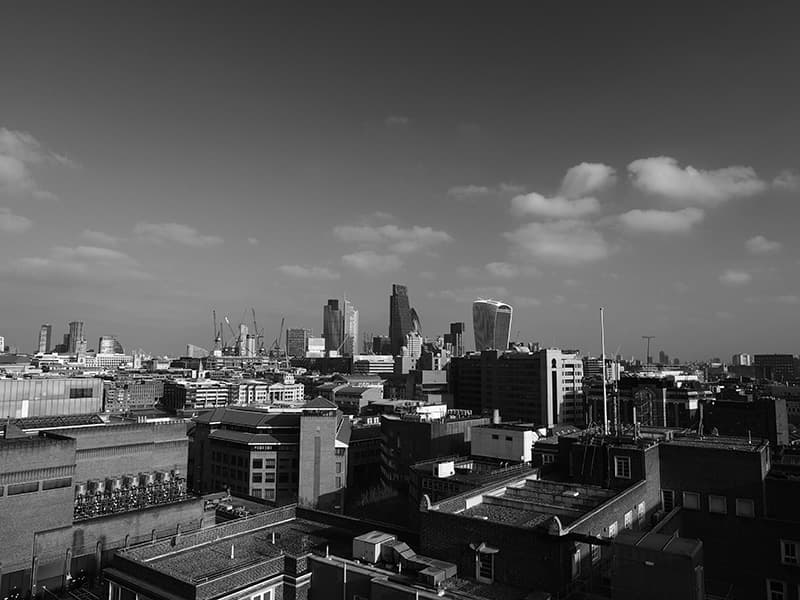
Using a polarising filter can help to darken a blue sky. Compare this shot to the unpolarised version below.
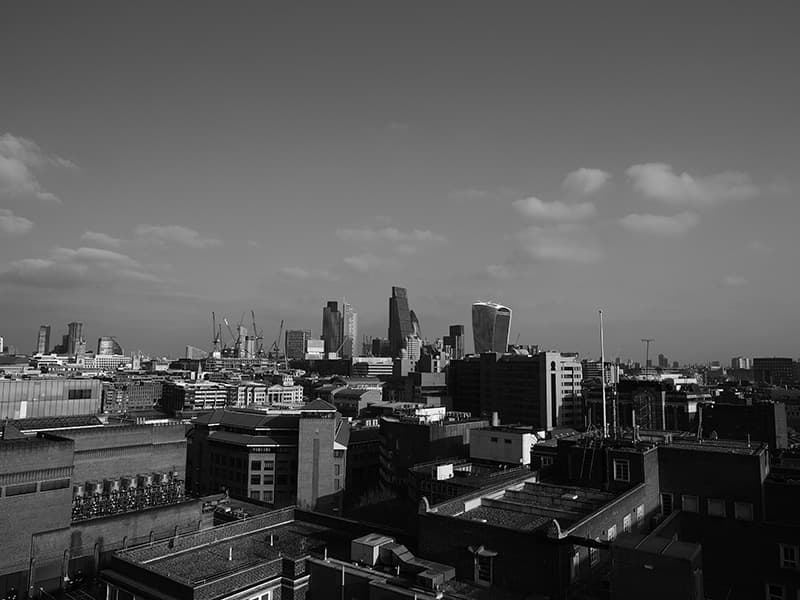
This is the same shot without a polariser – look at the sky at the top of the frame
Also, neutral density gradients can help balance a bright sky against a dark foreground, while ND filters are useful for getting long exposures for motion blur effects.
Noise reduction and sharpness
Tweaking noise reduction and sharpness settings can accentuate or suppress noise, especially when shooting at high ISOs. To some extent this can mimic shooting with fast, grainy film. All cameras are different, so it’s difficult to make any specific recommendations here. But try turning down the noise reduction and turning up the sharpening to get grainier, grittier images.
All images by Andy Westlake

