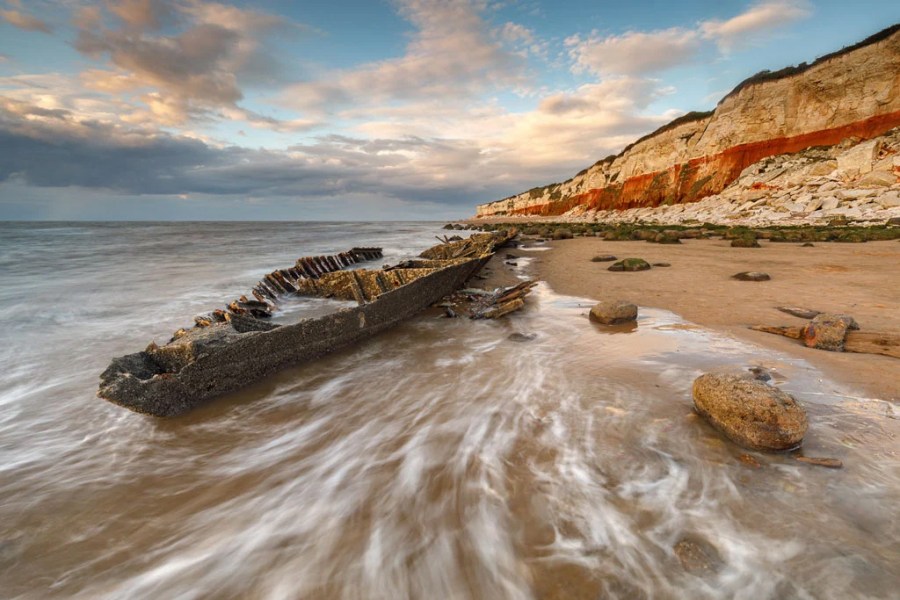
Seascapes are one of the most interesting segments of landscape photography. There’s a variety of imagery you can capture when it comes to the sea and coast, and the dynamic nature of seascapes makes it a challenging subject. Three top pros share their tips to help you get your best-ever sea and coastal shots.

Emily Endean
Emily Endean is a Fujifilm X-photographer and brand ambassador as well as being on the Pro Team for 3 Legged Thing. The ocean is her favourite subject to photograph, whether at the shoreline or out in the water, exploring new techniques. To see more of Emily’s work, follow her on Instagram and Facebook.
Emily’s top tips for seascape photography
1. Protect your camera
There are many brands out there offering underwater housings and the prices can vary massively. Depending on your budget, look for something secure and safe and that you trust taking your camera out into the ocean with!
For all these images here, I used a SeaFrogs Underwater Housing for my Fujifilm X-T3 and 60mm macro lens. If you want to experiment before investing too much money, there are plenty of brands offering underwater cameras, or even a GoPro. I’ve got plenty of lovely shots using my GoPro and it’s a lot of fun!
2. Get creative
Think outside the box and step away from the confines of how you might create seascape imagery on land. Get low, as close to the water as you can, and try photographing at this level and see the interesting perspective this brings. Use a macro lens so you can photograph the ripples up-close on the surface of the water.
I tend to fire off a few images to get a feel for things and often I am surprised by what I see; that fleeting moment of a ripple as it passes by, the sun rising above the horizon and out of the water. The lower you are, the more interesting it gets.
3. Know the ocean
Keep safe by checking apps like Magic Seaweed to check the conditions and the swell expected for that day. Observe the ocean before you head out, see what it is doing. Is it an incoming or outgoing tide?
Head out in conditions you feel safe and don’t go out of your depth. I like to head out in calm, gentle waters to focus on the smaller details. If it’s rough, I’ll head out and shoot the surf, but if I don’t feel confident, I won’t go out of my depth to get nearer to the action if I don’t feel it’s safe.
Emily’s favourite seascape shots
Boscombe Pier
I have photographed Bournemouth’s Boscombe Pier many times over the years, always looking for different angles. Once I’d discovered a love for photographing out in the water, it gave me a brand new perspective and a new challenge on coming up with something different. For this image, I ventured out at sunrise, to give a soft light and gentle colour palette to the scene.
The water was calm, moving around me very slowly. I positioned myself as low as I could, so it was clear to see I was fully submerged in the water. I focused on the pier and composed the scene with it positioned in the top third of the frame along with the soft clouds in the sky.
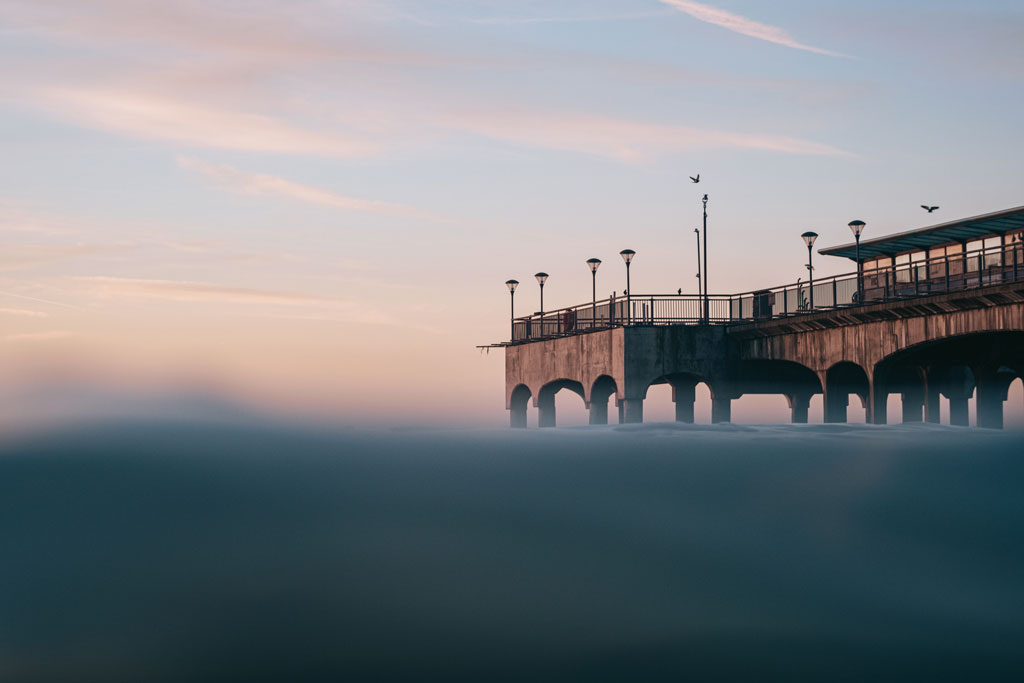
Shooting iconic landmarks from the water offers a different perspective. Fujifilm X-T3, 60mm, Seafrogs underwater housing, 1/250sec at f/5.6, ISO 80
Rising Sun
This is my absolute favourite type of image to create out in the water. I love to head out a few moments before sunrise to connect with nature and the water as it moves around me. For this shot I settled myself low at water level and waited for the sun to rise over the horizon.
By focusing on the water up close to my lens, I can capture very abstract shots of the sun rising. No image is ever the same as the water is always different and the sun shows itself differently every day. We all know that shooting into the sun can blow the highlights of an image, so I tend to underexpose my images when shooting in this way.
That way I can recover any details from the dark areas of the scene while ensuring I haven’t lost any in the highlights later in Lightroom. I do find if there is enough soft cloud or haze over the sea, it can sometimes reduce the brightness of the sun just enough for me to fire off images for a little longer.
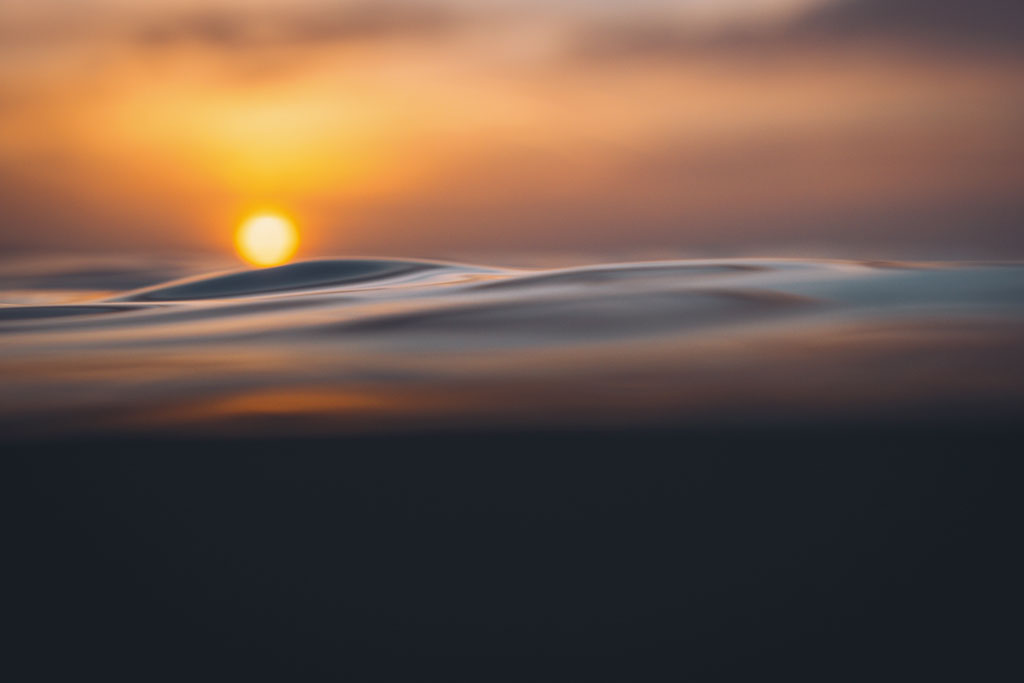
Underexpose your images when shooting into sun to avoid capturing blown highlights. Fujifilm X-T3, 18-55mm, Seafrogs underwater housing, 1/250sec at f/8, ISO 250
The Wave
I’ve always loved a slightly slower shutter speed to get creative at the shoreline or in the water. For this shot I went out on a ‘wavey’ day and had visualised a wave going over my head and trying to capture the movement as it went over.
I set my shutter speed to 1/8sec and waited. As the waves came over, I fired off multiple shots. It didn’t take long for me to bag this image, which I was so excited to see on my screen! The creativity of longer shutter speeds out in the water is so refreshing, realising not everything has to be super-sharp to be a great image. Learning new techniques and having a play can be the most fun approach to photography.
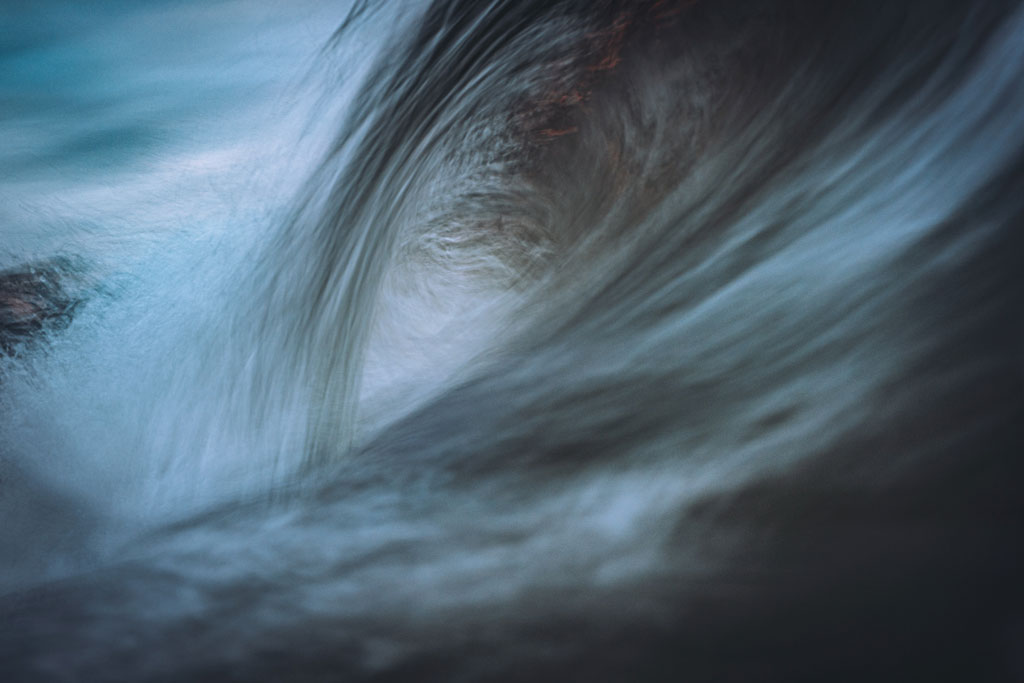
Don’t let being in the sea stop you from capturing movement. Fujifilm X-T3, 18-55mm, Seafrogs underwater housing, 1/8sec at f/8, ISO 80

Justin Minns
Justin Minns is an award-winning, professional landscape photographer best known for his atmospheric images of East Anglia. He runs landscape photography workshops both in East Anglia and around the UK, plus photo tours around the world.
Justin’s top tips for seascape photography
1. Do the research
Knowing the tide is essential. Not only are many locations best on a particular tide but there is also the very real danger of getting cut off by an incoming tide.
A simple sun position app (like suncalc.org) is useful for working out the best time of day or year to visit a location. I don’t often base my decisions on forecasts though; some of my best shots have come in unexpected conditions.
2. Use filters
I regularly use filters. Graduated filters to balance exposures, a circular polariser for cutting out glare but at the coast, NDs are especially useful. A range of ND filters (3, 6, 10 and 15 stop) allow me to control the shutter speed, opening up a host of creative possibilities – from very long exposures to blur the water and make the subject stand out, to shutter speeds of around 1sec to add a dash of movement to swirling water.
3. Stay dry
The best shots often come in changeable weather. Take extra layers and waterproofs (as it is often colder than expected) and decent wellies. They give you freedom to compose from wherever you wish and, unworried by the thought of wet feet, you will be more focused on the photography.
Justin’s favourite seascape shots
Boats at low tide, Essex
The bustle of Southend-on-Sea seafront may seem an unlikely place for coastal photography, but I love putting on my wellies and going out to photograph the boats left scattered high and dry on the endless mudflats which are revealed at low tide.
Time of year is important on this south-facing beach. In winter when this photo was taken, the sun comes up in the south-east, so the sunrise is visible out to sea, and the very first light sweeps unrestricted across the beach.
On this morning as sunrise approached, the edge of the solid bank of cloud, which was slowly drifting in, took on a pink glow so I adjusted my composition to position the boats in the space created by the cloud and its reflection. I love the effect of a wideangle lens, so I got down low and close using my 16-35mm to make the most of all the shapes and textures on the mud.
Wideangle lenses also appear to stretch out distance, emphasising the sense of space out on these mudflats.
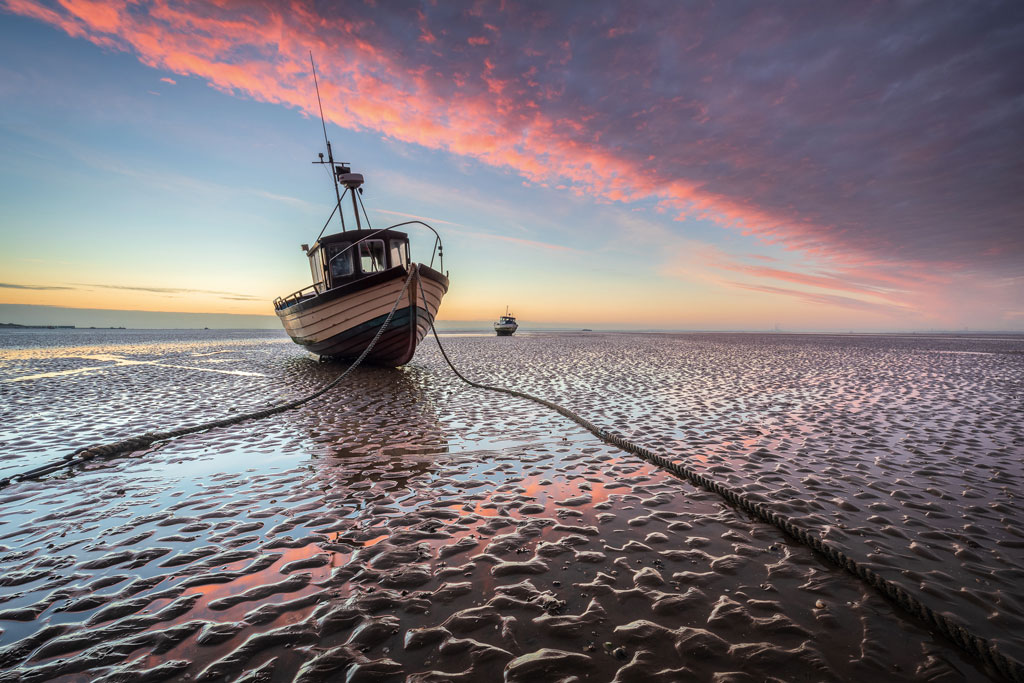
The time of year can make a big difference with sunrise and sunset, so do your research. Canon EOS 5D Mark IV, 16-35mm, 1.3sec at f/16, ISO 100
The wreck of the Sheraton, Norfolk
Lying half-buried in the sand below the unique striped cliffs at Hunstanton, this wreck presents a bit of a challenge to photograph. For the most impact (and to hide the inevitable footprints in the sand) it looks best surrounded by water, ideally with waves crashing against it.
The challenging part is that the tide here comes and goes very quickly and the window between the sea being high enough to surround the boat and so high that it comes over the top of your wellies is very short.
I wanted to use the strong diagonal line of the cliffs receding rapidly into the distance from the top right of the frame, but the composition needed balance, so I adjusted my position until the wreck formed a similar diagonal line from the opposite corner.
I also adjusted my height. Although I like the drama created by using a low angle, here I wanted to be as high as possible to reveal the shape of the boat. The foreground area felt a little empty, so I used a slow shutter speed (1 second) to blur the water a little; the resulting streaked effect (known as swooshery) filled the area nicely and added movement and interest.
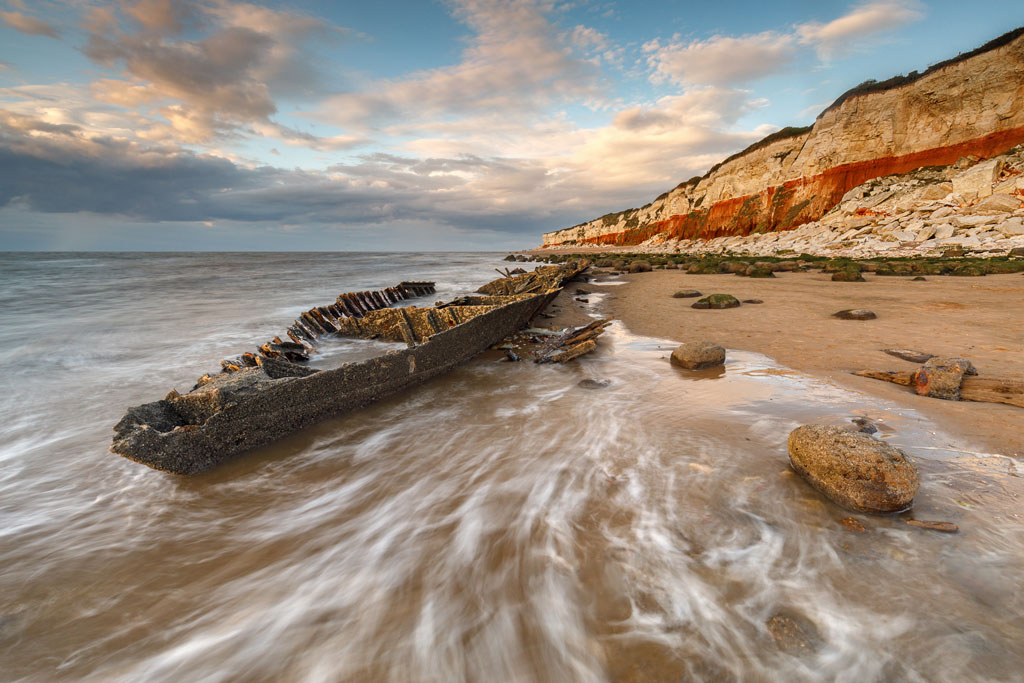
By slowing down the shutter speed you can capture nice water detail in areas of the frame that feel a little empty. Canon EOS 5D Mark IV, 16-35mm, 1sec at f/16, ISO 200
Twin Peaks, Iceland
I have photographed the famous Diamond Beach on the south coast of Iceland many times. The amount of ice on the beach changes with the tides and the winter weather in the blink of an eye so the photos I capture here are always different.
On this occasion I noticed the similarity between the jagged peaks of the distant mountain and the shape of the splendidly blue block of ice in the surf. I wanted to keep the composition simple, so I used a 100-400mm lens to isolate the two elements from the rest of the ice floating around in the waves and the other mountains along the coast.
Lens choice plays a huge part in the look of an image and the telephoto lens also makes the distant mountains appear closer to the ice which was essential to make the connection between the two shapes. A Lee Filters Little Stopper ND filter slowed the shutter speed to 13 seconds, further simplifying the scene.
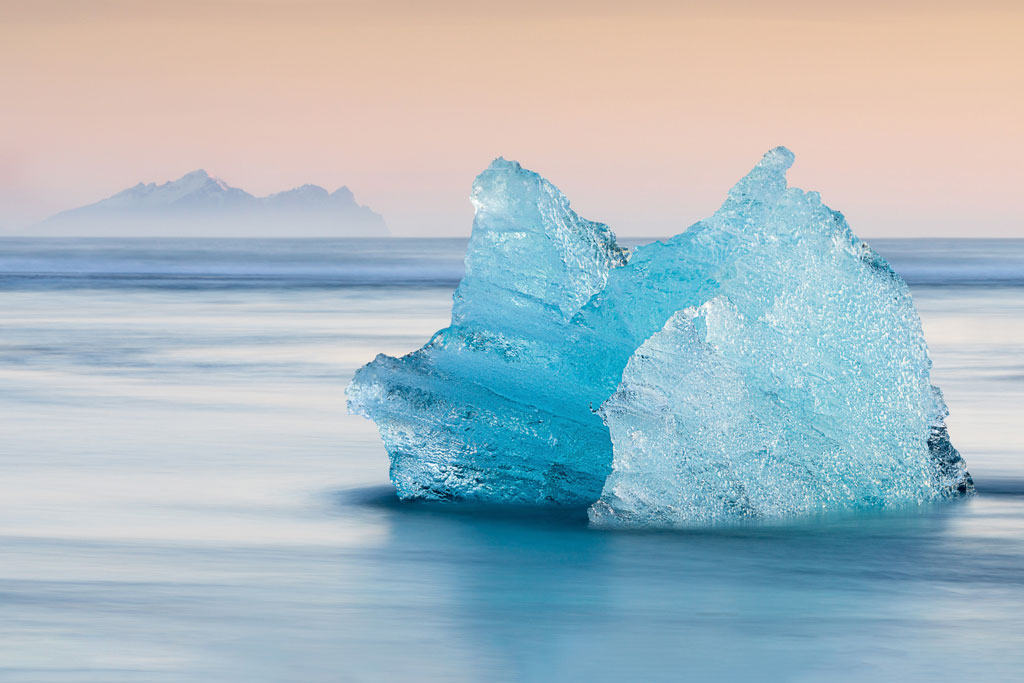
Lens choice can have a huge impact on how you compose and capture a scene. Here, a telephoto lens has nicely compressed the two key elements in the scene together. Canon EOS 5D Mark IV, 100-400mm, 13sec at f/16, ISO 200

Lucie Averill
Lucie Averill is a seascape photographer living in Cornwall. She exhibits her photographs in galleries and has had images published in journals, books, and magazines. To see more of Lucie’s work, follow her on Instagram
Lucie’s top tips for seascape photography
1. Take your time
When arriving at a location, take the time to look carefully around you before setting up your tripod. Being mindful of where you walk, so you don’t unwittingly leave footprints or scuff areas of sand you may later wish to photograph, will improve the quality of your images. Though minor blemishes can be removed in software, it’s much easier to work with a clear beach and it will save you time in post.
2. The golden hours
Aim to get to the beach before sunrise, and don’t be in a hurry to leave after the sun has set, as the light is usually less harsh then and the colours can be softer. The beaches are much quieter at these times, too, allowing you to shoot freely without trying to avoid people in your shots.
3. Experiment with exposure.
Using a faster shutter speed to freeze waves, or a longer exposure of over 15 seconds to smooth the water, looks very different to an exposure time of a fraction of a second, and each has their merits. Using an ND filter enables you to use a longer exposure in daytime, but if you shoot before sunrise and after sunset, when the light is low, you won’t need filters.
Lucie’s favourite seascape shots
Colour Blending
I’ve been working on a series of intimate seascapes for several years now, mainly photographing fishing boats and their reflections in local harbours. I’m drawn to the brightly coloured patterns and shapes, particularly how they interact with each other when reflected in the water, and the abstract, painterly effect this creates.
The reflections constantly change depending on the movement of the water and it is the fleeting nature of each scene that intrigues me. Using a 70-300mm lens on my Canon EOS 5DS R enabled me to zoom in more closely, and it is as important to know what to leave out as what to include in the frame.
In this image I’ve zoomed in to 155mm and composed it so that it’s obviously a boat, but the reflection becomes the focal point. As the boat was bobbing around slightly in the wind, I needed a faster shutter speed of 1/500 seconds at f/7.1 and an ISO of 640, as the sun was still low in the sky. Using a tripod and shutter release helped me to keep the image as sharp as possible.
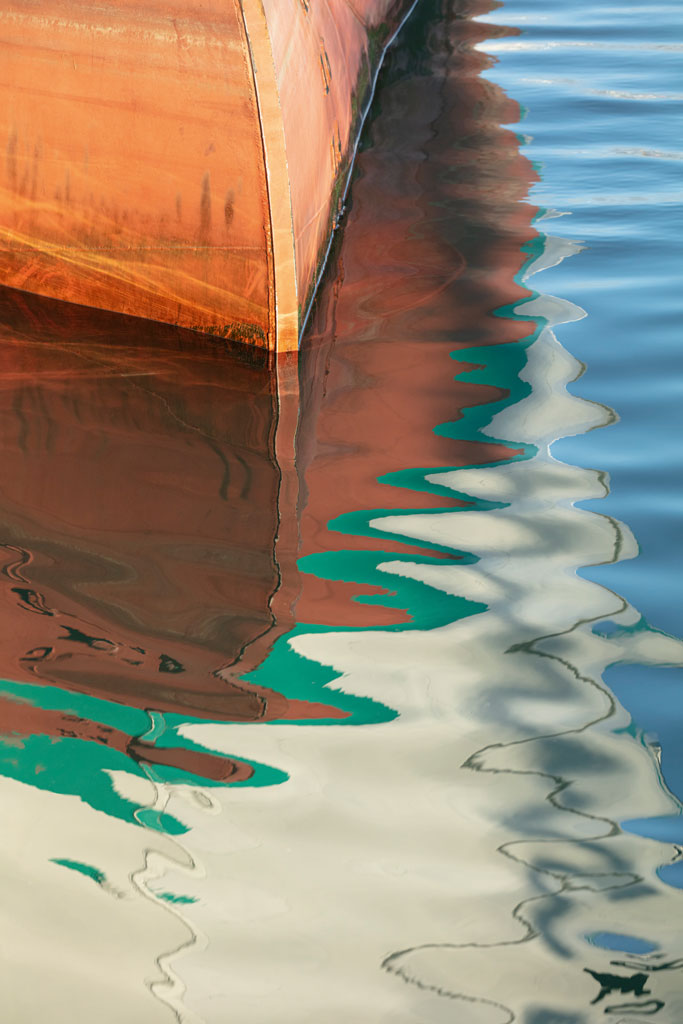
Seascapes don’t need to include an entire scene. Focusing on the smaller details can produce some wonderful images. Canon EOS 5DS R, 70-300mm, 1/500sec at f/7.1, ISO 640
Infinite
Becoming familiar with a coastal location by visiting at different times of the day, and in various light or weather conditions, is invaluable for learning to understand and ‘read’ a place.
I’ve been photographing this area of the Hayle Estuary, with its ever-changing sand patterns and vibrant water colour, for some years now, and know it well. On this day I was drawn to the shapes of the pristine sand ripples, and I liked how the delicate clouds diffused the light and seemed to mimic the sand patterns as well.
Using my Canon EOS 5DS R on a tripod at 24mm and ISO 100, I added a 6-stop soft graduated filter over the sky and I also used a Lee Little Stopper to slow down the exposure to 2.5 seconds, knowing the water would then be smooth enough to show the reflection of the clouds.
Choosing a portrait orientation gave space for the sky and created a more minimal image, and the muted light meant I could shoot in the middle of the day. Post-processing was minimal – local edits to texture, clarity, and exposure.
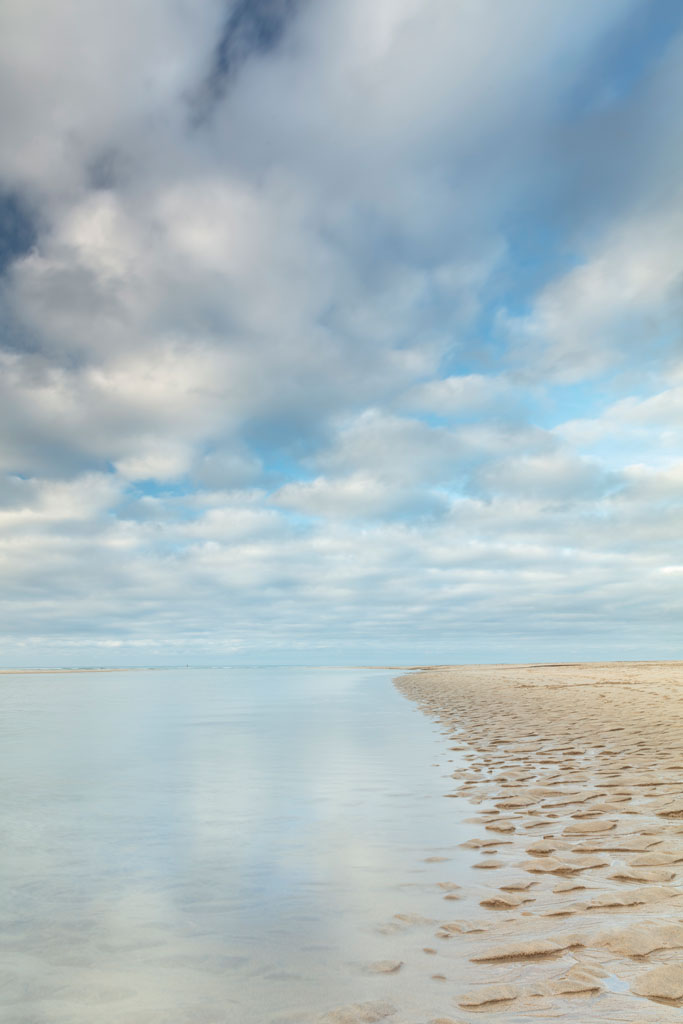
Experiment with framing in a vertical format to create a sense of space and capture detail in the sky and foreground. Canon EOS 5DS R, 24-70mm, 2.5sec at f/14, ISO 50
Winter Wave
Wild weather is exciting for seascape photography, but sitting in the dark, with rain hammering down and wind rocking my car, I did wonder if I’d made the wrong call on this morning.
The tide was on its way out, but the strong wind was blowing the waves in all directions across the beach, and I wanted to capture that sense of movement. Pushing my tripod deep into the sand for stability, I stood in the water so the waves rushed in around me.
I chose ISO 50, with a focal length of 24mm in portrait format to include the bank of cloud as well as the foreground wave pattern. A shutter speed of 0.3 seconds recorded detail and the shape of the incoming waves. With a remote shutter release I could gauge when to take the shot, aiming to line up the curve of the waves with the cloud above St Michael’s Mount.
To convey the drama and exhilaration of the morning, I converted it to black & white in Lightroom with minor contrast edits.
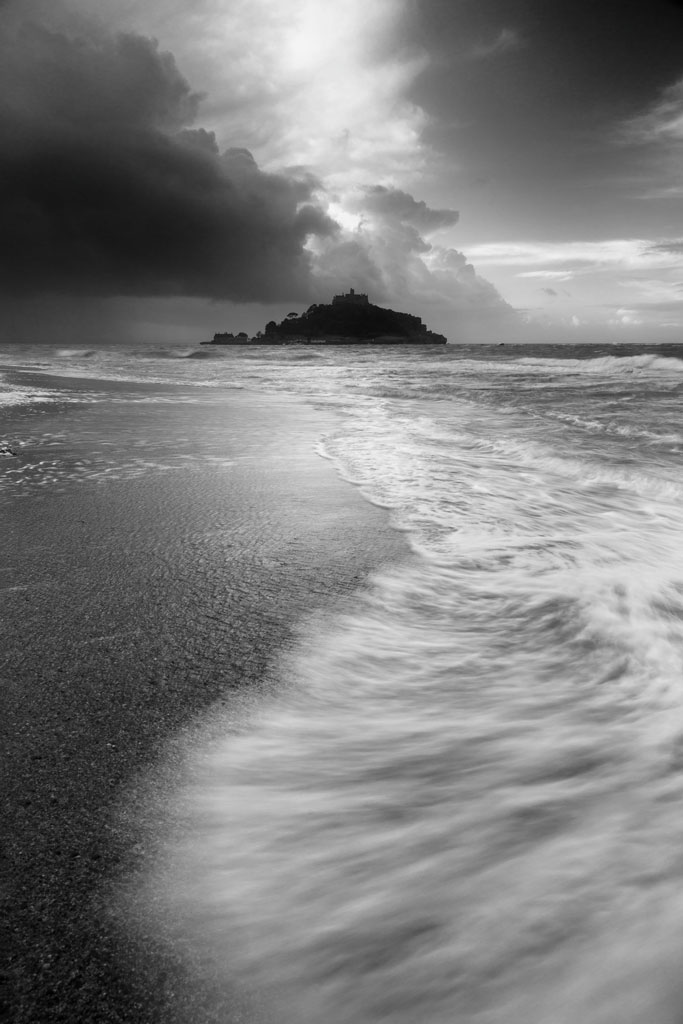
Don’t be put off by bad weather conditions, as it can create drama and depth in both the sea and sky. Canon EOS 5D Mark III, 24-70mm, 0.3sec at f/11, ISO 50
Further reading
A guide to great coastal shots and seascapes
Best cameras for landscape photography
Square format landscapes
Follow AP on Facebook, Twitter, Instagram, YouTube and TikTok.

