Technique Explained: How to Create Motion Blur in Photoshop
Requirements:
Software: Adobe Photoshop, Photoshop Elements or similar software
System Requirements: Windows PC or Mac
Skills Required: Medium
Time to Complete: 45 minutes
Panning is a difficult skill to master and often it can result in a series of very blurred images. It is far easier just to select a fast shutter speed and capture images of moving subjects, but the problem with this method is that it completely freezes any movement and loses the dramatic sense of speed and motion.
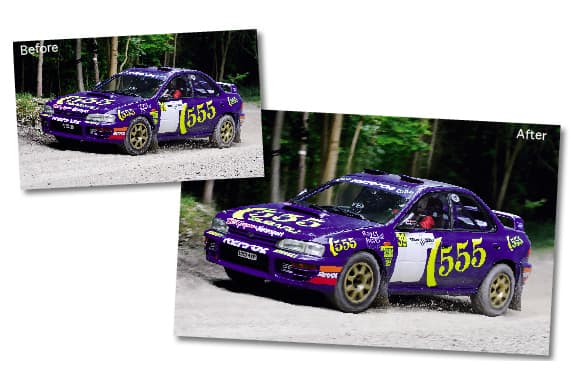
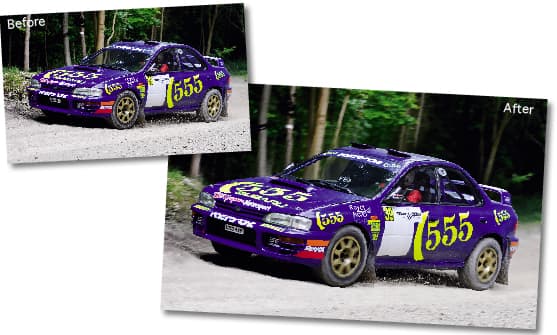
If you do use this method, and consequently have a picture of a moving object that looks motionless, it is possible to recover that feeling of speed. The image of the rally car I’m going to use is a good example. It is a nicely composed shot, but it is difficult to appreciate the speed at which the car was travelling when it was taken.
A panning effect can be replicated, which will keep the car sharp but blur the background. To do this the car first needs to be isolated from the background. How you do this will depend on the image-editing software you use, but the basic technique remains the same.
How to Create Motion Blur in Photoshop – Step by Step Guide
Learn how to use layers and masks to isolate a subject and blur a background
Step 1

Begin by copying the Background layer. Go to Layer>Duplicate. This will ensure that you always have a copy to revert to should you make a mistake. To blur the background, you first need to isolate the car.
Step 2
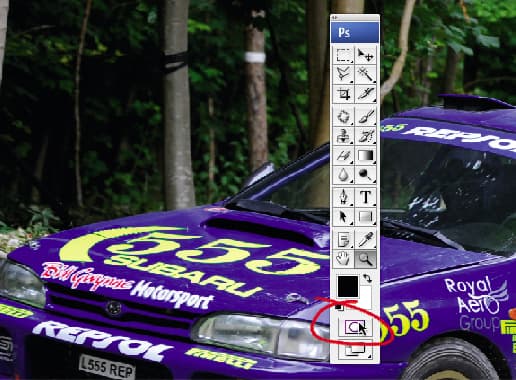
There are a number of ways you can create a selection around the car. Photoshop Elements users can use the Lasso or Magnetic Lasso tools, but for Photoshop users I think that using the Quick Mask feature is one of the most simple and forgiving. Select Quick Mask editing mode towards the bottom of the Tools palette.
Step 3

Now select a black brush and paint the car. The mask you are creating will show up as red/pink colour. If you make a mistake, change the brush to white and paint over the mistake to erase that area of the mask.
Step 4
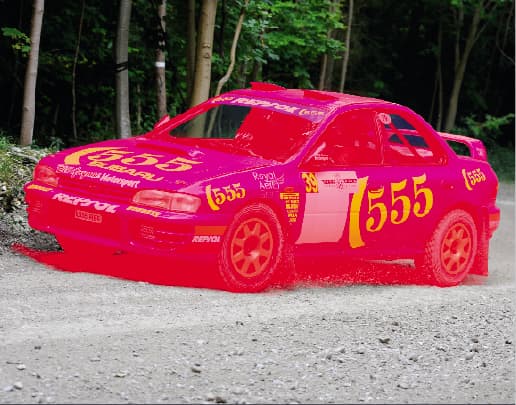
Remember not to mask any of the background, including what can be seen of the background through the car windows. As the shadow beneath the car moves as the car does, make sure that you mask this too. Change the brush opacity to around 30% and lightly paint around the edges of the shadows underneath to create a smooth transition.
Step 5
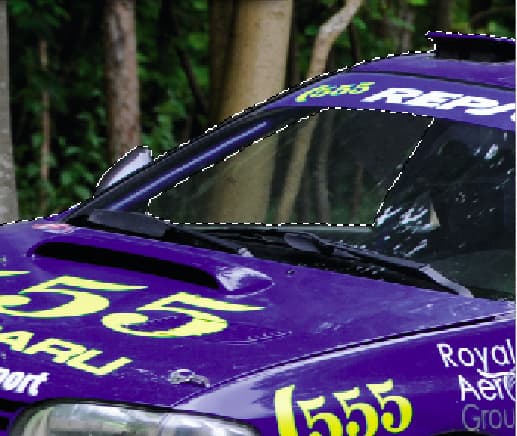
Exit Quick Mask mode by pressing the button at the bottom of the Tools palette. You should now find a marquee around the car and its shadow. Go to Selection>Invert so that the car, rather than the background, is selected.
Step 6

Cut the car and paste it to a new layer. The simplest way to do this is to go to Layer>New>Layer via Cut.
Step 7
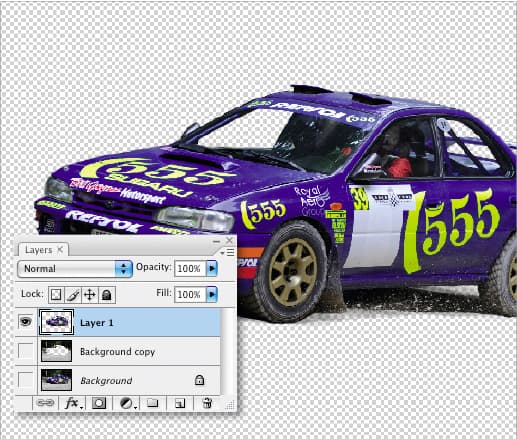
By turning off the visibility of all the other layers, you should be able to see the car and shadow isolated against a transparent background.
Step 8

The Background copy layer should now have a hole where the car was. When this background is blurred the transparent area will become bigger, so its size needs to be reduced around the edges by using the Clone tool. Use the Clone tool to clone the background over the hard edges of the car-shaped hole.
Step 9
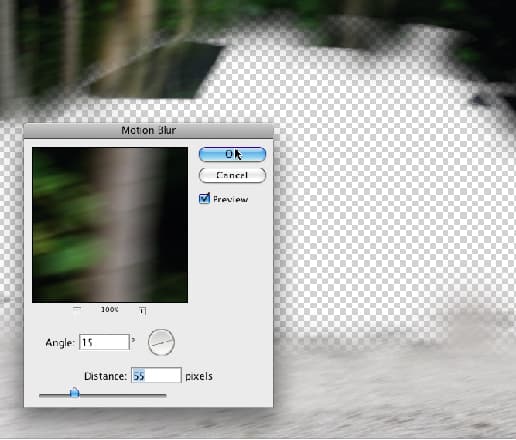
To blur the background, select Filter>Blur>Motion Blur. Alter the angle of the blur so that it follows the direction the car is moving in. Adjust the di
stance slider so that it blurs the background sufficiently. This will depend on the speed of the car and how realistic you want the effect to be.
Step 10
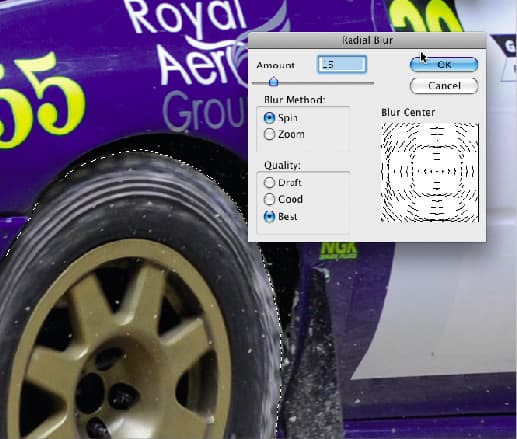
With the background blurred, the car wheels still look stationary. Select one wheel at a time using the Quick Mask tool as in steps 2-5. With each wheel, select Filter>Blur>Radial Blur and select Spin. Adjust the Blur Center until it matches the position of the wheel in the image and then adjust the blur until appropriate to the background. With no live preview it may take a few attempts to get it correct.
Step 11
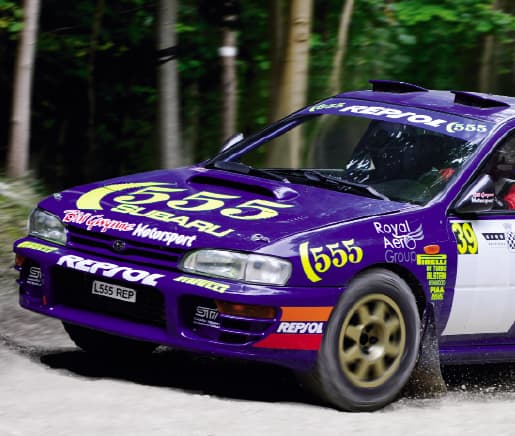
In this particular image the car wheel is turning inwards, rather than being parallel to the camera and lens. I have therefore kept the Radial Blur effect to a minimum on each wheel, because if it is too extreme it will distort the shape of the wheel. This keeps the image looking realistic and not manipulated.

