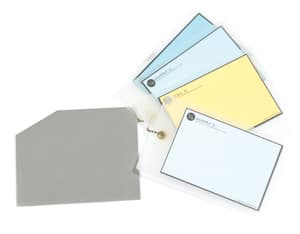
 How to use warm cards
When you wish to obtain an image with a clinically neutral white balance you will usually take a custom white balance reading from a white object, or better still a grey card.
However, as we have discussed in the article Atmospheric White Balance, this will remove any ambient colour cast from the image. However, there is a way to fool the camera into producing slightly warm or cool images to either maintain the ambient colour or to add it to an image for effect.
Instead of using a white or neutral grey card, a white balance reading could be taken from a coloured card.
Using a very light-blue card will fool the camera into thinking that there is a lot of ambient blue light in an image so it will try to neutralise this by adding amber. The result will be an image that has a slightly warm hue. Conversely, taking a reading from an amber card will result in a cool blue hue. These cards are commercially available, but it can be more economical to make your own.
Make your own warm cards
It is possible to make your own warm or cool cards using image-editing software.
To start, create a new A4-size document (297x210mm) and then create a new colour with the value R=221, G=227 and B=232, or use the hex value #dde3e8 (see below).
In Adobe Photoshop or Photoshop Elements it is possible to create this colour by simply double clicking on the colour swatch on the tool palette. Once created, simply use the Fill tool to fill the entire image with this colour. Now print the image using the correct colour profile for your printer and paper.
When taking a custom white-balance reading, use the cool-blue warm card in place of a grey card to add a touch of warmth to your images. By adjusting the strength of your blue warm card, you can change exactly how much warmer your images will be.


