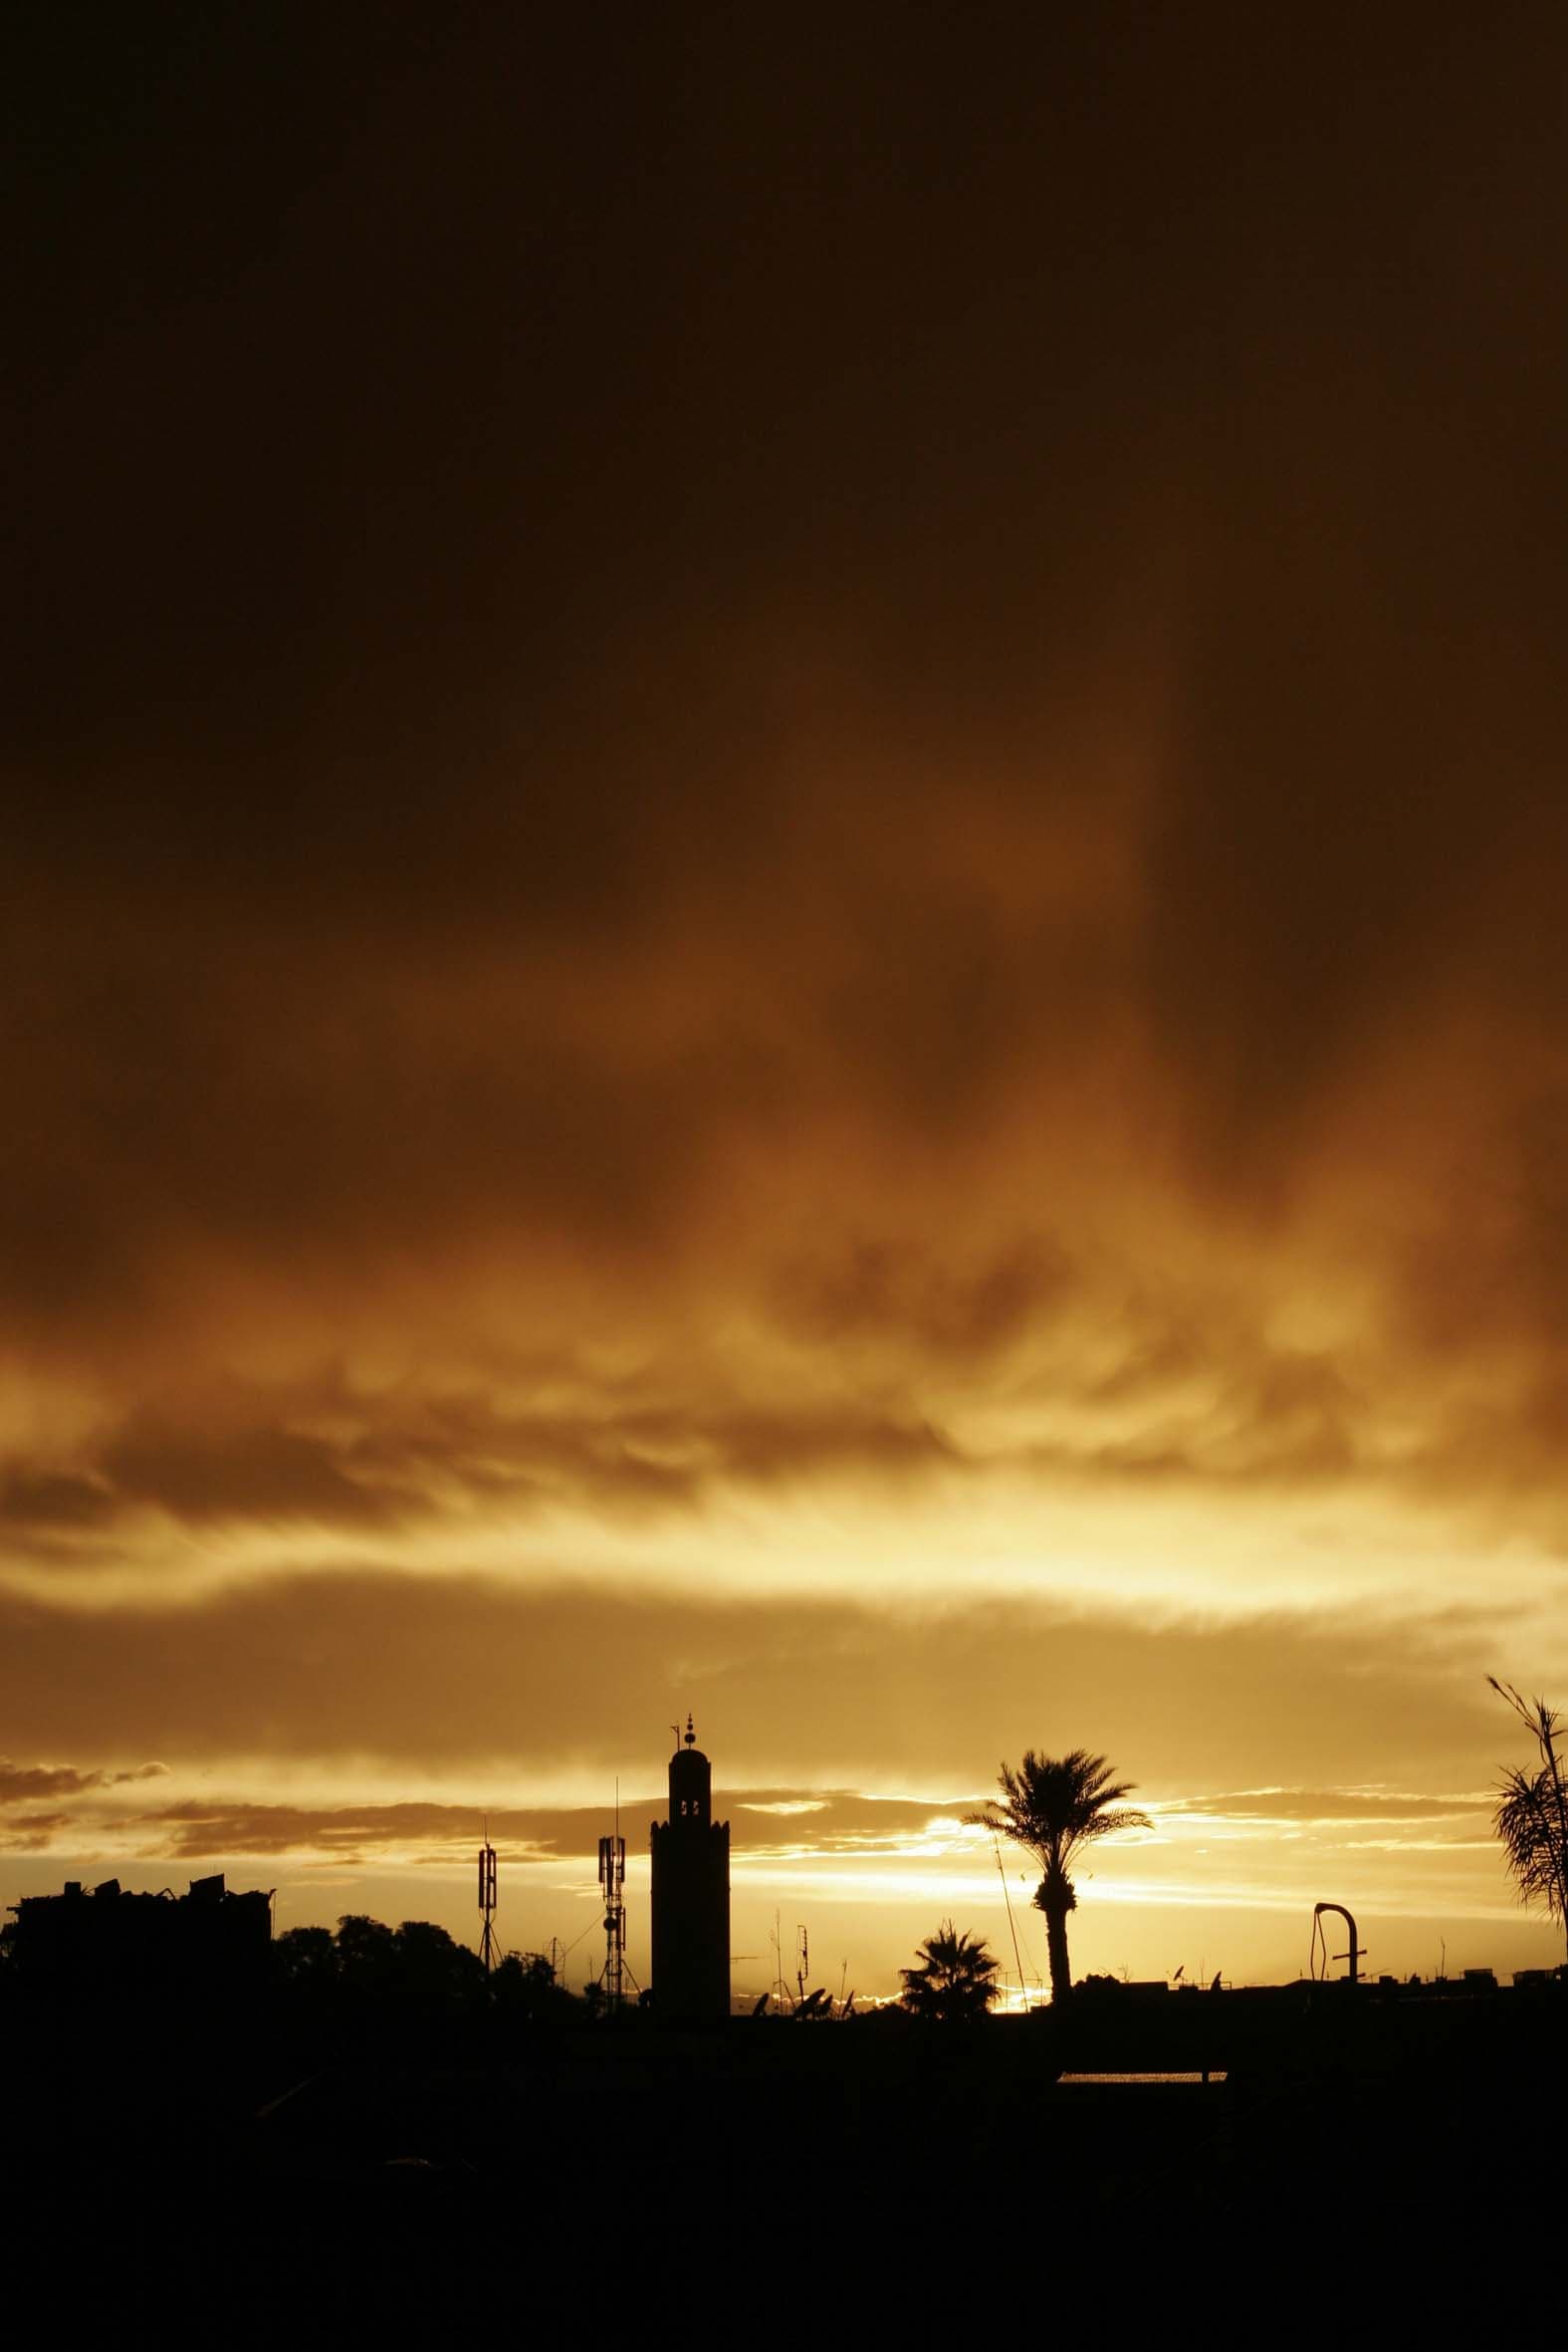
The most compelling landscape photos don’t just document a place, they also convey a mood. The sky can play a vital role in building a sense of atmosphere – whether it be a brooding, rain-threatening grey, an uplifting display of sun rays or a sliver of colour on the horizon. A striking sky can elevate a landscape photo to new levels. There are lots of photographic techniques we can employ to boost a sky, from lens-mounted filters to exposure settings. Then there’s the editing side of things. Sometimes a sky may come out disappointingly lacklustre, or nowhere near as dramatic as we remember it to be. But often the detail is there, just waiting to be coaxed into life with simple tonal adjustments. As such, when it comes to enhancing skies we have plenty of options, whether in-camera or in post-production.
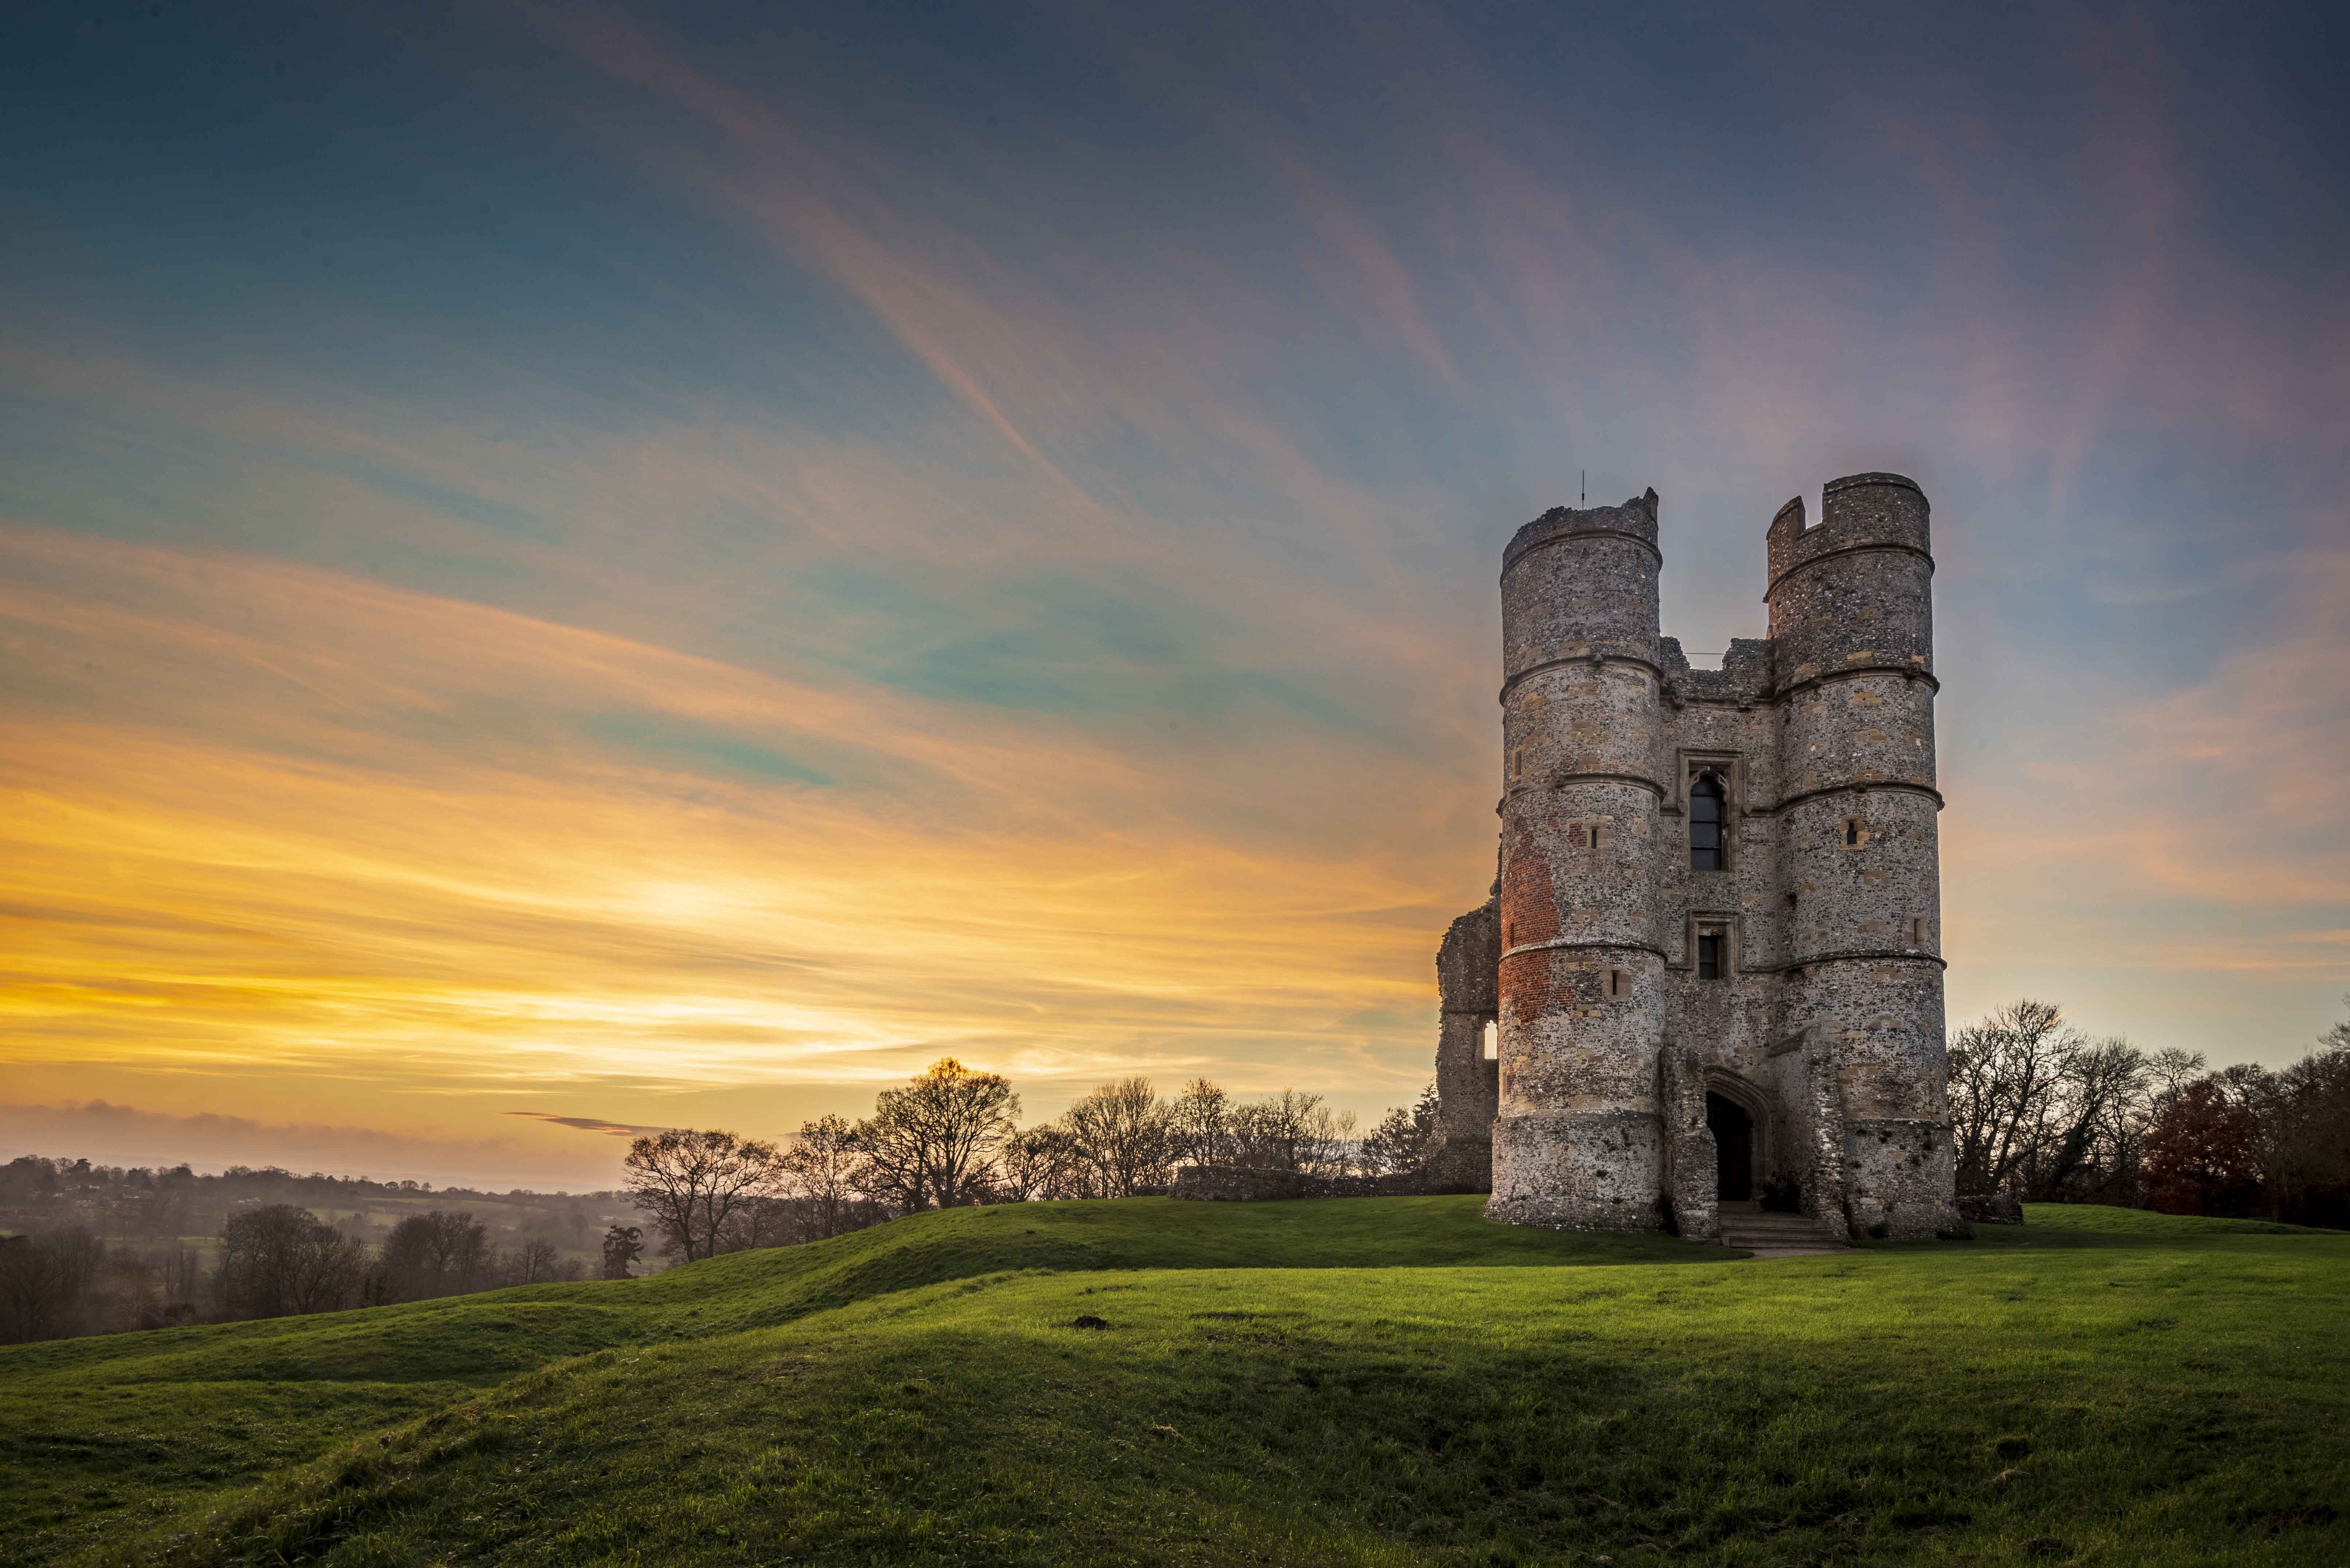
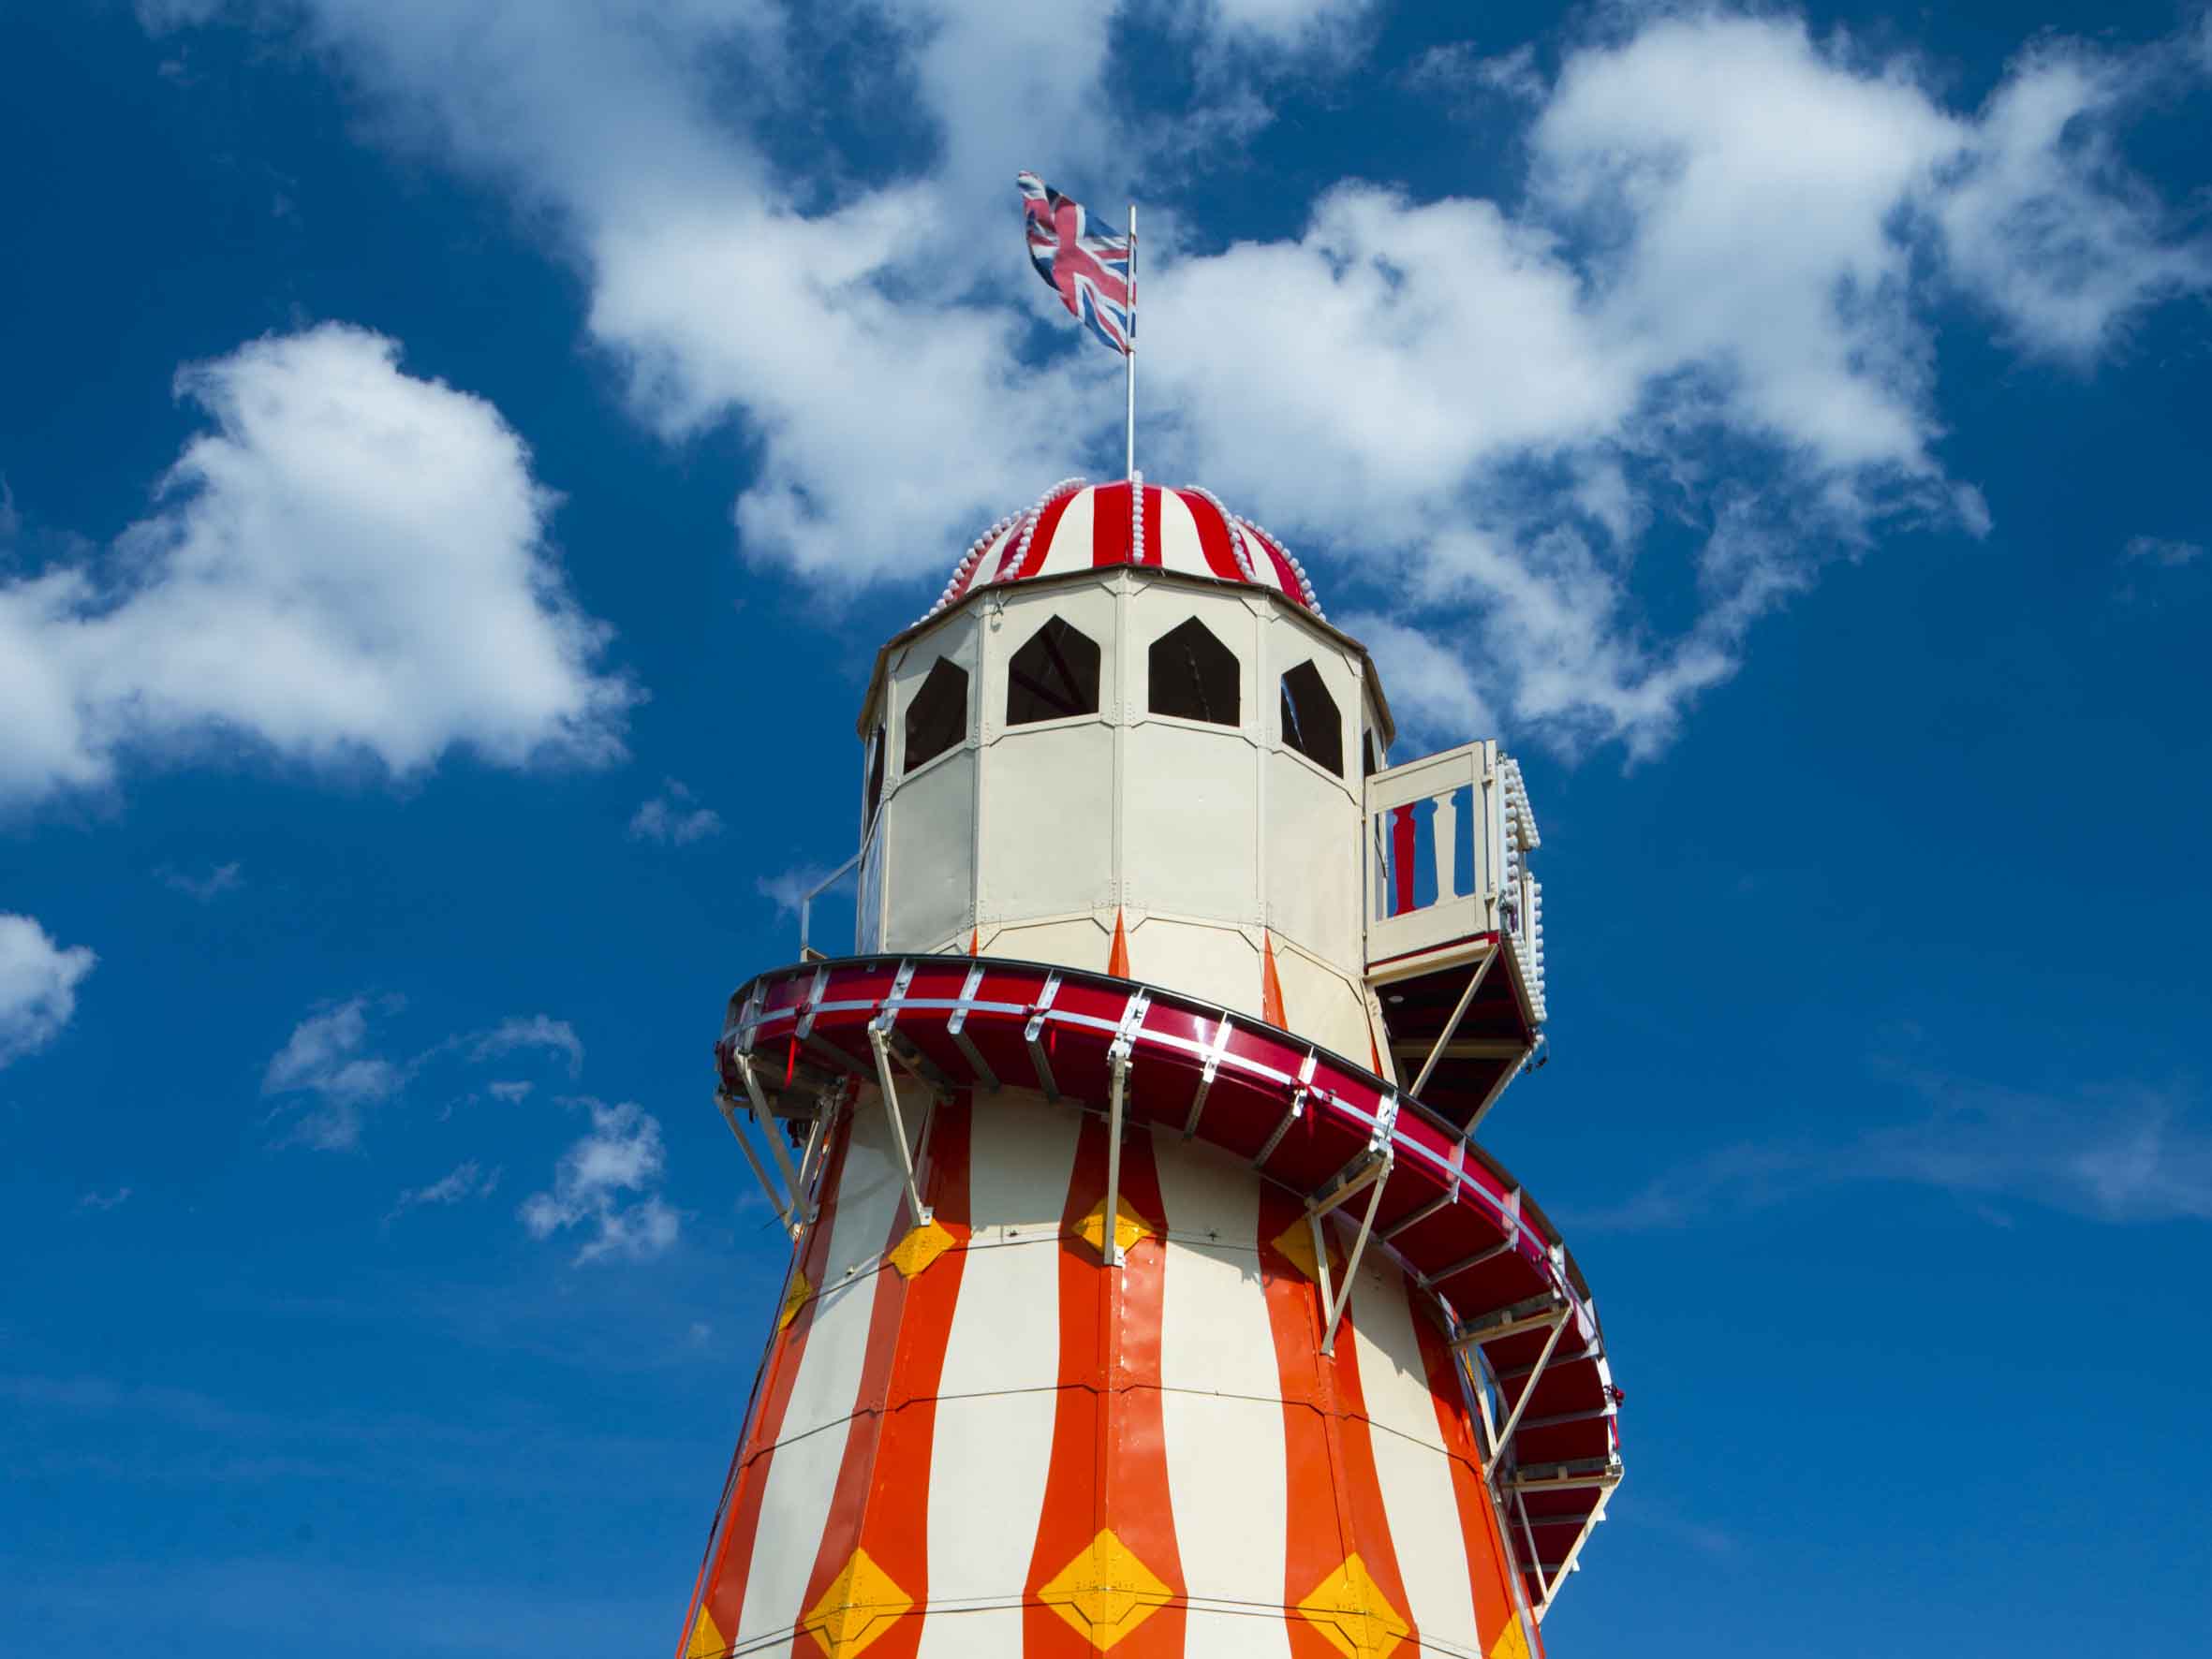
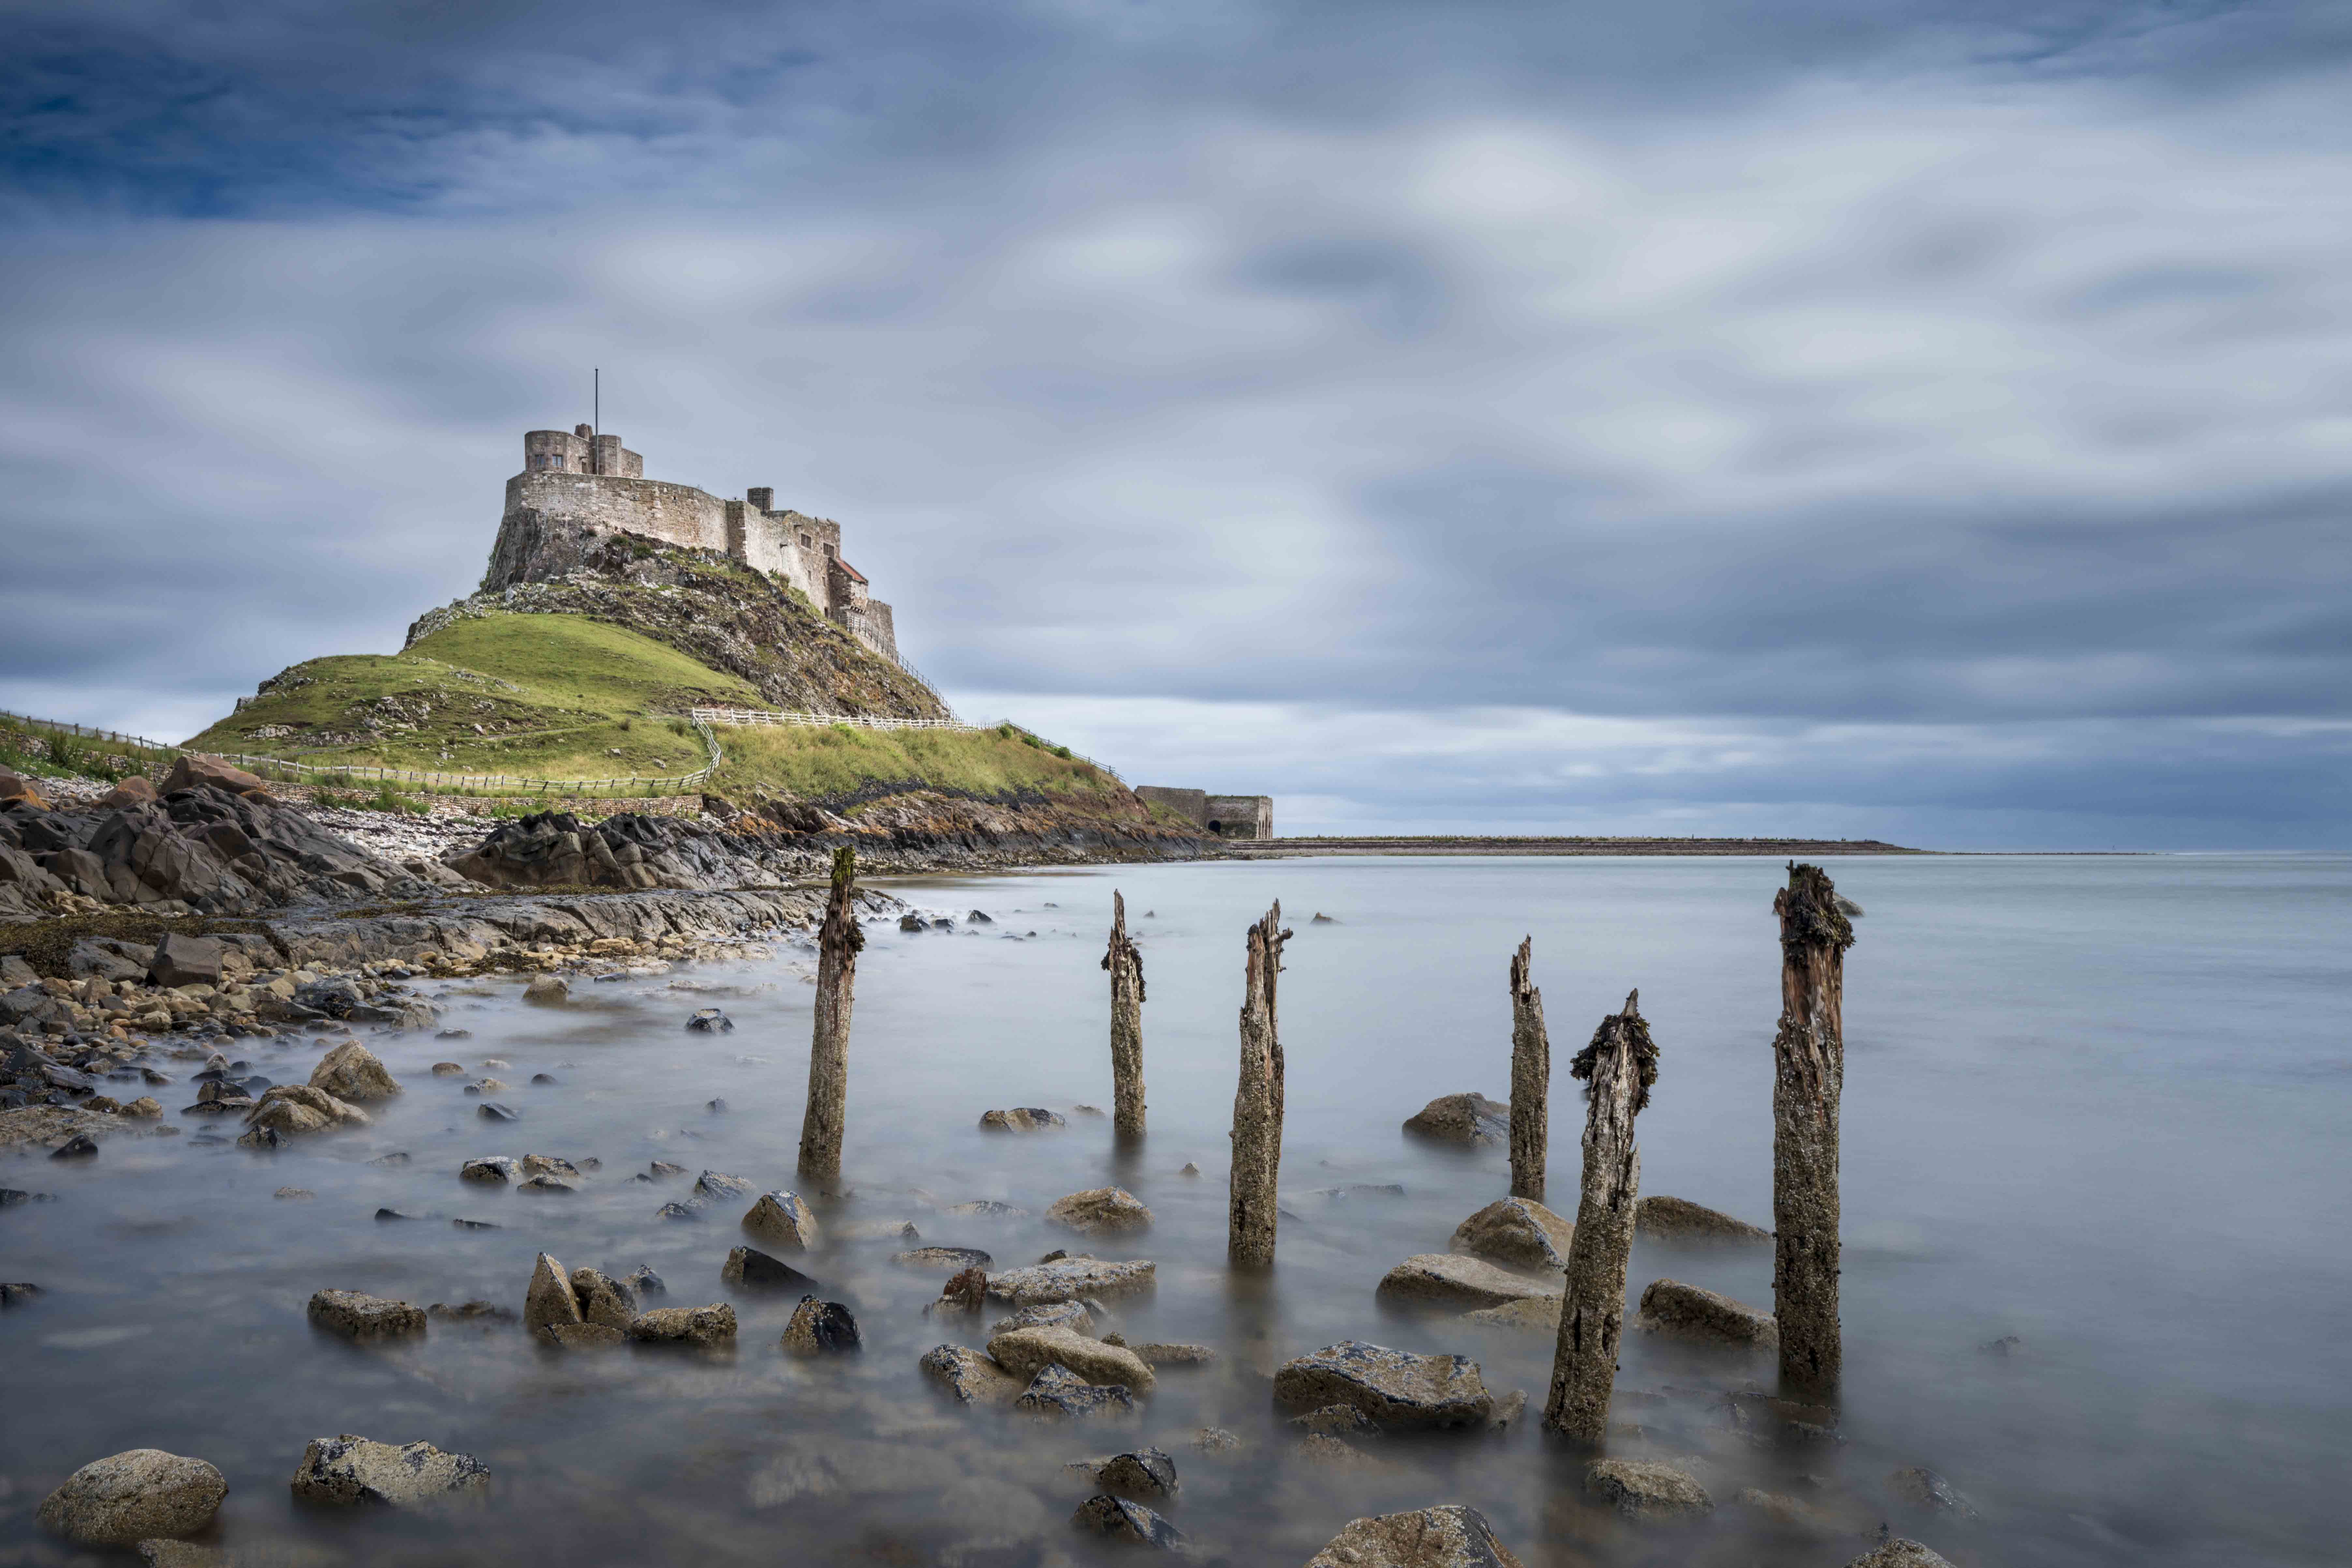
A striking sky can transform a scene and elevate a photo to new levels
Shoot in raw
There are plenty of techniques we can employ as photographers to get better skies, but perhaps the most effective method is good old-fashioned patience. By revisiting a place repeatedly, waiting for the perfect cloud formation, or hanging around for sunset, we might be rewarded with a glorious sky. When it occurs, we need to ensure our camera is set up to capture the maximum detail. Your camera’s raw quality format is usually a better choice for landscapes than JPEG, as raws are capable of holding vastly more colour information and a wider dynamic range. This means they retain greater detail at the tonal extremes, so if you need to pull detail out of highlights in the sky, or rescue a foreground in deep shade, then raw gives you more options (see below).
Exposing for the sky
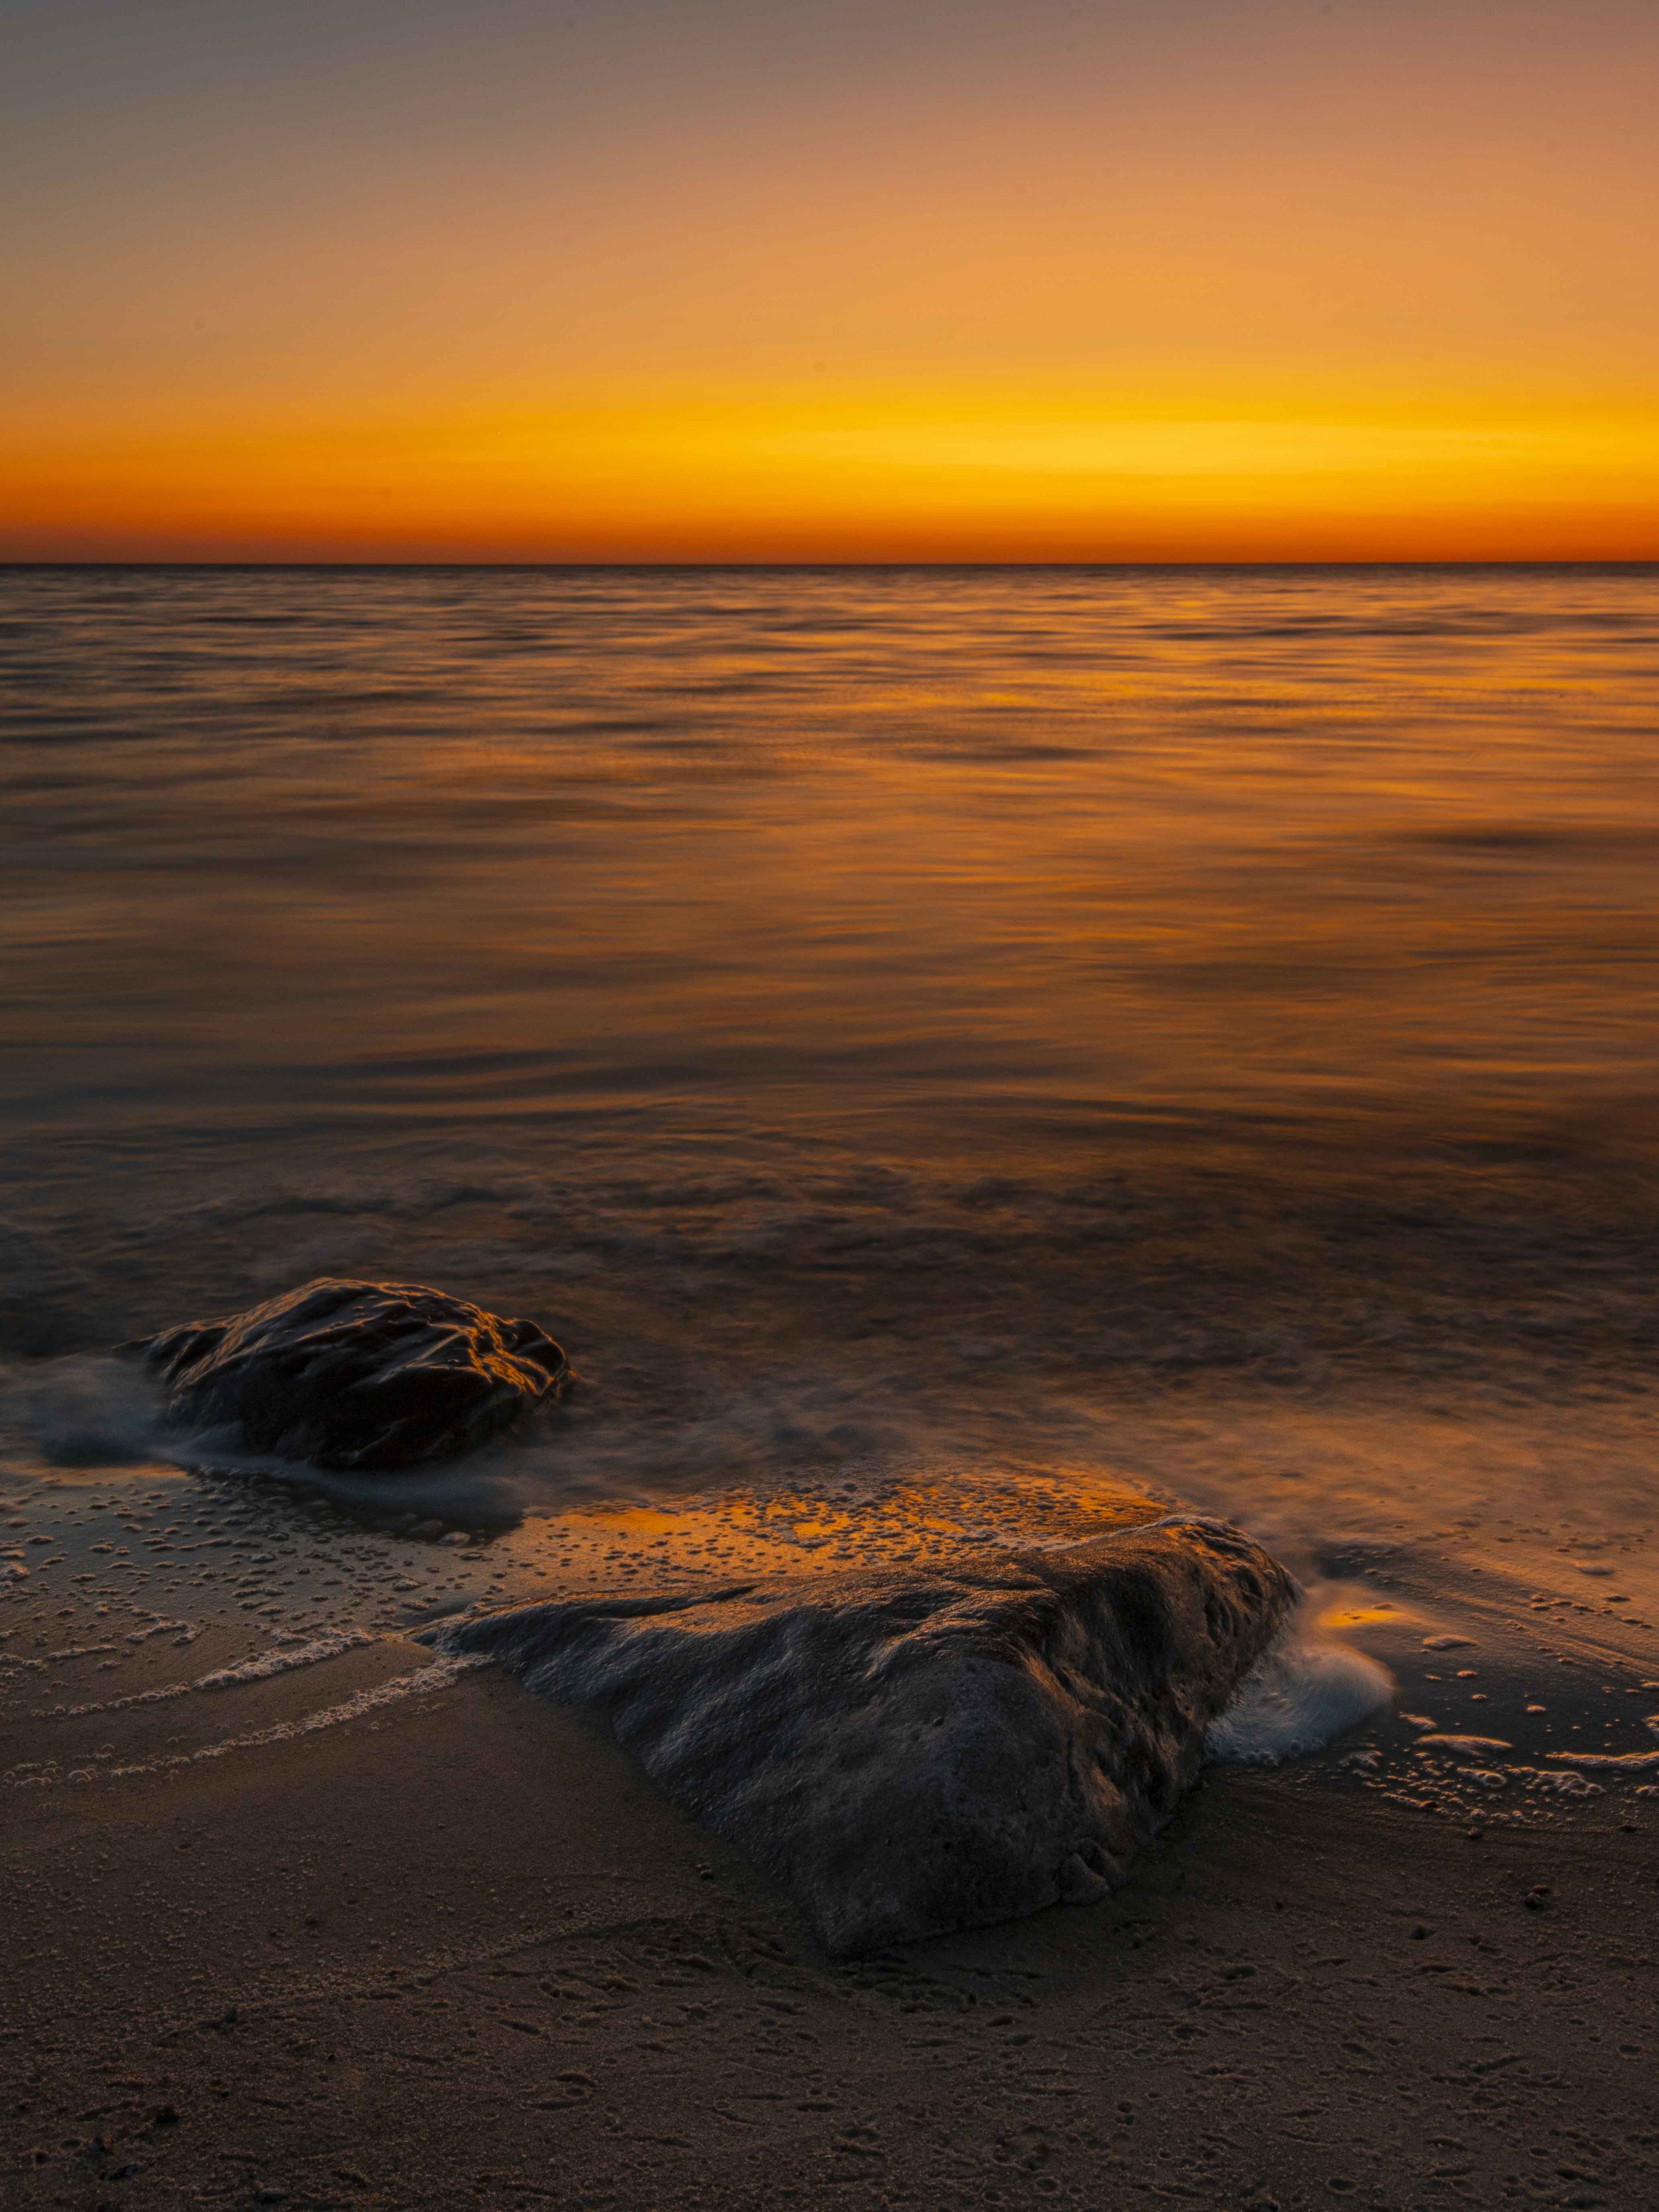
A blown-out sky is perhaps the most common exposure problem in landscape photography. If the highlights are clipped to pure white then the sky is usually ruined. To help prevent this, check the histogram. This graphical representation of your image as shades from black (left) to white (right) can be more accurate than simple reviewing the image. Just make sure that the graph reaches down to ‘sea level’ on the right side, rather than intersecting the side of the box. See below.
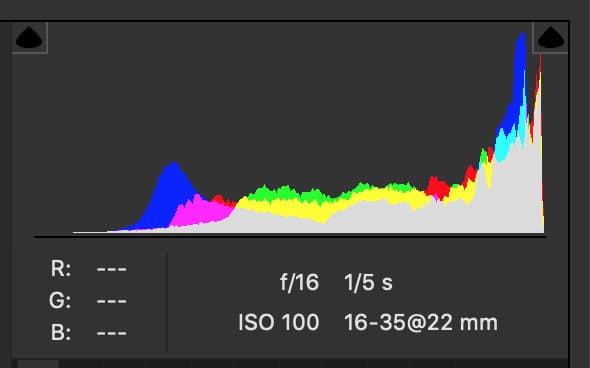 Some photographers like to employ the ‘expose to the right’ technique, which involves shooting as bright an image as possible without clipping the highlights, so that the histogram is stacked to the right. Then the brightness can be corrected afterwards. This ensures the minimum of image noise, as shadows are noisier than highlights. Bracketing is another invaluable camera technique. This gives you a safety net by automatically varying your exposure for you. On most cameras you can set it up to shoot 3, 5 or more frames, and choose the number of stops between each. Afterwards you can choose the exposure that most suits the scene. If you use a tripod it also gives you the option to try out an HDR or exposure blending technique.
Polarising filters
A circular polariser is one of the most useful in any photographer’s kit bag, and it gives results that simply can’t be replicated with Photoshop trickery. It works by filtering polarised light, which can have a dramatic effect on skies. The polariser can cut through atmospheric haze and make blue skies come out darker, richer and more dramatic. So it’s very effective on blue skies with fluffy white clouds, but can also be useful on more subtle cloud-filled skies. And it’s not just skies that can benefit, polarisers cut through reflections, so they can tone down specular highlights on foliage or wet rocks. See below.
Circular polarisers have a rotating ring, which we can turn to cut out the polarised light. A polariser is most effective when you are shooting at 90 degrees to the sun (to find the right angle, try lining both your shoulders up with the sun then shoot in the direction that you’re facing). However, keep in mind that when using a wideangle lens you might find that parts of the sky look darker than others, as the field of view will cover more than 90 degrees of the sky. A polariser will block a stop or more of light so you’ll need to adjust your exposure accordingly by either increasing IOS, dropping the shutter speed or opening up your aperture.
Graduated NDs
In most scenes the sky will be brighter than the land below, which poses a constant problem for the landscape photographer – how to balance the exposure to record optimum detail in both areas? One of the most practical solutions is to use a graduated neutral density (ND) filter. This blocks light in part of the frame, so by positioning the transition along the horizon, you can darken a bright sky and balance out an exposure. Graduated ND filters come in different strengths for different skies, some have a hard transition and others a more gradual blend.
Intense blues
As well as tools that let you edit a specific area of the frame, you can also make use of tools that target a specific colour. The Targeted Adjustment Tool can be very useful for boosting colours in skies. In Camera Raw it’s found in the toolbar and in Lightroom it’s accessed from within the HSL panel. Simply grab the tool, right-click and set it to Saturation, then click and drag to the right over parts of the sky to boost the saturation of specific colour ranges (you can also use the HSL sliders for this, although the tool is often a better choice as it is capable of affecting several ranges at once). The tool can also be used to darken blues in a sky by setting it to affect luminance then dragging down over the colour.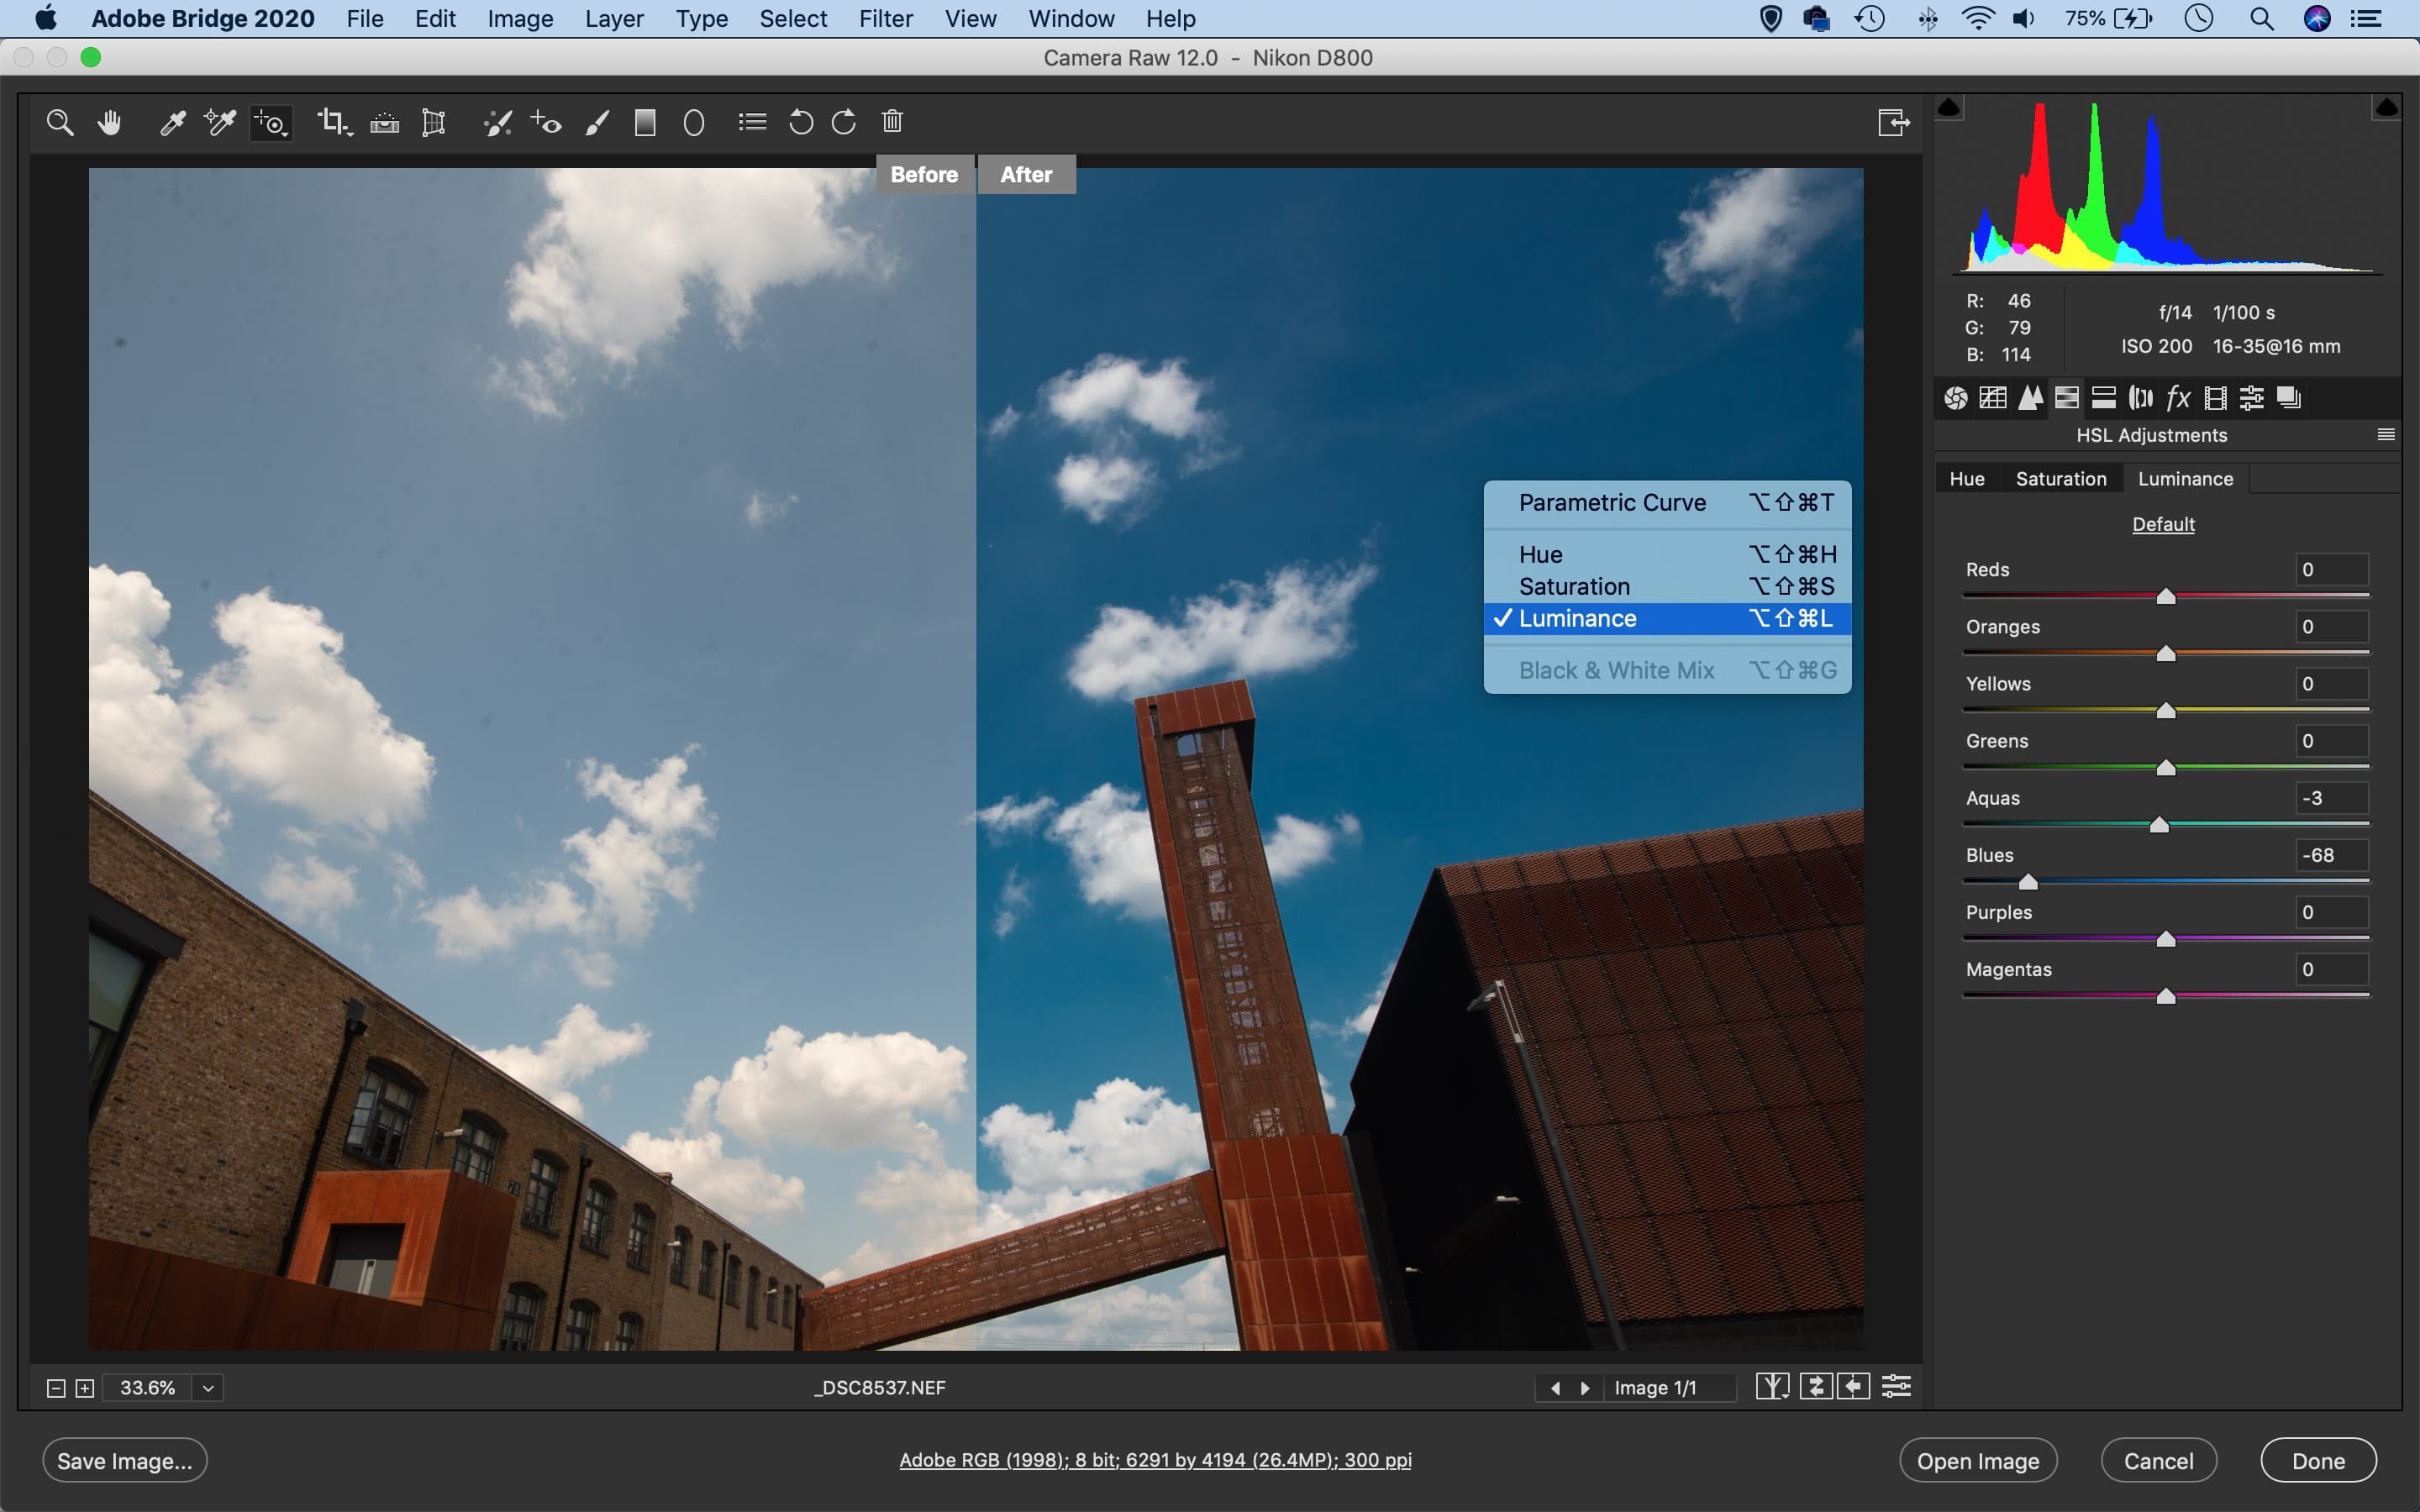
Merge an HDR image
If you have a bracketed sequence of frames then you can merge them into an HDR image in Lightroom/Camera Raw with ease. Simply highlight the set of images (Shift-click between the first and last in the set) then right-click them and choose Photo Merge > HDR. Simple controls in the HDR Merge command let you correct for ghosting (movement between frames) and fix slight misalignment between the images. Once merged, you’ll have extra shadow and highlight detail to work with. The Graduated Filter and Adjustment Brush are the best tools for enhancing this extra detail. If you want further HDR options, try a dedicated HDR app like Photomatix or HDR Efex Pro, both of which can link in with your Lightroom workflow.
Tonal settings for skies
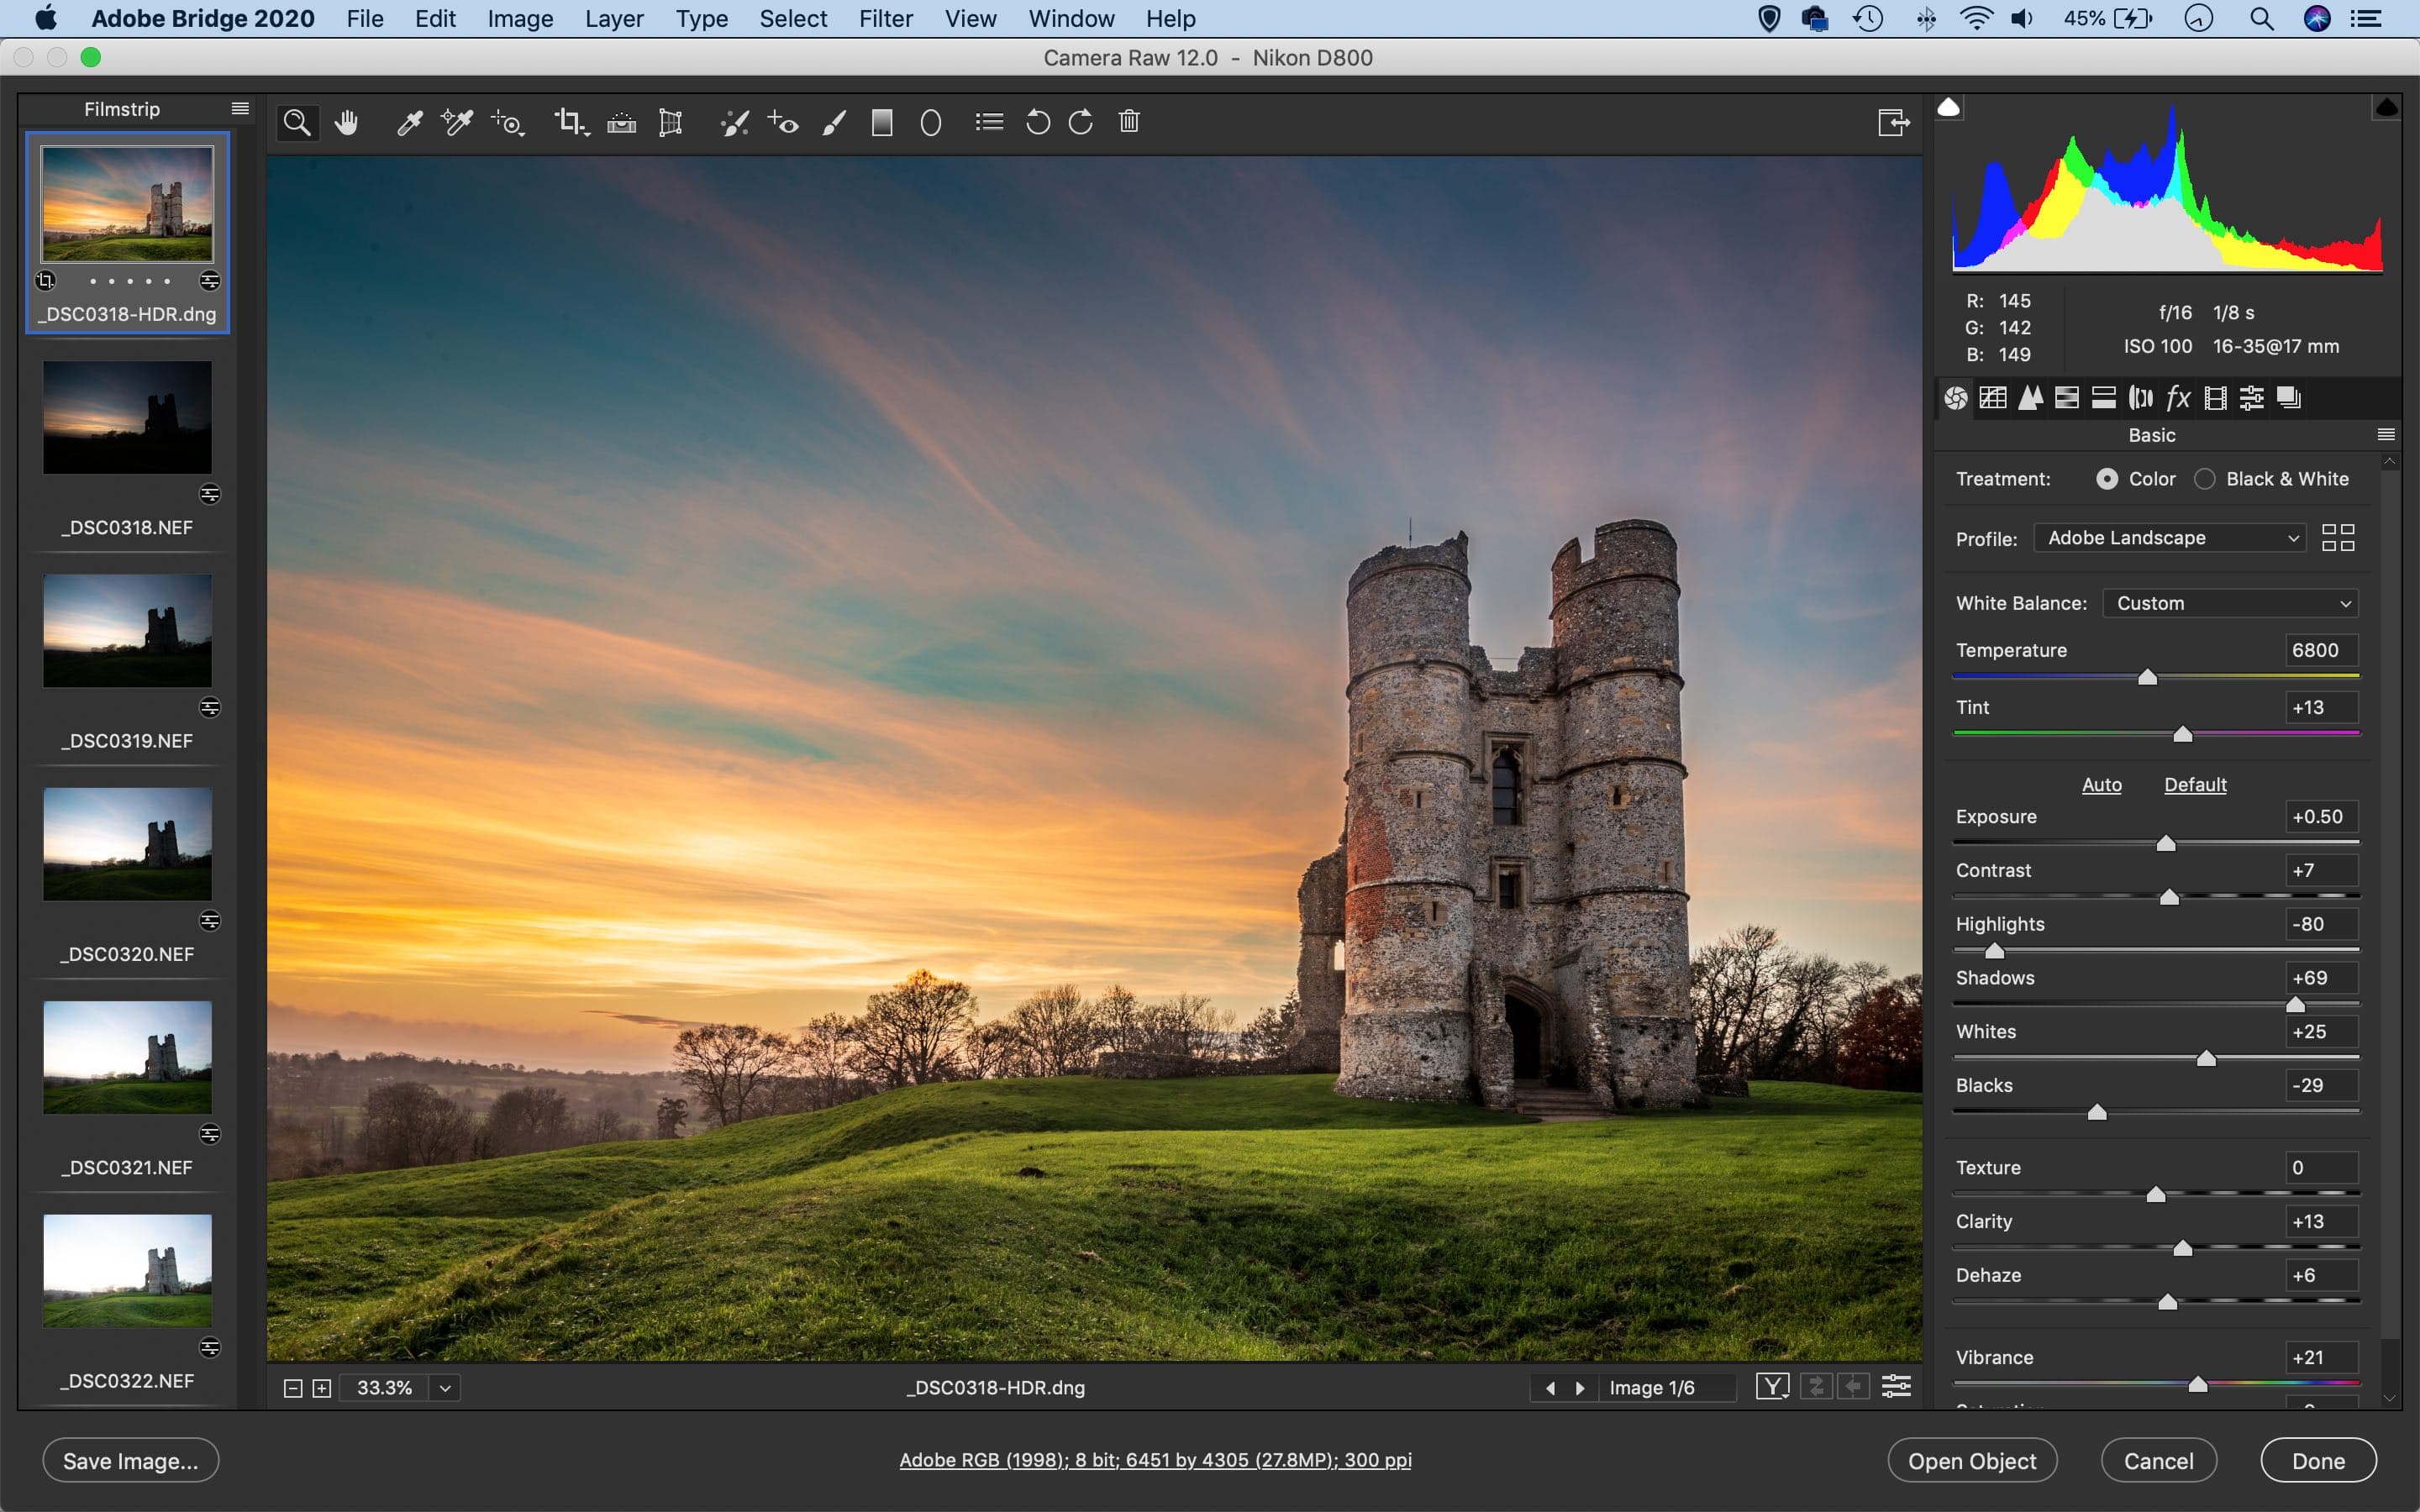
Upon opening your landscapes into Photoshop or importing into Lightroom, the best place to begin enhancing skies is in the Basic Panel. The Profile Browser is a good starting point. The Adobe Landscape Profile (only available for raw files) has been optimised to boost skies and pull out details in rocks and foliage. Once a profile is chosen, move on to the sliders below. The Highlights and Whites sliders can be useful if your sky is blown out, as they let you claw back detail in bright areas. The Dehaze slider can also boost skies by helping to cut through atmospheric haziness, and the Clarity slider can crisp up cloud details. These should all be used sparingly, an over-processed sky will ruin a landscape.
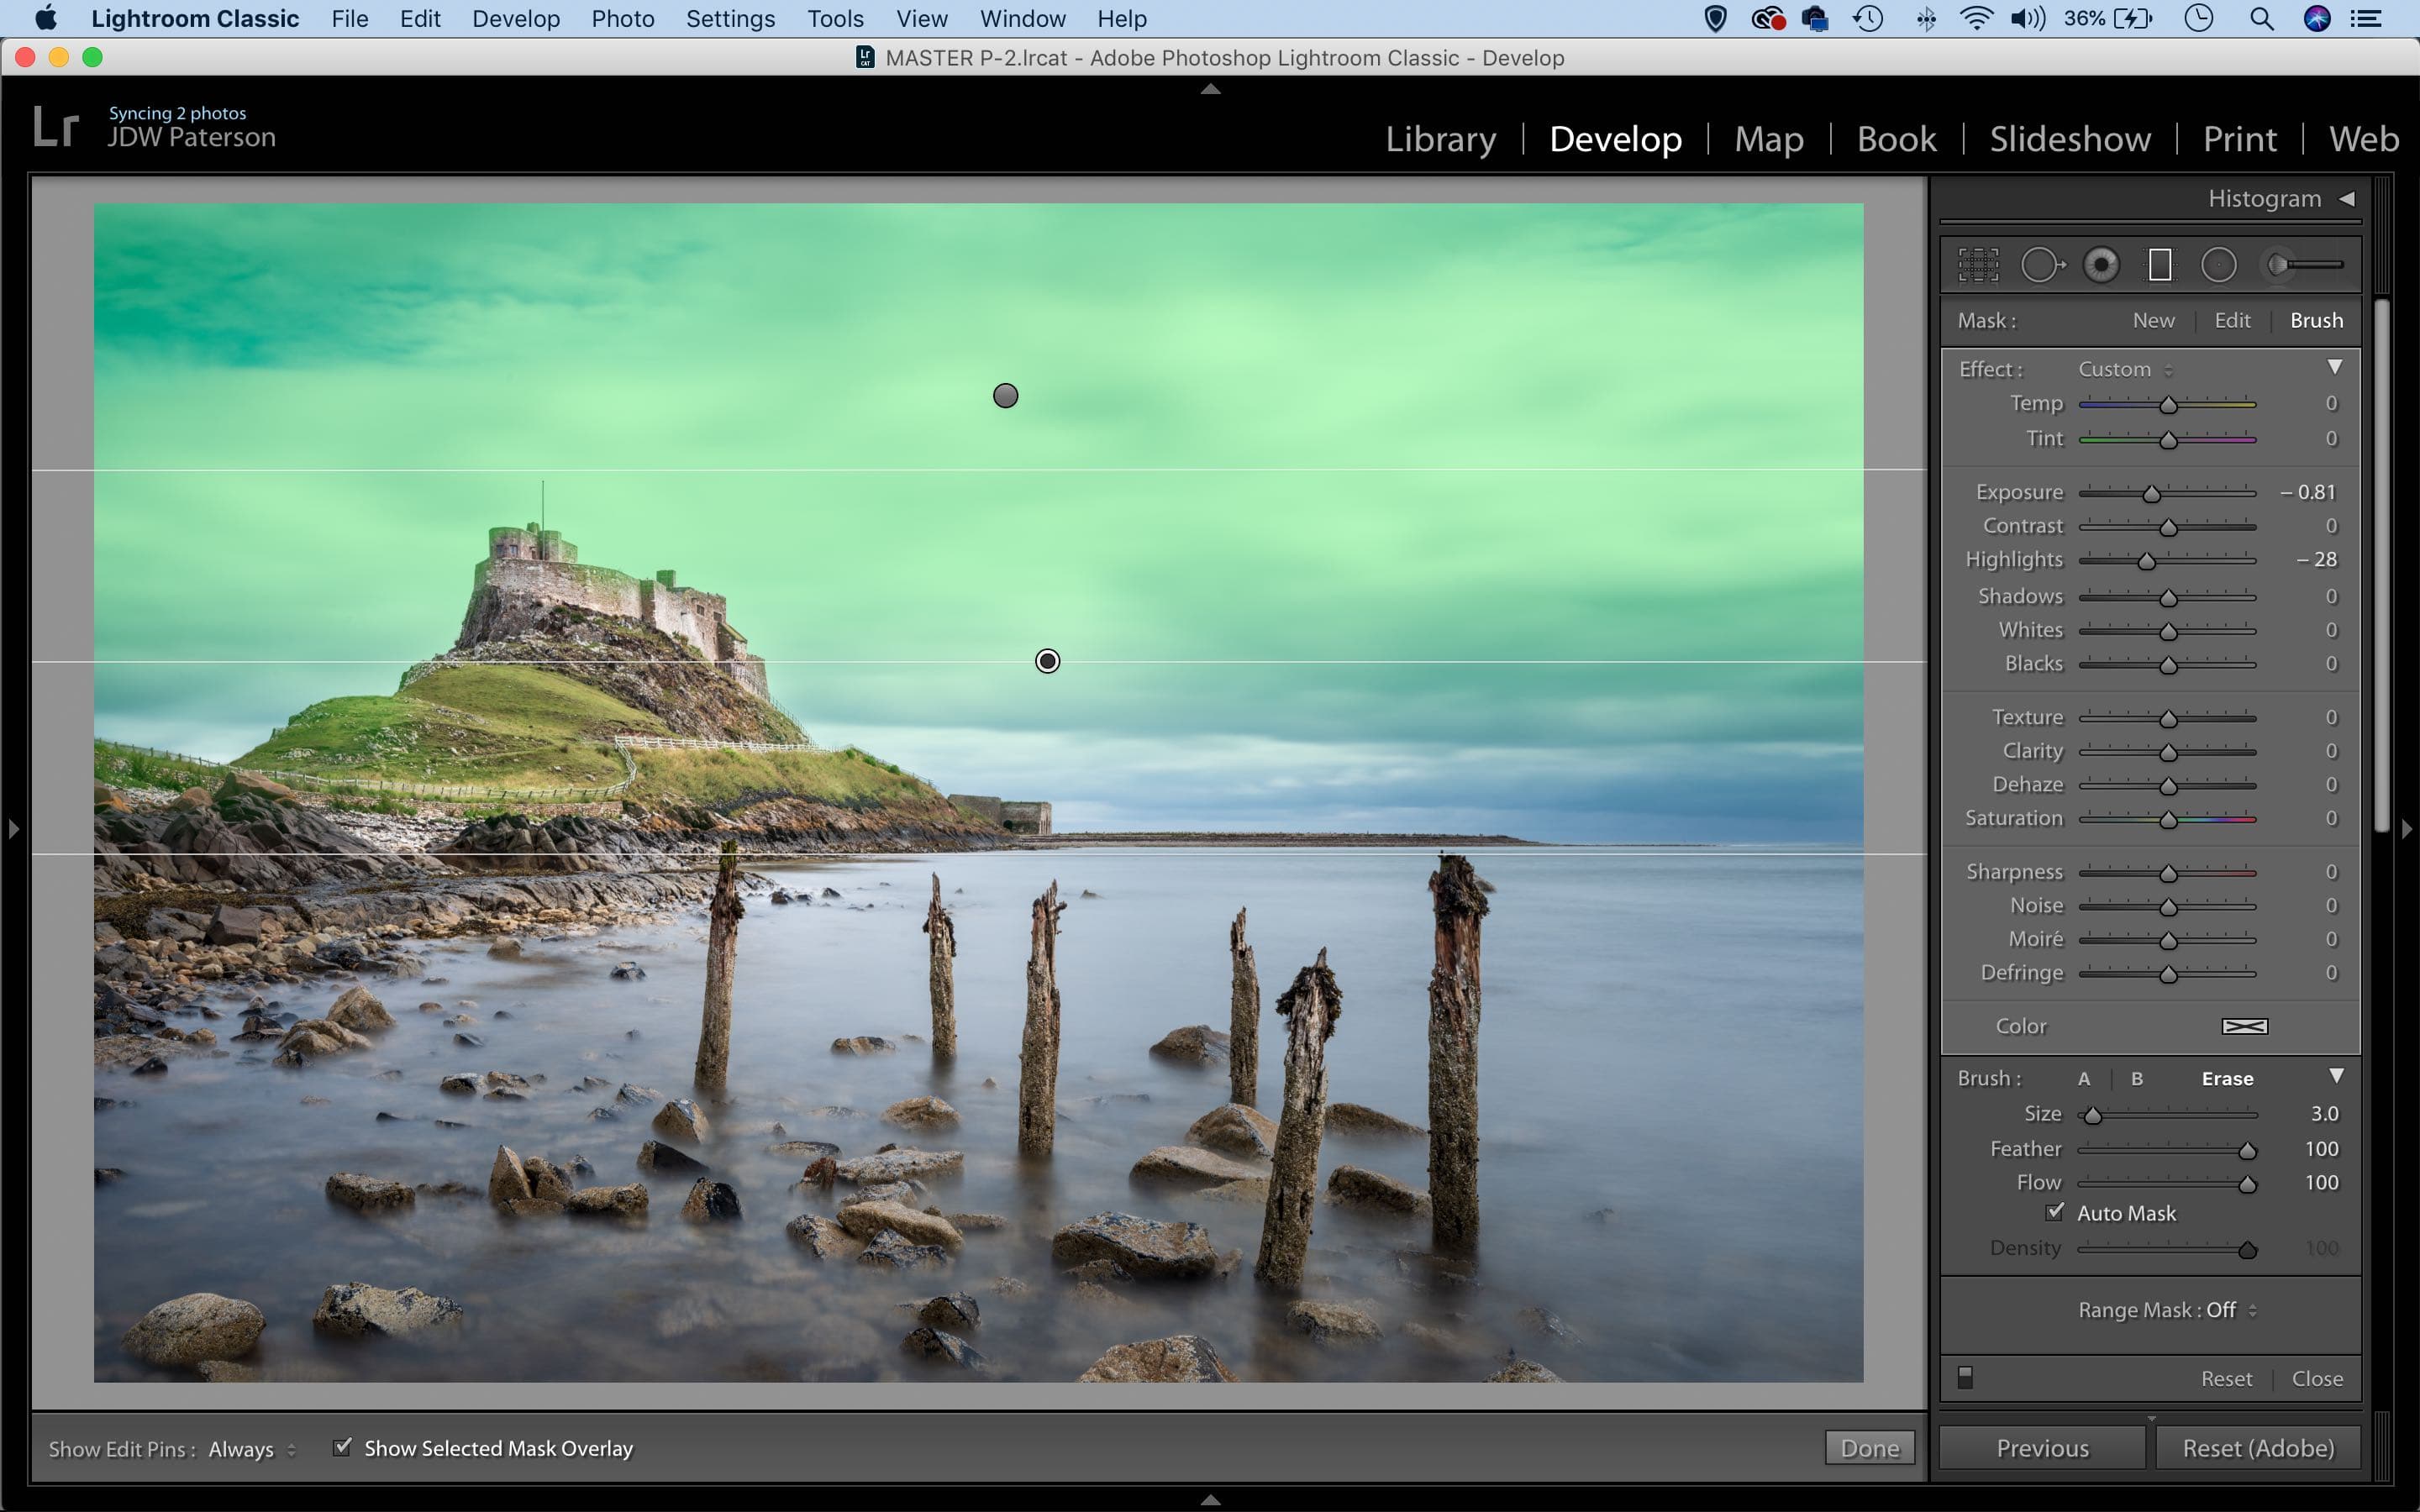
There are a number of local enhancement tools you can use to boost different areas of the scene
Local enhancements
Often skies will benefit from a local adjustment to boost the area. This is where Lightroom and Camera Raw’s local adjustment tools come into play. They let us define an area – either by painting with the brush, dragging lines with the graduated filter, or making a circular adjustment with the radial filter – then we can adjust the tones in the designated area to enhance part of the frame. As such, they’re ideal for pulling detail out of skies, boosting cloud formations and intensifying colours.
The Graduated Filter
This is one of best tools in Lightroom/Camera Raw for enhancing skies. Simply grab the tool from the toolbar then drag down from sky towards land, while holding Shift to keep lines perfectly horizontal (sometimes a second grad near the top of the sky can be effective too). The filter creates a graduated tonal shift, with a gentle transition between the two lines. You can hit O (or Y in Camera Raw) to toggle a mask overlay on or off, which helps you to visualise what is affected.
Tonal controls
Once you’ve defined the area to be affected with the Graduated Filter tool, the next step is to fine-tune the tonal sliders to change the look of the sky. There are lots of different options. You could lower exposure to darker down a bright sky and balance it with the land below. Or you could increase Saturation to boost colours, or perhaps tweak Temperature and Tint to make it warmer, or maybe increase Dehaze and Clarity to add definition to the clouds.
Fine-tuning the overlay
In most scenes the horizon won’t be a single straight line, there will be objects that jut upwards into the sky like the structure here. We can adjust the area affected by the graduated filter by subtracting or adding to it with a brush, so we can erase parts of the mask that affect foreground details. Simply click Brush in the settings to the right, hit O to turn on the overlay then either paint to add areas, or hold Alt and paint to subtract them. It might be helpful to toggle on Auto-Mask too. This can make brushing around fine details easier as the brush will seek out edges while you paint. You can also try using the Range Mask controls, which let you target certain tones based on their colour or brightness.
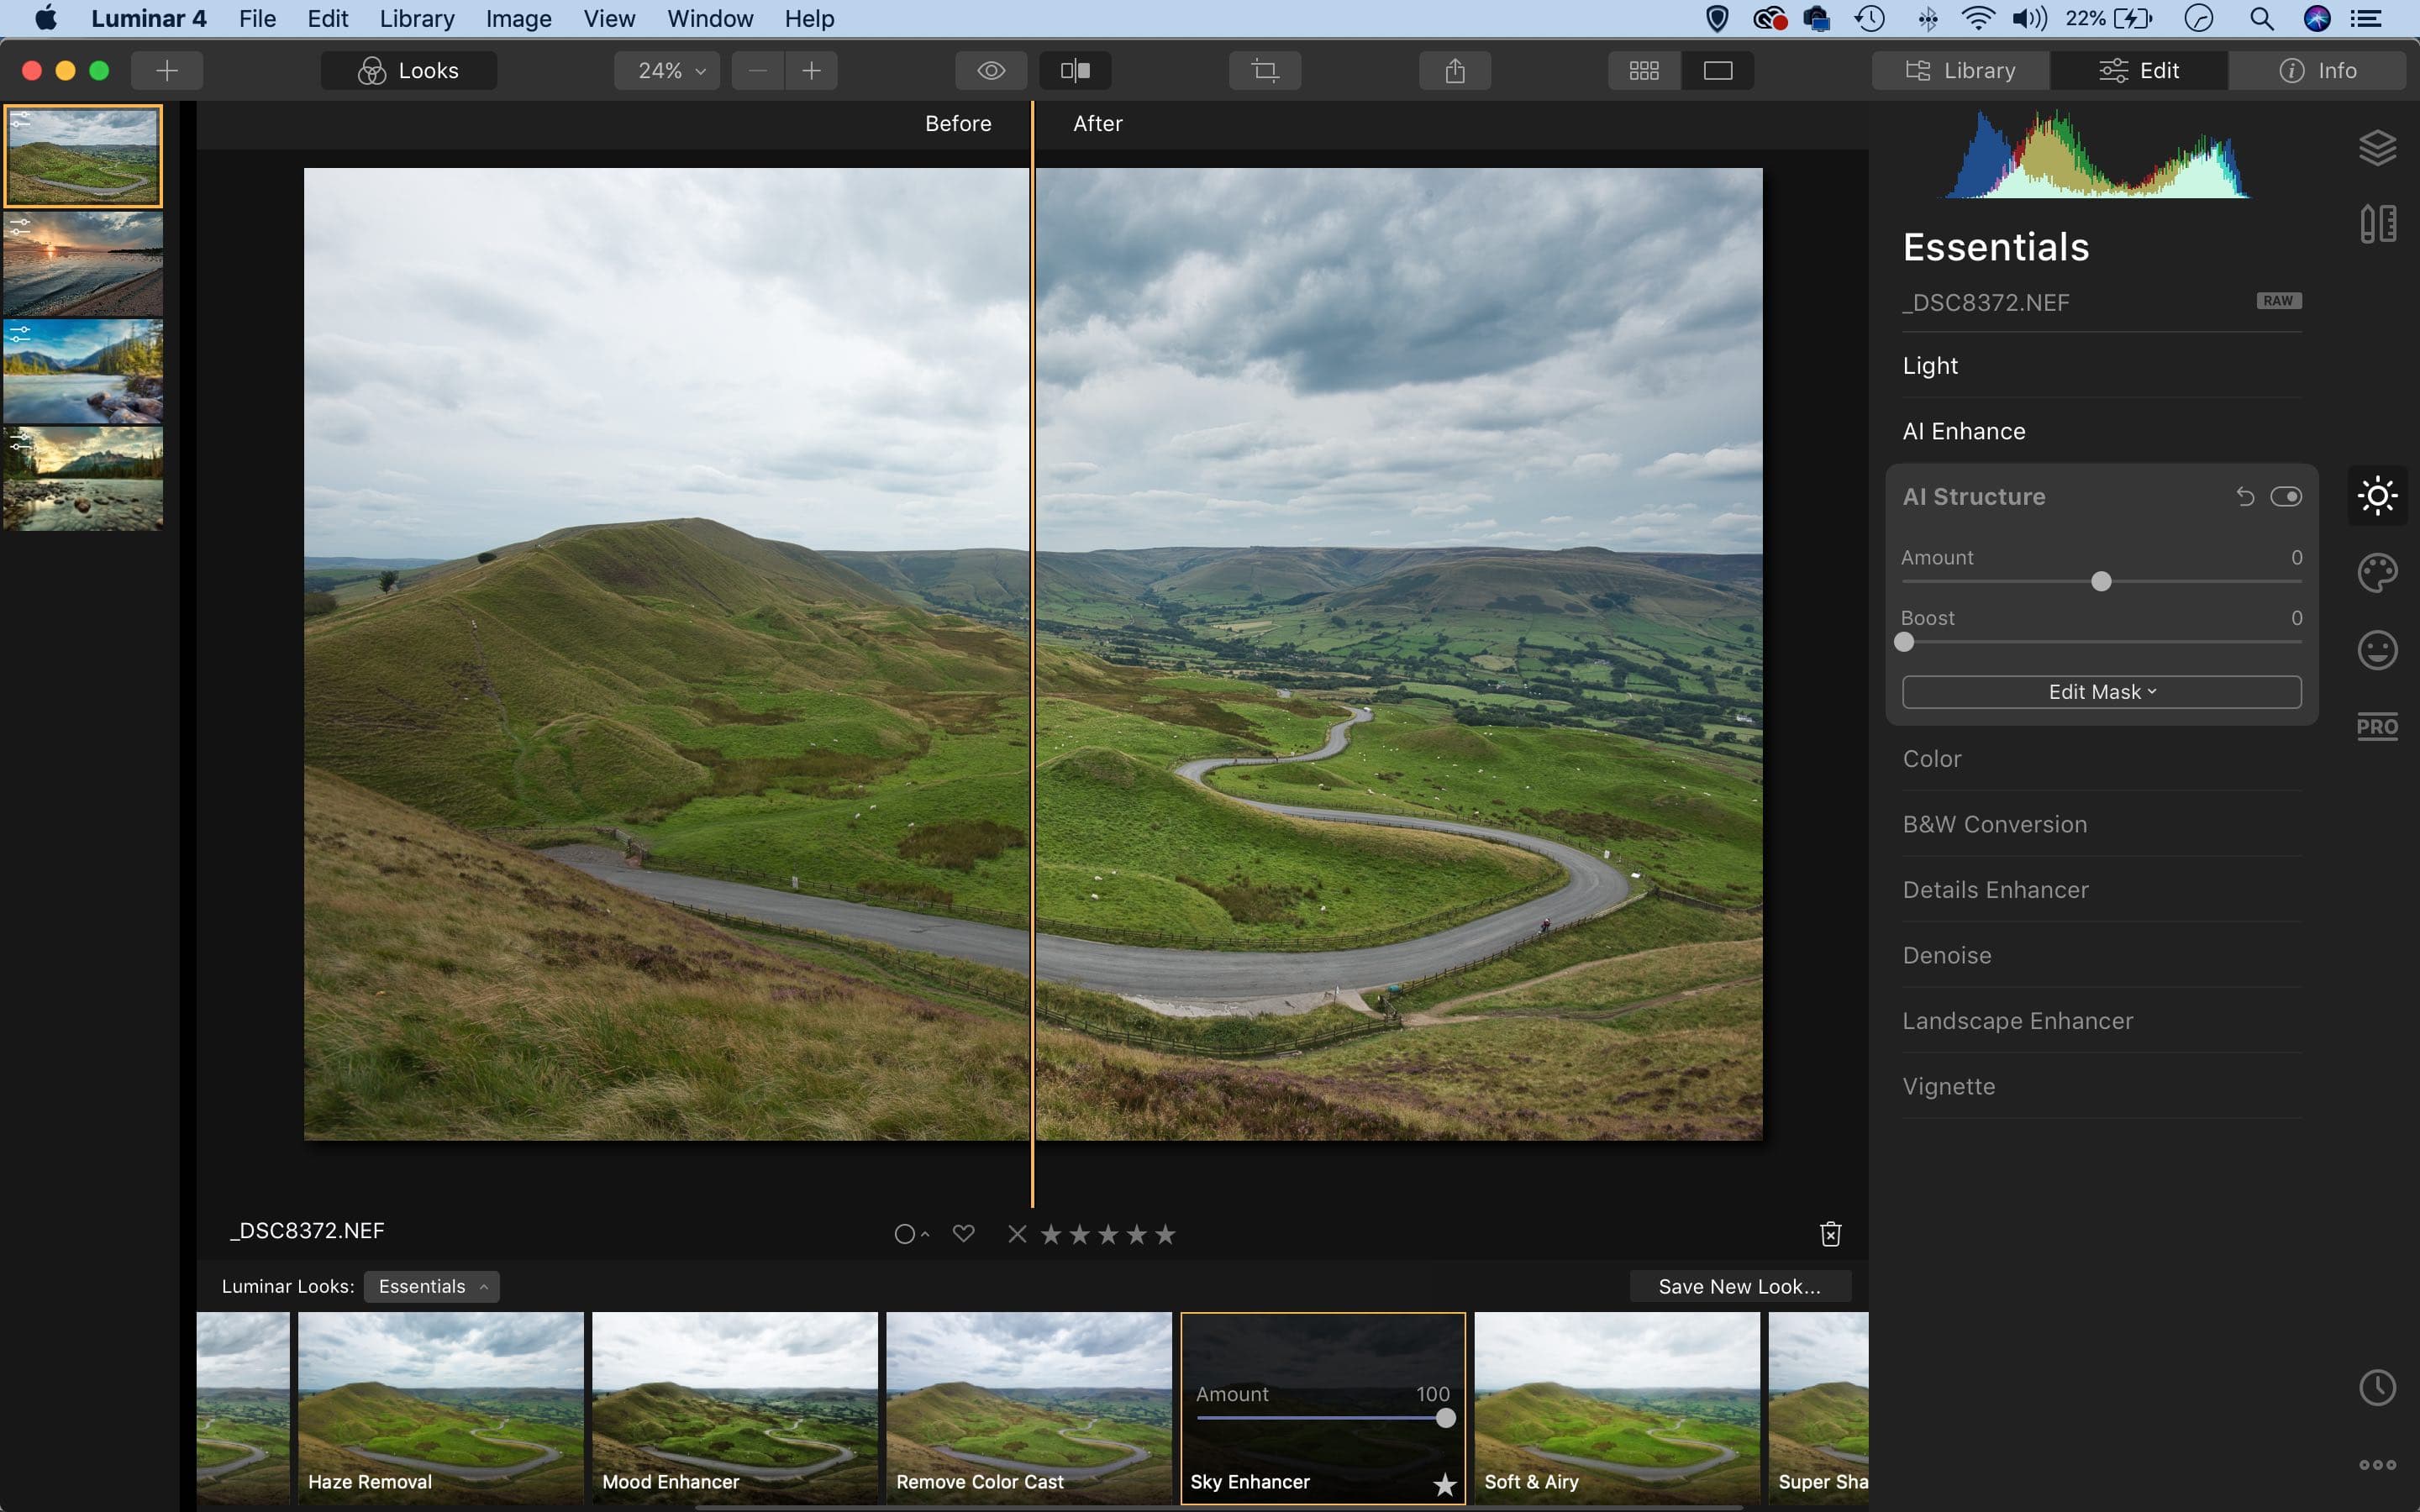
Luminar 4’s automatic sky enhancements
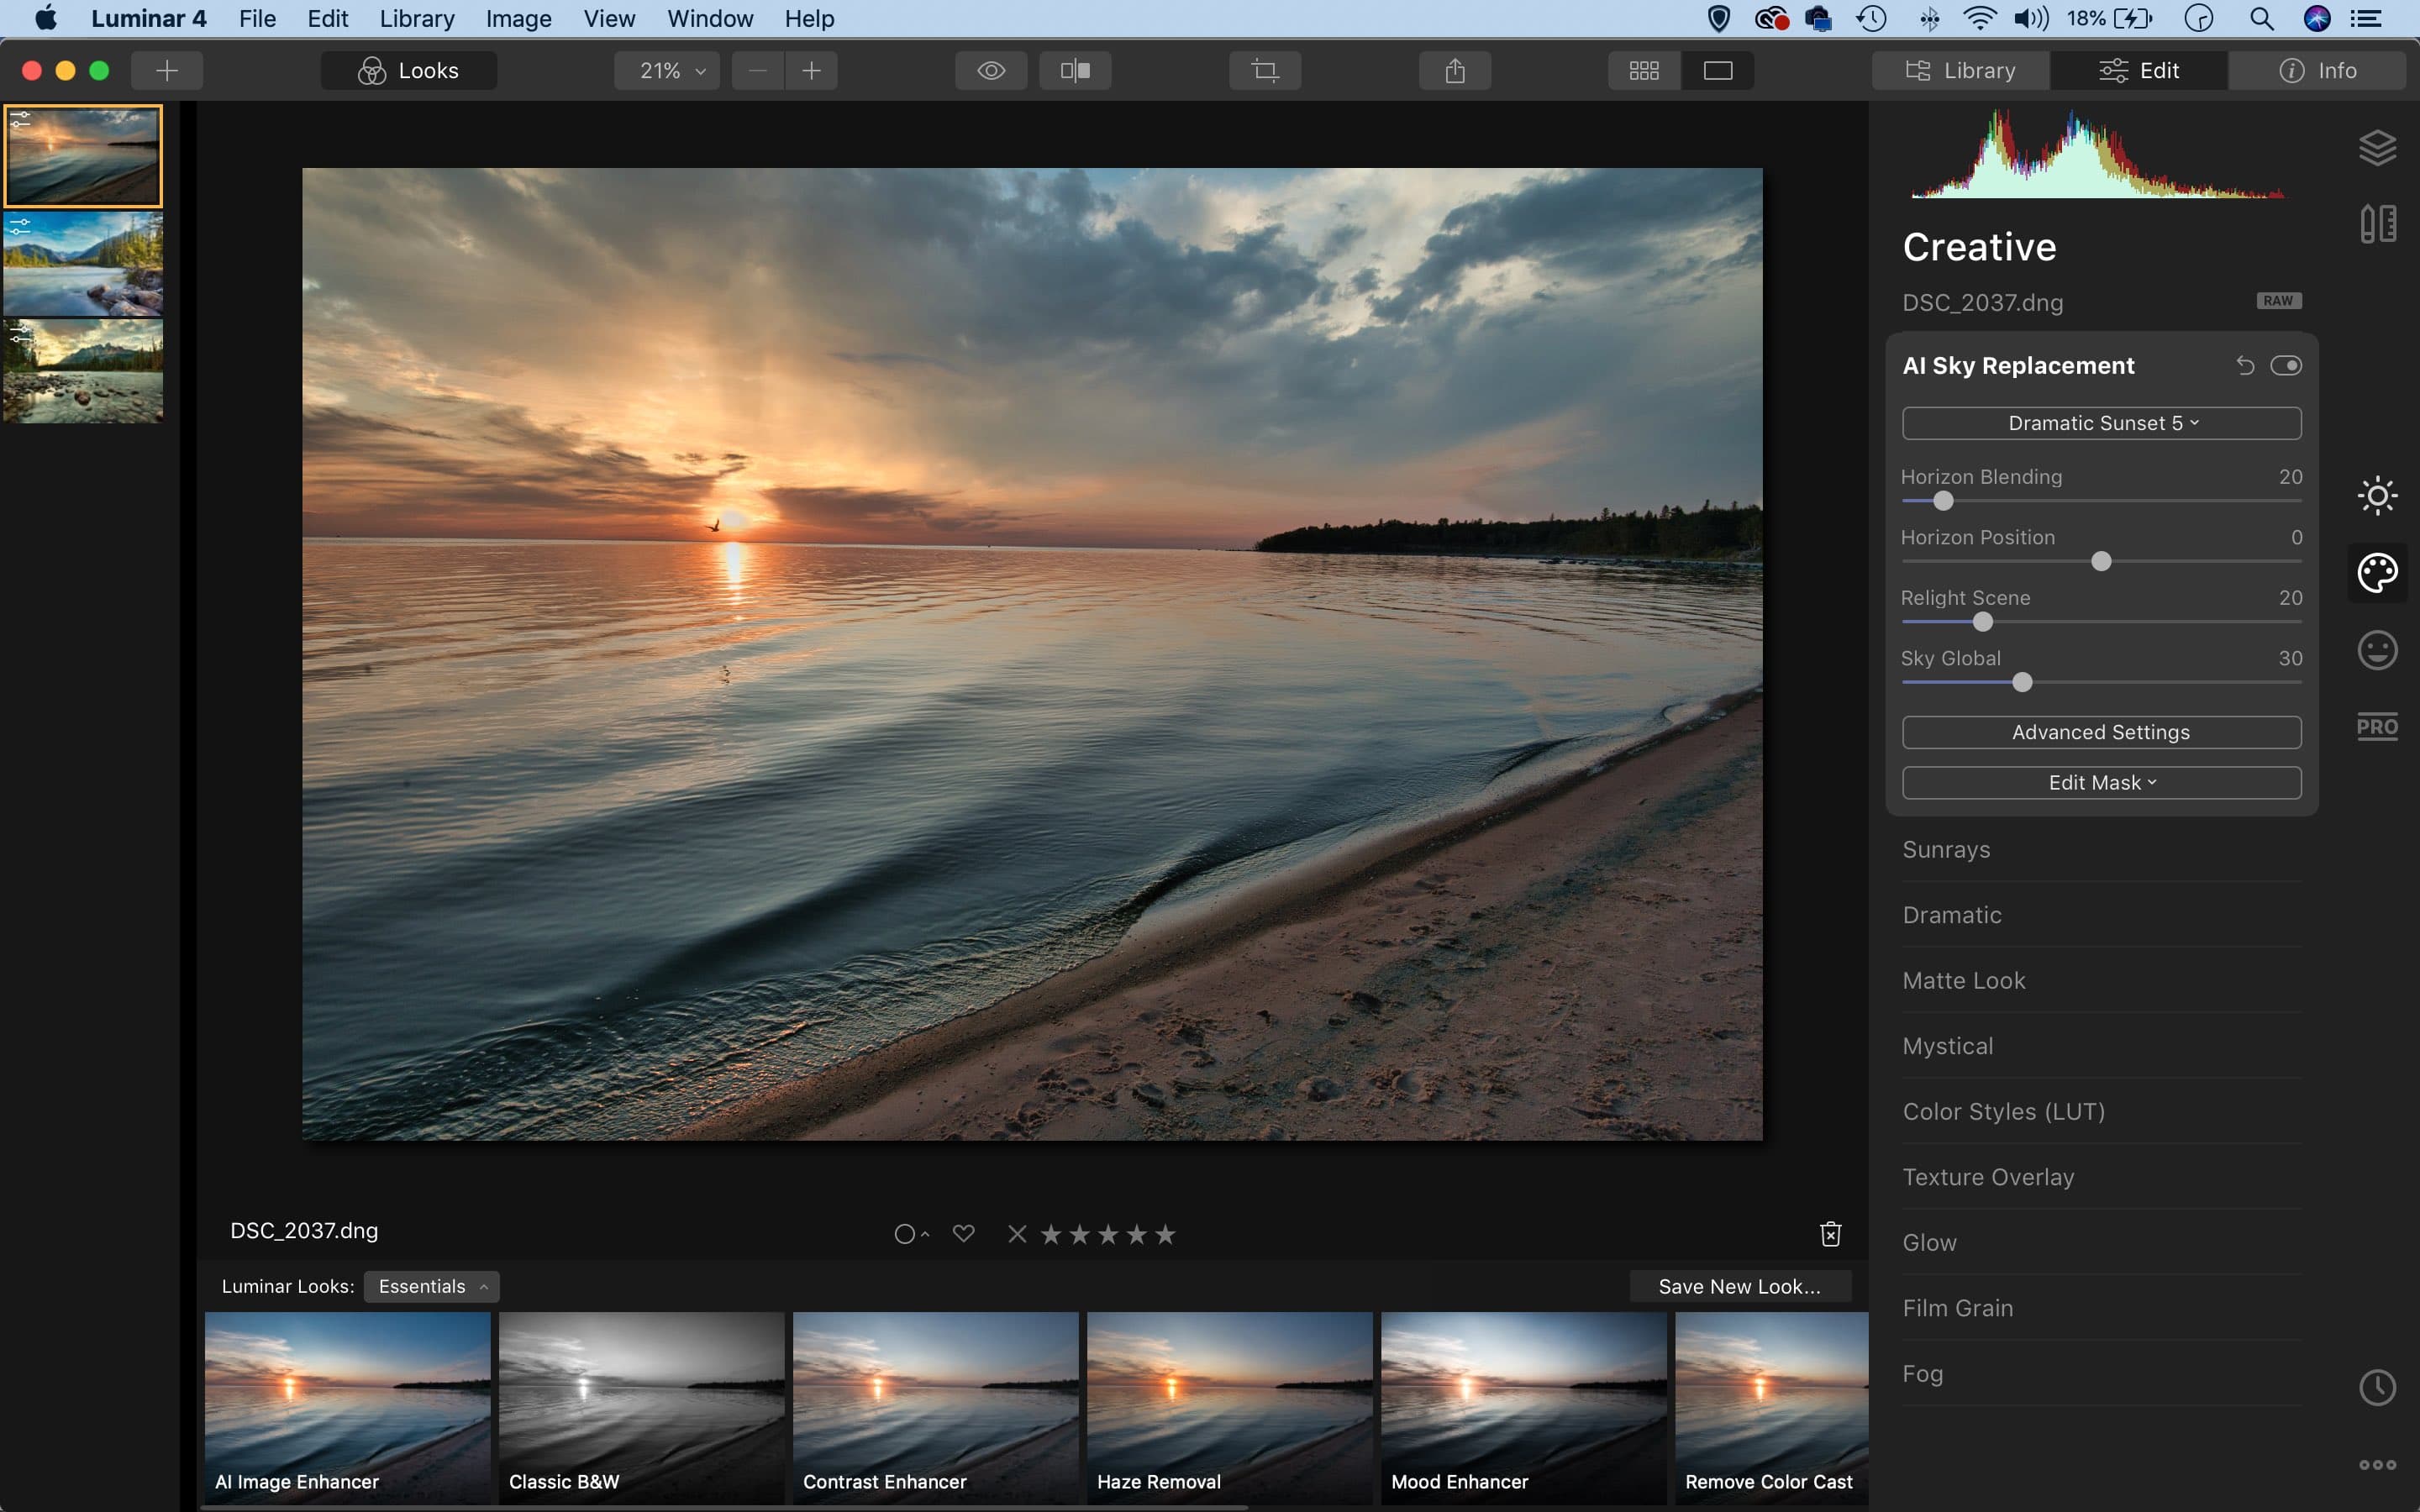
Photoshop and Lightroom aren’t the only options for boosting skies, and there are many other excellent editors out there, from DxO’s PhotoLab 2 to Capture One, Affinity Photo and the Nik collection. Then there’s Skylum’s Luminar 4, below, which takes a slightly different approach to boosting skies. Luminar lets you apply a range of different filters and one-click enhancements to your landscapes, then go on to fine-tune the look with more advanced tonal controls. One of the more unusual features is the AI sky enhancer, which employs artificial intelligence to analyse your image and isolate the sky, then apply automated tonal adjustments to boost colours and details in the area. A simple slider lets you control the strength of the effect.
Replace skies with a single click
New to Luminar 4 is a feature that is sure to delight some. The AI sky replacement feature automatically swaps out a sky with another of your choosing. There’s a list of stock skies to choose from, or you can load in your own. Of course, we’ve been able to replace dull skies for years using Photoshop or Affinity Photo, but this is the first time the process has been entirely automated. The command is very effective at isolating and cutting out the original sky, but if the horizon line has complex details like trees then some of the edges may not be perfect (although you can fine-tune the mask manually). In a scene like the sunset image above, the feature impressively replaces the sky while retaining the original sun and the bird. Not every sky works for every scene, but the results are often surprisingly natural. Once a sky is chosen, we can go on to fine-tune the positioning and adjust the tones so that the sky more closely matches the feel of the land below.
