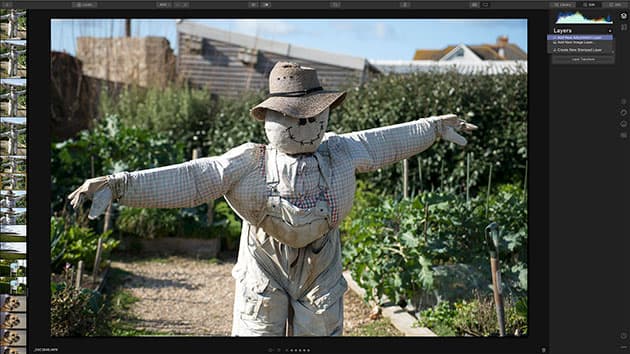
Skylum’s Luminar 4 software can be used as a standalone image-editing package or as a plug-in for software such as Adobe Photoshop, Adobe Photoshop Elements and Adobe Lightroom Classic. When used as a standalone, Luminar relies on your standard folder structure and there’s no need to import images, you can just open one to start editing. However, it can be helpful to import a folder of images as this enables you to scroll through your shots to select the ones you want to work on.
There are two main views in Luminar 4, the Library and the Edit view. The Library is the browser section while the Edit view gives access to all the adjustment controls.
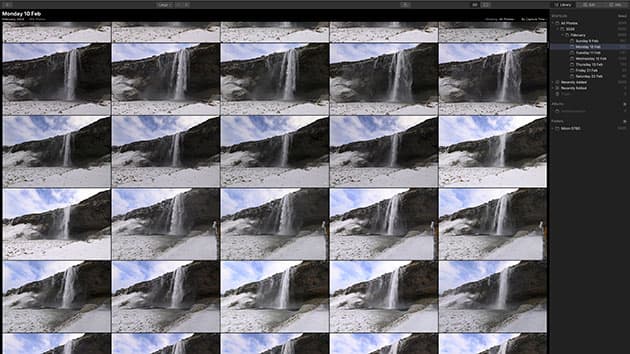
The Library
To import images into Luminar 4’s Library, click on the + in the top left corner of the screen and select the pictures to work on in the normal way. The Library has a column on the right that shows the file organisation structure while thumbnails of images are everywhere to the left of that. Clicking on the ‘Library’ button at the top right of the screen hides and reveals the organisation column. Clicking on the ‘Info’ button reveals essential image data. As well as the structure of the folders that you’ve imported into Luminar 4, the Library organises the images by date, so you can quickly locate images captured on a specific day just by clicking on the relevant folder. There are also icons to reveal the images you most recently added or edited in Luminar. Clicking on the heart that appears in the bottom right corner of images as you hover over them in the Library adds them to the Favourites folder.
It’s also possible to create virtual albums of images simply by selecting them in the Library and clicking on the + next to ‘Albums’ in the folder structure. Just select and drag additional images to the album to add them.
Get the essentials right
The Essentials section gives control of exposure, white balance and colour. There are also ‘AI Accent’ and ‘AI Structure’ controls that assess the image and allow you to determine the degree of adjustment.
However, you can also take control yourself with exposure and white balance adjustments (and a white balance dropper tool) plus the curves control that’s revealed by hitting the ‘Advanced Settings’ option in the Light panel. The latter lets you manipulate the exposure and contrast. The Color panel also gives control over the Saturation and Vibrance, and there’s a slider for removing a colour cast. Hit the ‘Advanced Settings’ to control the Hue, Saturation and Luminance of eight colour channels independently.
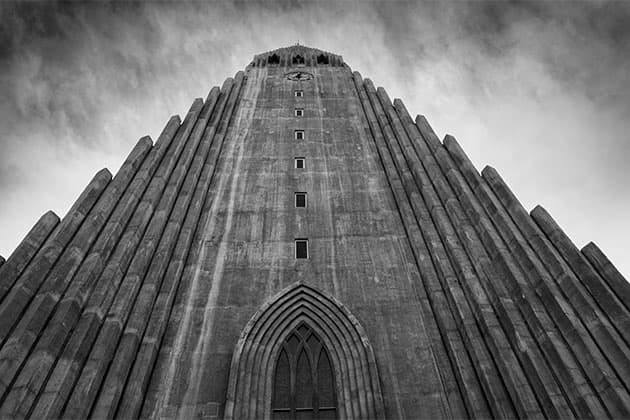
Impressive black & white conversions are just a few clicks away. Credit: Angela Nicholson
Convert to black & white
It’s possible to make a one-click black & white conversion of a colour image using Luminar’s Looks, but if you want to take control you need to head to the Essentials section of the Edit panel and select ‘B&W Conversion’. Next, click on the ‘Convert to B&W’ button to switch the image to monochrome. Now use the sliding controls to adjust the Luminance of each of the six colour channels.
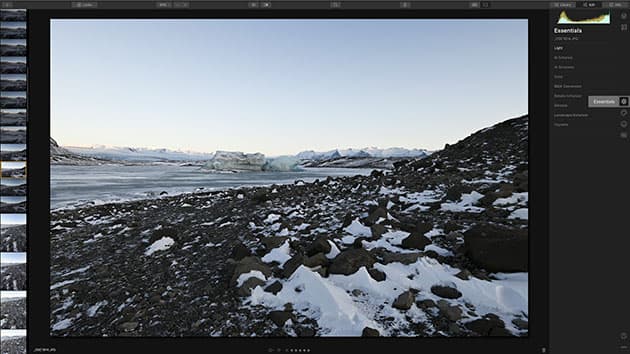
Edit
Once you’ve selected an image that you want to adjust, click on the ‘Edit’ button in the top right corner of the screen to open it in the Edit area. This arranges thumbnails of your images in a column to the left of a larger preview of the selected shot.
At the top of the screen there’s a bar with a small collection of tools including a zoom control to magnify the image and a crop tool that lets you level the horizon as well as adjust the composition of the image. There’s also an icon to reveal the Luminar ‘Looks’ and buttons to switch between the single image and gallery view.
The Editing panel sits over on the right side of the screen. The controls are arranged by category: ‘Layers’, ‘Canvas’, ‘Essentials’, ‘Creative’, ‘Portrait’, ‘Pro’ and ‘Legacy’. Clicking on the appropriate icon reveals the tools in the adjacent column. There’s also a clock icon that reveals the editing history. The Layer control lets you combine images, adjustments and textures, use blending modes and apply masks.
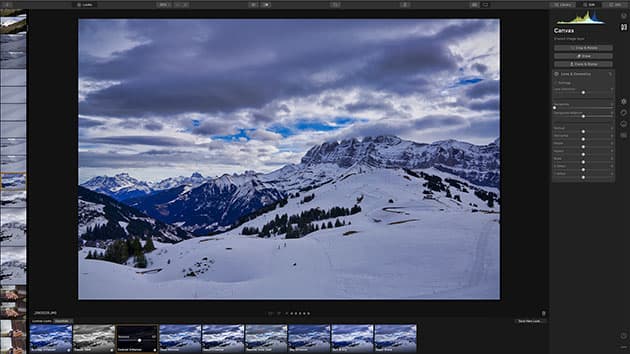
Get the look
When the ‘Looks’ option is activated, Luminar shows a series of thumbnail previews under the main image. These are the one-click treatments that can be applied to your image.
By default the Essentials collection is displayed, but if you click on the up arrow next to the word ‘Essentials’, you’ll find more. This area also enables you to download more from the Skylum website. Just click on a preview you like the look of to apply the preset to your image. You then have the option to reduce the strength of the effect. The Looks are also a good starting point for making further adjustments using the controls in the edit panel.
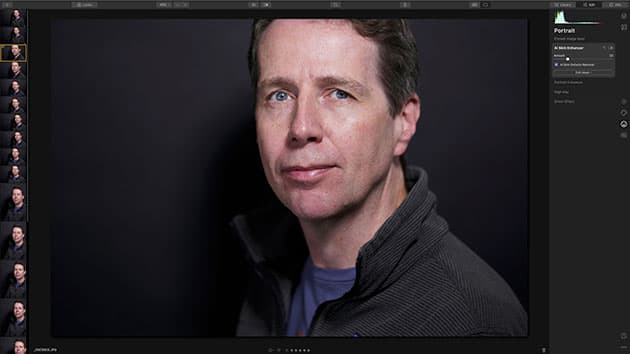
The AI within Luminar 4 has a number of modes specifically designed to enhance portraits
Perfect portraits
High-resolution cameras can be very harsh on portrait subjects but the AI within Luminar 4 can help create portraits that everyone is happy with. The first step after opening a portrait image is to click on the Portrait icon in the Edit Panel. Next, select the ‘AI Skin Enhancer’. Putting a tick in the ‘AI Skin Defects Removal’ box has instant impact, subtly removing blemishes. Then gradually slide the ‘AI Skin Enhance’ control to the right. Stop before the skin becomes plastic-looking. If you want to do a little more work, expand the ‘Portrait Enhancer’ panel and try using some of the controls there, but the first two steps are often enough.
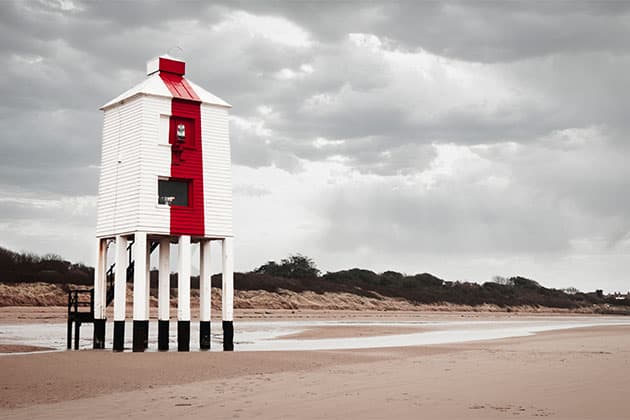
Luminar’s AI Sky Replacement tool can add a more dramatic sky to an image. Credit: Angela Nicholson
Replace a sky
Clear blue and dull, grey skies often lack impact but Luminar 4 can help with that by making it easy to put in a new sky using the ‘AI Sky Replacement’ tool in the Creative control panel. There’s a selection of skies available for selection, but you can add your own if you like.
The AI Sky Replacement tool can automatically detect the subject and horizon so the sky is replaced in seconds, but occasionally some objects, such as the white lighthouse in this scene, can confuse it. If this happens, use the Edit Mask control, which is a feature of all the adjustment controls, to create a mask and paint in where you want the sky to appear. You can then replace the sky in just a few minutes.
[collection name=”medium”]
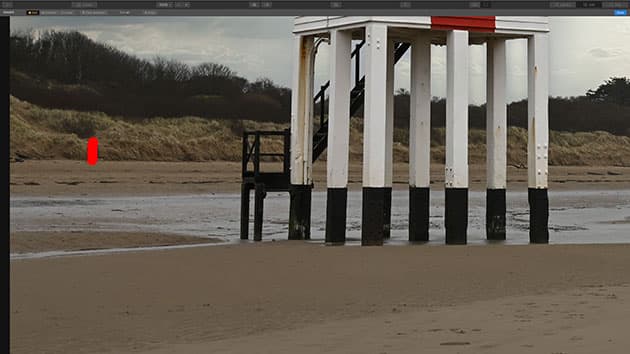
Clean up the image
Luminar 4 has two tools in the Canvas category that can help you deal with sensor spots or annoying distractions in your shot. The first and easiest to use is the ‘Erase’ tool. When this is selected you just need to zoom into your shot and paint over the offending object. Luminar automatically clones out the object. It’s perfect for getting rid of small marks and objects against plain backgrounds. However, if the scene is more complex, it’s often better to use the ‘Clone and Stamp’ tool. This allows you to select the area that you want to use to paint over the object by holding down the Alt or Option key as you click. You can then paint over the object.
It can be helpful to reduce the opacity of the brush and to move the sample area occasionally as you paint over the object.
Access the plug-in
If you’re editing an image in Adobe Photoshop you can access Luminar by selecting Filter > Skylum Software > Luminar 4. Similarly in Lightroom, select Photo > Edit In > Luminar 4 or right-click on the image and select Edit In > Luminar 4.
Use Adjustment Layers
One of the great features of Luminar 4 is that you can apply adjustments as Adjustment Layers. That gives you scope to use different blend modes and to tweak the opacity of each layer to get exactly what you want. To create an Adjustment Layer, click on the Layers button at the top of the Edit panel, then click on the + and select ‘Add New Adjustment Layer’. Now make the adjustment you want, such as adding a curve to boost contrast, or making a black & white conversion. Next, click on the Layer button again to see the Layers panel. You can change the blend mode or use the sliding control to reduce the Layer opacity. If you create multiple Adjustment Layers you can adjust their impact to your taste. It’s helpful to name your Adjustment Layers so you know what each one controls. To do this, click on the three dots in the top right corner of the layer’s control panel and select ‘Rename Layer’.
Buying Luminar 4
Website: skylum.com
Perpetual license for up to two computers: £81. Upgrade from previous version, perpetual license for up to two computers: £68
System Requirements:
MacOS
Mac model: 2010 or newer MacOS: 10.12 or higher
RAM: 8 GB or more
Disk space: 10 GB of free space Windows
Graphics: Open GL 3.3 or later Intel Core i5 or better
OS Windows 7 or higher (only x64-bit OS)
RAM: 8 GB or more
Disk space: 10 GB of free space
Plug-in Compatibility Windows and Mac: Adobe Photoshop, Adobe Lightroom Classic CC, Adobe Photoshop Elements
Mac-only: Apple Aperture, Photos for Mac


