The excellent image editor Camera Raw can be used as a Photoshop filter. Martin Evening shows you how to make best use of it
Camera Raw first began life as a plug-in for Adobe Bridge that allowed photographers to process their raw photos via Bridge, rather than rely on proprietary raw-processing software. Since then Camera Raw has evolved to become a sophisticated image editor in its own right as well as providing the core image processing in Lightroom. Since the first release of Photoshop CC, it has also been possible to apply Camera Raw as a filter to RGB or greyscale images, in place of regular image adjustments such as Curves or Hue/Saturation. Some might argue that Camera Raw editing is already available for non-raw images, but this is limited to flattened files saved in the TIFF or JPEG format. And, to be honest, the preference options can make this a really confusing process. Therefore, the Camera Raw filter can be a much simpler alternative. In some ways the Camera Raw filter offers a similar scope to what you can do in Lightroom when editing non-raw files, except that in Photoshop, the Camera Raw filter can be used to target individual layers, or individual image channels as well.
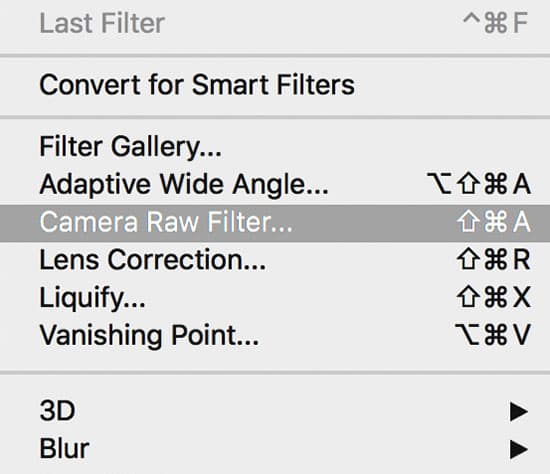
The Camera Raw filter can only be applied to RGB or greyscale images that don’t exceed 65,000 pixels in either dimension. To apply Camera Raw adjustments via Photoshop, go to the Filter menu and choose Camera Raw Filter (Command+Shift-A [Mac], Control + Shift-A [PC]). Ideally, it is best to apply Camera Raw adjustments non-destructively by first converting the image or image layer to a Smart Object (Smart Filter) layer. This allows you to re-edit the Camera Raw settings just as you would when editing a raw image. This can benefit certain workflows. For example, when working with scanned images you can use the Camera Raw filter to apply the capture sharpening. Or, maybe, you’ll feel more comfortable using the Camera Raw Basic panel tone controls instead of Levels or Curves to tone edit an image? There’s also the benefit of being able to apply other Camera Raw-specific adjustments such as Clarity to adjust the mid-tone contrast or Camera Raw-style black & white conversions.
However, some limitations can only be expected, such as features missing from the Camera Raw filter dialog. There are no workflow options (the hyperlink beneath the preview). This is because the workflow output settings are not relevant when processing an image directly in Photoshop – it will already have been rendered to a specific RGB space and bit depth and the histogram RGB values will refer to the document colour space. You can’t save snapshots because there is nowhere to save them. There are no Crop, Straighten or Rotation tools, and there are no lens-profile correction options because there is already the Lens Corrections filter you can use in Photoshop. There is also the overhead that comes from having to create a Smart Object, which inevitably leads to bigger saved file sizes. Above all, if you care about optimum image quality, you shouldn’t really skip carrying out the Camera Raw processing at the raw image stage, as Camera Raw is most effective when it’s used to edit raw images. You can’t expect to achieve the same range of adjustment control on a non-raw image when adjusting, say, the Highlights slider to rescue extreme highlight detail.
The positives though are that the Camera Raw filter is essentially a wonderful convenience to have when working in Photoshop as it can save you having to export an image or layer to apply the Camera Raw processing separately, and it extends the range of image adjustments you can apply when working in Photoshop.
How to filter multiple layers
Credit: Martin Evening
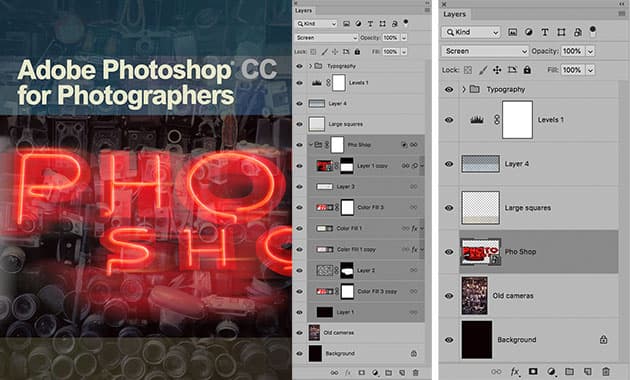
The Camera Raw Filter is not restricted to single layers. You can apply the Camera Raw filter to as many layers as you like. To do this they must first be grouped together within a Smart Object/Smart Filter.
In the example shown here, I grouped together all the layers that were used to create the neon sign effect, and merged these into a Smart Object that could then be filtered using the Camera Raw filter (the easiest way to do this is to choose Filter>Convert for Smart Filters. Once merged as a Smart Object, it is easy to expand these layers again by double- clicking the Smart Object layer to reveal the nested layers, all appearing within a separate, new image document.
Credit: Martin Evening
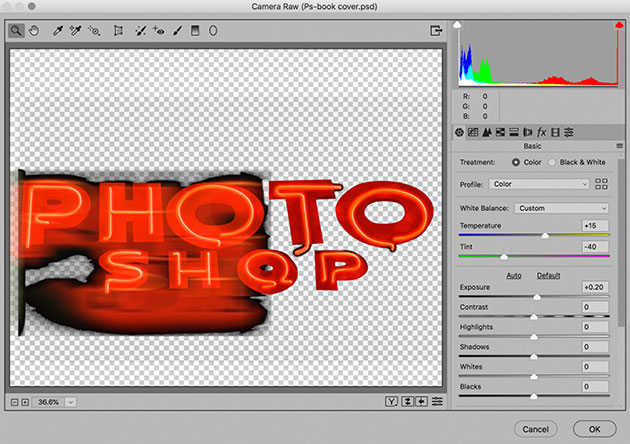
1. Here is a layered image photograph that had been edited in Photoshop. For the next step I ensured all the visible layers were selected and chose Filter>Convert for Smart Filters. This created a Smart Object layer that contained all the selected layers, enabling me to move onto the next step.

Credit: Martin Evening
2. I then selected the Camera Raw Filter, which was applied to a composite of all the layers contained within the Smart Object. Here, I adjusted the White Balance Exposure and Clarity to make the neon sign appear warmer in colour. Once I clicked OK, these adjustments were applied to the Smart Object layer.
Camera Raw filter for video files
Credit: Martin Evening
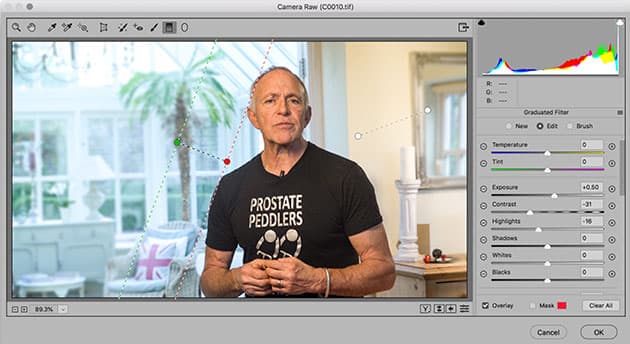
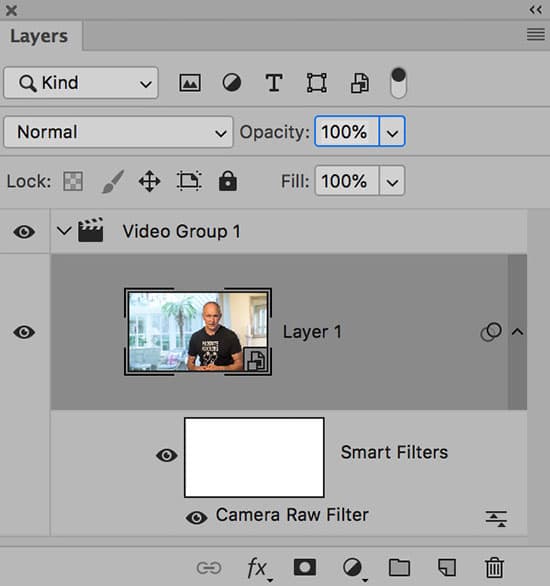
It can sometimes be very useful to apply the Camera Raw filter to video files. First, you’ll have to convert a video file to a Smart Object before choosing to add Camera Raw as a filter. This then allows you to use nearly all the Camera Raw editing tools to improve the appearance of a video clip.
You can also apply the Camera Raw filter to video files, such as in this example. Credit: Martin Evening
In the example shown here, I found it useful to add a Graduated Filter layer to lighten and soften the light in the background and thereby make this clip look more like the others that I had filmed that day, where the lighting was more consistent. Having done this, I could export the edited clip using File>Export>Render Video to export as, say, an MP4 format video clip.
Useful tools in Camera Raw
Credit: Martin Evening
Filter a single layer
If all you want to do is filter a single-pixel image layer element in an image, you can simply select that layer and choose Camera Raw Filter from the Filter menu, just as you would if applying any other type of Photoshop filter. If you want the filter effect to that layer to be reversible, then choose ‘Convert for Smart Filters’ first.
Credit: Martin Evening
B&W conversion tool
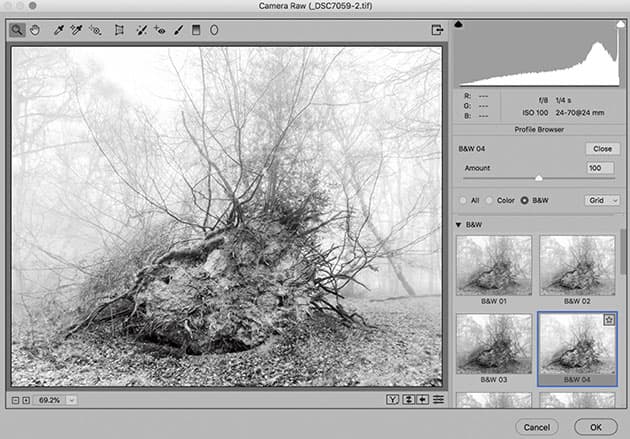
Camera Raw arguably offers more sophisticated ways to convert to black & white compared to Photoshop. Instead of adding a Black & White adjustment layer to the top of a layer stack, you can group all the image layers into a Smart Object, apply the Camera Raw filter and then select from the many black & white conversion options in Camera Raw.
Credit: Martin Evening
Filter individual channels
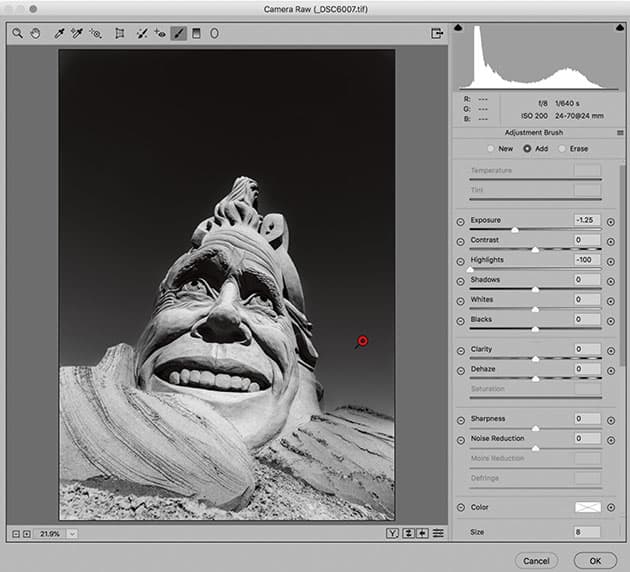
You can apply the Camera Raw filter to individual channels. For example, you can filter the luminosity channel when working with an image that is in Lab Colour mode. Or you can use Camera Raw to refine the look of a mask channel. However, in this mode of operation, certain features such as per-channel curves and Split Tone controls will be disabled.
Credit: Martin Evening
Perspective corrections
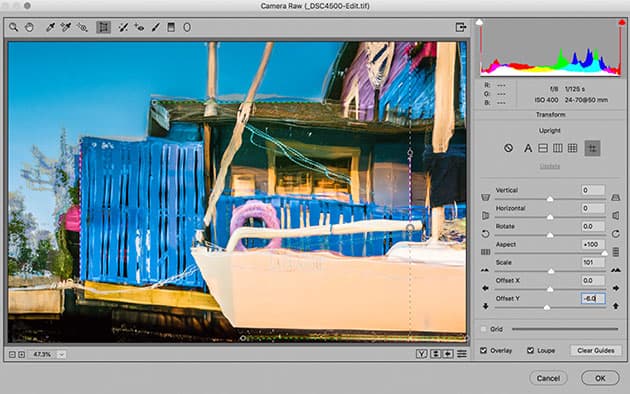
The perspective correction tools in Camera Raw are superior to those in Photoshop and there will be no loss in image quality if applied as a Camera Raw filter. Therefore, you can use the Camera Raw filter to apply Upright adjustments or you can adjust the manual Transform controls to make your images unique and a work of art.
Credit: Martin Evening
Add a creative sharpening layer
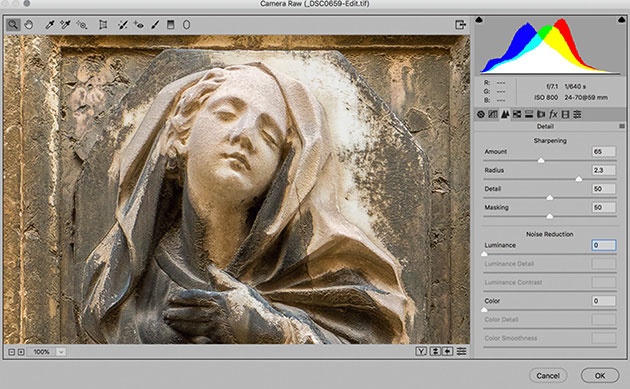
To make your images sharp you can use Camera Raw to apply additional Detail sharpening adjustments that bring out more detail where it is needed most. Having done that, you can edit the Smart Object layer mask to restrict the sharpening to only those areas that require extra sharpening.
Credit: Martin Evening
Darken skies
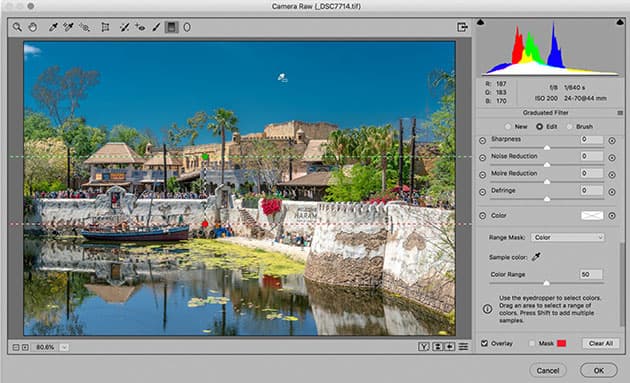
While you can apply an adjustment layer and edit the layer mask to darken a sky, using the Camera Raw filter you can add and edit a Graduated Filter adjustment to achieve the same aim, but have lots more control over the filter effect. For example, you can use the Range Mask to selectively apply an adjustment to the sky colours only.
Martin Evening is a commercial photographer, best known for his knowledge of Photoshop and Lightroom and as an author on digital imaging. His books include The Adobe Photoshop Lightroom Classic CC Book and Adobe Photoshop CC for Photographers 2018.


