It’s never been easier to combine two or more photographs into a single image. Whether creating fantastical images or barely noticeable alterations, image editors like Photoshop have made the impossible possible. In fact, the prevalence of compositing – where we routinely see landscapes with replaced skies, portraits with modified backdrops and all manner of other digital trickery – has fundamentally altered the relationship between photography and truth. To some this might seem like cheating, but like it or not, compositing has become an integral part of modern photography. Whether a composite photo is a true photo at all is open to debate, but for those willing to embrace digital trickery, it’s a skill that can not only lead to eye-catching images and incredible effects, but also makes everyday tasks quicker and easier. Here, we’ll explore some of the key factors in creating successful composites of your own.

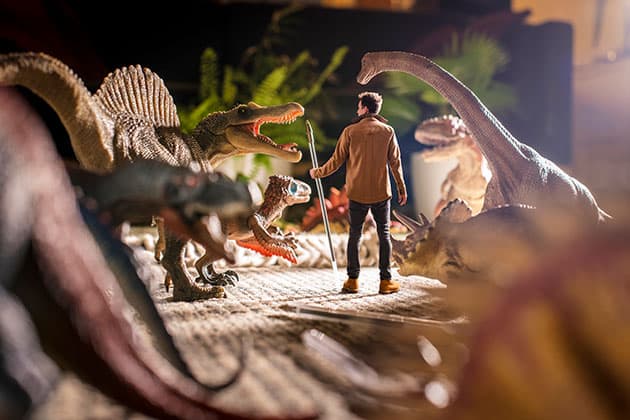
Crafting creative composites is simple as long as the lighting and shadows are consistent. Credit: James Paterson
Photoshop may be integral to creating composites, but it’s only the last step. There’s an art to combining photos that goes way beyond any skill with layers. For conceptual photography, it begins with an idea. This is the fun part, as the possibilities for combining two or more photos in creative ways are endless. Send your dog to Hawaii, make a giant marauding toddler, cross a cat with a hippopotamus… but it’s not all about fantastical concepts – the same compositing techniques can be applied to more mundane tasks like replacing a blinking face in a group photo, enhancing a window view with a better exposure, or merging several lighting set-ups together for a polished still-life photo.
Shooting for composites
The capture stage of composite photography is mostly about executing the concept as brilliantly as we can. But it’s also about making life easy for ourselves. If we do things properly, then the Photoshop work will hopefully be quick and easy. For natural, convincing composites we need to shoot the different components as if they belong to the same scene. This means matching the lighting, camera angles and depth of field. Photoshop can work wonders, but it can’t convincingly merge one photo shot under the midday sun with another captured at dusk. So consistency is key. Matching the direction and quality of light goes a long way towards selling the effect.
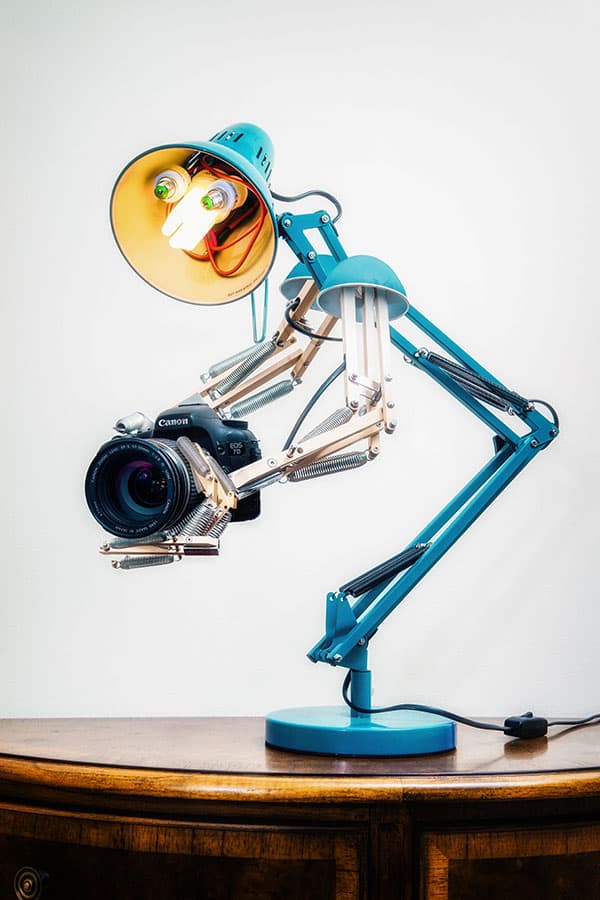
The key to combining images in Photoshop is knowing how to use layers and masks. Credit: James Paterson
Piecing it together
When it comes to piecing the photos together in Photoshop, the key skills to get to grips with are Layers and Masks. Layers let us combine our images while keeping them – or parts of them – independent and editable, like sheets of tracing paper overlaid on top of one another. A Layer Mask simply allows us to hide or reveal parts of the layer. By hiding areas on one layer we’re able to see the adjacent areas on the layers below, which is a hugely powerful feature for all kinds of compositing. It’s just like erasing the unwanted parts of a photo, only with Layer Masks nothing is ever erased – it’s only hidden. So the invisible areas are available to us should we ever need them.
It’s the little touches that can make or break a composite, like a subtly painted shadow, a tweak to the colours or a touch of added image noise. It’s often difficult to tell whether two images will merge convincingly until you start the process, but it is usually easier to piece together if you get it right at the shooting stage.
In-camera vs compositing
Aside from the technique of creating composites, we should also consider the ethics of digital trickery and weigh it against the merits of in-camera capture. Certain genres, like documentary and street photography, demand the truth embodied in a single click. For others, like portraiture, truth isn’t always necessary – where’s the veracity in a person posing for a photo anyway? The same goes for commercial, studio and food photography, where if compositing aids the end result then that’s all that matters.
Even landscapes – the mainstay of the in-camera brigade – can raise interesting questions about the nature of photography and truth. Should a landscape be simply a record of the scene in a single shot? Or is it OK to blend two exposures taken moments apart, and if so is this more truthful than blending two taken an hour apart? What about the biggest crime for many landscape photographers – comping in a new sky? Is there greater reward in experiencing a moment or manufacturing it afterwards? Is it more important to document a scene or create a mood?
Isn’t this all just cheating?
These are important questions for all photographers. Opinions differ on where the line should be drawn, but for me it is crossed if a photo purports to present facts, but is instead fiction. In essence it’s a question of honesty. The medium has always been subjective and – from Man Ray to Jerry Uelsmann – manipulation has been going on long before digital. But like it or not, Photoshop has moved the goalposts to such an extent that, when presented with a fantastic photo, many of us might instinctively start hunting for the seams. In fact, when you consider modern news coverage, the recent controversies at Facebook and the rise of Instagram influencers, we’re often right to be sceptical of what we see.
This erosion of trust can be demoralising for those who strive to capture the perfect shot in-camera (and if by chance they do, they may be accused of Photoshopping it). However, while it offers neither the romance nor the kudos of in-camera perfection, composites take skill of a different kind, and in this digital world it’s a potent weapon in any photographer’s creative arsenal. Thankfully photography is about personal expression, so we
can draw our own lines wherever we choose.
Layer Masks explained
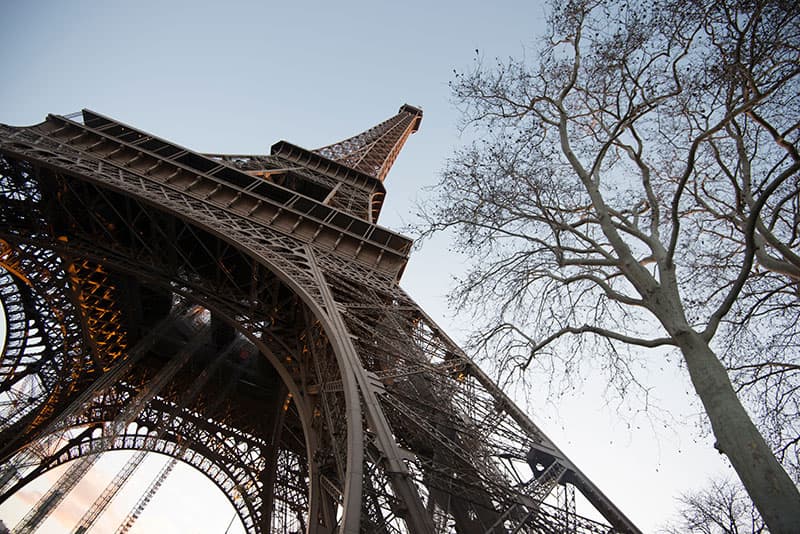
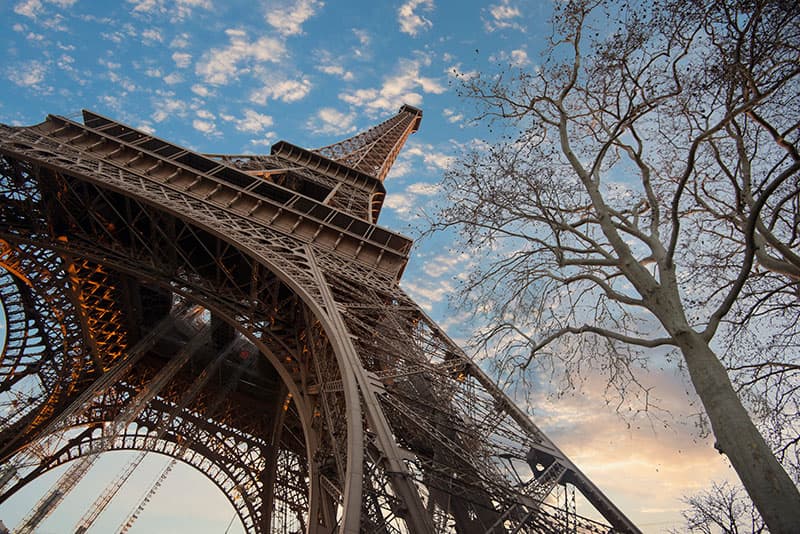
Before (top) after (bottom). Credit: James Paterson
Masks are central to all kinds of composites. They allow us to hide parts of a layer – like the original dull sky here – thereby revealing the layers below. The simplest way to make a new mask is to click the Add Mask icon in the Layers Panel. You can then start painting over the image with either black to hide areas or white to reveal them. When doing this, it’s also crucial to have the mask thumbnail in the Layers Panel highlighted, otherwise you might find you’ve painted black over the original image by mistake. When editing a mask, you can hit X to switch between black and white, and Alt-click the mask thumbnail to toggle a handy mask view.
Often the best way to begin a mask is by making a selection. This way we can utilise Photoshop’s powerful array of selection tools to isolate intricate parts of the photo. Once done, run the selection through the ‘Select and Mask’ command, as here it can be refined for a better edge. Finally, the selection can be converted into a Layer Mask, either using the Select and Mask’s Output options, or by using the Add Mask icon when a selection is active.
Shooting for a composite
When shooting separate photos that are intended for a composite, they’ll merge more naturally if they are photographed under similar lighting conditions with consistent shadows. For the scene here I used a small posing doll in order to capture natural shadows, cast by a lamp positioned behind and to the right of the scene. I then captured myself in a similar pose, again lit with a light behind and to the right. The consistent shadows made it easier to combine the two shots later. As well as the direction, it also helps to have a consistent quality of light. The size of a light source dictates how diffuse it will be, so a larger source results in softer light and gentler shadows. Of course, the size of the light will change in relation to the size and distance of the subject, so while a smaller lamp was used to light the miniature scene, a proportionally larger softbox was used for the full-size portrait, resulting in similar quality of light in both frames.
Compositing in Photoshop
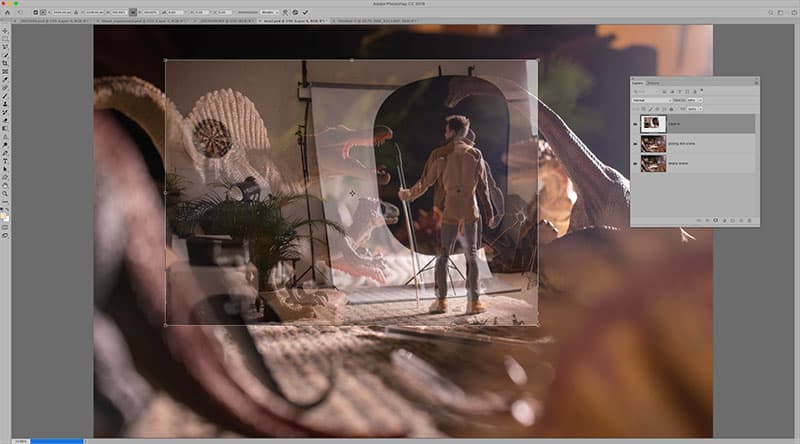
Credit: James Paterson
1. Copy, paste and position
Copy one image – or part of it – into another in Photoshop. The easiest way to do this is by dragging it in with the Move tool. Once done, we can roughly position it and use transform (Cmd/Ctrl+T) if it needs resizing or rotating. Temporarily lowering layer opacity can make positioning easier.
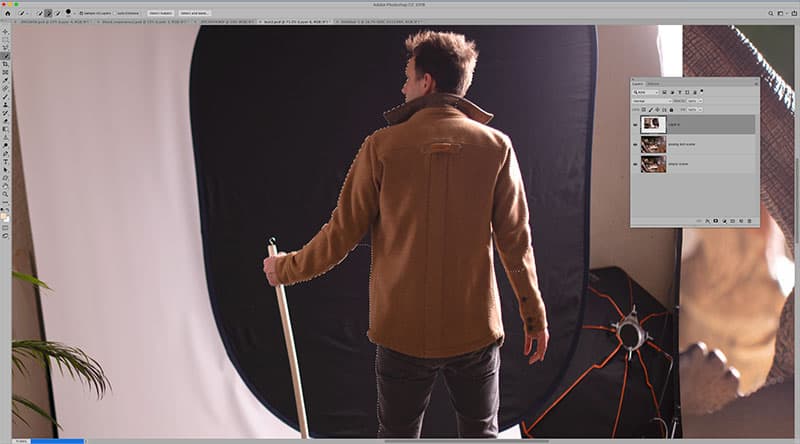
Credit: James Paterson
2. Make a selection
A composite will only be a success if the seams are hard to detect, and this relies on a precise selection. The Quick Selection tool is one of the best at isolating complex areas – we simply paint over the area and the tool seeks out edges for us. If it goes wrong, we can hold Alt and paint to subtract areas.
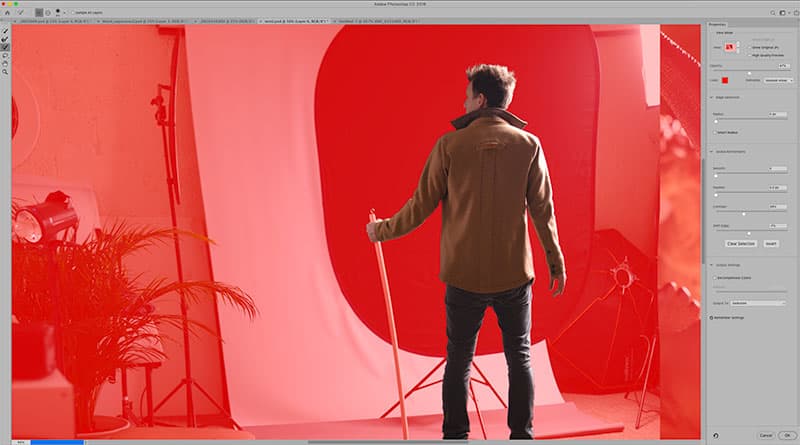
Credit: James Paterson
3. Refine the edge
The Select and Mask command (Select>Select and Mask) lets us smooth and refine our jagged selection. The key setting here is to define the Radius and use the Refine Edge brush, which lets us expand the area of refinement along the selection edge – perfect for tricky areas like hair or fur.
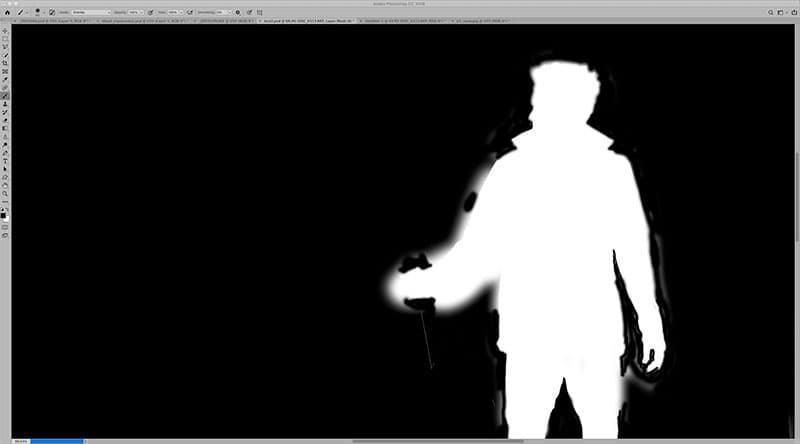
Credit: James Paterson
4. Fine-tune the mask
Next we convert our selection into a Layer Mask using ‘Output Settings’ in the Select and Mask command. Any areas outside the active selection will be hidden. We can fine-tune the mask by highlighting the Mask thumbnail and then paint with black or white. You can Alt-click the mask thumbnail for a mask view like this.
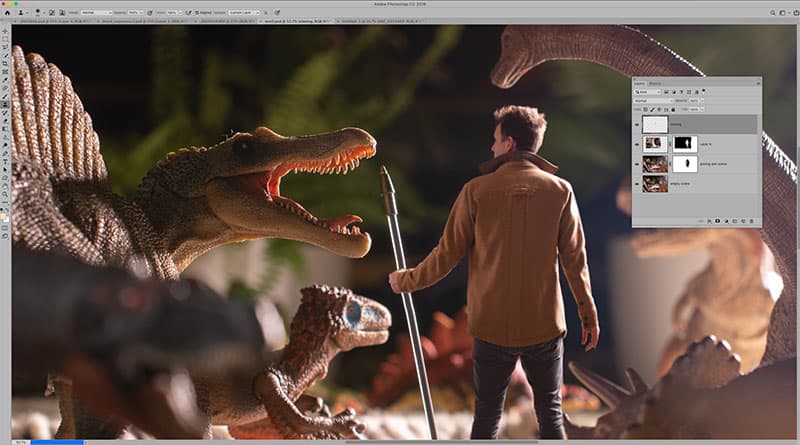
Credit: James Paterson
5. Sell the effect
Once our images are combined, they may require some cloning to tidy up rough patches, or reshaping of the image with the Liquify command. Here we’ve used Edit>Puppet Warp, which lets us position and pull anchors to alter the shape of the body, allowing us to match the pose to the shadow underneath.
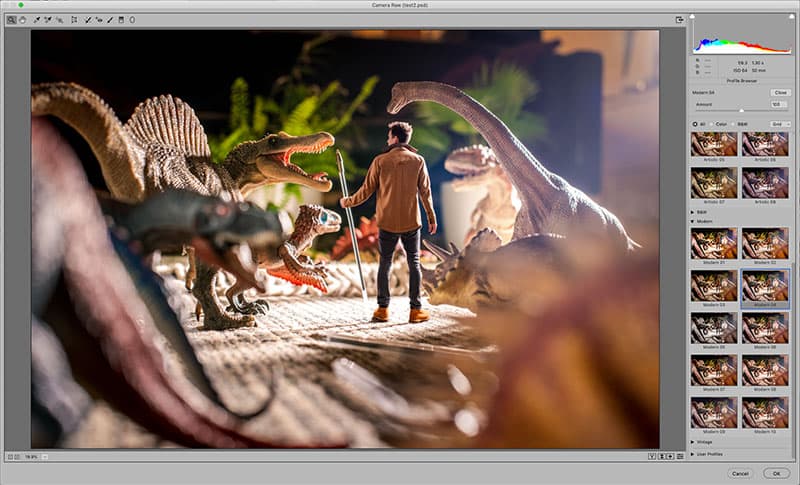
Credit: James Paterson
6. Enhance the tones
Bad composites are let down by mismatched tones, so it’s important that they match in both photos. Use Adjustment Layers, which affect all the layers below them. It also helps to add tonal effects on top of all layers at the end of the process, as we’ve done here to a merged layer using Filter>Camera Raw filter.
Composite case studies
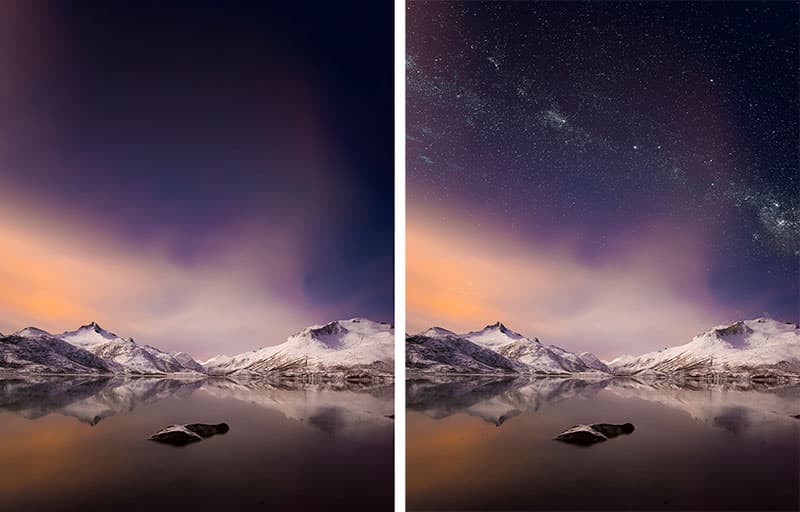
Credit: James Paterson
Try Blend Modes
Layer Blend Modes in Photoshop can be used to combine photos in all kinds of creative ways, from double exposures effects (use the Screen mode) to adding stars to the night sky with the Lighten Blend Mode here. Sometimes a simple Blend Mode change can save lots of time making complex cutouts.
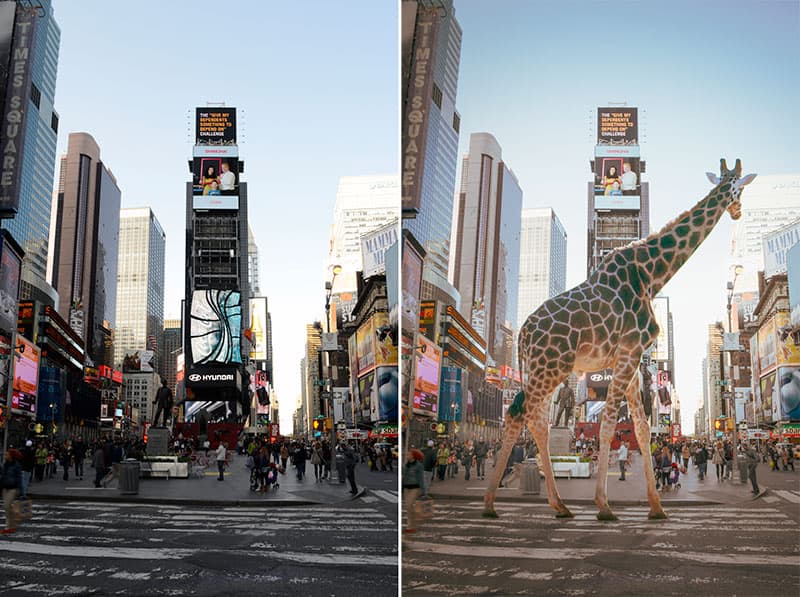
Credit: James Paterson
Consistent camera angles
Here the upwards camera angle between the two shots and the consistent focal length helps the images to match, and the gentle backlighting in both scenes makes it much easier to merge them convincingly. It also highlights the importance of leaving negative space for the subject to be dropped in.
Credit: James Paterson
Match the tones
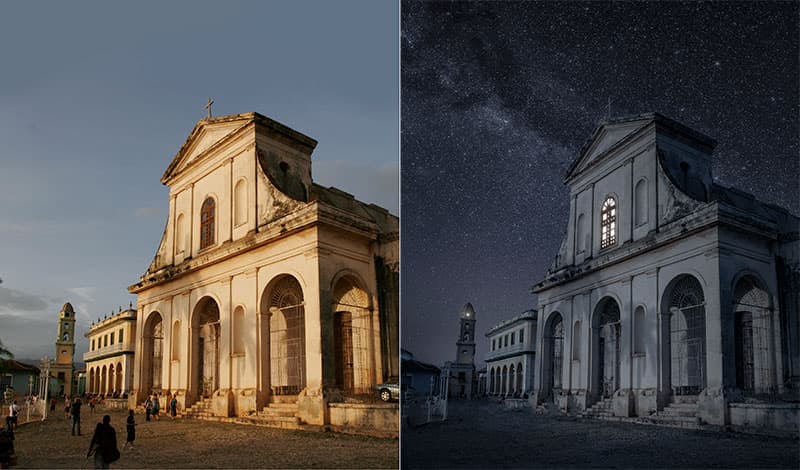
This shows the importance of controlling the tones in a composite photo. The warm glow of the late afternoon sun is transformed into moonlight using a Color Balance Adjustment Layer to dial in a strong blue and cyan cast. Little touches like the glowing windows help to sell the effect.

