How to apply a selective colour adjustment
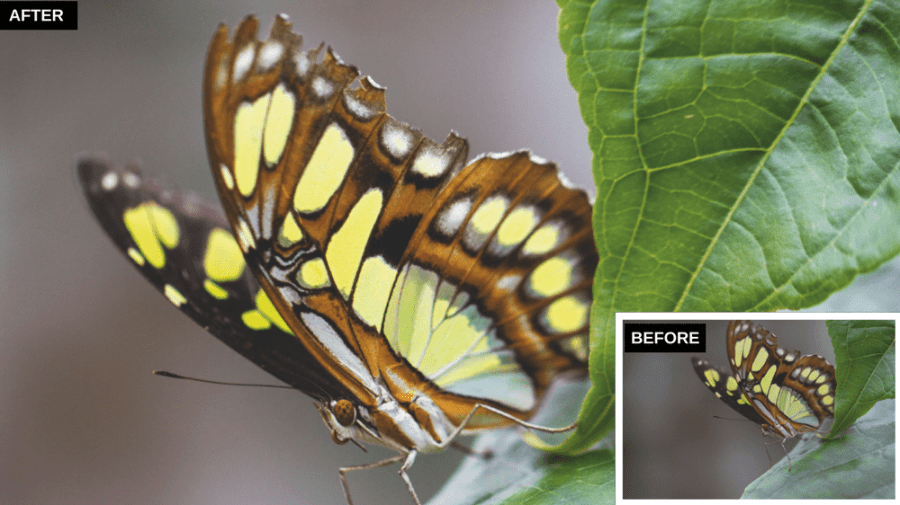
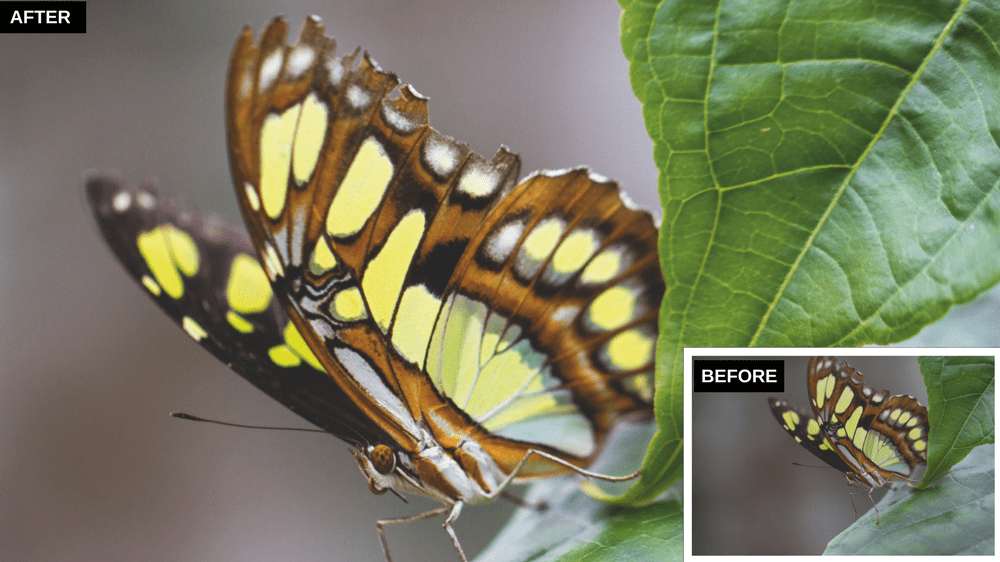
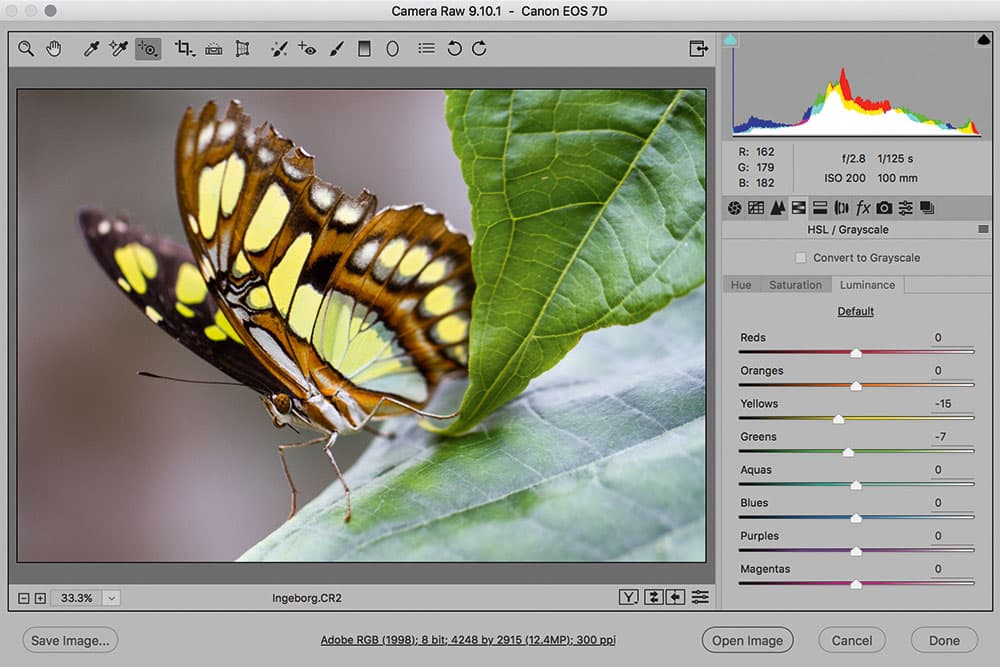
This image by Ingeborg Gibbon is flawless. It helps, of course, that she shot it using a good-quality macro lens. The camera was most likely mounted on a tripod and the butterfly subject is beautifully positioned in the frame with a narrow depth of field, where the head and body are in perfect focus. When photographing flowers or insects, some things may contain more colour detail than can be seen on the display. So in this instance I used a selective colour adjustment to darken the luminance of the yellow patches on the wings.
1. Basic panel adjustments
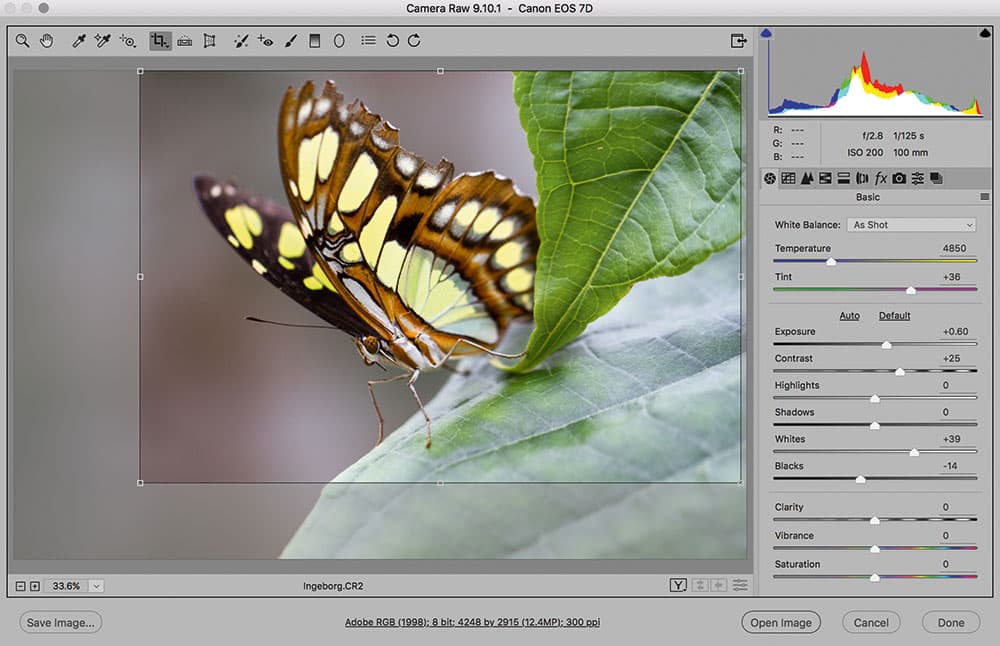
First, I opened the image in Camera Raw, selected the Crop tool and cropped more tightly around the butterfly and leaf. In the Basic panel I adjusted the Contrast slider to add more contrast. I followed this by holding down the Shift key as I double-clicked to auto-set the Blacks & Whites sliders.
2. Selective colour adjustment
Next, I went to the HSL/Color/Grayscale panel and clicked on the Luminance tab. I selected the Target Adjustment tool from the toolbar, clicked on the yellow of the butterfly’s wing and dragged downwards to selectively darken these colours. At the same time, I increased the Vibrance.
3. Sharpen the image
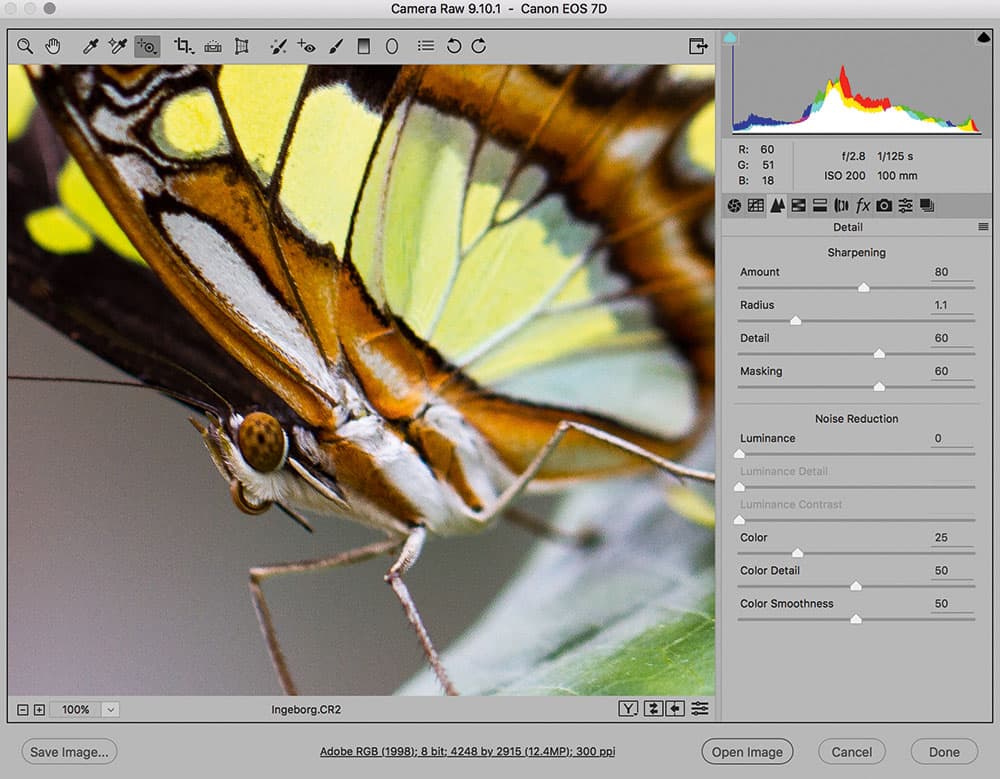
I selected the Detail panel where I adjusted the Sharpening sliders to add more sharpness to the butterfly. Here, I applied an aggressive Amount setting combined with a high Detail and high Masking setting. This added more sharpness but without emphasising the underlying noise in the image.
Detail panel Masking slider
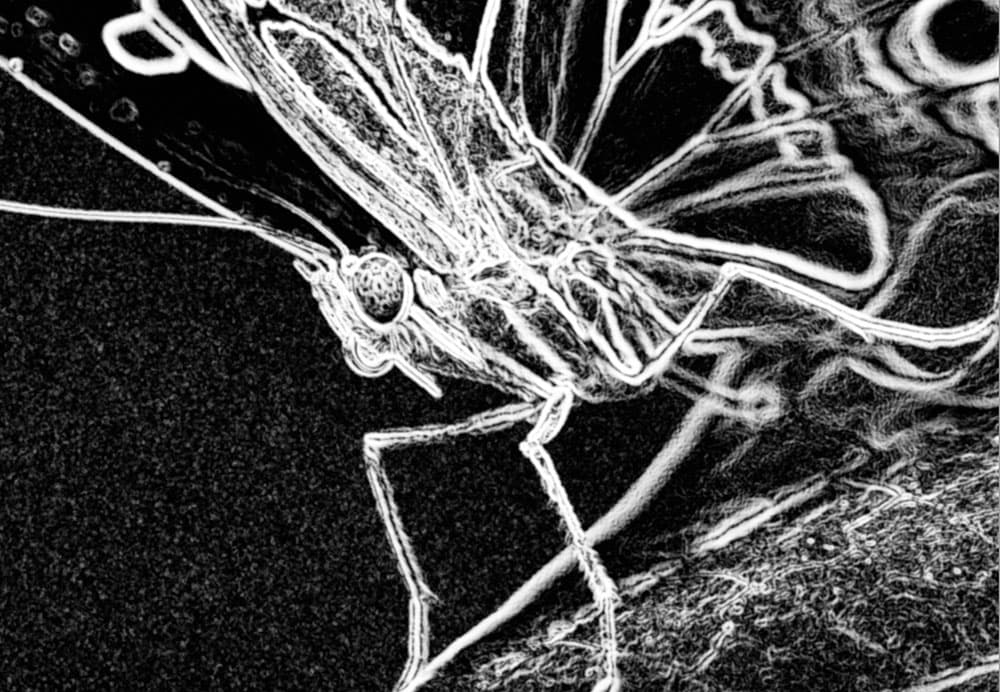
The Masking slider in the Detail panel can be used to protect flat areas of tone from being sharpened. By increasing the amount of Masking that’s applied, you can afford to increase the Amount and Detail sliders to add more sharpness to the fine edges of a photo, while preventing the flat-tone areas from being sharpened. For example, when sharpening a portrait, you will want the sharpening to add sharpness to facial features such as the eyes, but not to the skin-tone texture. Hold down the Alt key as you drag the Masking slider and you will see a temporary mask preview. White shows the areas that will be affected by the Detail panel sharpening, while black shows the areas where the sharpening effect will be masked.
Martin Evening is a noted expert in both photography and digital imaging. He is well known in London for his fashion and beauty work, for which he has won several awards. Martin has worked with the Adobe Photoshop and Adobe Lightroom engineering teams over many years and is one of the founding members of a software design company. Visit www.martinevening.com.
[collection name=”small”]

