With so many cameras now shooting 4K a lot of people have computers that will struggle to edit the footage. However, editing 4k footage on a low-spec computer is still possible with a little workaround. We explain how.
We’ve all been there at some point. You try to edit a video on your computer only to find it skips and jumps, making it virtually impossible to edit with any real finesse. Obviously the ideal solution is to splash the cash and buy a new computer, but that isn’t always possible. Or it could be that you want to edit 4k video on your laptop whilst on the go, but it simply isn’t powerful enough.
Thankfully there is a way you can still edit 4k footage, or any other high resolution video, on a computer that is underpowered.
In this article I’ll explain how I am able to edit 4k video on a 2011 Apple Macbook Air.
Editing 4K: The Basics
If you can’t edit 4k footage properly then you can always use proxy files and offline editing. Not sure what this means? Basically it means making a copies of the 4k video files at a lower resolution. You then load these lower resolution files in to your editing software and editing using these. Before you export your finished edited video you replace the low-resolution, proxy, files with the full resolution 4K ones. Then all that is left is a final colour edit and to export the final 4K file.
With this technique you can edit and export a 4K video even if you don’t have a computer or monitor that is suitable for editing 4K video.
Now lets show you how to do it in Adobe Premiere.
Create Your Proxy Files
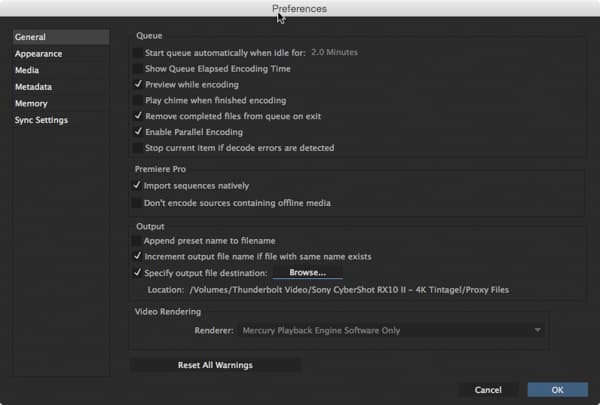
General Preferences in Adobe Media Encoder
1. The first job is to create the lower resolution, or proxy, files that you will be using. To do this open Adobe Media Encoder application (which comes with Adobe Premiere).
2. In Media Encoder go to Preferences then in the General tab tick the Specify Output Destination box and chose were you want the files to go. I would suggest saving the new files to a folder called ‘Proxy’ within the same folder as the original 4K videos. It is important to use a seperate folder as this way all of the low-res files can maintain the same file name, rather than having to have a suffix. Keeping the names the same makes linking to the 4K footage later a lot easier.
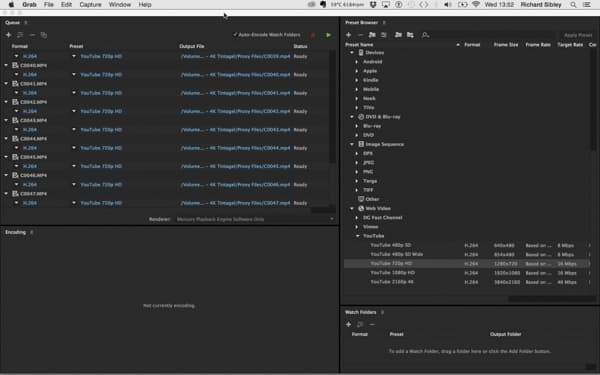
Adobe Media Encoder exporting 4K files as 720p files
3. Now choose a suitable resolution and file type to use for the proxy files. Here I have chosen the YouTube 720p 25fps option as my Macbook Air can easily handle this resolution, and the 25fps matches the frame rate I shot the 4K footage at.
4. With the preset selected, load in all of the 4K video files that you wish to downsample and hit the play button to begin batch processing them all.
Editing In Adobe Premiere
5. In Premiere you need to load all of the proxy clips that you have just created in to the new project. Drag one of the clips on to the timeline to create a new sequence.

Adobe Premiere 4K Sequence Settings
6. Now go Sequence>Sequence Settings and setup the Video settings so that the resolution and frame rate matches that of your 4K video, in this case 3840 x 2160. In the Video Previews settings, change the resolution so that it matches the resolution of the proxy, files, in this case 1280 x 720.
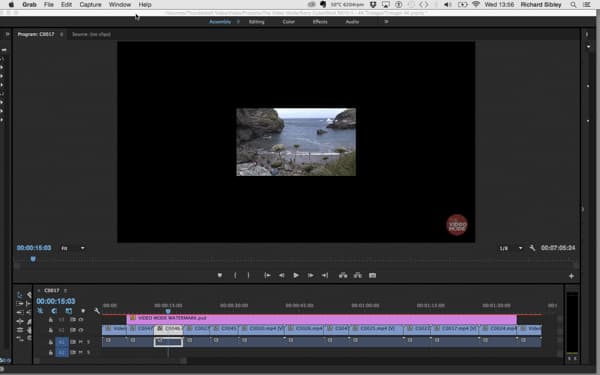
720 footage in a 4K sequence
7. With this now done you can drag all of your clips on to the timeline. However, you will notice that as they are lower resolution than the 4K sequence settings, they only take up a fraction of the frame. To fix this select the clips, right-click (or control click on a Mac), and select Scale to Frame size. This will now stretch the videos so that they fill the frame.

Use Scale to fit to stretch the 720 footage to the size of the 4K sequence
8. You can now edit all of your video as you usually would, but with footage that is actually playable on even a low-spec computer.
Finishing Off
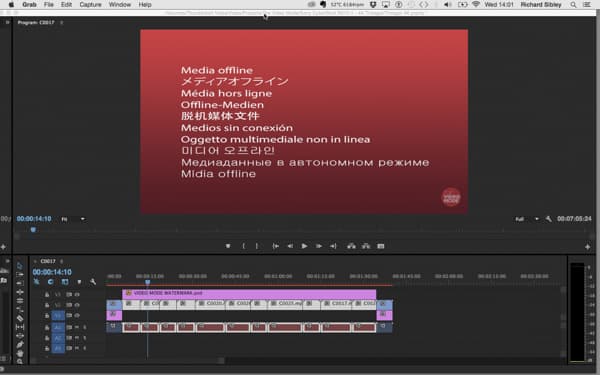
Make Offline
9. Once you have edited the sequence it is time to replace the footage with the original 4K footage that you shot. To do this select all of the video clips, right-click and chose Make Offline. You should now see a red warning screen on all of the clips you have made offline.
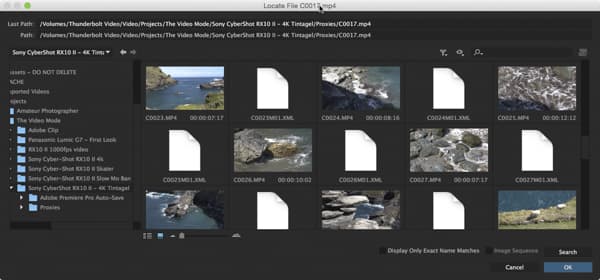
Link the file names to the original 4K files
10. Now we need to link the clips to the 4K footage. To do this right-click on the clips again and this time select Link Media. A new window will open up asking you to find the missing files. Click on Locate and in the next window navigate to the folder with the 4K files in. Adobe Premiere is now intelligent enough to look for the missing files by matching the files names to the files name of the proxy files. Simply click ok. If you changed the name of any files, you will have to select all of the files manually, which is why we put the lower resolution ones in a different folder to begin with: it means you can use the same file name.
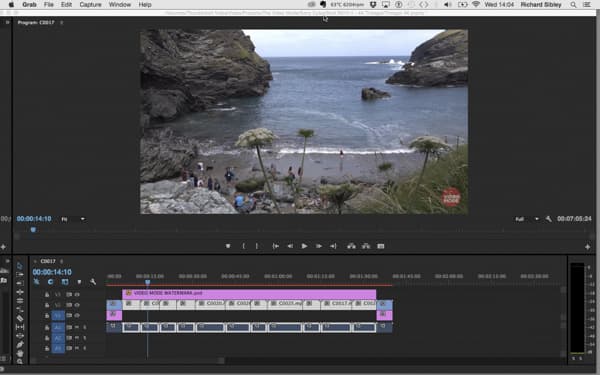
Final 4K video footage
11. Now back in Premiere all of the video files should now be the 4K originals. If you need to make any colour adjustments, do them now, as you should always do this to the original footage which will be much more detailed. This shouldn’t be too intensive a task as you only preview the effect on an individual frame.
All that is left to do is export at 4K. So even though you may struggle to watch it at that resolution, others will be able to enjoy your video and you will be future proofing it so that it will still look good in a few years time.