With the first signs of spring upon us, it’s time to get outdoors and brush up on your shooting skills. We speak to four pros to get their tips on capturing the best of British nature – don’t forget to enter your best shots into Round Two of APOY as it’s on the ‘Natural World’. The closing date is tomorrow!
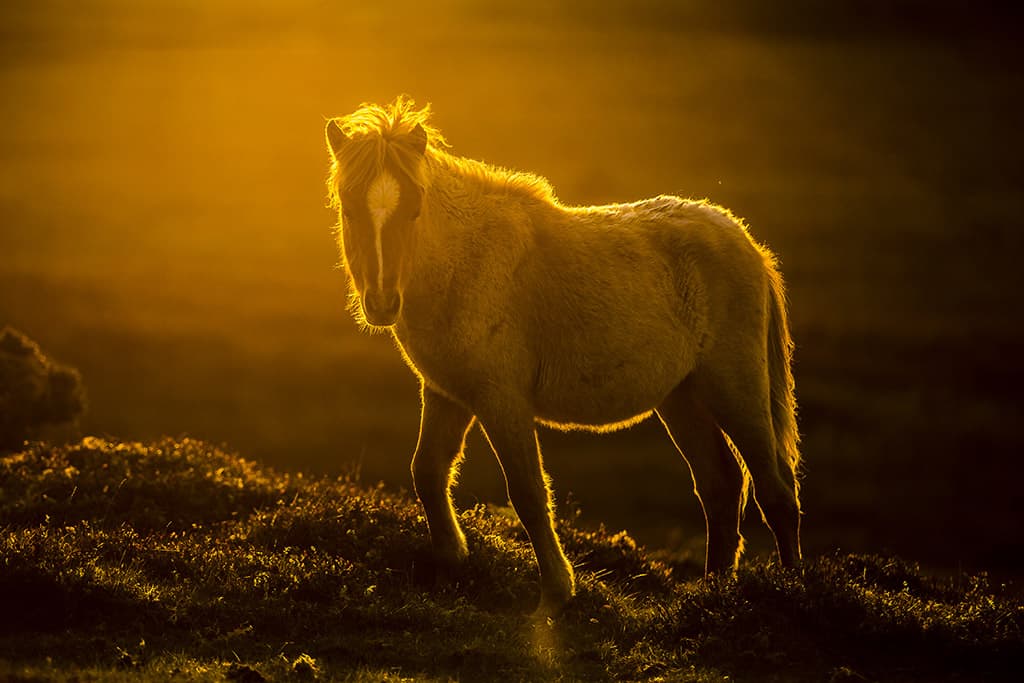
Photographing Mammals: your guide Kevin Morgans
Kevin is a multi-award-winning wildlife photographer and photographic guide. His work celebrates the best wildlife the British Isles has to offer from its highest peaks to its beautiful coastline. See more of his work at his website.
Since the turn of the year, the nation has been on lockdown, making it difficult to get out with our cameras and do what we love most. While it feels like our lives have been put on hold, the natural world has not stopped.
Wildlife is still going about its daily routines as normal, albeit under less pressure from humans. With the days now starting to lengthen, spring is just around the corner. This is one of the busiest times for our nation’s wildlife as they set about preparing for the upcoming breeding season.
Work locally
Photographing in your local area allows you round-the-clock access to be on location quickly when the perfect conditions arise. Being able to explore your local patch freely and getting to know what wildlife is accessible, you’ll soon build up a good knowledge of knowing where and when to find different species.
So when the conditions are perfect, you know where to be and are able to manoeuvre freely, exploring every possible angle and manipulating light to your advantage. The way I view photography is it is never about the subject but the light.
Set a long-term project
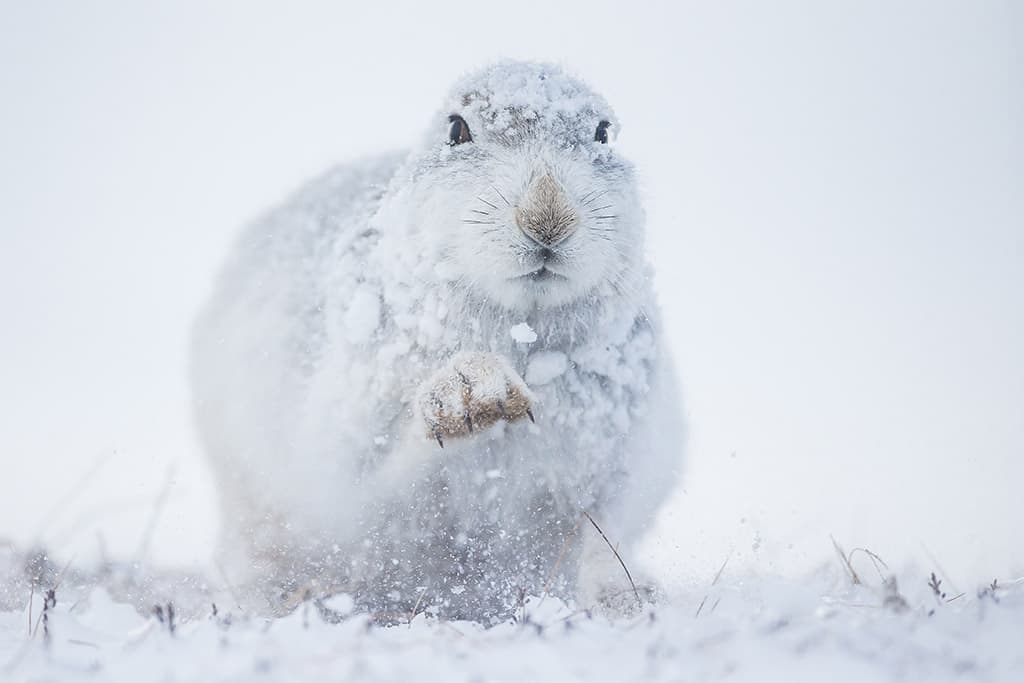
Each photographer has their own way of working. I like to work on long-term projects with an individual species. Over the past few years I have worked extensively with two species, the Atlantic puffin during the summer months; and the UK’s only true Arctic species, the mountain hare, during the cold winter months.
Working with just one or two species over an extended period of time has allowed me a detailed insight into their lives, witnessing many forms of secretive behaviour and unique photographic opportunities, which has only been possible by spending countless hours watching these amazing animals. Dedicating as much time as you have available to one species can only be beneficial to the images you produce.
Think outside the box
When starting a new photographic project, I find it helps to see what images of your chosen species are out there already; be it on social media, books, magazines or the internet. Using the mountain hare as an example, just look at the number of images that appear in our social feeds each winter.
You need to look at these images and think ‘what hasn’t been done’ – the bar has been raised higher with these species than no other. But always remember: however well a species has been documented, there is always a new image to be had.
Don’t be afraid to break the rules
Don’t be afraid to take a chance and break the core ‘rules’ of photography. Photography isn’t about pleasing everyone, it’s about getting a reaction. Shooting outside your comfort zone allows you to tread your own path.
I’ve often found drawing on your emotions and not what the photography handbooks tell you is a great way to produce a style of photography that reflects your own style. Ultimately, shoot what you love and not what you think others will.
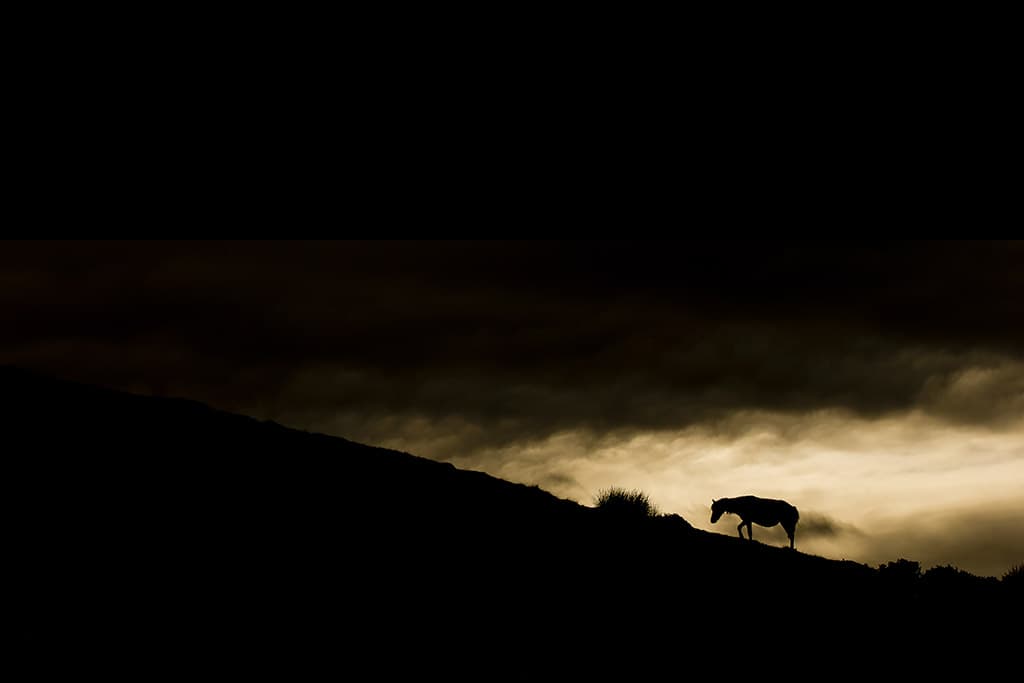
Embrace the weather
Typically, the weather in spring is a mixed bag of cloud, rain and whatever else the British weather chooses to throw at us. Meaning, if we make the decision to wait for the beautiful golden tones of sunrise or sunset, we may be waiting a long time. But don’t get downbeat when the weather isn’t in your favour, embrace it.
Often the best images can be achieved in the worst weather. Shooting in wet conditions can come with its own challenges, such as keeping yourself and your kit dry. The longer you can stay out in these conditions, the more chance you have of producing unique imagery. Just make sure you have the appropriate apparel!
Kevin’s best kit
- Waterproof camera cover – Having a good waterproof cover is essential when it comes to protecting your expensive camera gear in wet and wild weather. It allows you to keep shooting in conditions when others may have already packed up and gone home.
- Spare batteries – Working with accessible species allows you to experiment with many different photographic techniques and lighting. This means you will be taking a lot more images than normal, so don’t be caught out, always pack a spare battery.
Photographing Birds: your guide Andrew Parkinson
Andy is a Nikon ambassador and a contributing photographer to National Geographic magazine. He’s been awarded in all of the world’s biggest wildlife photography competitions and he runs his own photographic tour company, leading photographic adventures all over the world. See his website and Instagram @andyparkinsonphoto
As the cold dark days of winter start to recede, new life springs forth in the coming months. With the increasing day length and warming temperatures, hedgerows, forests, lakes and coastlines suddenly erupt into activity, filled with the sound of bird song.
With our avian friends sporting their very finest breeding plumage there is no better time to photograph them, wherever in the UK you might find yourself. Outlined below are some of my top tips for which species to seek out, what behaviours to watch out for, and how you can optimise your opportunities by understanding the importance of accurate exposure, light and perspective.
Coastal birds
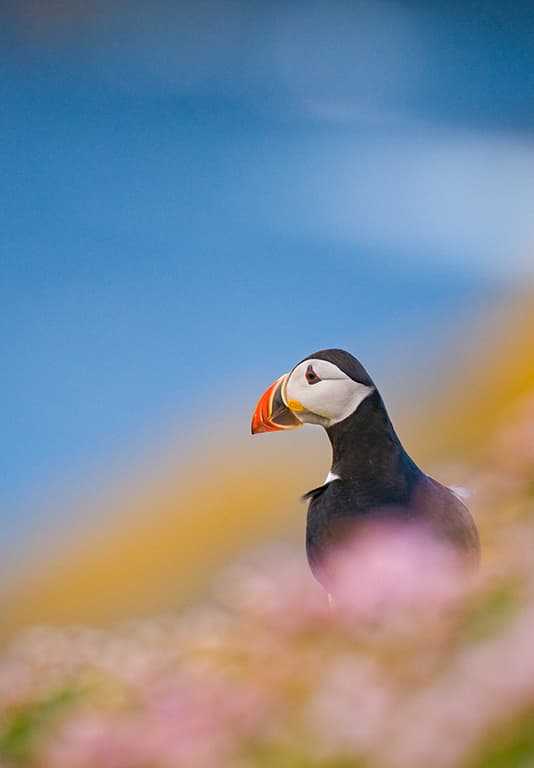
If you are able to travel, or living in proximity to the coast, then late April-May is a great time to photograph one of our most iconic and identifiable species, the Atlantic puffin. Endlessly entertaining yet surprisingly diminutive, these characterful auks are difficult to take a bad picture of. In some parts of the UK, coastal thrift will have already emerged creating a fantastically colourful palette amongst which to frame them.
Alternatively, find a perspective where you can watch them coming in to land. These fast flyers will certainly test your reflexes so concentrate on using the central focusing point as this is the most tenacious and grippy. If you do get lucky, their bright orange legs will create an additional burst of colour in the frame.
Stay local
There can be no more salient piece of advice in these current times than to enjoy the many and varied advantages of staying local. Not only can you react more quickly to a sudden improvement in weather but by investing the time in getting to know your local species, you will develop an encyclopaedic knowledge about their likely behaviours.
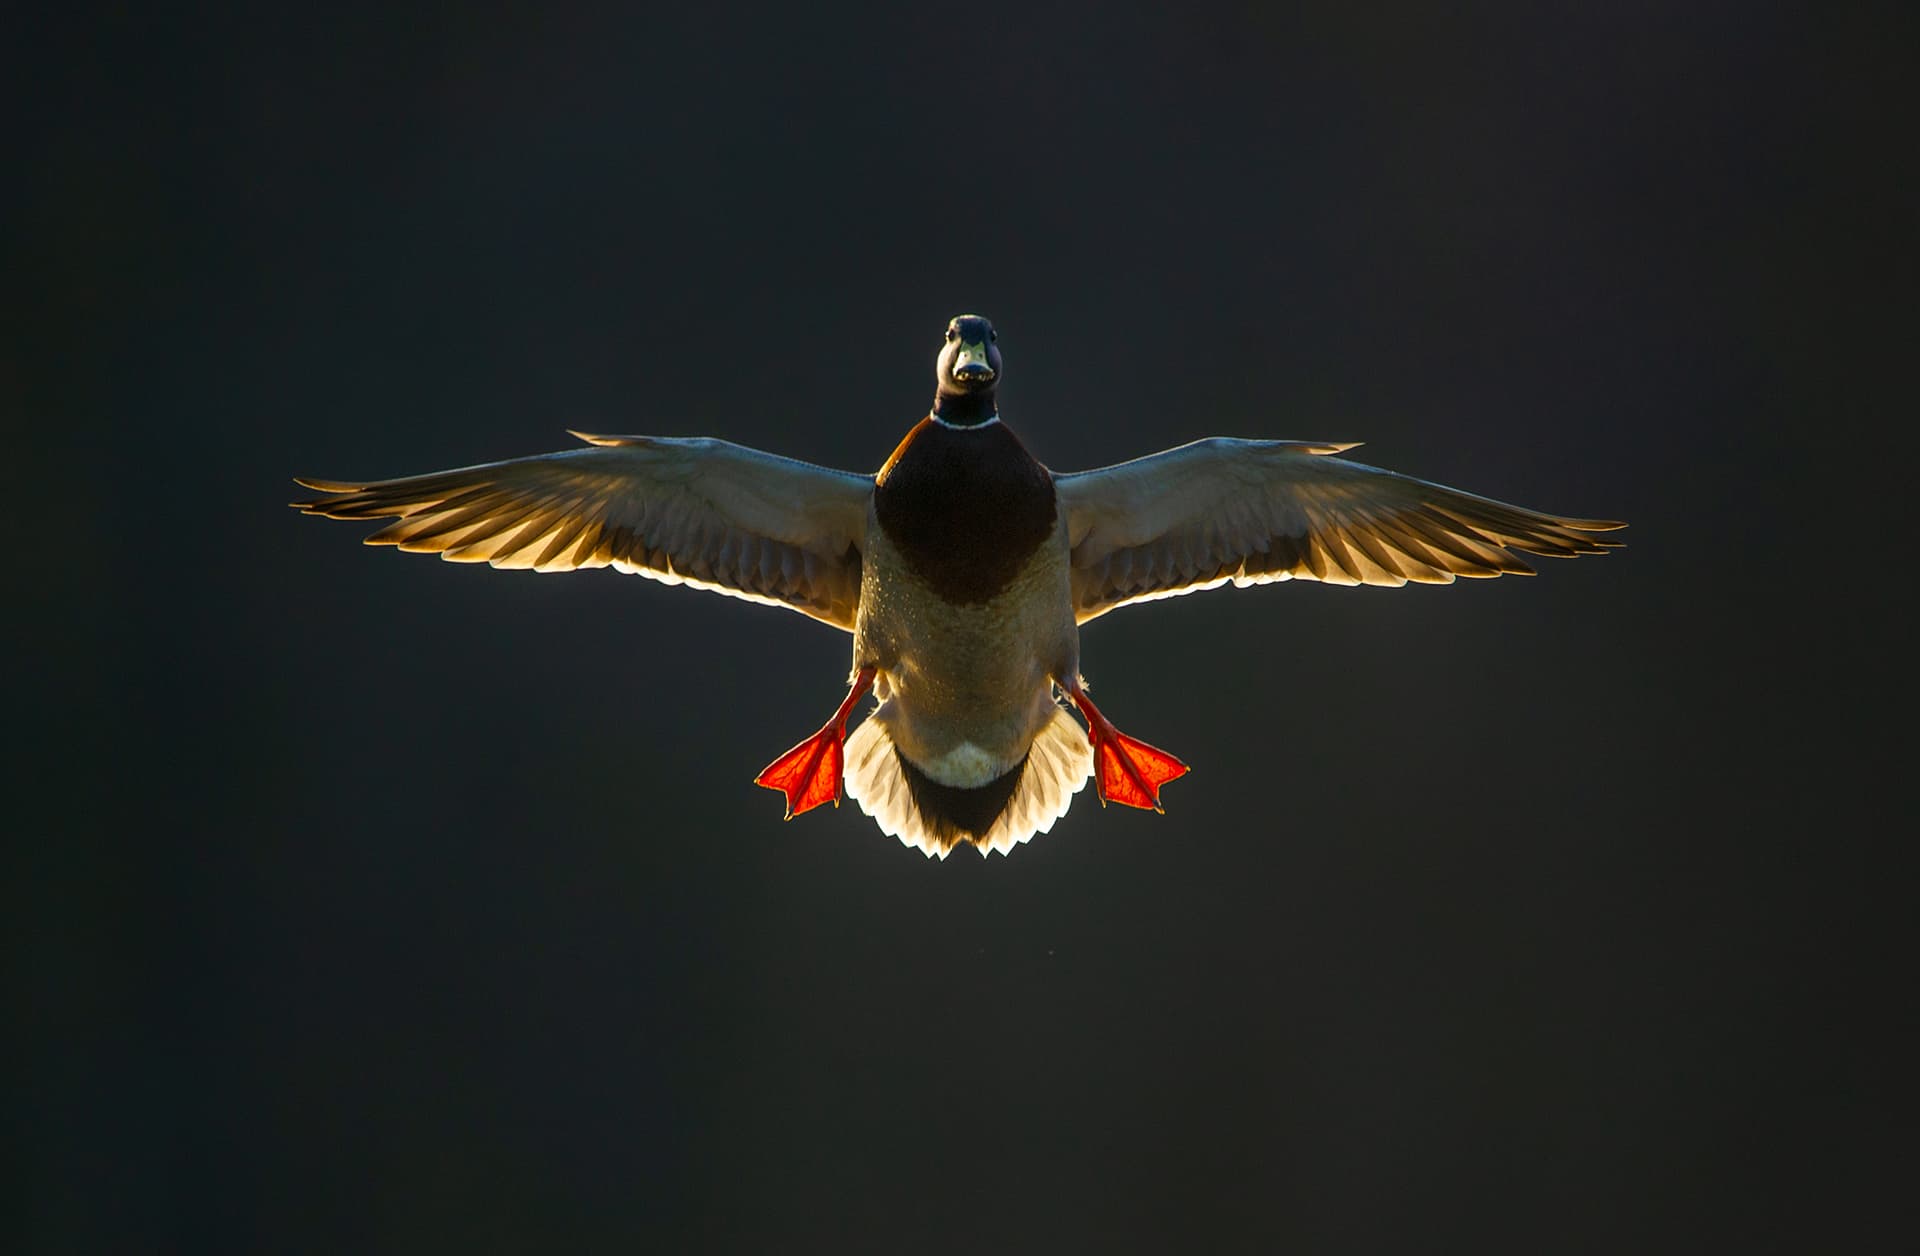
You will also quickly work out the ever-changing fall of light and which vantage point offers the best perspective. If producing the very highest quality image is your primary goal, then this is the single best way to achieve it. Remember, it does not matter how mundane the species is, even a mallard photographed in beautiful light will make for a beautiful image.
Courtship rituals
Some bird species have the most exquisite and elaborate courtship rituals, and none is more elegant and refined than that of the great crested grebe. The peak of this behaviour is in March, but it can still often be seen throughout April on lakes and waterways throughout much of the country.
Don’t worry if you can’t get close enough as you can still produce compelling and evocative images by shooting them backlit (with the sun behind them), using their distinctive silhouettes enshrouded in dawn mist. Head out on crisp, clear windless mornings to maximise your chances and aim to expose to retain detail in the mist itself, thereby capturing the extraordinarily warm colours.
Know your subject’s behaviours
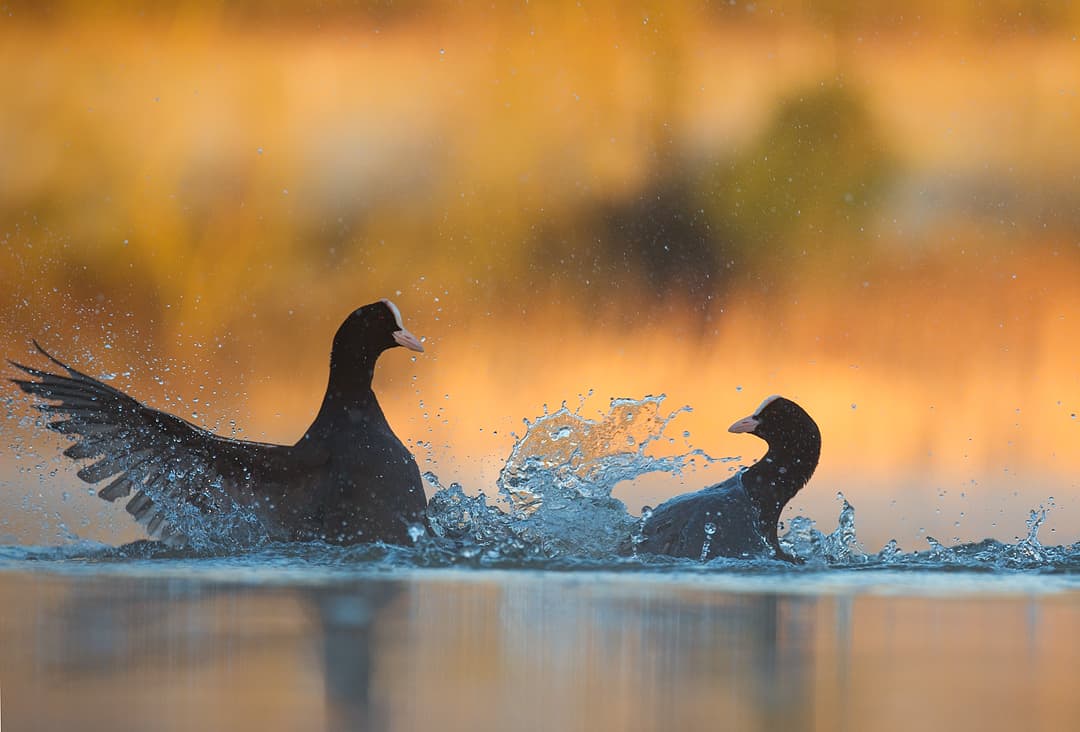
This often locally acquired knowledge is so beneficial when it comes to knowing when certain behaviours are more likely to be displayed. March and April are the peak of the coot fighting season and I’ve enjoyed hundreds of hours watching these characterful and engaging birds chase, fight and squabble.
If possible, aim to shoot at, or as close to water level as possible because this will produce the most dynamic images. If you have a lake near you then scout around it, looking for places where you can shoot from a lower perspective. I often sit in reservoir outflows where I can sit, warm and dry, my camera stabilised on a tripod but at water level. This is how I captured these coots fighting at dawn.
Explosive behaviour
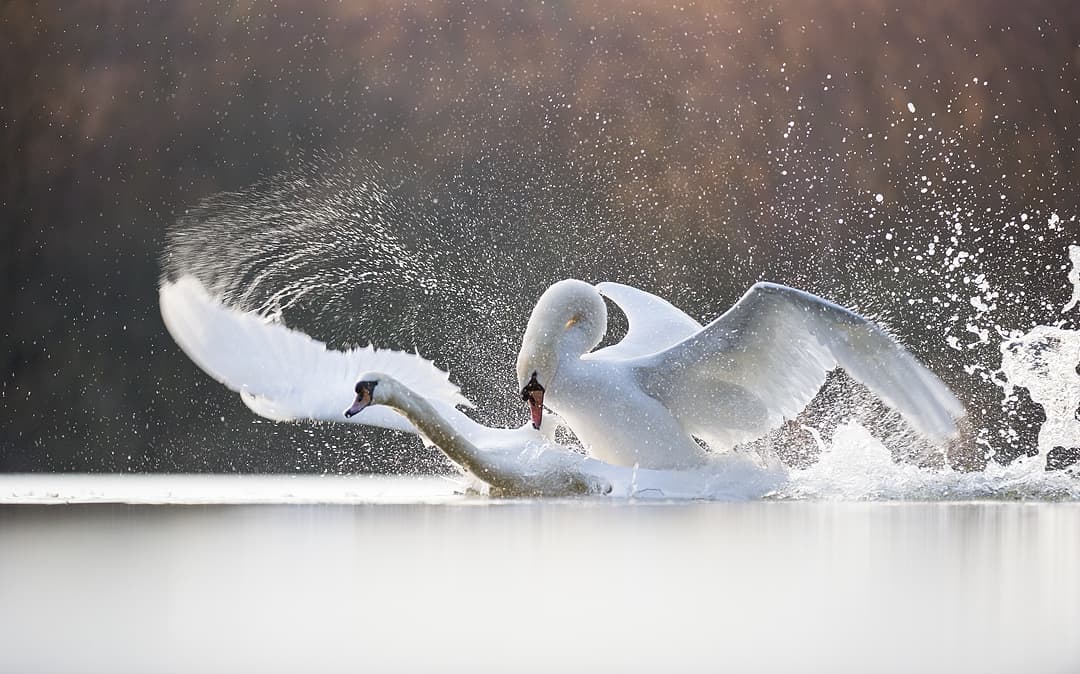
Swans are notoriously territorial at the best of times, but this ratchets up to extremes in the months of March-May. Any invading swan daring to venture into their breeding territory will be met with an unbridled ferocity and this will not relent until the interloper has been driven away. In these moments use a minimum of 1/500sec to freeze the action, faster if your camera has the flexibility in its ISO.
If the light is consistent, I always use manual exposure. If however the fall of light is variable then I’ll shoot on aperture priority and simply make appropriate exposure adjustments using exposure compensation.
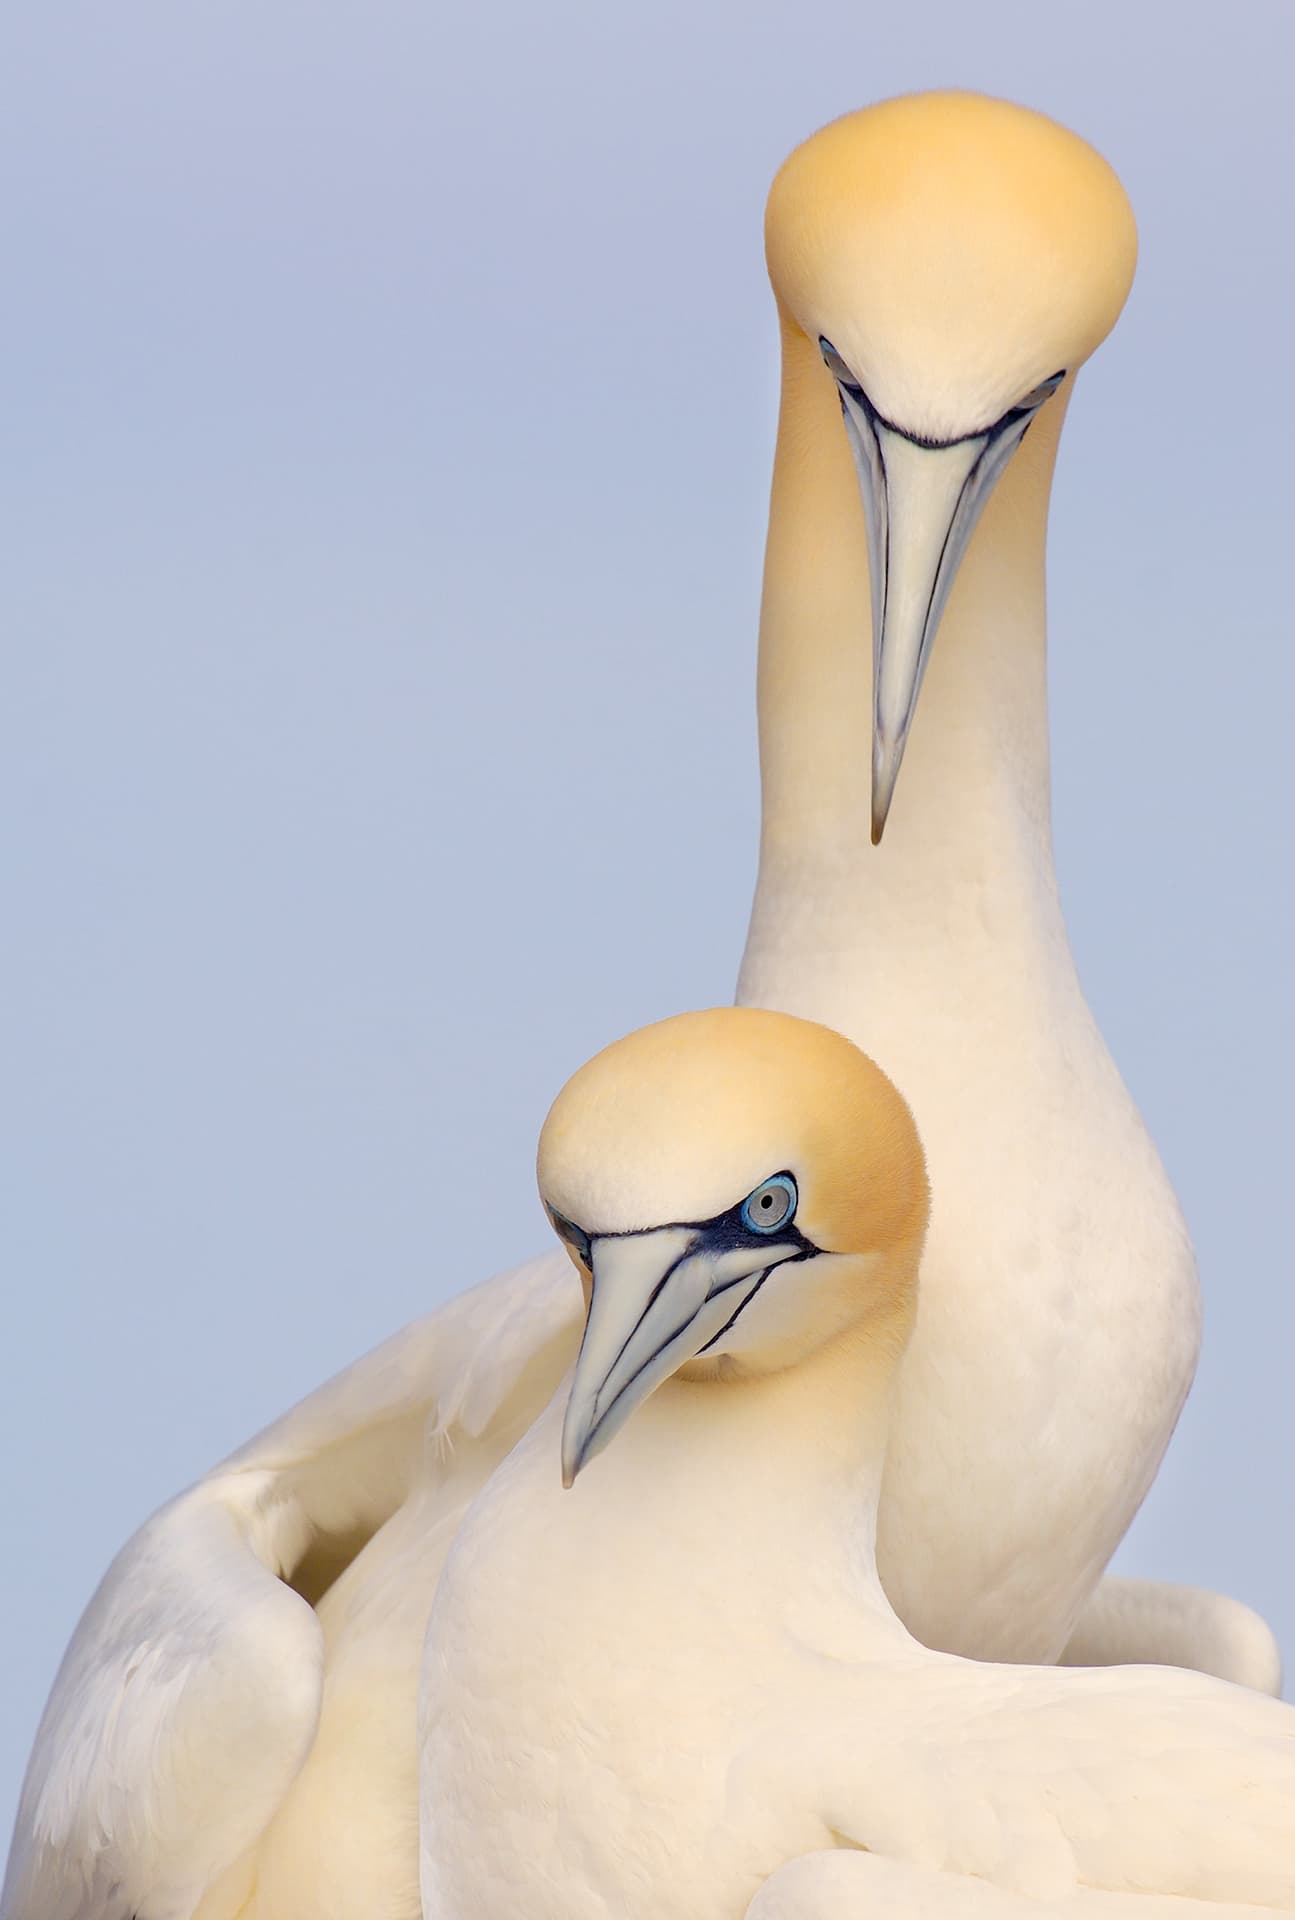
Breeding plumage
Whilst gannets are present around the UK coastline from April to November, their plumage is at its best during May. Their yellow heads contrast beautifully with their blue-framed eyes and make for compelling images, either as part of the wider scene or for more detailed, close-up images.
Remember to always remain mindful of the depth of field required in each opportunity, including detail that adds to your image but trying to exclude that which does not.
Andrew’s best kit – what accessories do I need for Mammal photography?
- Neutral clothes – Birds will always be more approachable if you wear neutral-coloured clothes. Becoming part of the environment will make birds feel comfortable and they will thereby display natural behaviour.
- Gloves – It doesn’t matter how familiar or confiding a species is I always wear thin, black glove liners to blend in. Hands flapping about startle and spook birds easily so move slowly and cover exposed skin.
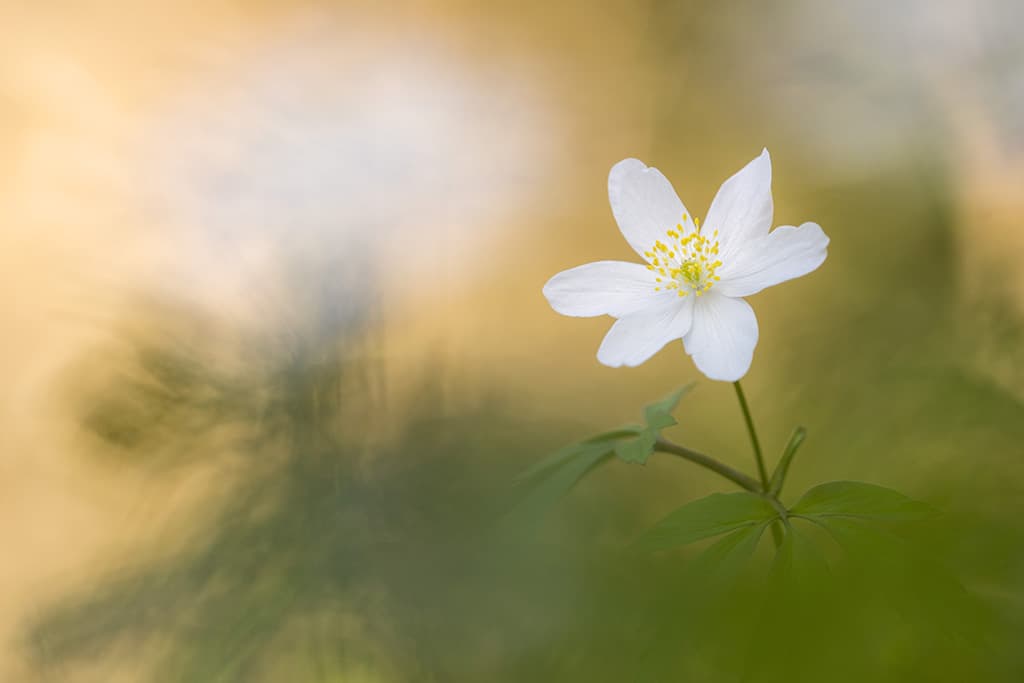
Photographing Wildflowers: your guide Ross Hoddinott
Ross is one of the UK’s leading landscape and close-up photographers. He is the author of several technique books, including Digital Macro & Close-up Photography and a multiple award winner. Ross lives in north Cornwall and loves nature and the great outdoors. Visit his website
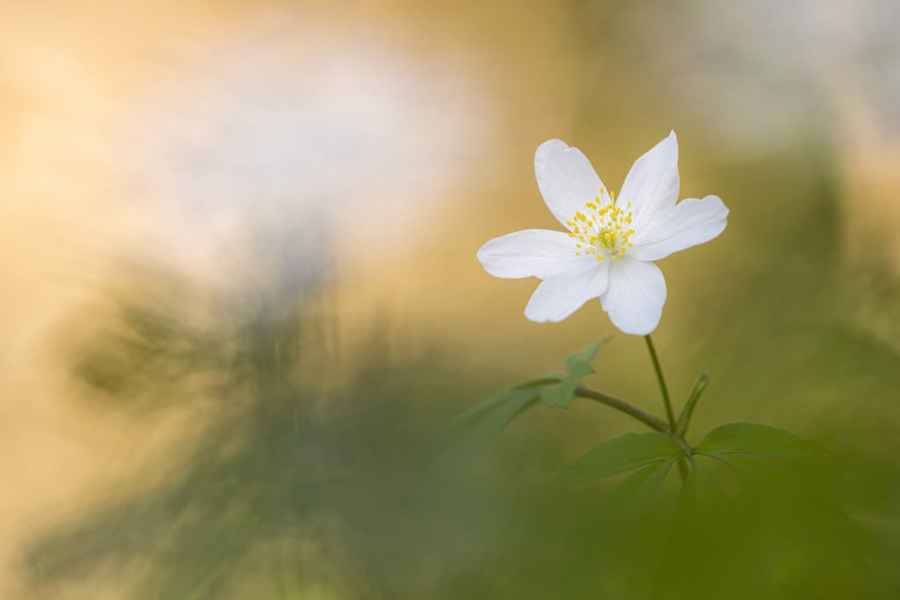
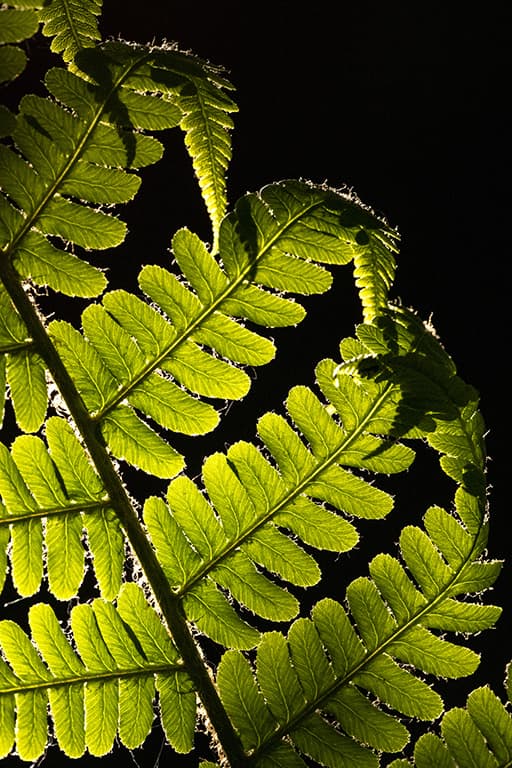
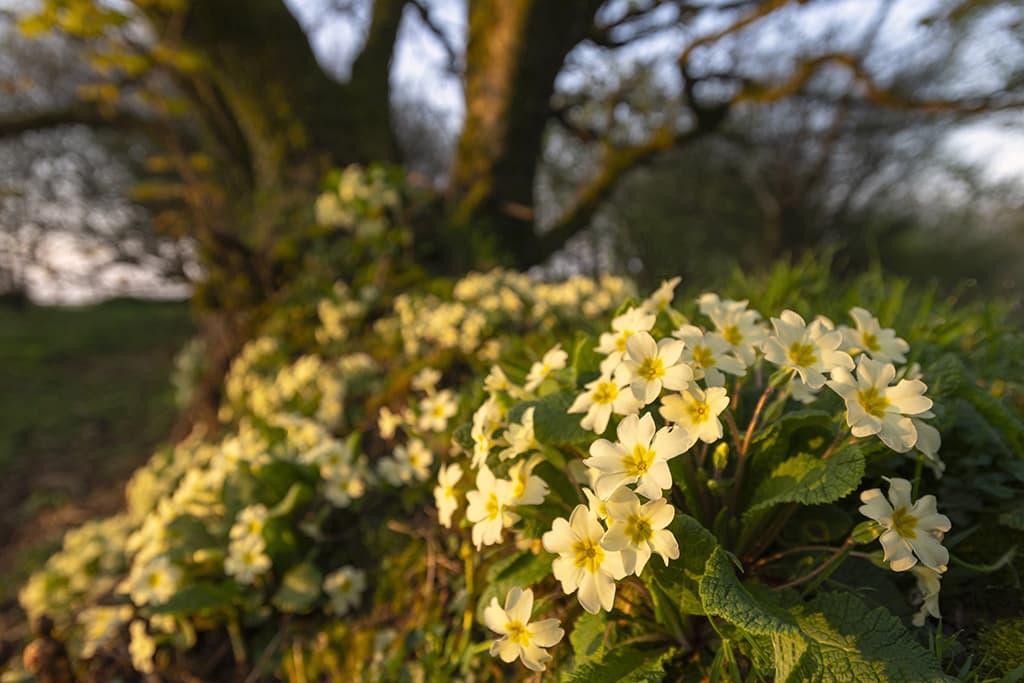
This is a magical time for nature photographers, particularly those who enjoy getting down and dirty and up close and personal with miniature things. Woodland is a particularly rich habitat, with snowdrops, wood anemone and wild garlic blooming, while ferns start to uncurl. Fruit trees blossom and fresh green leaves emerge.
Some coastal cliff tops will be carpeted with wildflowers, like sea pinks and kidney vetch. And don’t overlook the many photo opportunities found in your very own back yard, as gardens come alive once again. It is time to dust off your macro lens, or close-up attachment, and focus on flowers and plants.
Consider the light
Don’t rush when shooting flowers and plants – you have time to refine your shots. Strong direct midday light is harsh and best avoided, but you can use a diffuser to soften it. Backlighting will highlight fine detail, while overcast conditions will help you to capture strong, saturated colours.
Beware of ugly shadows that might ruin your close-ups. The easiest ways to relieve shadows is using either a reflector, a sheet of white card or tin foil. Position close by and bounce light onto your subject for natural-looking results.
Double vision
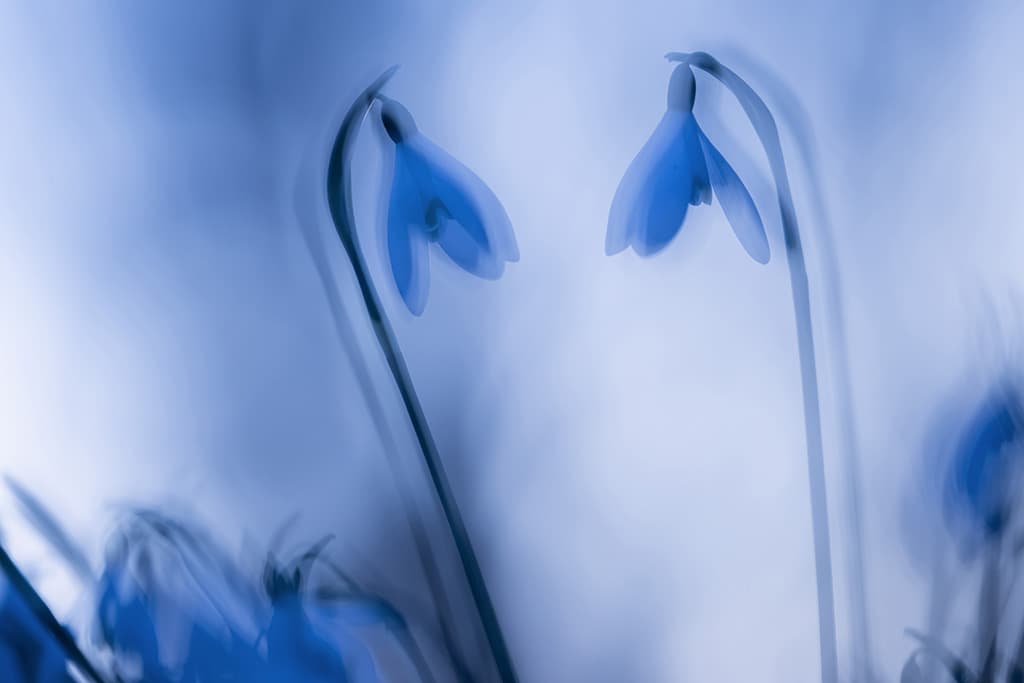
Most modern cameras have a multiple exposure mode that allows you to capture and overlay two or more frames in-camera. Use this function to create ethereal shots by layering together images that are either framed or focused differently. This technique suits flowers particularly well.
Try sandwiching a sharp frame with a defocused shot. By doing so, you mimic the Orton Effect, which adds a dreamlike glow and softness. Switch on Auto Gain so that your camera automatically adjusts exposure for each shot and produces a correctly exposed end image. As with any creative technique, do experiment!
Go wide
A wider viewpoint will allow you to capture your subject in context with its surroundings. Most wideangles have a close minimum focusing distance that allow you to capture this type of environmental perspective. Alternatively, you could opt for a short macro lens, like Laowa’s 15mm f/4 wideangle macro.
This style works best in combination with subjects located in scenic spots, for example flowers growing on coastal cliff tops, or alpine flowers with mountain peaks behind. You will want to generate a large zone of focus, so select a small aperture and focus with care. If you wish to achieve complete front-to-back sharpness, consider focus stacking to extend depth of field.
Perfect timing
Plants are best shot when they are in pristine condition. They are ephemeral things, though, so planning and timing is important – miss their peak flowering period, and you may have to wait another 12 months for another opportunity. Do your homework, so you know where and when to look.
For example, snowdrops and crocuses will be in flower from early February, while lesser celandine and early purple orchids will bloom in April. But be aware that the weather conditions may accelerate or delay the flowering period. Keep an eye on the forecast too. The best days to go out and photograph plants is when it is still, because wind movement can make focusing and framing a challenge.
A wind speed below 15kph is best – if it is windy, visit woodland where you will be more sheltered.
Get low
A worm’s eye view suits many flowers, particularly orchids, wood anemone and campion that are flowering at this time of year. Shooting from ground level creates a natural and intimate perspective. It will also help you disguise boring or messy surroundings, as by getting on the ground you can keep the attention on your subject and blur everything else.
Longer focal lengths, upwards of 300mm, generally work best, together with a large aperture. Meanwhile, a ground sheet will keep you and your kit clean and dry. Some tripods don’t have low-level capacity, so try using a beanbag to support your set-up. Using a camera with an articulated LCD screen makes composing and focusing easier and more comfortable.
Ross’ best kit
- Macro lens – To fill the frame with flowers and plants, the long end of a telezoom may suffice or even a close-up attachment, but a dedicated macro lens is the best choice. A focal length of 100mm will provide a nice working distance.
- LED light – This is handy for highlighting detail, relieving ugly shadows, or backlighting petals and leaves. I always carry a couple of Manfrotto Lumimuse devices in my camera bag.
- Wimberley Plamp – This adjustable arm is great for holding a reflector in place, stabilising stems and generally acting like a handy extra helping hand.
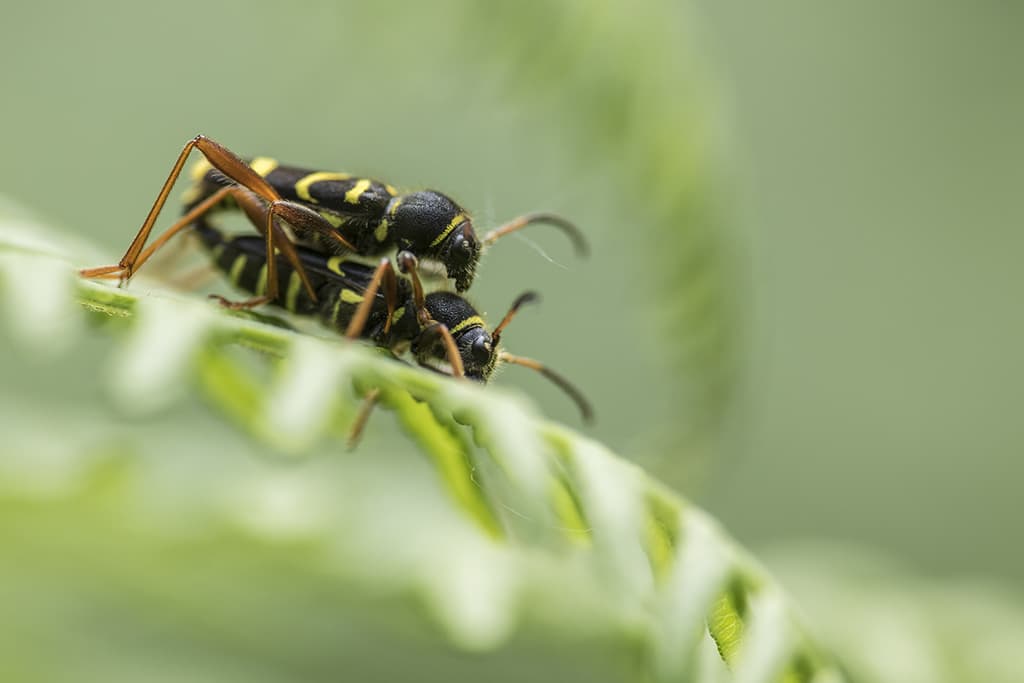
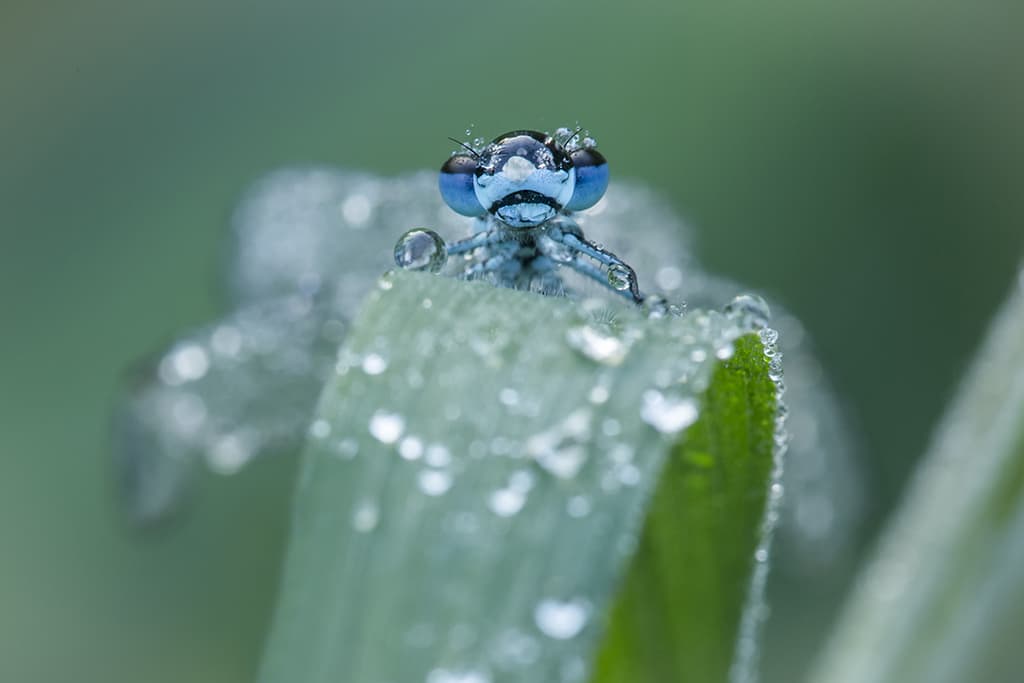
Photographing Invertebrates: your guide Victoria Hillman
Victoria is a zoologist, photographer, Manfrotto UK ambassador, author and judge specialising in creative macro photography of plants, invertebrates, amphibians and reptiles in their natural habitats in the wild. See more at her website
Invertebrates are amazing and fascinating animals and both a real challenge and joy to photograph. The best way to really capture the beauty and nature of these animals is to photograph them in the wild in their natural habitat – this also causes minimal disturbance to the invertebrates and results in natural images.
There are many different ways to capture the exquisiteness of invertebrates, from close-ups to in-habitat shots and undoubtedly the best times of day to photograph them is first thing in the morning and in the evenings when they are roosting.

Weather
Try photographing in various weather conditions. Although bright sunny days can provide some beautiful lighting, soft overcast days or even wet days can give a different kind of image. Not only that but working on colder, overcast or wet days can give you more time to photograph your subject as they will be naturally cold and wet and therefore much less active.

Take a step back
Traditionally a lot of macro photography of invertebrates is taken close up to capture all the amazing details. Take a step back, as including some of the habitat in the image can produce interesting and different images – telling more of a story of where the subject lives and how it interacts with its habitat.
Taking a step back to include the habitat allows you to create beautiful works of art.
Take your time
Concentrate on capturing just one or two subjects and really take your time. Observe your subject and the surrounding habitat.
Not only will this provide some ideas for images to work on, but you may also get lucky and be able to photograph behavioural interactions such as mating or predator prey battles, of which there are plenty that take place in the long grasses and foliage.
Perspective
Looking for different perspectives can make a big difference to the appearance of an image. Instead of shooting down on a subject, try shooting at eye level. Not only will this give a connection with your subject but also you will find that some subjects will be less skittish if you are level or below them.
By shooting from below you can isolate them against the sky. Experiment with different compositions and apertures – try manually focusing on just one part of your subject and use a wide aperture.
Lighting
Natural light – whether soft and diffuse, or bright and high contrast – both give different options for photographing invertebrates. I prefer using natural light as it provides more natural results, and the right conditions create great bokeh. Occasionally you may need a little additional light and for that I like to use a small LED, which provides a soft, diffuse and continuous light that you can position exactly where you want.
Field craft skills
Work on and perfect your field craft skills. These will not only allow you to get close to your subject without causing disturbance but it will result in being able to capture both natural portraits and behavioural images.
Victoria’s best kit
- Macro lens – This may sound obvious, but a good macro lens is worth its weight in gold. My lens of choice is the Sigma 180mm macro because it not only allows me to capture the details close-up but also allows me to shoot beautiful in-habitat images.
- Small LED light – I prefer not to use flash and instead find a small LED light such as the Manfrotto Lumimuse to be perfect for those moments when you need a little soft, diffuse continuous fill-in light.
- Tripod – Using a tripod will allow you to take your time and set up the shot. My tripod of choice is one that will allow me to shoot at ground level as well as higher up.
Further reading
To read more articles like this one subscribe to our print magazine today. You’ll save money every week and enjoy having each issue delivered to your door! Click here