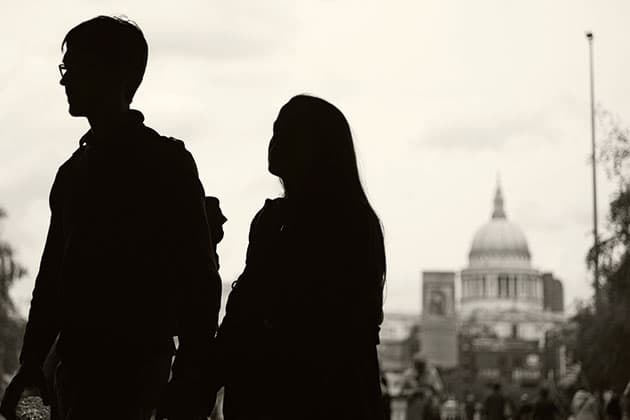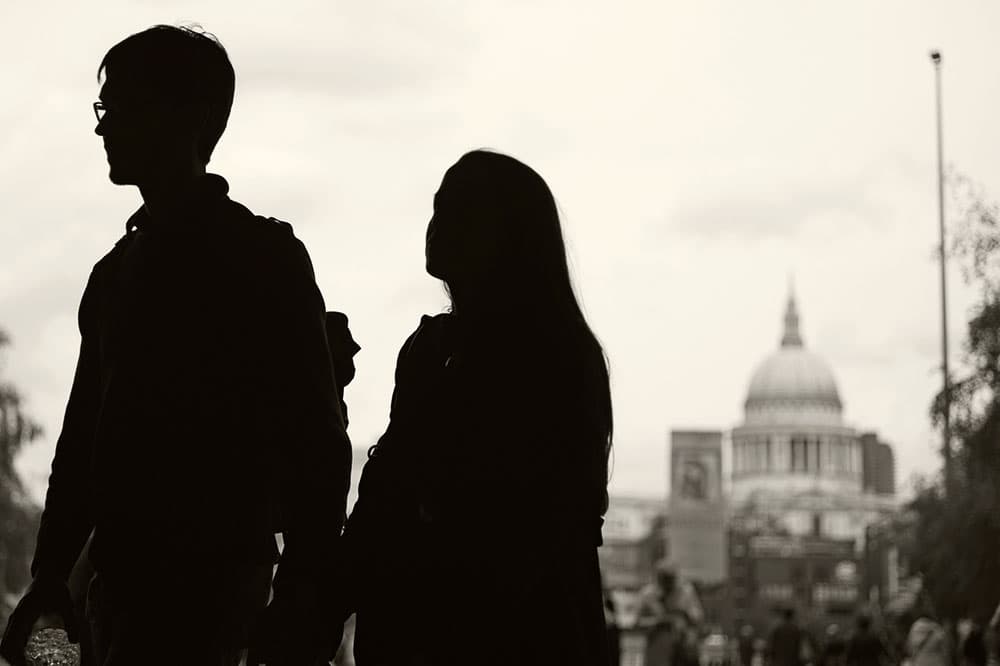
Using a small camera allows you to take pictures discreetly. Leica M (Typ 240), 50mm, 1/4000sec at f/2, ISO 250. Credit: Damien Demolder
In truth, any camera can be used to take pictures in the street. Some time before I was born, hardy photographers were using gigantic wooden-plate cameras to document the life and activity on the pavements of the world. Even I have used monstrous medium-format bodies, with flapping barn-door mirrors, to record the buzz of city streets in this century.
It is pretty obvious, though, that just because a type of camera can be used to take street pictures, it doesn’t make it the best type of camera for the job. I’m not especially old, but in my time I have used just about every sort of camera (with the exception of sub-aqua models) to shoot in streets. I have come to the conclusion that models that are small, quick to use and don’t make any noise suit me best. Those models are, almost invariably, mirrorless compact system cameras.
Make sure your camera is ready so you don’t miss good opportunities. Panasonic DC-GX9, 25mm, 1/8000sec at f/1.4, IS0 200. Credit: Damien Demolder
What’s so good about mirrorless?
All camera systems have positive and negative points – otherwise we wouldn’t need so many. But for street photography, the benefits of mirrorless models far outweigh the negatives. These cameras are not all the same, of course, but in general they share smaller dimensions than most DSLRs and an ability to shoot without making a racket that attracts attention. Almost all mirrorless cameras have silent modes that allow you to take pictures with no giveaway sounds at all. This not only means that in a quiet place you can take pictures, but that if the first frame isn’t what you wanted, you can shoot again and again without your subject moving out of your way.
Size and weight are important when you are spending a day trying not to stand out. Mirrorless cameras won’t put your back out and can remain concealed in a coat pocket or discreet bag. There is nothing like a giant camera bag to advertise the fact that you are taking pictures!
One of the other real benefits is the ability to shoot in live view without a massive delay. From a short distance, I like to hold a camera away from my face to take in the composition on the rear screen. The distance allows me to see the whole image in one glance, which makes it easy to see how elements at opposite ends of the frame relate to each other. The other benefit is that you don’t look like a proper photographer, so people are even more inclined to ignore you.
My favourite mirrorless models also have touchscreen controls that make moving AF areas around so much quicker to achieve. In a fluid situation, where you can’t be sure about exactly where the subject will be in the frame, it’s a godsend to be able to simply touch the back screen at the right moment and have the camera focus on that spot – and even trip its shutter at that exact moment, which is seen in some models.
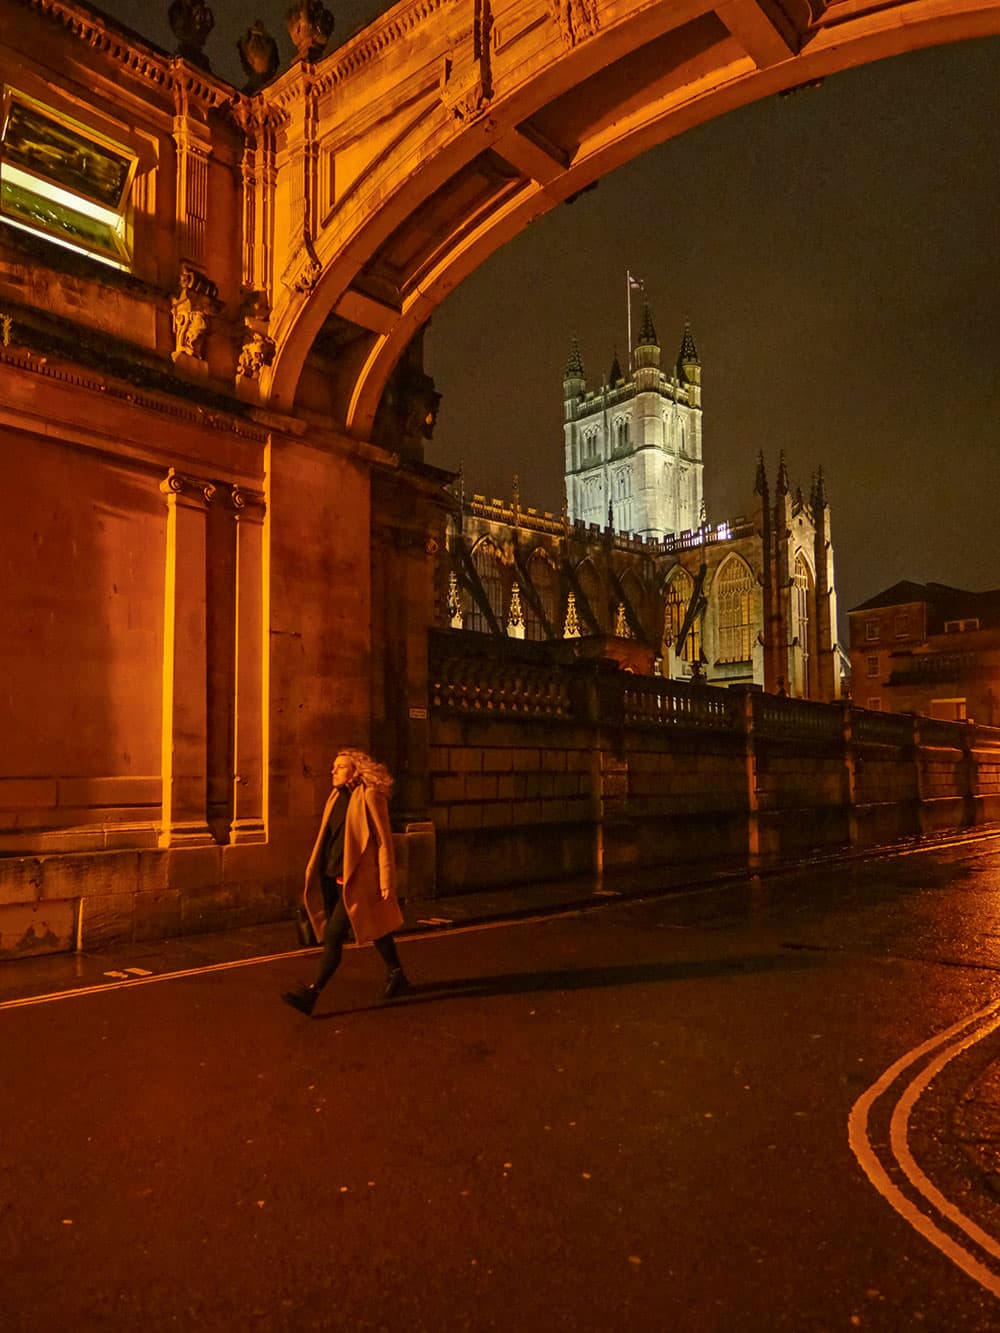
A wide focal length is great for including the surrounding environment. Panasonic DC-GX9, 12mm, 1/100sec at f/1.4, ISO 3200. Credit: Damien Demolder
The downsides
There are some downsides to using mirrorless cameras for your street photography, but none of them are life-threatening. The main one is short battery life, so you need to carry spares. Most of the models I use can get by on three batteries for a whole day’s shooting and reviewing, plus editing photos in-camera and sending them to my phone on the way home. Manufacturers’ own batteries can often be fairly expensive, so you can save a bit of money by looking for reliable independent brands such as Hähnel or Ansmann.
Another slight disadvantage is that you have to be extra careful when changing lenses to ensure you don’t get dust on your sensor. Some models leave the sensor exposed, so when there is nothing blocking the mount, the sensor is open to the elements. This can make some people nervous, though in reality I’ve rarely had much of an issue with dust, and certainly no more than I have with my DSLR bodies.
The only other downside to shooting with a mirrorless model is that some DSLR users will look down on you as though you have taken up potato printing. This is only a problem if you worry about what other people think. And, of course, the upside is their expression when you show them what you can do with your idiot’s camera.
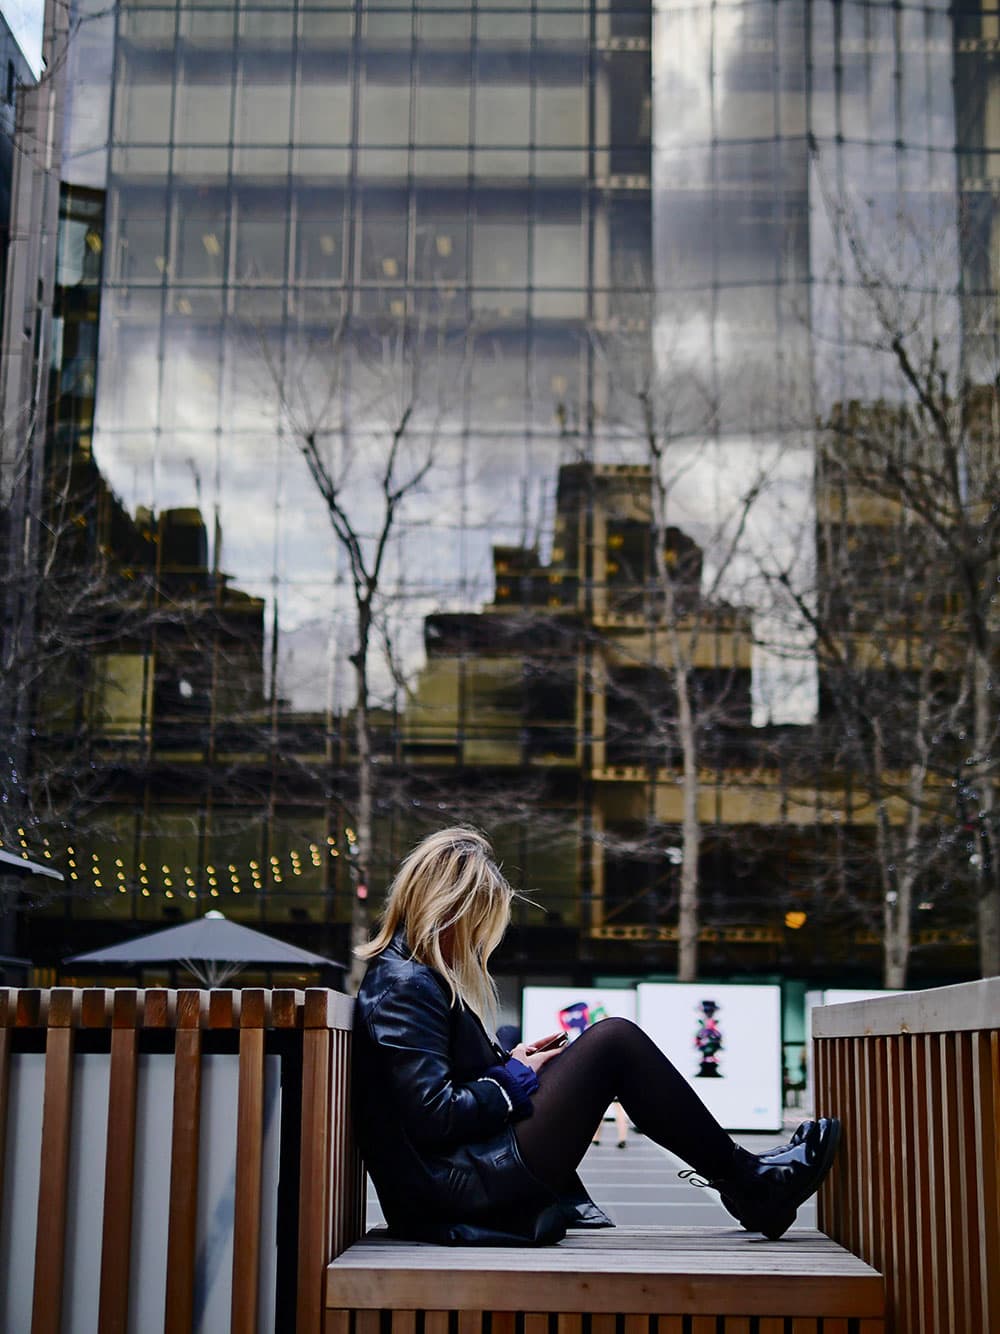
Using live view enables you to hold the camera away from your face so you can take in the entire scene. Panasonic DC-GX9, 25mm, 1/2000sec at f/1.4, ISO 200. Credit: Damien Demolder
What’s so bad about DSLRs?
There is nothing bad about DSLR cameras and, of course, they can be used for street photography. However, the best-performing models tend to be quite big and the best lenses tend to be quite heavy. These systems might not feel too big and heavy at the beginning of the day, but by the end of the day they can do – and often by lunchtime. I’m physically quite strong, but even I need to rest when carrying around a bag of DSLR lenses, and sometimes I want to go home before I’ve finished shooting.
When using a DSLR to shoot anything moving we need to hold the camera to our eye to see what is in the picture, which tends to give the game away when we are trying to be discreet. DSLRs can also draw attention as they create quite a clatter when the shutter fires. It isn’t always the act of the shutter firing that’s the issue, but sometimes it’s the mirror flapping around and the sound reverberating through the hollow of the shutter box. In some places that sound doesn’t really stand out, but in the majority of situations the distinctive sequence reveals that a photographer is at work. My problem is therefore that it makes it much harder to capture the world in its natural state.
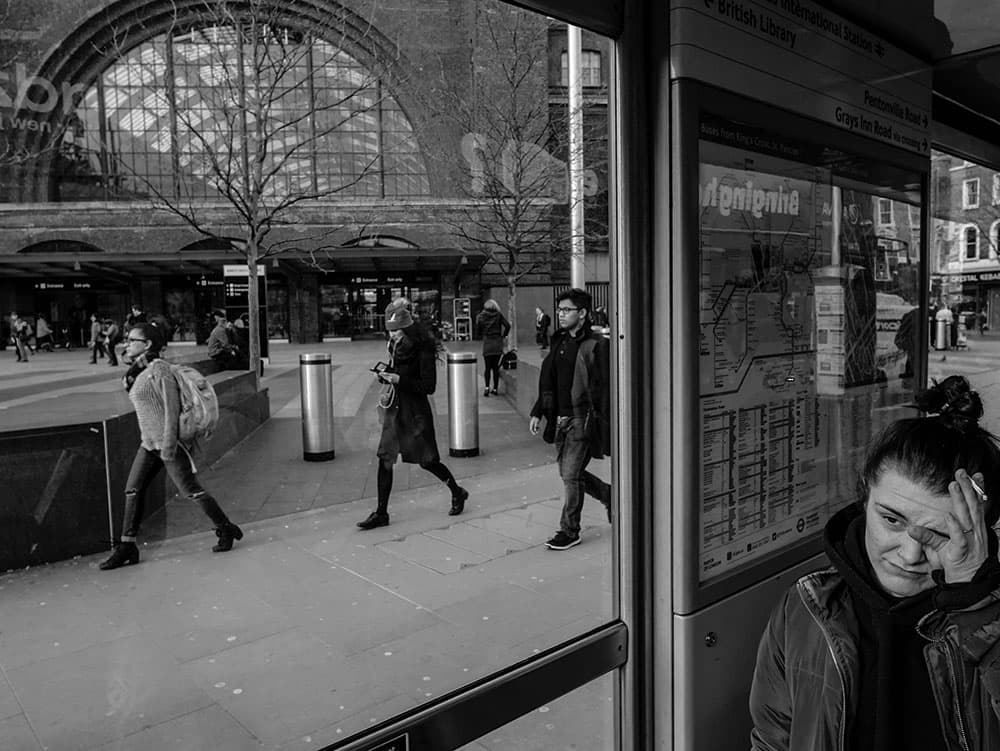
Get in close to enable viewers to feel like they are there with you. Panasonic DC-GX800, 12mm, 1/250sec at f/4, ISO 200. Credit: Damien Demolder
Damien’s top 10 tips for street photography
Things to consider when out on the streets shooting with your mirrorless camera
- A viewer will feel as close to the subject as you were when you took the picture, so get in close to make viewers feel as though they are actually there.
- Don’t take a bag – it will mark you out as a photographer. I try not to look like a photographer at all and I keep my kit in my pockets when I can.
- Use the rear screen rather than holding the camera to your eye. This allows you to be more flexible with your viewpoints and enables you to see all around you as you shoot.
- Use contrast to make your subject stand out from the scene: a bright subject against a dark background, or a dark subject against a bright background, for example. Make sure the viewer knows where to look.
- Pay attention to light, noting its direction and qualities, and photograph it. When you make light the subject, your pictures will improve.
- To blend in, find the smallest cameras you can. Small cameras go unnoticed in most places and they don’t weigh very much, so you can carry them all day.
- Short lenses make you get close and they allow you to include the environment, so the viewer can see where you were when you took the picture. This helps with impact and conveys the sense of storytelling.
- Make sure you know your camera well, so that when you need a feature, you know how to access it quickly. There’s nothing less productive than searching through an unfamiliar menu system while out shooting in the street.
- Always have your camera with you. Amazing moments will not restrict themselves to your dedicated photo days – they can pop up at any time. Don’t regret not having a camera with you.
- Be selective about what and who you shoot as not everyone you see in the street is interesting, and neither is every place. Wait, be patient, and try to make your pictures say something.
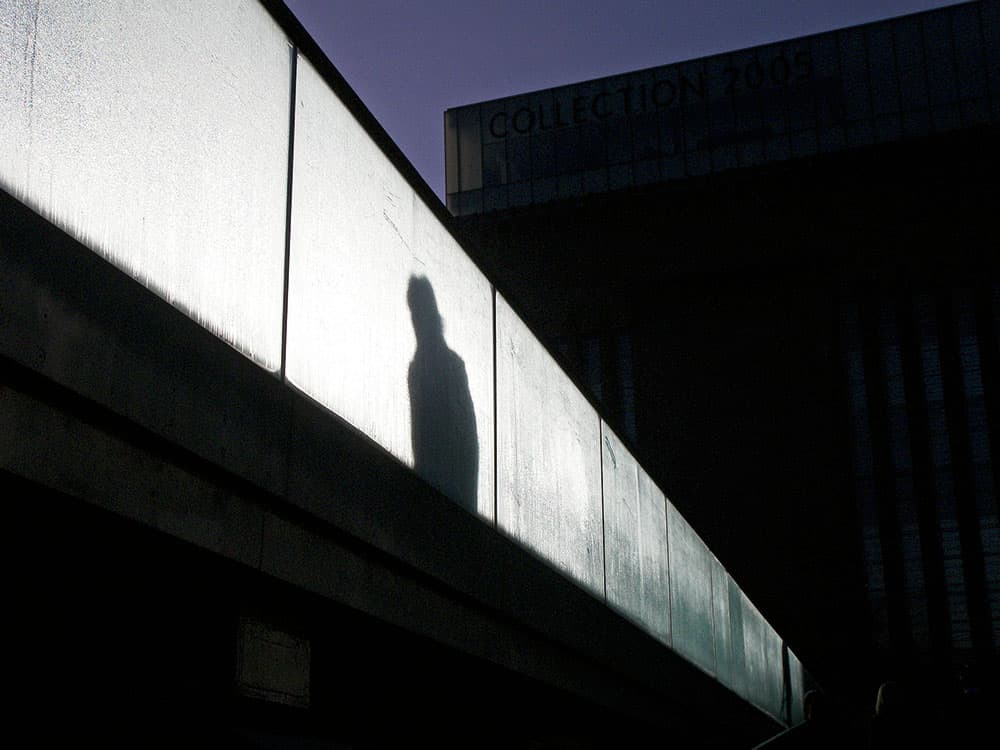
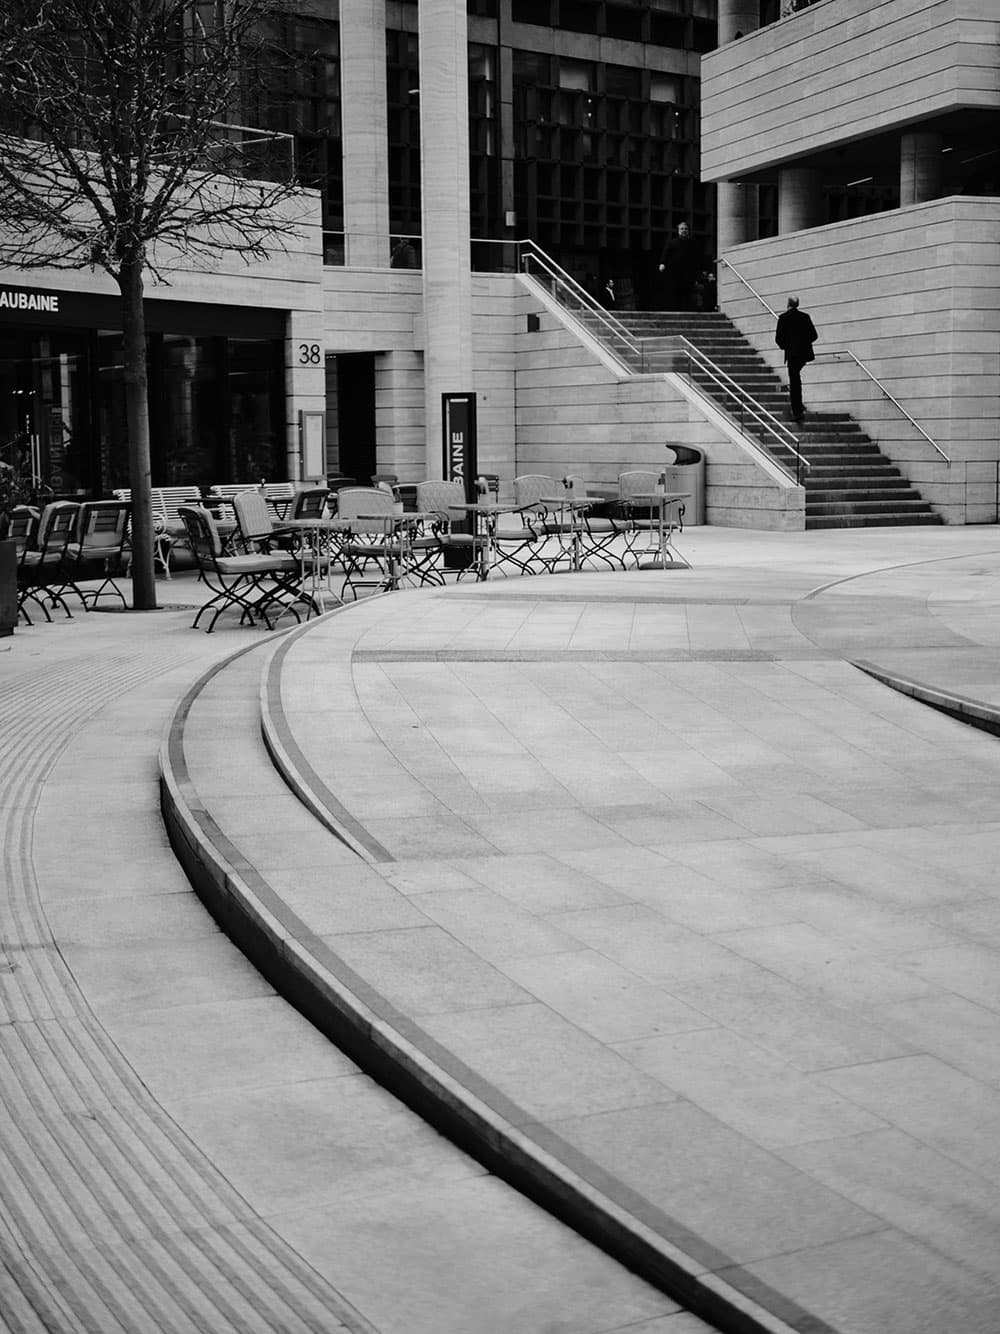
Make use of strong graphic shapes and lines to create a striking composition. Kodak P880, 10.8mm, 1/2500sec at f/8, ISO 100. Credit: Damien Demolder
Why it works
Here’s a shot I took when I was working at Amateur Photographer. I’ve picked it mainly because I think it works, but also because it was shot on quite a basic model: the Kodak EasyShare P880 bridge camera. It appeals to me because of its simplicity, the graphic elements of the environment and the immediately obvious subject. It also shows an everyday scene in a manner we may not have seen before, which helps to create impact and a positive first impression.
The shot is of someone walking across the Millennium Bridge in London – which doesn’t sound very interesting in its own right. The fact it was a bright November morning adds a layer of frost on the glass and a strong backlight to create clear shadows against an illuminated panel. I studied the shapes and looked for echoes and contrasts in the surrounding area, and used the corner of the Tate Modern to form a collection of triangles and hard edges that work well with the shapes and lines in the middle of the frame. The man stands out partly because he is the only natural form in a frame filled with hard edges and angles.
Kit list
- Standard lens I love the Panasonic Leica DG Summilux 12mm f/1.4, but Fujifilm has a nice XF 35mm f/1.4R and Olympus has the M. Zuiko Digital ED 25mm f/1.2 Pro.
- Wide lens Wide lenses are great for including the environment. I like the Leica DG Summilux 12mm f/1.4 for Lumix or the Fujinon XF 16mm f/1.4 R WR.
- Mid-tele lens I find long lenses don’t retain a connection with the subject. I like a moderate tele between 75-85mm, like Leica’s DG Nocticron 42.5mm f/1.2 for Lumix.
- Small cameras The Lumix DC-GX800 is an amazing tiny model, and the Lumix GX9 is a bit bigger but more advanced. Fujifilm’s X-Pro2 and the PEN F also give first-class results.
- Slightly bigger cameras Slightly larger models, more like DSLRs, include the Olympus OM-D E-M1 Mark II and OM-D E-M5 Mark II, Fujifilm X-T2 and Lumix G9 or G80.
Post-production tips for editing
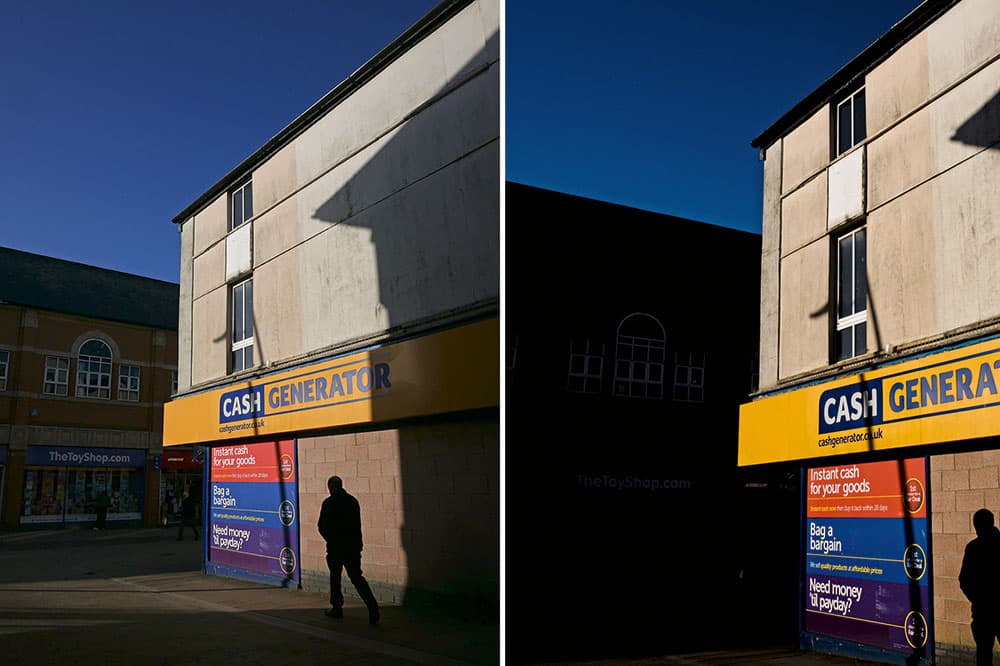
Before (left). After (right)
I try not to do much post-production as I don’t get much time after a shoot, so I do what I can to get the shot as close as possible to the way I want it at the time I take the picture. However, almost always, there are things for which software is needed.
I actually really like in-camera raw-processing facilities that allow me to skip the software stage, but not many cameras have a processing ability that is extensive enough for this. Fujifilm X-series models have decent processing features and those in the Lumix cameras are excellent. I always shoot in raw to allow myself the best starting position, and I usually use Adobe Camera Raw and Photoshop or Phase One’s Capture One Pro.
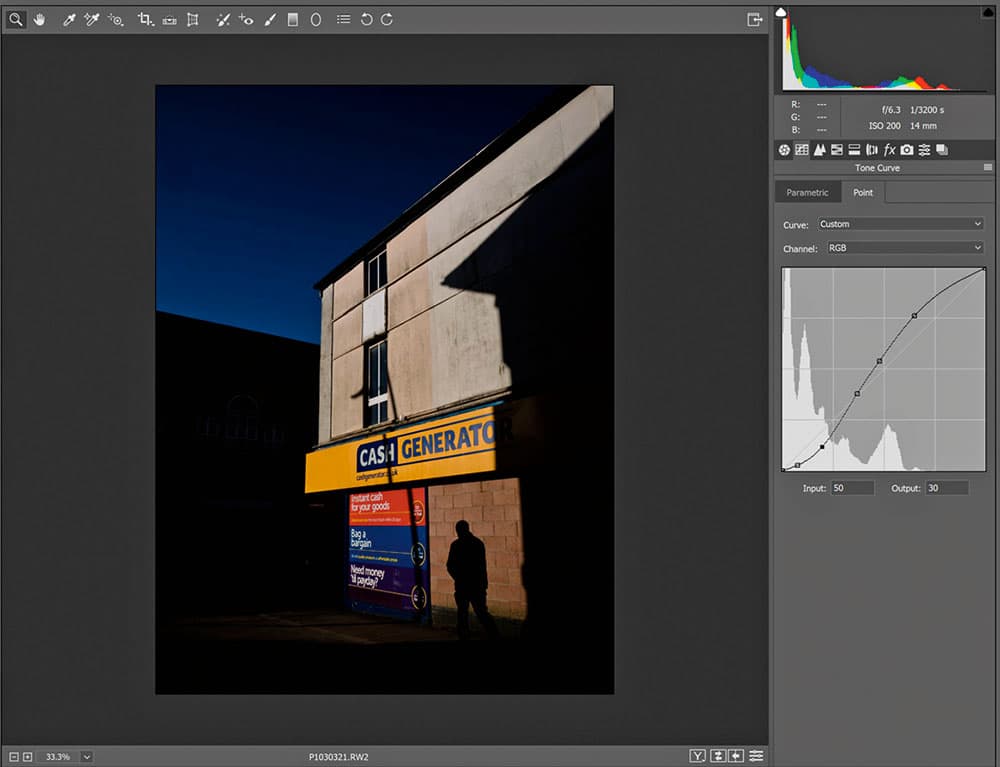
1 Lift tones
If I am generally happy with my exposure, the first thing I do is deal with the mid-tone contrast using the Curves tool. For a shot like this, I’ll pull down the shadows and lift the
lighter tones to emphasise the difference between the sunshine and the shade.
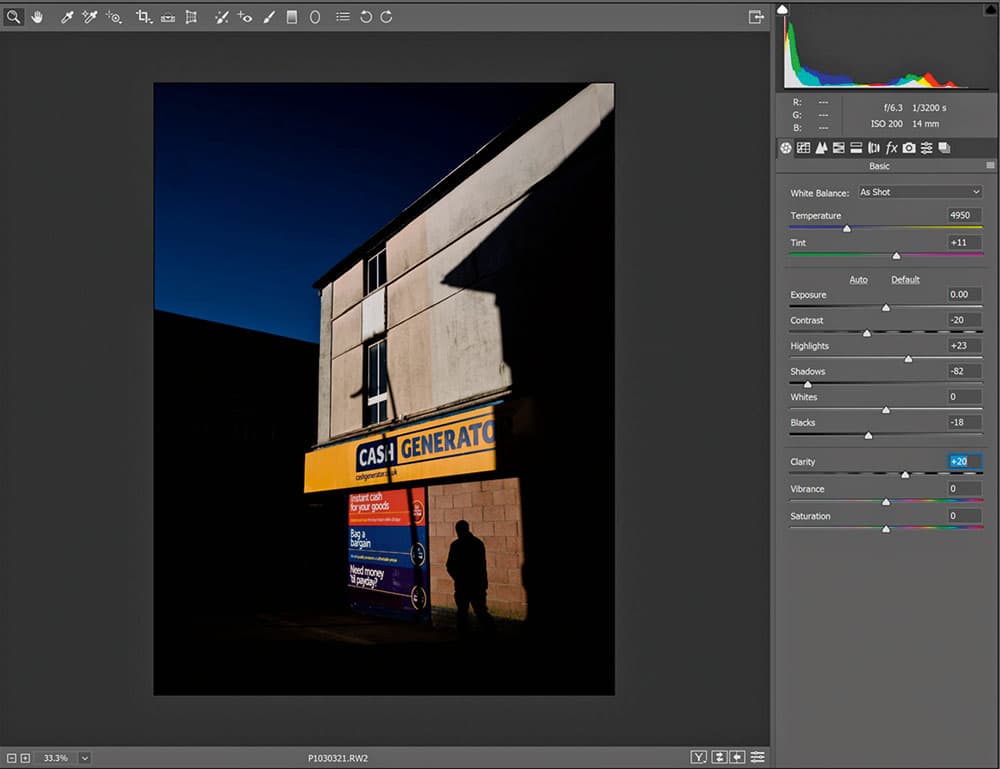
2 Adjust contrast
Next, I deal with other more subtle tools for increasing mid-tone contrast – the Highlights and Shadows sliders. I often use the Clarity slider to help with the process, but almost always draw the Contrast slider down so the contrast doesn’t look crude.
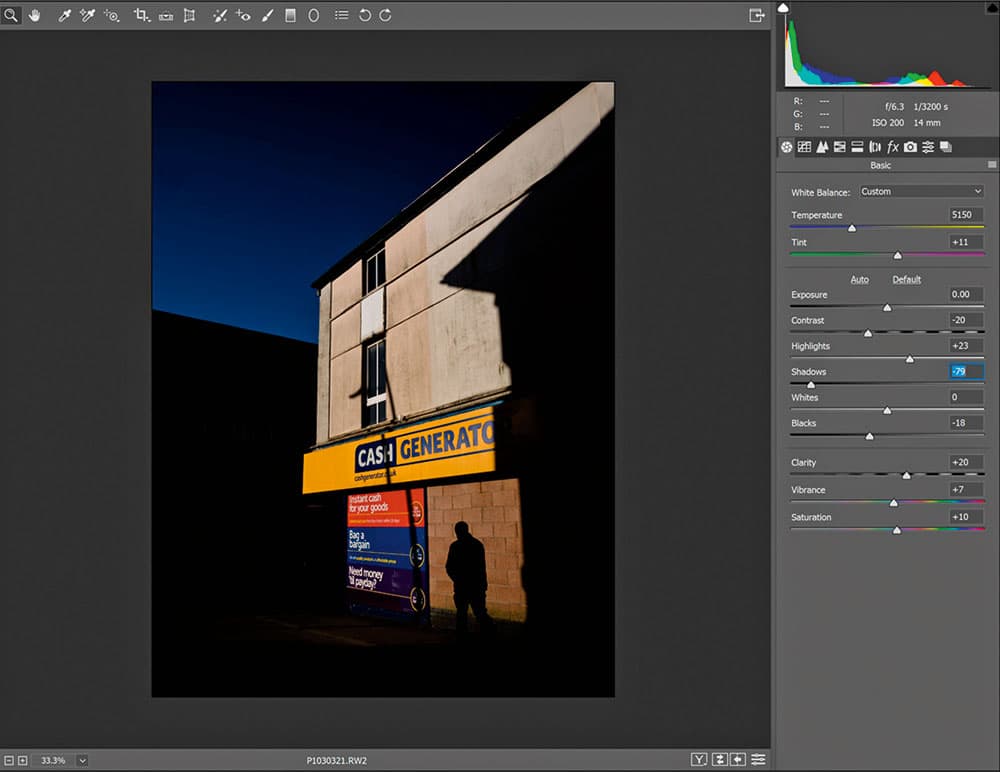
3 Boost colours
Colour is important here, so I’ve added a touch of Vibrance and a bit of Saturation – but not too much of either as Curves has already lifted the colour. I’ve also tweaked the colour temperature by a few degrees to warm the late-afternoon light.
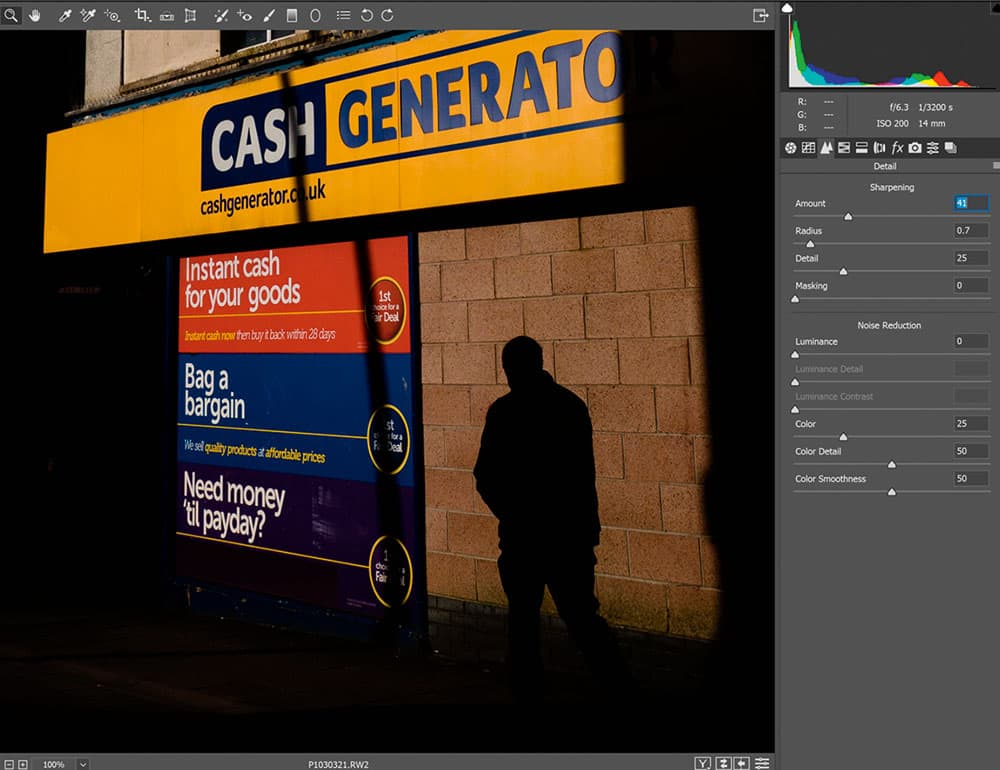
4 Sharpen
All images need a bit of sharpening and the way you apply that sharpening depends on the noise, detail and base sharpness of the picture. This one is fine grained, so I set the Radius low and increase the Amount. I rarely use Noise Reduction and rather enjoy a bit of texture.
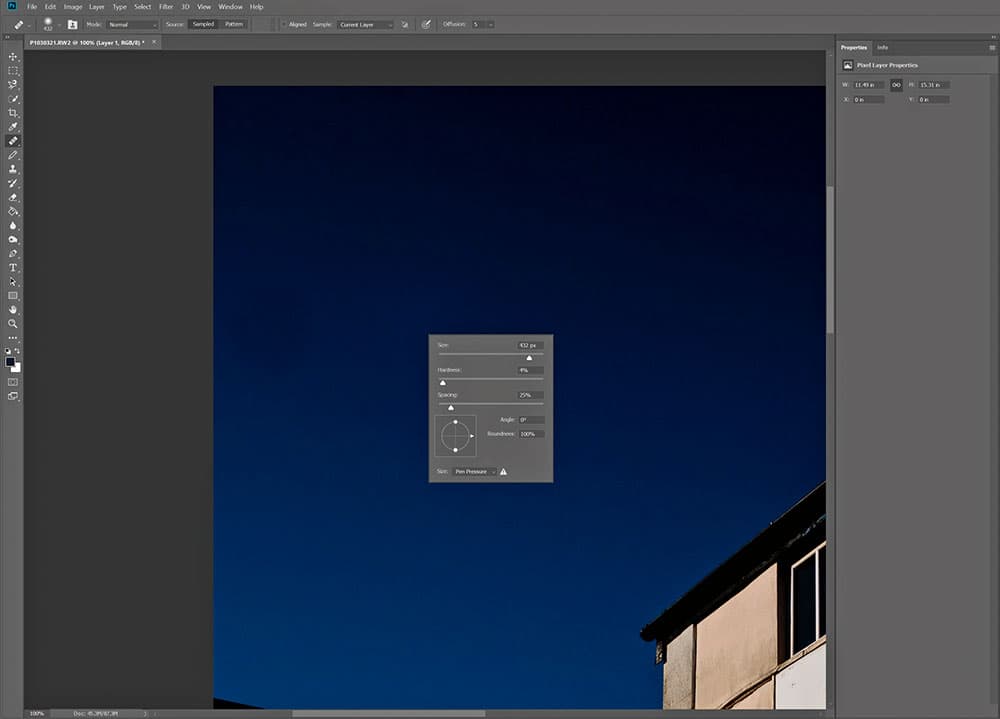
5 Clean up
I usually shoot at a wide aperture so dust spots tend not to show. As this was shot on a very bright day, I used an aperture of f/6.3 – so there’s a visible dust spot in the sky. To remove this I’ve used the Healing Brush in Photoshop, but I’ll often use the standard Cloning tool.
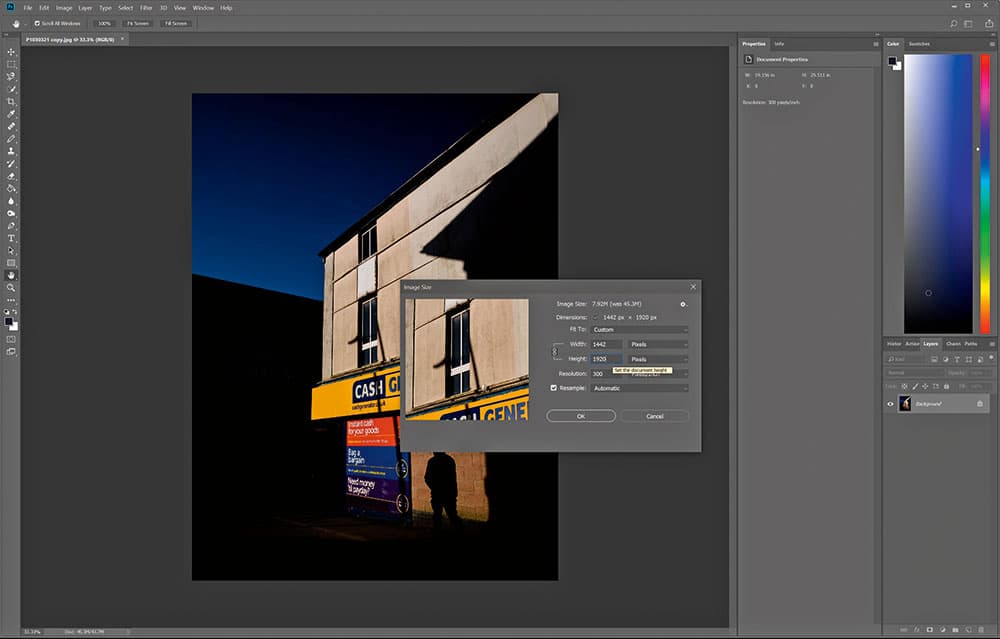
6 Resize
I save images at their largest size and with as little compression as possible. For Instagram, Twitter or Facebook, I’ll resize to 1,920 pixels on the longest edge to reduce the size. I also use JPEGmini Pro by Beamr Imaging to make file sizes as small as possible for my phone.
Damien Demolder is a photographer, journalist, judge and educator who shoots almost all types of subjects with a wide range of equipment. A former editor of Amateur Photographer, he gives club talks and teaches photography across the country. See www.damiendemolder.com.
New to street photography? Check out our Beginners guide to Street Photography here.

