
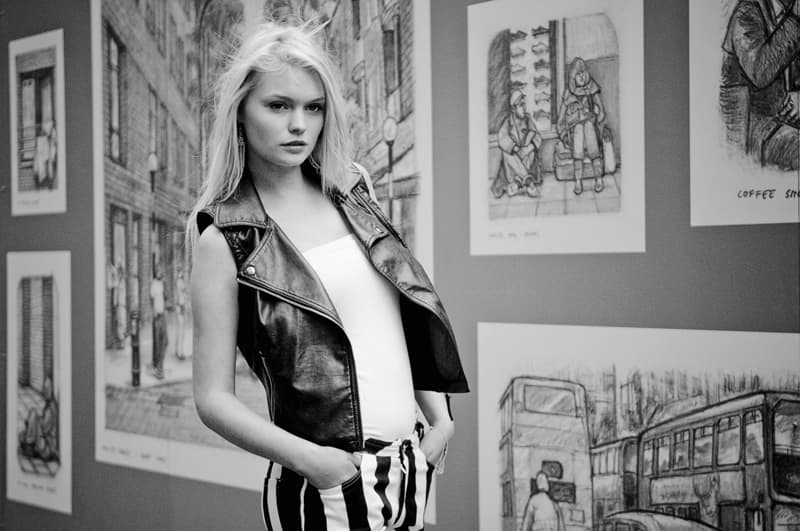
photo by Jennifer Peel
Annabel Williams takes two readers out on location and shows them how to arrange a simple portrait shoot with the minimum of fuss. Oliver Atwell joins them
Most of us have tried our hand at portraiture, whether it’s on holiday, at a wedding or during a stint of street photography. Yet portraiture can be a tricky genre. What we imagine to be a simple pursuit soon turns out to be a minefield of technical considerations, as well as a real test of just how confident we are as photographers. Directing people isn’t exactly the easiest task in the world.
‘Rather than working with “real” people today, we’re going to be using a couple of models,’ says Annabel. ‘The reason for this is that it gives us the freedom to lay down the basics of arranging a simple location-based portrait shoot. However, directing people is an important part of any successful portrait shoot, so we’ll also touch upon that today.’
Annabel will demonstrate to our two readers, Jenny and Izzy, how to set up their cameras, look for the best lighting, choose the correct background and how best to compose and frame their subject.
‘Whenever I lead a workshop, there are four key things that I always say are the most important aspects of portrait photography: rapport with subject; light; background; and equipment – in that order,’ says Annabel. ‘In many ways the camera is the least important thing that you need to take a picture. It needs to be set up simply so you don’t need to worry about it. Digital technology has made things so much easier for the portrait photographer that we don’t have to spend too much time messing around with the technical side and can instead focus on composing our shots.’
While it would be easy to imagine that shooting people on location is a vastly different discipline to shooting in a studio, the two share many common factors. Light reacts the same no matter where you are, and learning how to work in different conditions will significantly build your confidence as a portrait photographer.
‘Today, we’ll be using a variety of locations and you’ll see that light is never the same in two different places or even at two different times,’ says Annabel. ‘It doesn’t matter under what conditions you’re shooting – even a dreary day can give you interesting shots. You can always work around the light, no matter what it is.’
So, with that final thought in their minds, Annabel, Jenny and Izzy move off into the city (accompanied by their two models Chynna and Chi) to see what the streets have to offer.
Your AP Master…
 Annabel Williams
Annabel Williams is one of the world’s leading portrait photographers. She is passionate about working in a very simple way with natural light and has forged a successful career as a photographer and tutor. Combining previously acquired skills as a special-needs teacher has allowed Annabel to understand the psychology of people and utilise those skills to get the best possible images of them. She is based in the UK and the USA. For more details, visit www.annabelwilliams.com.
The AP readers...
 Isobel Murphy
Isobel is a keen photographer with a particularly strong interest in portrait imagery. She uses a Canon EOS 7D. ‘The workshop with Annabel was amazing,’ she says. ‘We had so much fun, but learned a lot too. Annabel has a very relaxed style of teaching, which helps a lot with the practical side of photography.’
 Jennifer Peel
Jennifer is a keen portrait photographer and has been keen to attend an Annabel Williams workshop for a long time. She shoots using a Nikon D300. ‘It was a really good experience to watch Annabel shoot, and to see how she directs her models into poses to get the expression she wants,’ she says. ‘I’ve learned how to get a variety of shots by making small changes to the pose and changing position to get a different backdrop or angle.
Would you like to take part?

Every month we invite three to five AP readers to join one of our
four experts on a free assignment over the course of a day. The experts
are Tom Mackie (landscapes), Cathal McNaughton (documentary and photo
essays), Annabel Williams (location portraiture) and Andy Rouse
(wildlife). If you would like to take part, visit
transport.kelsey.host/amateurphotographer/masterclass for details of how to apply.
Please remember to state which Masterclass you would like to attend and
make sure you include your name, address, email address, daytime
telephone number, some words about your work and three or four of your
images.
Camera Settings
In previous Masterclasses, we’ve often talked
about getting to know your camera’s settings and how working in manual
mode means having total control over your exposures. However, Annabel
prefers to take a different approach with her camera, and suggests that
worrying about technology and settings should not be something that
takes up the photographer’s time.

‘When
you first start you should never feel self-conscious about working in
auto mode,’ says Annabel. ‘There’s a lot of snobbery about working in
this way, but there’s no need for it. The auto mode is there to help you
so you can concentrate on taking a great image. Once you’re comfortable
with your equipment, you can start exploring how best to take control
of exposures.’
While Annabel encourages people to explore the
capabilities of their camera, she also recognises that doing so can get
in the way of actually taking images.
‘I don’t believe that you
need to know too many things about how your camera functions in order to
take great pictures,’ continues Annabel. ‘It’s great photographers who
take great pictures, not great cameras. Photographers, particularly
those new to image making, can get tied up trying to figure out
f-settings and what every little dial and button does on their camera.
As far as I’m concerned, that’s counter-productive.’
Annabel’s advice
to our readers is to work with the settings that have served her well
for the past 20 years of her career. First, set your camera to AV mode.
Then set the aperture to f/5.6 and the ISO to 400. Set the camera to
‘one shot’ and the white balance to auto.
‘If you have your
camera locked on these basic settings, as soon as you pick up your
camera you’ll be able to shoot straight away,’ she says. ‘In that way,
you can spend your time working on your backgrounds, directing your
subject and ensuring that your composition is as you want it.’
The Subjects
When
working with people who aren’t used to being photographed, your
subjects can often feel a little awkward so it’s important to put them
at ease. While this Masterclass finds our readers photographing models
who are used to being photographed, the same principles apply to make
sure everyone is at ease.
 photo by Annable Williams
‘One
of the first things that I do is visit my model and get them to lay out
a wide selection of their clothes,’ says Annabel. ‘Then I get them to
take me through their outfits and what piece of clothing goes with what.
It’s a great way of involving your model in a collaborative manner.
‘I
always get to know my clients before getting my camera out,’ says
Annabel. ‘Just sitting down and having a coffee with them can help to
put them at ease. However, as comfortable as they may be around you,
they may not necessarily feel comfortable being photographed. That’s a
great concern with many people who want to be portrait photographers –
their subjects don’t really know what they’re doing. That’s why I always
tell my models that I’m making it up as I go along. This is not a
million miles from the truth, though, as a portrait shoot should be
spontaneous. Don’t be afraid to wing it slightly and admit this – the
main thing is to make your model feel better about being photographed.’
Lighting and Composition
Working
in a location such as a city can mean that the photographer is
overwhelmed by the visual clutter that surrounds them. This can often
make it difficult to identify what will make an interesting location for
their subject. One of the best ways to approach this problem is to see
your model and their surroundings as a simple arrangement of shapes.

photo by Jennifer Peel
‘Taking
these kinds of images is a lot easier if you can begin to see
everything in graphic terms,’ says Annabel. ‘Everything you see is just a
shape, from the models and their clothes to the environment they find
themselves posing in. The way those shapes interact with each other is
going to determine your composition. Everything in the street is a
series of shapes and lines, and you need to fit the shape of the person
in with the background. Move the person around until their shape looks
good, and don’t be afraid to move them back and forwards until you see
what works.
For Annabel, when it comes to the methods of lighting a subject, there’s no competition – natural light wins every time.’
‘I
really feel that flash can often ruin a good picture and studio
lighting can be quite tedious to work with,’ says Annabel. ‘When you’re
in a studio, you’re very restricted to the kinds of backgrounds that you
can use and the types of things you can do with your model. Therefore,
working on location with natural light will always be my preferred
method. When you’re out on location, you begin to see how different
intensities of light will work with all the shapes we just discussed.
You can treat the sun as a natural spotlight. It’s just that rather than
moving your light, you’re moving your subject.’
Finding the
right light for your subject can often be a difficult task. Sometimes it
can be too harsh and at other times completely flat. The trick is to
look for areas that offer something a little more flattering.
‘There
are a huge number of different lighting conditions in a street
location,’ says Annabel. ‘Standing in direct sunlight works well for
flawless models, but is too harsh for the rest of us mere mortals and
will highlight flaws. However, if you can find some sort of cover, such
as a doorway, then that will work a lot better as it will soften the
light slightly and give a much more even exposure. Also, areas like that
can make for really excellent backgrounds.’
Location and Background
One
of the really fun parts of embarking on a portrait shoot is exploring
all the locations that could potentially serve as interesting
environments in which to work. A key consideration is to look for an
interesting setting. The easy option would be to find a ‘clean and
simple’ location, but it’s also worth looking for something a little
different.

photo by Annabel Williams
‘When
you look really closely at a location, you’ll begin to see all sorts of
interesting shapes, colours and textures that can produce brilliant
backgrounds,’ says Annabel. ‘I’m always attracted to things like
brickwork and graffiti as these can really give your images a grungy
feel.’
The key thing is to explore, but that doesn’t mean having
to travel for miles, explains Annabel. Sometimes one location will
provide ample opportunities.
‘It may take a while to find the
perfect background, but keep your eyes open and your mind receptive,’
says Annabel. ‘It could be that your background choice is affected by
your model’s clothes or even the skin tone. Make sure the different
elements complement one another.’
Annabel also suggests
experimenting with depth of field. Having an out-of-focus background can
help to emphasise your subject and make him or her much more
three-dimensional.
‘When I want an out-of-focus background, I’ll
use a long lens such as a 75-200mm,’ says Annabel, ‘and that’s why I
always have my camera set to f/5.6. This will really bring your subject
out from the background.’
Using an iPhone

photo by Annabel Williams
‘I
love shooting with my Apple iPhone,’ says Annabel. ‘I’m particularly
fond of the Hipstamatic and Camera+ functions. I love Hipstamatic
because you never quite know what you’re going to get – in fact, it
reminds me of working with cross-processed film years ago. With Camera+
you have more control and can do all sorts of things to the picture in a
few simple clicks, making pretty ordinary pictures look amazing.

photo by Annabel Williams
However,
if you are taking photographs on a proper shoot, where you are
controlling the lighting and so on, then just picking
up your iPhone
can result in some great shots.
‘I am always careful to keep the
subject’s face more in the centre of the shot when using apps,’ says
Annabel. ‘Apps tend to do weird things to the edges, so you need to
check that you don’t get colours bleeding into the face, for example.
With objects this is fine, though, and just adds to the wacky look,
particularly with Hipstamatic.’

photo by Isabel Murphy
Readers’ Images
Annabel Williams takes a look at a selection of our reader’s Masterclass images and offers some practical advice
Jennifer Peel

I’m particularly fond of the muted colours in this image. Jennifer has
managed to use the buildings behind the model to add another level. The
tones and textures complement her hair perfectly. Plus I’m in love with
those wonderful boots!

This is definitely an unusual composition, but I have to say it works
really quite well.
I like the way the model is looking up, and the
buildings in the background towering above her give the image a real
sense of scale.
I think this shot is gorgeous. The light is beautiful because the model
is standing under a roof that is creating really good top shade and soft
light. I love the out-of-focus café scene in the background, and I
particularly like the blurred edge on the left of the picture, which is a
curved wall. I think this really helps to make us focus on the model.
The blurred wall also links with the lights at the top right of the
shot, which helps to balance the photograph.

Isobel Murphy
Izzy has captured a really great moment here and has managed to make
the shot look spontaneous, even though we asked the model to do this
several times. The model looks really happy, and it makes the shot a lot
of fun. I also love the out-of-focus texture and the colour of the
background in the top right of the picture. It’s amazing to think it’s
just a café window at the end of a subway.
 ‘A
‘A
good tip is to experiment with different camera angles. Just tilting
your frame slightly can add a real dimension to your photographs’

What really stands out in this shot is the fact that Isobel has tilted
the camera to achieve a dynamic effect. That’s a good tip – to
experiment with different camera angles.
Just tilting your frame
slightly can add a real dimension to your photographs. Also, the
positioning of the model looks great with the columns towering above
her.
This is a great shot. I’m particularly in love the model’s hair colour and
the way that it works with the brick wall behind her. I’m also struck by
the way Izzy has faded out the right side of the picture to emphasise
the model. The composition works really well and, most importantly, the
model looks incredibly relaxed.


