
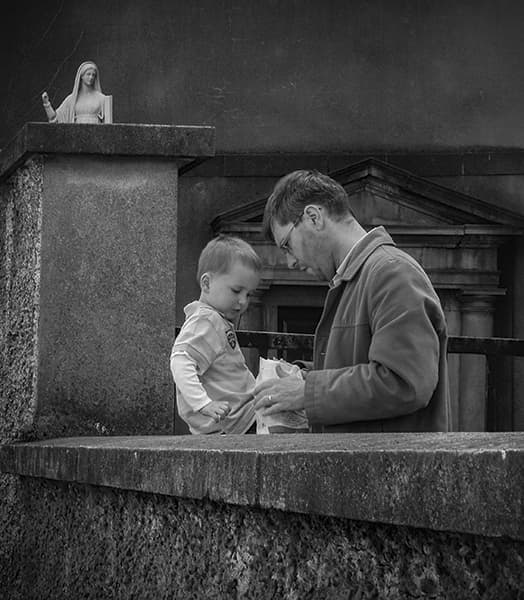
The main focus of this photograph from Julian Ashleigh is the touching interaction between the man and his son as they both peer into the bag that the man is holding. I like the composition in this photograph, as well as the statue figure in the top left, looking down approvingly.
Before.
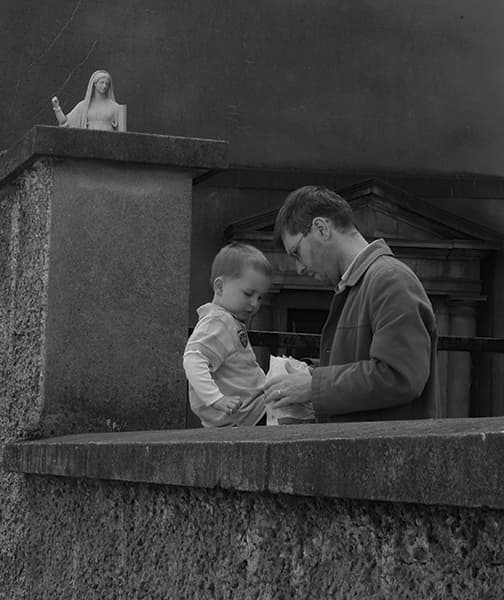
The original version has a nice soft contrast feel to it. However, it’s also rather dark. The following steps show how I first went about increasing the overall global contrast to extend the tonal range. I followed this by applying a localised Radial Filter adjustment to reverse the global contrast boost and preserve the soft-contrast feel over the area that contains the man and boy. My aim here was to achieve a photograph that had a nice balance of black & white tone, but at the same time preserve a delicate tone contrast on the two people in this scene.

After.
1. Apply an Upright adjustment
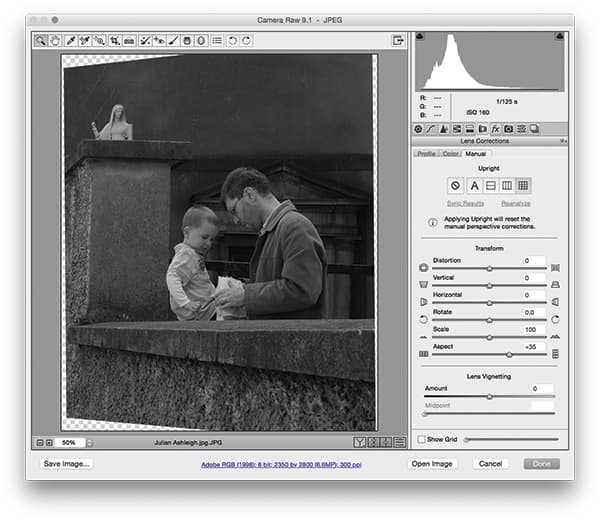 I felt that some of the lines in this image would benefit from being straightened. To do this, I first went to the Lens Corrections panel and applied a Full Upright correction, which I combined with a +35 Aspect Ratio adjustment. This squashed the image horizontally, straightened things out and helped preserve the proportions of the original.
2. Crop and apply Basic panel adjustments
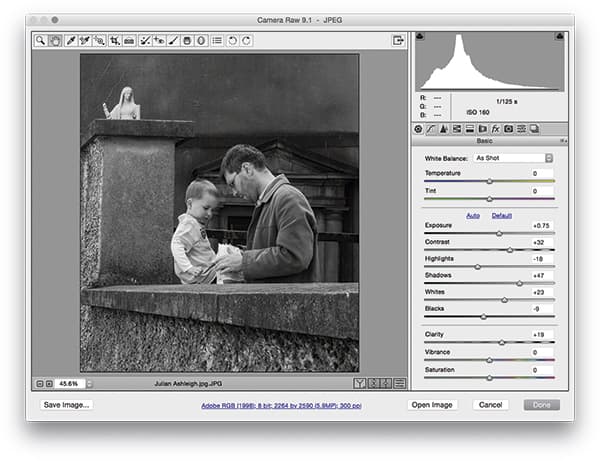 I selected the Crop tool and applied the crop shown here. I then went to the Basic panel, where I lightened the image, increased the global contrast and made some further adjustments that involved darkening the Highlights, lightening the Shadows and fine-tuning the Whites and Blacks sliders. These adjustments increased the overall global tone contrast.
3. Apply a Radial Filter adjustment
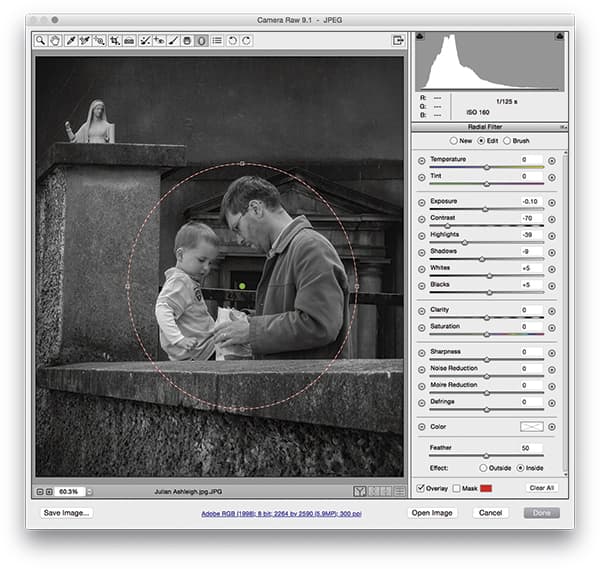 Next, I went to the Effects panel and applied a darkening vignette to darken the corners of the image. I followed this by selecting the Radial Filter and added a localised adjustment. The objective here was to decrease the tone contrast for the selected area – that of the boy and his father – to counter the global adjustment applied in Step 1.
Camera Raw histogram
The Histogram in the Camera Raw dialogue (and also in the Lightroom Histogram panel) can provide some clues to the tonal range characteristics. Here, you can see a before and after histogram for the photograph shot by Julian Ashleigh. The first shows the histogram for an image that has soft contrast, where the shadows and highlights have yet to be optimised.
Before.
The second shows the histogram for a version with an extended tonal range where the shadows just start to clip, and the brightest highlights are just shy of the point where they are about to clip.
After.
Note also the wider abundance of tone values in the shadows to midtone region. The histogram provides a visual representation of the tones in an image. It’s a useful guide to the way an image looks, which can help you check to the distribution of tones in a photograph.


