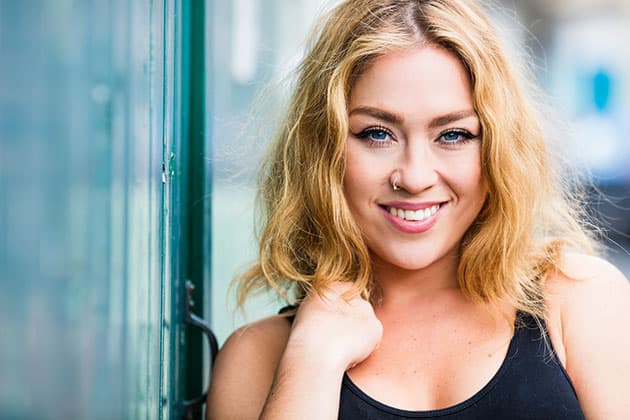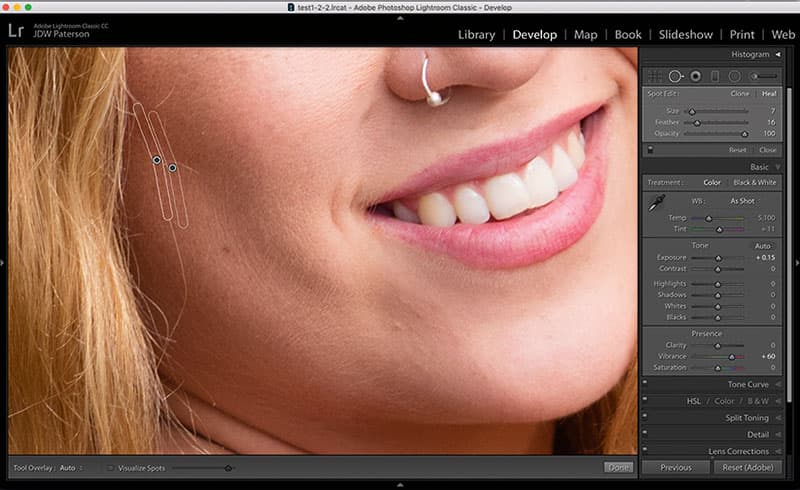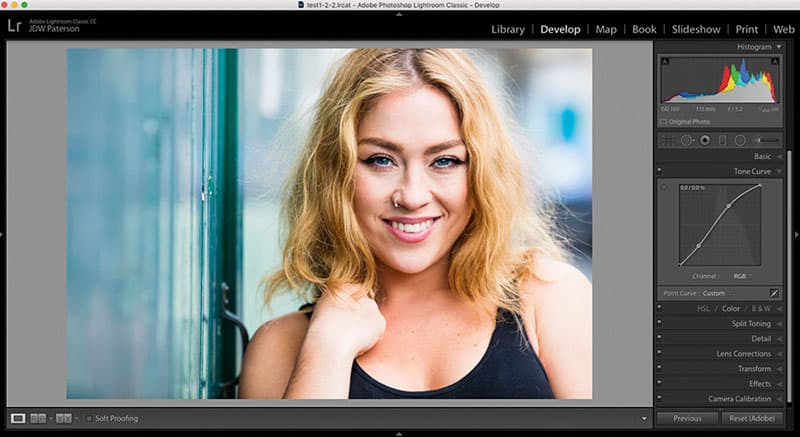
Plot the curve top heavy to lift hightlights
1. Boost with curves
An ‘S’ curve boosts contrast and colour saturation, so it can be useful for giving your portraits extra punch. We usually want to make the curve top heavy, as this lifts the highlights while pinning the shadows in place. Go to the Tone Curve Panel, click the Point Curve tab, and then drag the line up and down to create the ‘S’ shape.
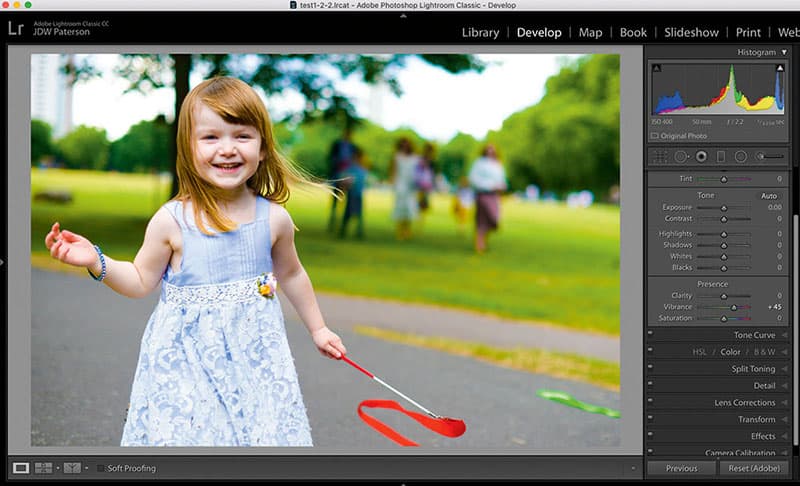
The Saturation slider can boost colours too far, so use the Vibrance slider to target the weaker colours
2. Vibrant colours
The Vibrance slider in the Basic Panel works by targeting the saturation of the weaker colours in the image while preserving the colours that are already strong. As such, it’s ideal for boosting portraits, as we can boost colours like the weak blues in the dress here without overcooking the yellows and oranges in skin tones. Use this in conjunction with the Saturation slider to boost the weaker colours.
3. Master local adjustments
Enhancing portraits is often about making localised adjustments to particular parts of the face or body – we might want to boost the eyes, enhance lip colour, soften the skin, whiten teeth, sharpen lashes and so on. The Adjustment Brush is the ideal tool for making selective changes like this in Lightroom.
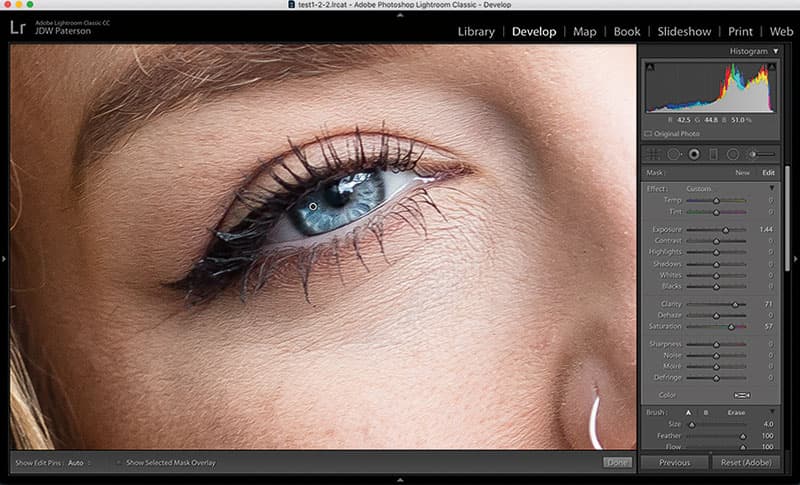
Use the Adjustment Brush to target smaller areas
4. Paint over the iris
The Adjustment Brush is a great tool for boosting irises, as we can make several adjustments at once. Grab the tool then dial in positive Exposure, Clarity and Saturation. Paint precisely over the iris with a small brush (exclude the pupil) and then fi ne-tune the tonal sliders.
5. Sync adjustments
A keyboard shortcut makes it easy to copy local adjustments – simply Alt + drag the pin. This is especially useful for portraits, as we can copy an adjustment from one eye to the other. If you have several similar photos you can apply local adjustments across the entire set by syncing the images.
6. Brush tips
The Adjustment Brush settings are on the right when the tool is active. To speed things up, hit O to toggle the mask overlay on or off to check your painting, and hold Alt to subtract from the mask. The square bracket keys resize your brush tip. Use Shift with the bracket keys to alter the feather (hardness) of the brush.
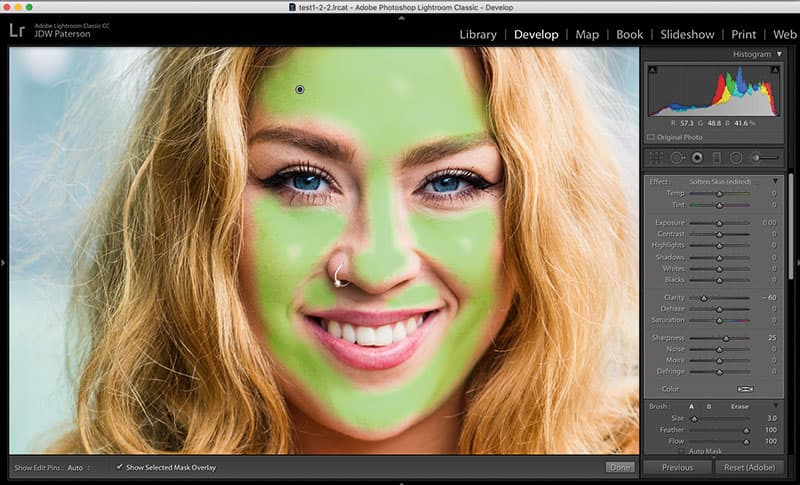
Dial in negative Clarity with the Adjustment brush to smooth skin
7. Soften skin
Negative Clarity can result in a subtle yet effective skin-smoothing effect. It’s not as refined as more advanced skin-smoothing techniques, but it’s fine for a quick fix. Grab the Adjustment Brush, hit the minus icon next to Clarity, then paint over the skin. Be careful not to go over sharp details like the eyes or lips.
8. Luminance lift for skin
Here’s a quick fix that can work wonders over skin. Simply go to the Luminance tab in the HSL Panel, grab the target icon for on-image control, then drag upwards over the skin slightly. This’ll make the skin slightly brighter, which results in a fresher feel that works well for beauty shots.
9. Whiten teeth
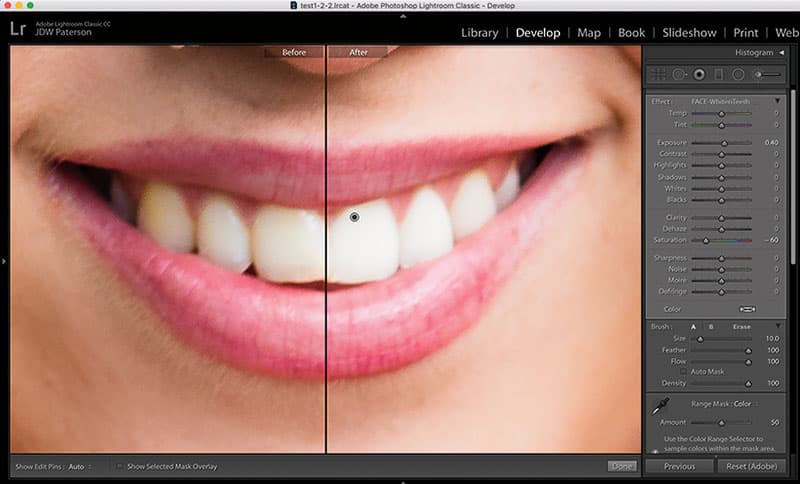
The Adjustment Brush has several inbuilt presets, such as one that whitens teeth. Grab the tool, click the Effect dropdown and choose ‘Teeth Whiten’, then paint over the teeth. Thanks to the new range masking feature, we don’t even need to paint precisely. Simply set ‘Range Mask: Color’ then sample the teeth.
10. Mask your sharpening
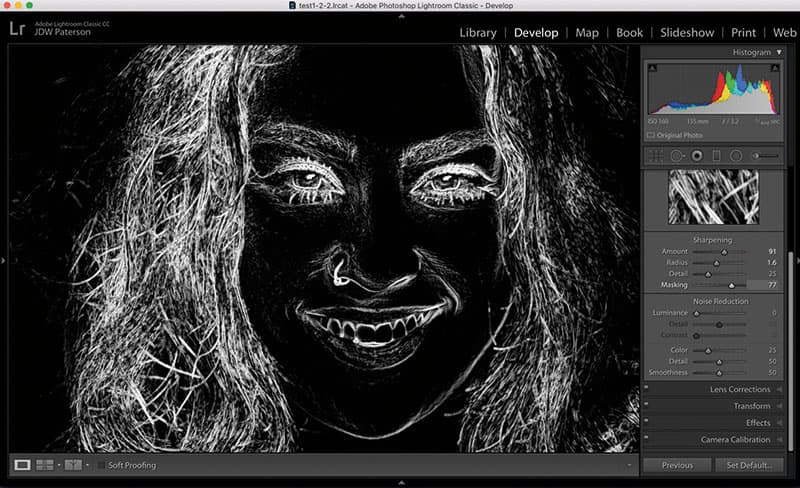
Found alongside the sharpening settings in the Detail Panel, the Masking slider is a great aid when sharpening portraits. We don’t really want to sharpen the skin or blurred backdrops, as this’ll amplify noise. So hold Alt while dragging the Masking slider, and you’ll see the lower frequency details begin to appear in black as you drag, which prevents them from being sharpened.
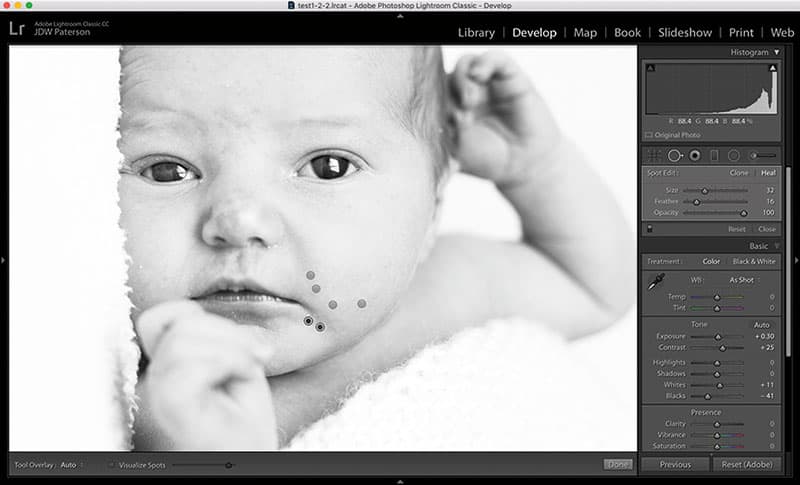
11. Retouch marks and spots
The Spot Removal tool is good for tidying spots and blemishes over skin. Ensure the tool is set to Heal in the tool options to the right. Use the square bracket keys (] and [) to resize the brush tip until it’s slightly larger than the point you want to fix, then dab or paint over it to remove. Adjust the GREEN source point, if necessary.
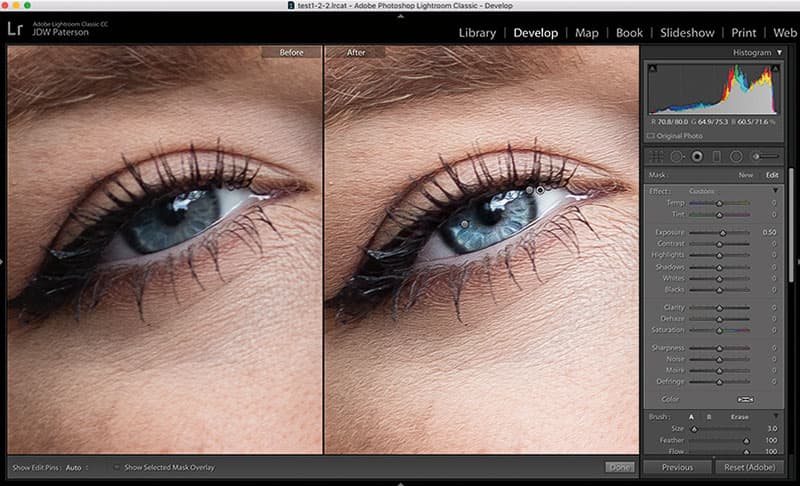
12. Whites of eyes
The whites of the eyes will often benefit from a subtle lift, although be careful, because this is an edit that’s easy to overdo. Grab the Adjustment Brush and dial in positive Exposure; then paint precisely over the whites. To take it further, try darkening the edges of the iris slightly with another adjustment.
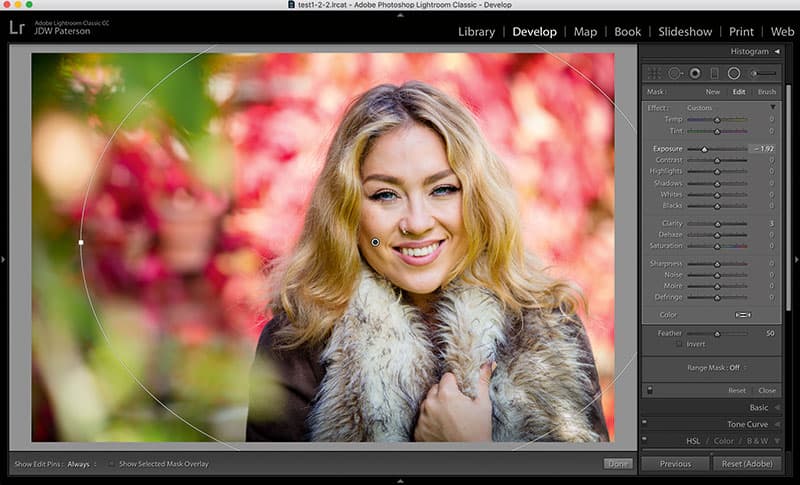
Add a vignette to darken the edges and lead the eye in
13. Vignette the edges
A subtle vignette darkens the corners of the image’s frame. This can be particularly useful for portraits, as it helps to draw the eye into the subject and away from the edges of the frame. The Radial Filter tool is ideal. Dial in negative exposure, then drag a circular adjustment. If necessary, select the brush option and subtract the vignette over areas you don’t want to include.
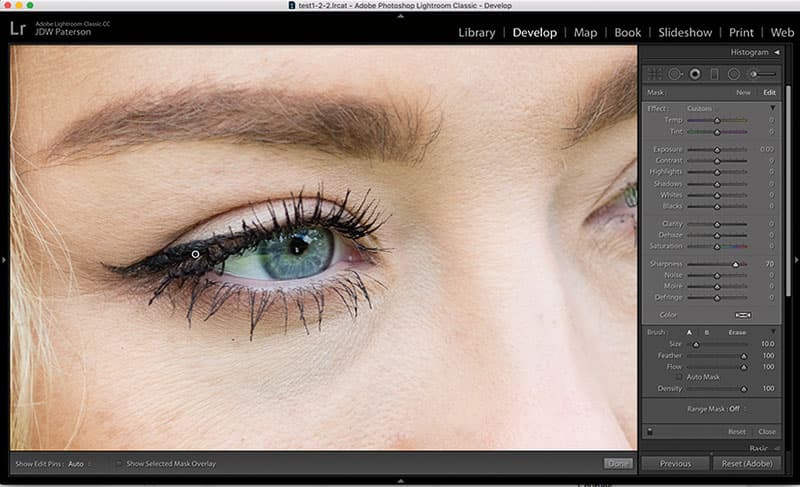
Eyes are a focal point, so sharpen the lashes for added impact
14. Sharpening for lashes
Eyelashes will often benefit from selective sharpening. To do so, grab the Adjustment Brush and load it with positive sharpening in the tool options to the right of the interface, then paint roughly over the lashes to sharpen them. A slight boost in the Clarity or Dehaze sliders can also work well here. This sharper detail will draw the viewer to the eyes.
15. Remove stray hairs
Stray hairs around the edge of a face can be very distracting. Major hair retouching should be done in Photoshop, but for the odd stray hair, Lightroom’s Spot Removal tool works just fine. You can paint to remove the hair, or hold Shift and click at points along the hair to heal in a straight line.
16. Cropping tips
The Crop tool is invaluable for portraits as it can often be tricky to get the crop right in-camera, especially when the subject is moving. Don’t be afraid to crop into foreheads in your close-ups to put the eyes on one of the third lines in the frame. You can hit O to toggle between overlays, or go to Tool> Crop Guide Overlay.
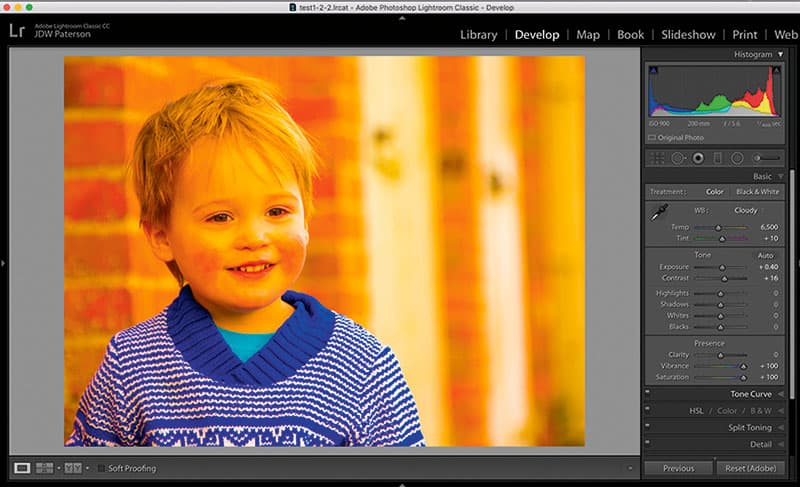
17. Fix skin tones
It’s important to get white balance spot on when dealing with skin tones. The best way is to click on a neutral point with the White Balance eyedropper, but if there’s no obvious neutral area, try temporarily increasing Saturation and Vibrance to +100. This can make it easier to judge the right Temp and Tint settings. Here the image is obviously too warm.
18. Share the love
When you’re taking portraits of a person, they will often ask you to send them a photo. If your camera or memory card has Wi-Fi then you can do this immediately. First upload the photo to your phone, then open it in Lightroom Mobile for a few quick tweaks or to apply a preset before sharing the image.
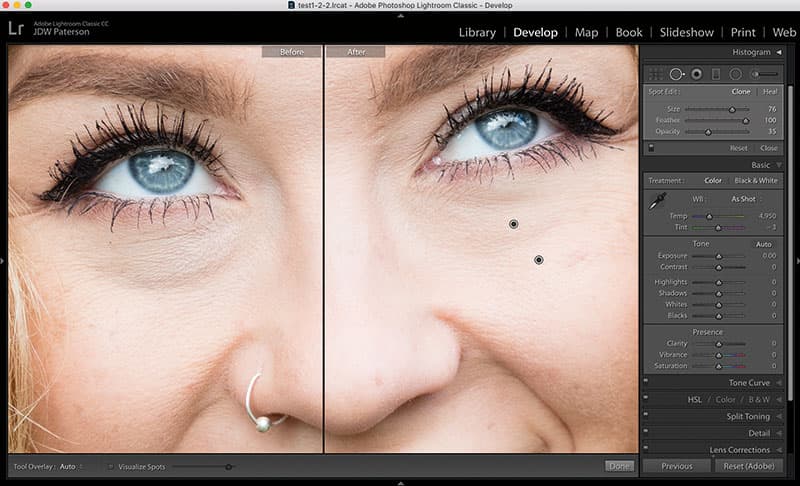
You can soften bags under eyes with the Spot Removal tool
19. Clone eye bags
Grab the Spot Removal tool from the toolbar and set it to Clone in the tool options to the right. Set Feather to 100 and paint over the eye bag to soften dark bags. Drag the sample point to a clear area on the cheek below the eye, then lower the opacity to about 30%.
20. Tweak all settings at once
Often, when making selective adjustments, we end up tweaking several tonal settings at once. Here’s a neat trick for fine-tuning the settings. Hold Alt and drag over the point to the left or right, and all the settings within will change together. It’s useful for portraits, as we can swiftly fine-tune the overall strength of any adjustment with ease.

