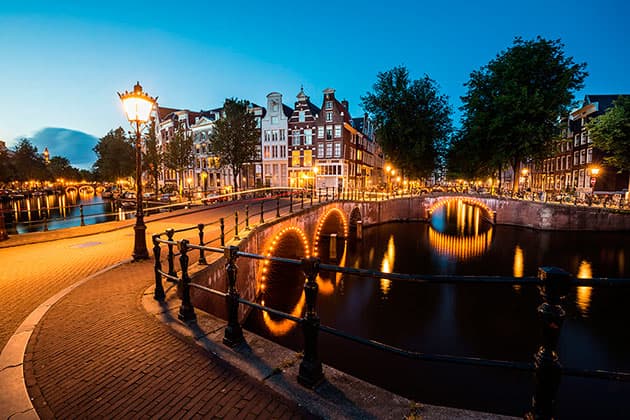
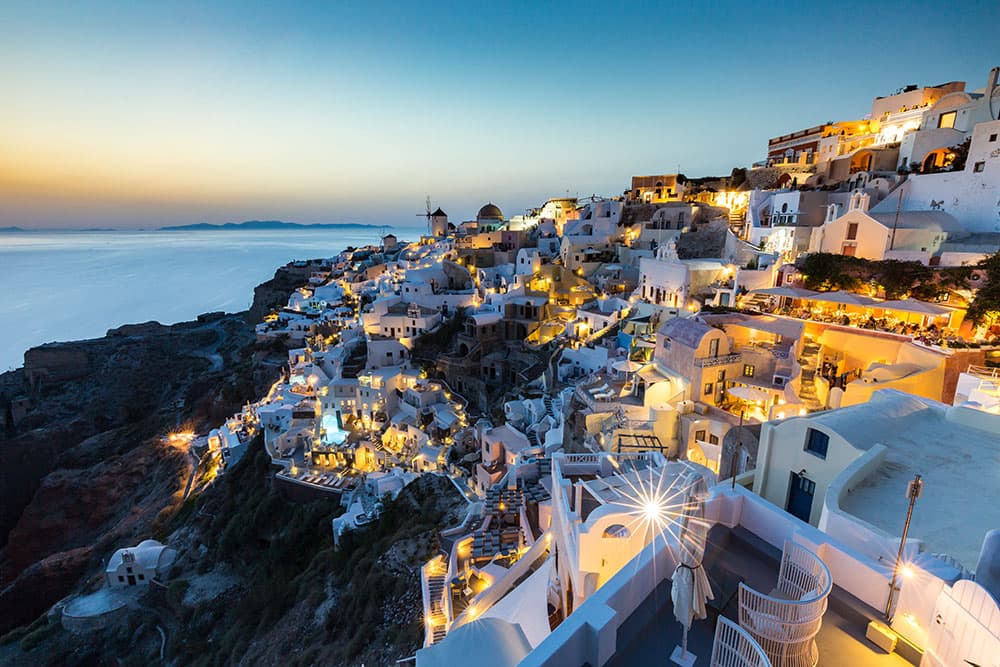
My favourite time for shooting cityscapes is when the sky takes on a blue hue and street and building lights come on. Canon EOS 5D Mark III, 16-35mm, 61secs at f/16, ISO 100
Millions of people live or work in cities and this can often influence the way we view them. As a result, the photographic potential of urban environments is often overlooked in favour of more natural landscapes. Despite this, cities offer numerous opportunities across many genres of photography and none more so than for those who enjoy capturing cityscapes in low light.
When to shoot
Like traditional landscape photography, dawn and dusk are the most photogenic times for shooting cityscapes. Cities that are bustling during the day can be calm and tranquil during the pre-sunrise glow of dawn. Take a stroll around a city during the morning ‘blue hour’ and you are often just sharing the pavements with joggers, dog walkers and the occasional weary commuter looking to beat the rush hour. This is particularly true of even the most popular cities around the world – early morning is the perfect time to capture iconic sights free from tourist hordes.
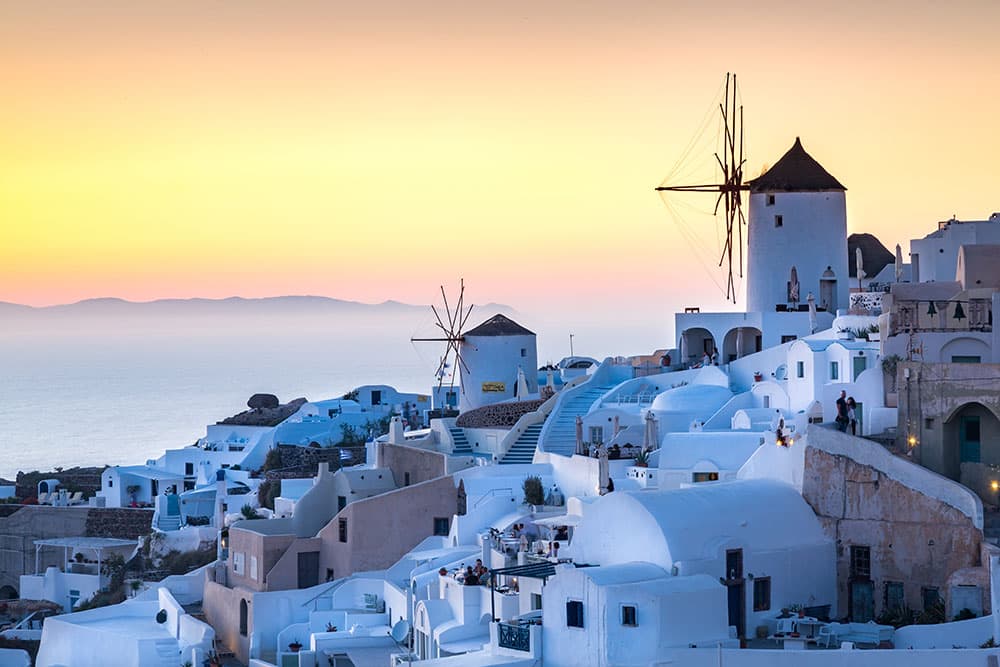
Dusk meanwhile, often falls at a more practical shooting time, making it perfect for cityscapes. If you have ever considered how light changes during an evening you will know it goes through a number of transitions. As the sun goes down the shadows get longer creating scenes of greater contrast. The colours of sunset can highlight buildings with an attractive warm glow and transform clouds and even rivers with vibrant hues of oranges and reds.
While sunset is a great time to shoot cities you need to factor in constantly changing natural light and the shadows cast from buildings. These can create a darkened foreground and lead to flat or unbalanced images. Using Graduated Neutral Density filters is a fantastic way to control the exposure by holding back the brighter sky, allowing you to lift the foreground shadows. An ND filter also works well for longer exposures but will cut light to the whole scene potentially leaving dark shadows in places.
After sunset, and once the sun has dipped far enough below the horizon, the sky starts to take on a blue hue. This gets deeper and darker the further the sun sinks below the horizon. This is often referred to as the ‘blue hour’ (the period of twilight after sunset). Often street, vehicle and building lights will come on (or become more noticeable) and you will be able to shoot longer exposures without the need for filters. This is my favourite time to be out shooting cityscapes.
Interior lighting turns buildings into beacons of patterned light. Canon EOS 5D Mark III, 24-105mm, 30secs at f/16, ISO 100
It is as though the whole city comes to life, gifting an array of photographic possibilities. Interior lighting turns bland office buildings into beacons of patterned light, transforming their appearance. Bridges are lit and give the rivers they span a makeover by turning their surfaces into shimmering pools of reflected light. Iconic tourist attractions also take on a completely different look in artificial light, often looking more impressive illuminated.
Following blue hour the sky gradually turns black. At this point it becomes harder to get a balanced exposure as highlights can get blown while trying to allow enough light into the camera. You are also much more prone to noise in the shadows which becomes more evident as you try to lift them when post-processing your images. You can still get great cityscape shots when the sky is black, especially if you like to convert your images into black & white, however they may lack the impact that a more colourful sky can provide.
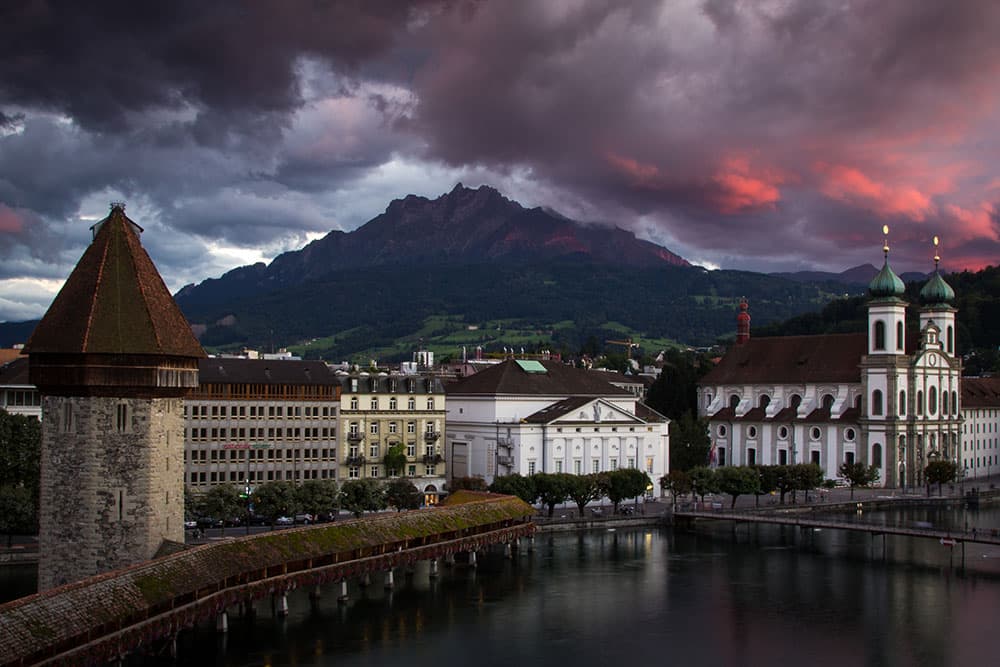
The medieval city of Lucerne in Switzerland looks dramatic under a stormy sky. Canon EOS 60D, 24-105mm, 1.6sec at f/20, ISO 100
Low-light challenges
Low-light cityscape photography is not without its challenges. I’ve witnessed enough people take a handheld snapshot of a beautiful night-time cityscape with their expensive DSLRs, yet when they view their images they see a dark scene with no detail. I’ve also seen photographers try to compensate for this by using flash which typically only lights the foreground and not the whole scene. Even during blue hour, with more available natural light, handheld images can be plagued by noise or blur.
It is natural to get disheartened when you are not able to replicate in-camera what the human eye sees. However, these are all relatively easy issues to overcome using long exposures.
First, it is important to understand the dynamics of light and how it interacts with your camera. As natural light decreases you need to compensate for this in-camera. One option is to widen your aperture, but for cityscapes you ideally want to use a narrow aperture to keep most of the scene in focus. You can also increase your ISO but in doing so you will add more noise to the image. This effectively leaves exposure time. A longer shutter speed will let more light into your camera while maintaining clean images but may cause blurring if your camera is not stable.
Therefore in low-light shooting scenarios it is best to stabilise the camera (ideally on a tripod) in order to avoid any movement and then use a combination of all three variables (ISO, aperture and shutter speed) to achieve the optimum image quality.
To get started fix the lowest native ISO (typically 100), select a narrow aperture (somewhere between f/11 and f/20) and then adjust the exposure based on the scene, the available light and what you are trying to achieve. This could range from seconds to minutes.
All the variables can be tweaked or adjusted to get your desired output. For example, as natural light decreases, or if you find the length of the exposure to be impractical, simply increase the ISO slightly or widen the aperture. Both these options can reduce the length of exposure needed to let in a similar amount of light.
To keep noise levels down you need to use a low ISO, which often results in a lengthy shutter speed. Canon EOS 5D Mark III, 16-35mm, 25secs at f/16, ISO 100
Choice of equipment
The good thing about low-light photography is that most modern cameras will cope admirably with the demands of long-exposure shooting. Of course, certain higher-spec cameras will offer better dynamic range (allowing you to recover more from the highlights or shadows), or better noise control (to give you cleaner-looking images at higher ISOs) but this should not put you off using the tools at your disposal. If you shoot raw, then noise, exposure, shadows and highlights can be improved in software tools such as Adobe Lightroom. Essentially, if you can adjust ISO, aperture and shutter speed manually you are good to go. Using a tripod will slow you down and encourage you to think carefully about the image you’re creating, both compositionally and technically. Tripods also offer considerably more flexibility when composing your shot, compared to resting your camera on a wall.
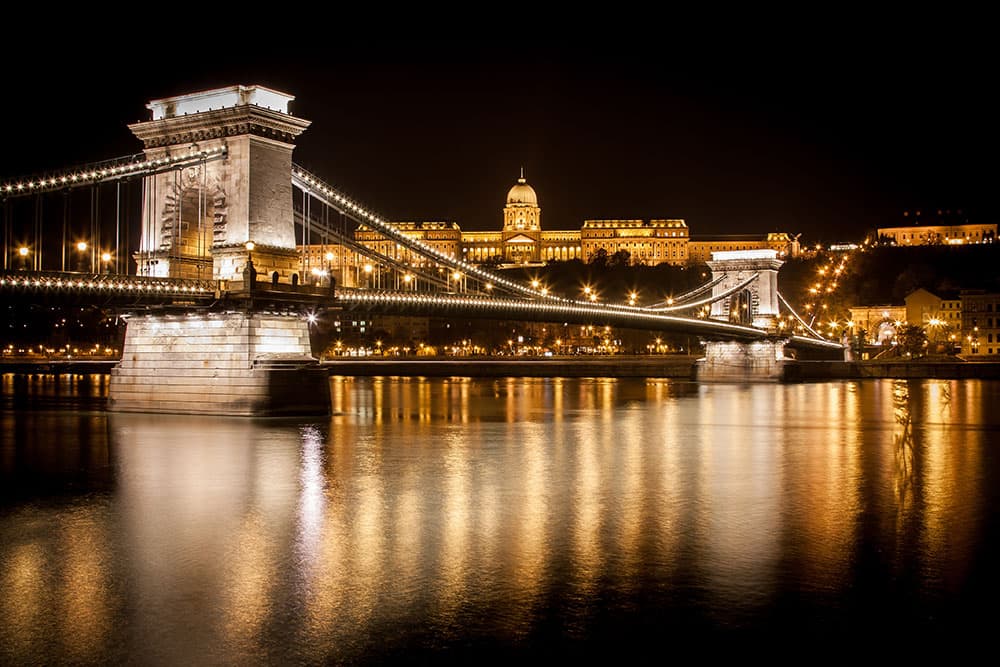
Lit bridges turn the rivers they span into golden pools of relected light. Canon EOS 450D, 24-105mm, 15secs at f/11, ISO 100
Lens selection
Your lens selection should be determined by what you are shooting. You can of course shoot cityscapes with any lens but your composition may be restricted. A wideangle zoom (or prime) is often the most flexible for cityscapes while tilt-shift lenses are also a popular choice as they can reduce/remove the barrel distortion caused by wide angles. Wide angle distortion is particularly noticeable on tall buildings where lines converge towards the centre of the frame. Additionally, there are situations where a telephoto lens can be used to great effect as they can isolate certain details and create attractive abstracts. More often than not you will be shooting with narrow apertures, so a fast lens is not essential.
Capturing light trails
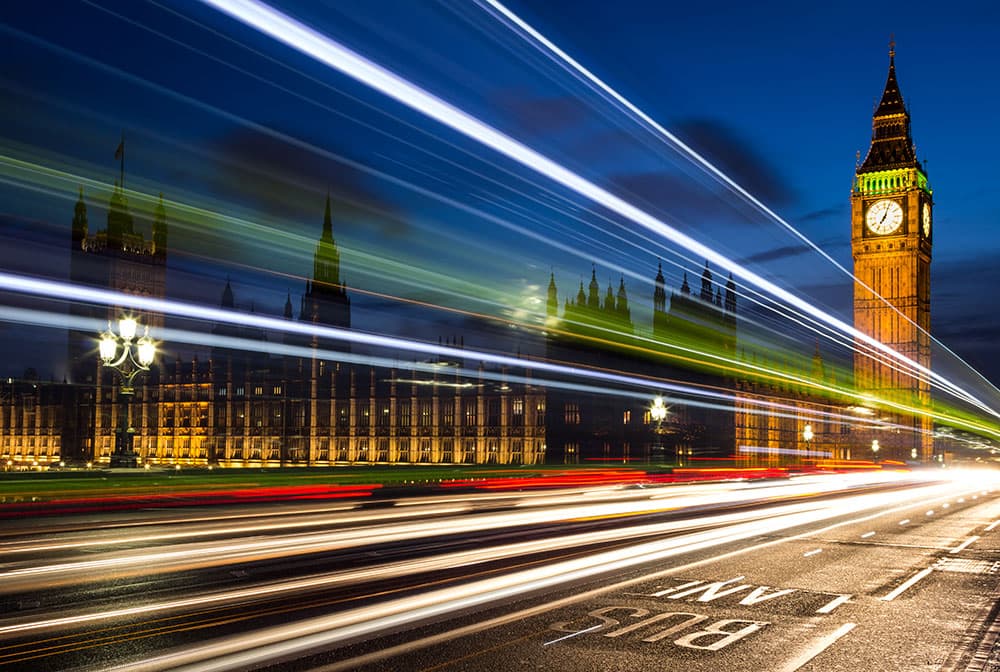
One of the best ways to transform a low-light cityscape is through the use of light trails. These can add a dynamic feature to an otherwise quite static scene through bright streaks of colour and motion.
A light trail can be created by any light source moving through your image while the shutter is open. This could be a car, bus, bike, boat or even a person with a torch. The evening blue hour is normally the best time for this as there is more traffic on the road, while light from the streets and buildings lifts the rest of the scene.
To get the cleanest light trails, open the shutter before the moving light source enters the frame and close it once it is fully out of shot. Shoot in Bulb mode so that you can control the exact timing of the shot as well as the length of the exposure to ensure you capture enough light for the whole scene and not just the trail.
10 simple steps to better shots
- Use a tripod: This prevents any camera movement, which can cause blur, and allows you to shoot long exposures.
- Set a low ISO: Your image will be kept as clean as possible and it sets the level on which to base your exposure time and aperture.
- Shoot in Manual or Bulb* mode: This allows you and not the camera to dictate the image parameters. *Use Bulb mode if you are shooting light trails or need an exposure time to last more than 30secs.
- Use Live View: Auto focus can struggle in low light so focus manually using the Live View magnifier or focus peaking. (An additional benefit of Live View on DSLRs is that it doesn’t let light leak into the camera through the viewfinder).
- Switch lens to Manual: Fix the focus then switch to manual on the lens to lock the focal point. This avoids the camera hunting for auto focus once you click the shutter.
- Turn off any lens Image Stabilisation: Lens-based stabilisation is not needed and can cause minor degradation of the image when the camera is on a tripod.
- Mirror Lock Up: In DSLRs, use Mirror Lock Up to avoid the minor vibration they can cause when the image is taken.
- Remote shutter release: Use a remote release to avoid any camera shake caused by pressing the shutter. Great for Bulb mode too.
- Setting aperture and exposure: Start with a narrow aperture (between f/11 and f/20) and adjust the exposure time depending on the amount of available light (both natural and artificial) and your subject matter.
- In-camera noise reduction: Turn off any camera noise reduction function. Sometimes the auto noise reduction setting on a long exposure can take as long as the exposure. Noise reduction can be done on the raw file in post-production
About Matt Parry
Matt Parry is an award-winning travel photographer whose images and articles have been published in leading travel and photography publications. He has visited more than 50 countries across six continents and his photography has evolved from showcasing his trips to becoming the driving force behind where and why he travels. www.mattparryphotography.com.