When photographing architectural subjects it can be difficult to control the perspective unless you are using a tilt-and-shift lens and have the camera perfectly aligned vertically. Furthermore, whenever you edit architectural images in Photoshop, it is important to ensure that the perspective still looks correct and any elements you choose to combine with the original also correctly match the perspective. With this in mind, it can certainly help to enable Lens Profile corrections in Lightroom or Camera Raw. This is because a lens profile can correct any geometric distortion and ensure the straight edges appear straight. You can also make use of Upright adjustments in the Transform panel to auto-correct the perspective at the raw editing stage. However, there are some extra tools available in Photoshop that you can also use to manage the perspective.
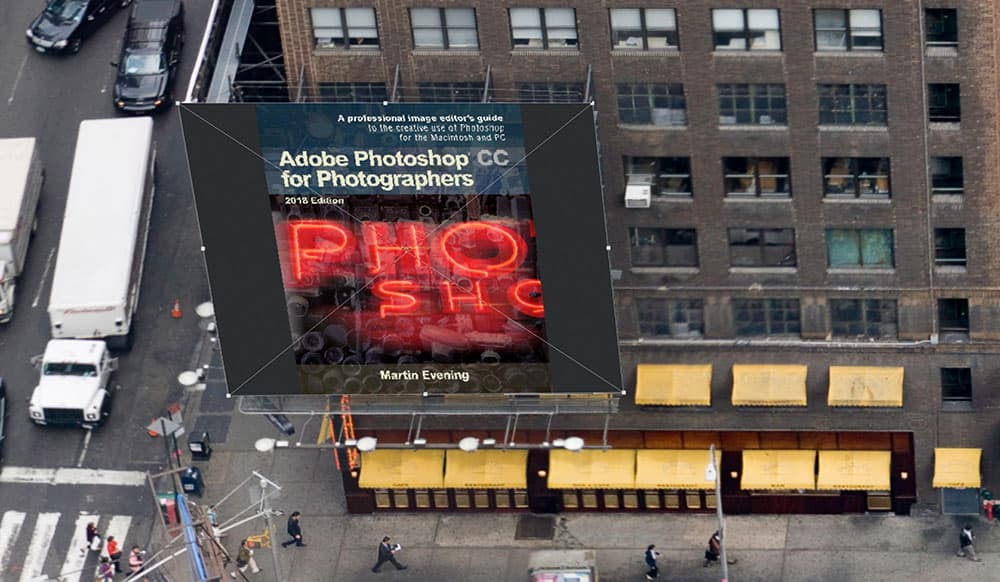
The key to successful retouching is to make use of the perspective clues that are available in the picture to help determine the positioning of additional elements. For example, the main image here shows a view of Midtown New York shot from a hotel balcony. In this scene one can easily define the three main axis planes by tracking the lines of the streets and buildings. There are lots of clues here that can be referenced. Now, let’s say I wanted to replace the poster highlighted here with something more appealing, such as our favourite magazine. The simplest way to do this would be to use the Free Transform command. With the Free Transform active you can drag the corner handles to accurately align the corners, or hold down the Shift key as you drag a corner handle to scale the Transform. As I explain in the following steps, it may also help to first convert the layer to a Smart Object so that the original pixel image data is always preserved no matter how many times you need to fine-tune the position and scaling.
Free transform editing

Credit: Martin Evening
1. Smart Objects
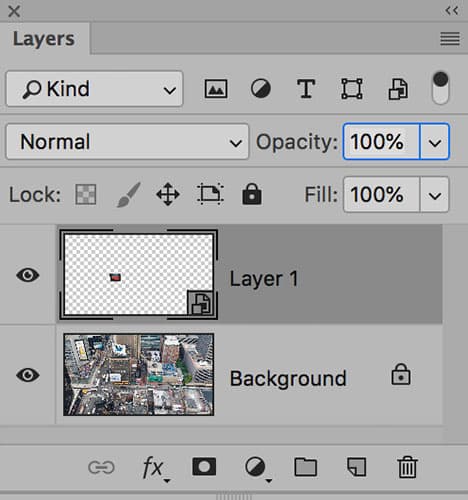
To add a new poster image to the original Photoshop document as a new Photoshop layer, go to the Layer menu and chose Layer> Smart Objects>Convert to Smart Object.
Credit: Martin Evening
2. Free Transform
Go to the Edit menu and choose Free Transform (Command + T [Mac], Control + T [PC]). Drag on the corner handles of the Transform bounding box to edit the shape to match that of the billboard poster in the original image.
3. Editing options
Since I had converted the added layer to a Smart Object, I was able to, at any time, doubleclick the layer thumbnail to open the original (untransformed) image and edit or replace it as necessary.
With other types of subjects it can be harder to match the perspective if there are no obvious clues in the image to work with, such as a landscape scene that’s devoid of straight lines. If you are shooting to intentionally combine elements together there are steps you can take which can help you achieve more realistic-looking results. For example, if you are able to place a 3D reference shape, such as a cube frame, in the scene that you are about to shoot, this can provide a useful guide to the perspective – plus it can also indicate the direction of the light. Professional photographers often do this when preparing a scene that is to be photographed for use in a CGI composite.
Having done that you can use the Vanishing Point filter to calculate the planes in the captured scene and retouch the photograph and match the perspective. Or, you can use the Free Transform or Perspective Warp tools described in this article to get added layered elements to match the original scene’s perspective.
Another thing you can do is to ensure that the photos you wish to combine are shot from the same height and angle. I have done this on a number of shoots where the objective was to create a composite image. Basically I would carefully note down the tripod measurements and subject distances as I shot location and studio photographs. Merging the different elements together is a lot easier then.
Vanishing Point filter

Credit: Martin Evening
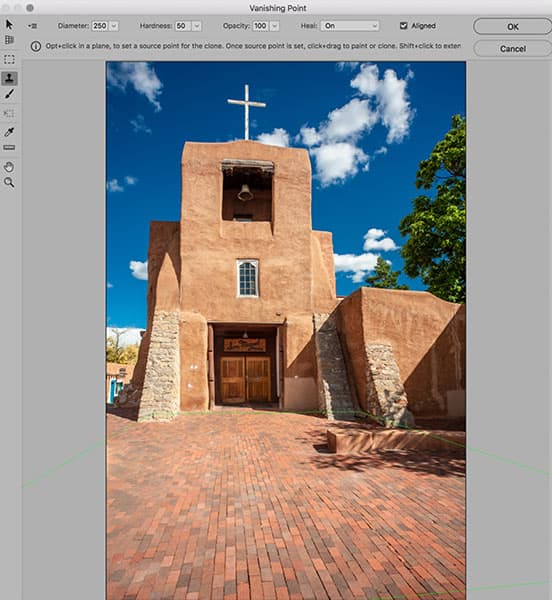
The Vanishing Point filter in the Filter menu can be used to retouch photographs while matching the perspective. In the example shown here I used the Vanishing Point filter to remove a section of the wall on the left, replacing it with paving stones sampled from elsewhere in the image.
Credit: Martin Evening
1. Duplicate layer
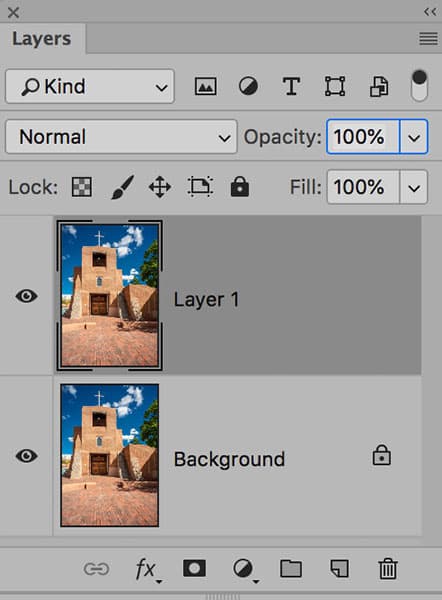
Open the image in Photoshop and create a duplicate copy of the Background layer by dragging the Background layer down to the New Layer button at the bottom of the Layers panel. Next, choose Vanishing Point from the Filter menu.
Credit: Martin Evening
2. Define perspective
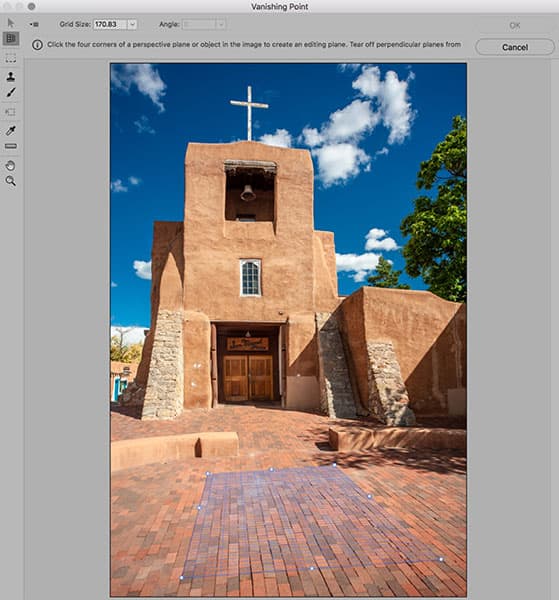
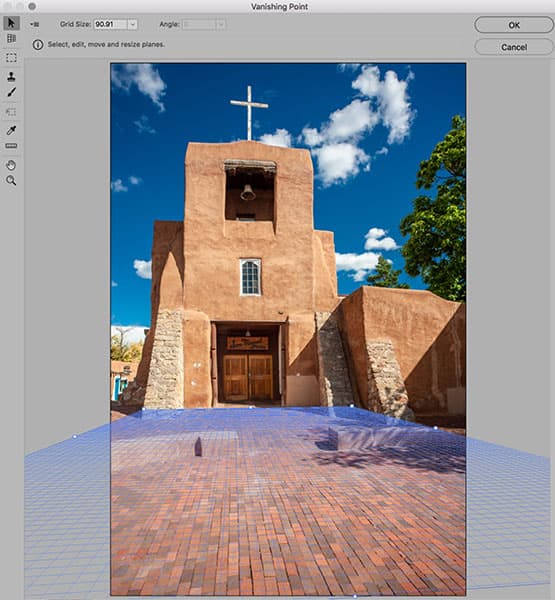
Use the Create Plane tool (C) to define the perspective. Do this by making four successive clicks to define the plane of perspective, which you can do by looking for clues in the image, such as by following the lines of the paving stones.
Credit: Martin Evening
3. Fine-tune it
In most cases it will be necessary to fine-tune the perspective planes. In this instance select the Edit Plane tool (V) and click on the corner handles to edit the plane shape. Then all you need to do is drag on the side handles to expand the plane.
Credit: Martin Evening
4. Remove wall
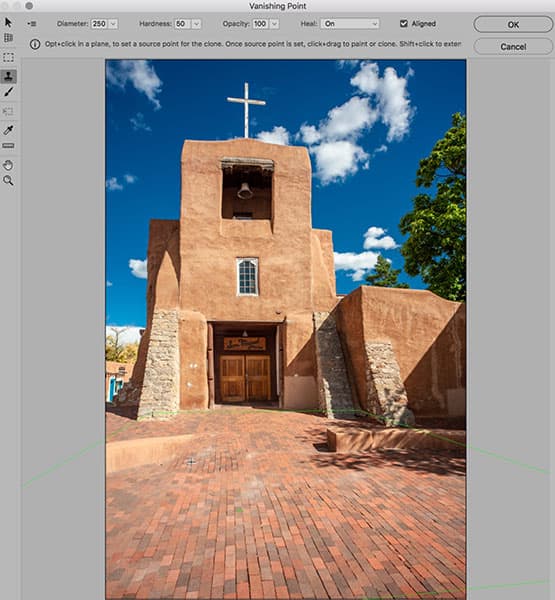
Next, select the Stamp tool (S) and, with the Heal mode enabled, used the Stamp tool to remove the wall on the left. Alt-click to set the source point then move the cursor across and click and drag to start cloning while matching the perspective.
Credit: Martin Evening
5. Retouch
To get the Vanishing Point retouching to look convincing, build up the retouching gradually, taking care to keep switching the source points. It helps that the Vanishing Point filter Stamp tool always shows a clone overlay to let you preview cloning before you click to apply.
Credit: Martin Evening
Perspective Crop tool
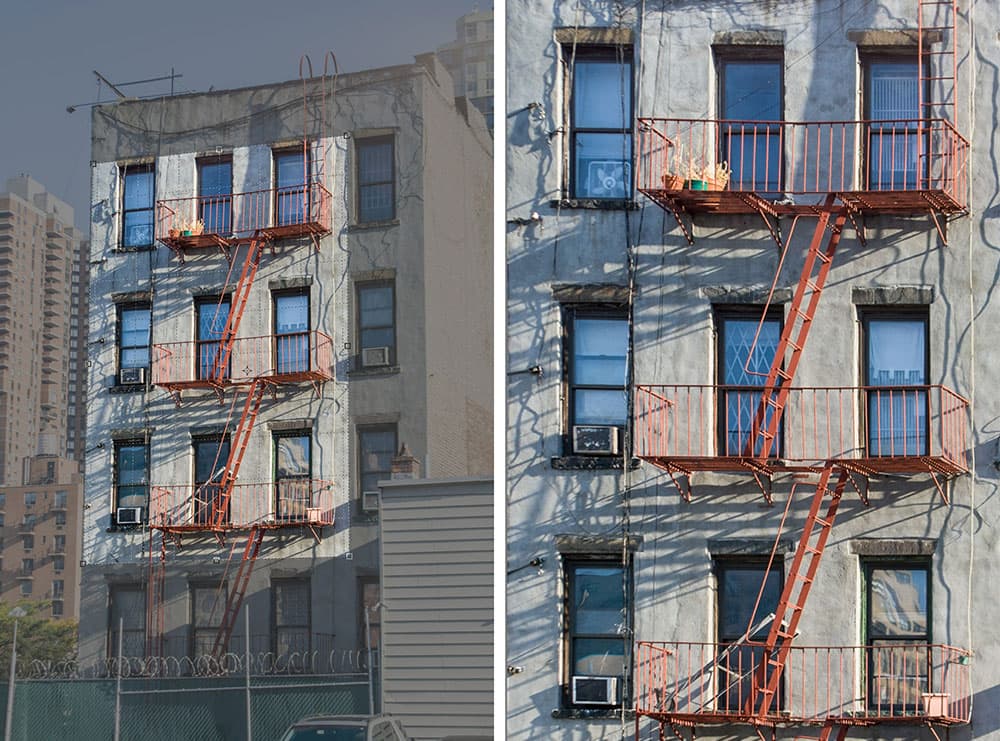
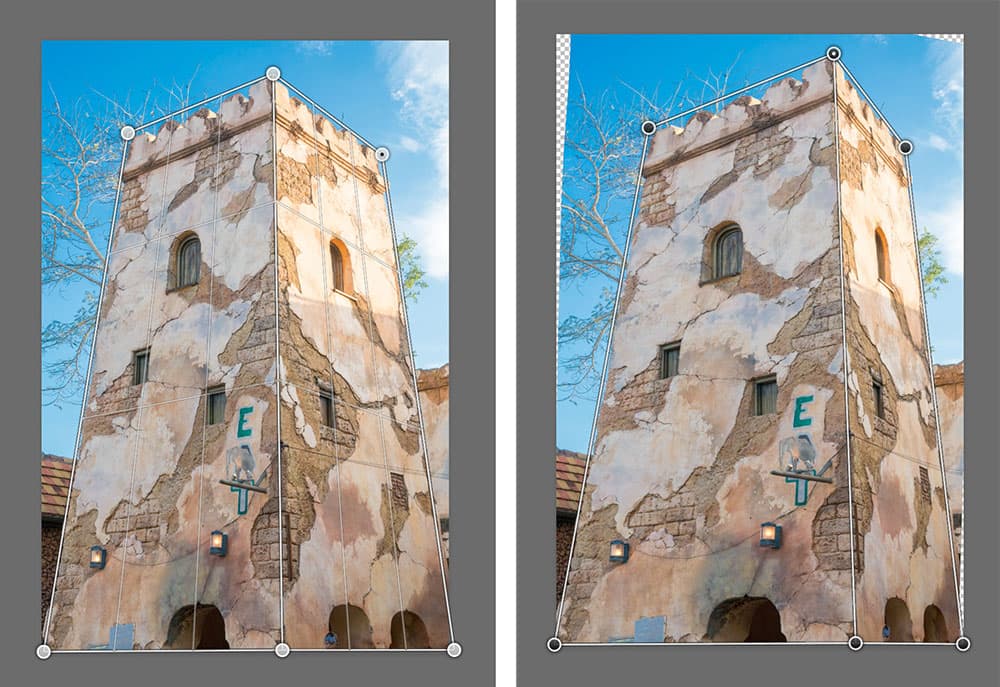
The Perspective Crop tool can be used to crop and correct the converging verticals or horizontal lines in a picture with a single crop action. Using the Perspective Crop tool I was able to accurately reposition the corner handles on the image to match the perspective of the building. To do this you can either marquee drag with the tool as usual, or click to define the four corners of the perspective crop, after which you can drag on the corner and/or side handles to adjust the crop shape. Having done this you can click to confirm and apply the crop and, at the same time, correct the perspective. The Perspective crop should work well in most cases, but you may sometimes need to apply a further Transform adjustment to compensate for any undesired stretching of the image.
Credit: Martin Evening
Perspective Warp
The Edit>Perspective Warp command can be used to warp photos to correct or alter the perspective. However, to do this you must have ‘Use Graphics Processor’ enabled in the Photoshop>Performance preferences. Perspective Warp can be used to manipulate the perspective in parts of your image, while still maintaining the original perspective in other areas. It is particularly well suited to images of architectural subjects. One way to use this tool is to correct the perspective of a building in a photograph, but without distorting everything else in the photograph. You can also use Perspective Warp to manipulate the perspective in a layer to match the perspective of the underlying image. Or, as shown in the example above, you can use it to simply change the perspective view in a photo. Starting out in Layout mode (L), I marquee dragged to add warp planes to each side of the tower. I refined the position by clicking and dragging on the corner handles. Then, in Warp mode (W), I dragged again on the handles to reposition the handles and warp the shape of the tower.


