As the megapixel values of our DSLRs increases every year, we create larger and larger data files that slow us down and give us a storage headache. Yet the data of our digital pictures can be miraculously shrunk using a compression format such as JPEG.
Compression is not to be feared, and is a good thing so long as you control it carefully throughout your shooting, editing and output workflows. If you want to make your workflow leaner and more efficient, read the following advice on how to get the best out of your files.
What exactly is compression?
JPEG compression breaks fine details into blocks and makes later editing near impossible. The JPEG compression routine never changes the pixel dimensions of your image file as data only describes the colour value of each pixel block, not its size.
Pixel size is always fluid and user-defined, and can be set in-camera as 300ppi (pixels per inch), or reset in image-editing software to a different value such as 240ppi or 72ppi.
So, if you’re shooting with a top-of-the-range camera such as the Nikon D810, and making enormous 7,360×4,912-pixel images, they will retain the same dimensions whether you shoot JPEG or raw. They will also have the same potential to be printed at maximum size.
The JPEG routine was developed by the Joint Photographic Experts Group and involves a clever algorithm that reduces the need for a discreet bit of code to recreate each colour pixel. Instead, areas of the image are grouped into 8×8 blocks that are then recoded using less data.
JPEGs can be created with enormous savings at one extreme, or roughly halved in size at the other. The key, however, lies in knowing how much you can squeeze your files before you start to lose image quality.
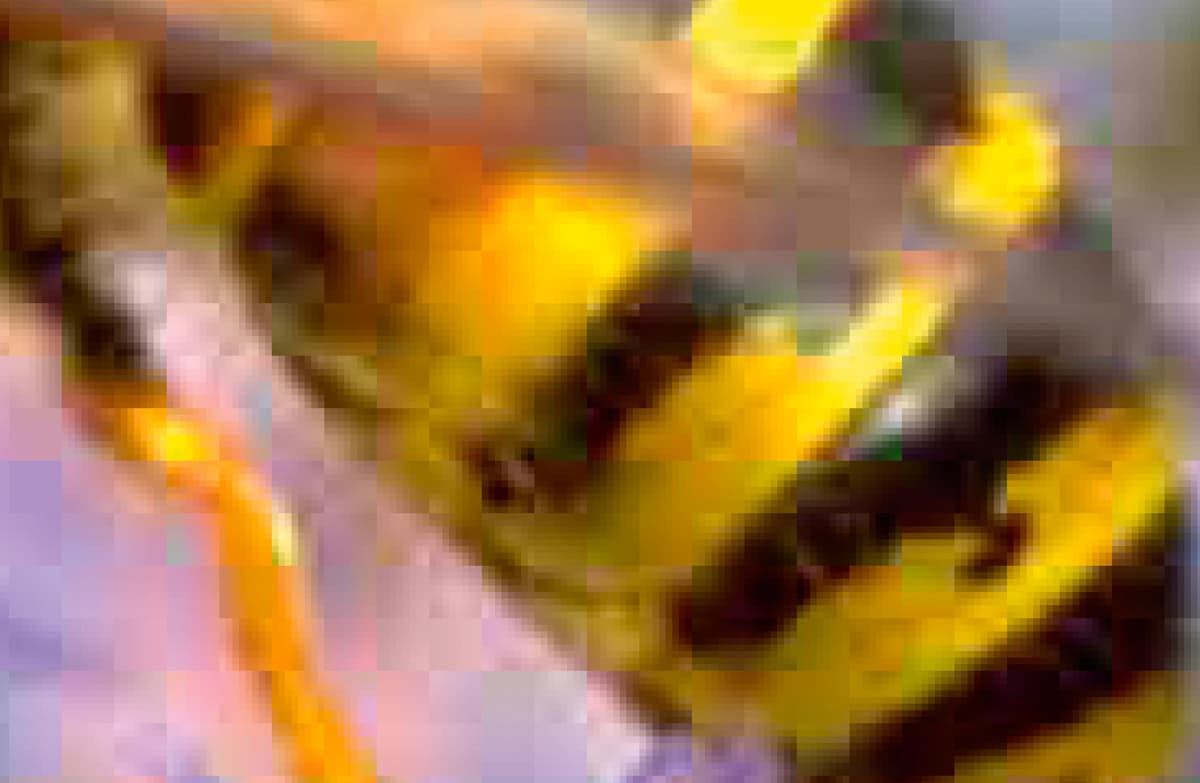
Low Quality Compression: JPEG compression breaks fine details up into blocks and makes later editing near impossible
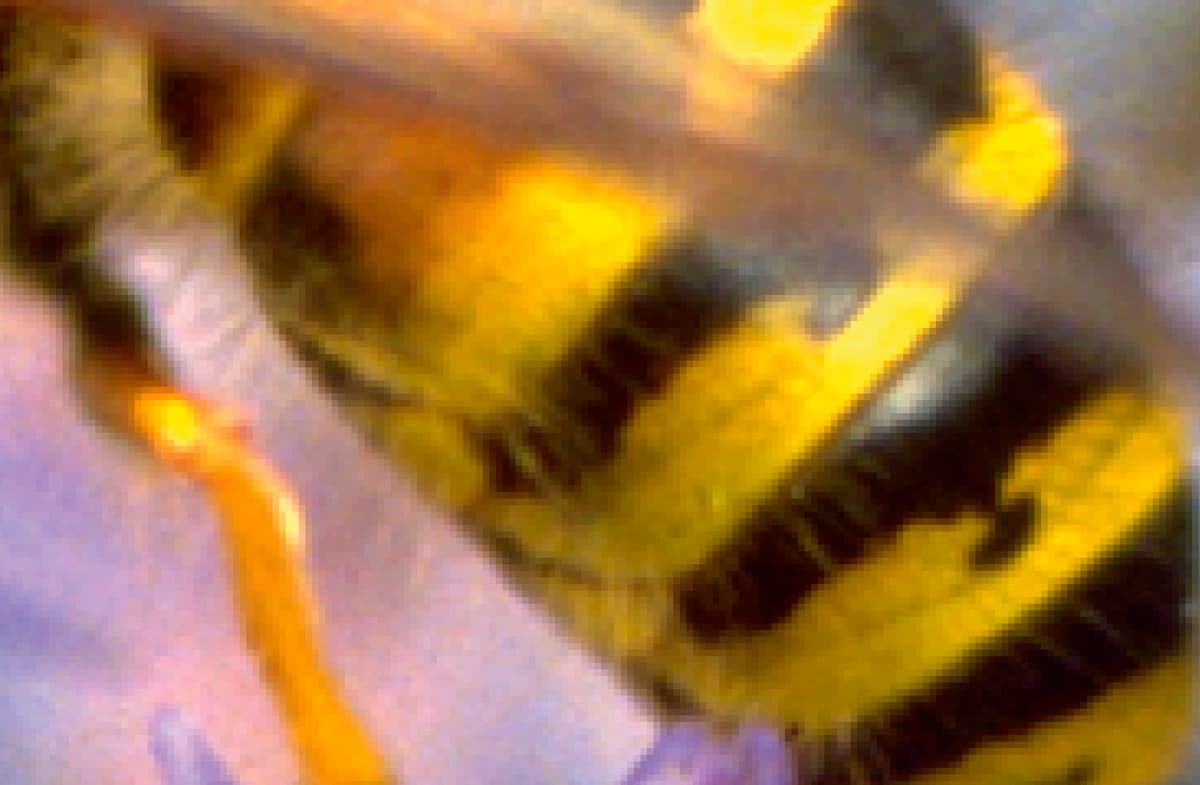
High-quality compression: Highest-quality JPEG compression has very little effect on image quality, leaving more scope for editing
Unwanted by-products
Poor-quality JPEGs are simply the result of careless workflow.
Extreme damage is caused by repeatedly saving low-quality JPEGs, visible as blocky patterns that cannot be removed easily. This damage looks like a crude pattern of disjointed blocks appearing in previously detailed areas in your image.
Like the compressed MP3 music format, low and medium-quality JPEGs can also feel washed out and lack punch.
Shooting situations
Shrinking digital data with JPEGs gives smaller files and makes uploading faster. Shooting JPEGs also allows you to make a longer burst of continuous shots as the camera’s internal buffer does not fill up as quickly as it would if you were shooting raw files.
In practice this is very useful, so if you are shooting fast-moving action on a DSLR such as the Nikon D750, its buffer can hold 87 Fine Quality JPEGs compared to only 15 14-bit raw files.
Unlike other file formats, JPEGs vary in data size depending on the kind of image that you shoot.
Generally, subjects that have multiple colours with sharply focused edges and details need more data than softly focused images with fewer colours. In practice, the former could be 5MB and the latter less than 1MB in size.
Despite such drastic data savings, high-quality JPEGs are an ideal format to shoot with, where the benefits easily outweigh the disadvantages.
If you have been shooting 100MB raw files with your DSLR, then you can easily shoot and store the same image as a 20MB JPEG.
Finally, just like raw files, JPEGs can carry metadata and a colour profile of your choice, so there’s plenty to shout about.
Camera settings
On a DSLR there are usually three or more image-quality settings such as Low, Medium and High, (or Basic, Normal and Fine), which are designed to enable you to cram more images onto your memory card.
These settings relate to levels of JPEG compression rather than image size, which, rather confusingly, can be referred to as Large, Medium or Small.
JPEGs captured with Low or Basic quality settings will give you the greatest data savings, but with the poorest image quality.
In addition to compression savings, many DSLRs have two or more options of compression type, such as Nikon’s Size Priority JPEG, which creates files of a uniform data size regardless of subject matter, or Optimal Quality JPEG, which responds to the unique characteristics of each image, maintaining maximum image quality, but with less data saving.
Best camera settings for JPEG
Image Quality
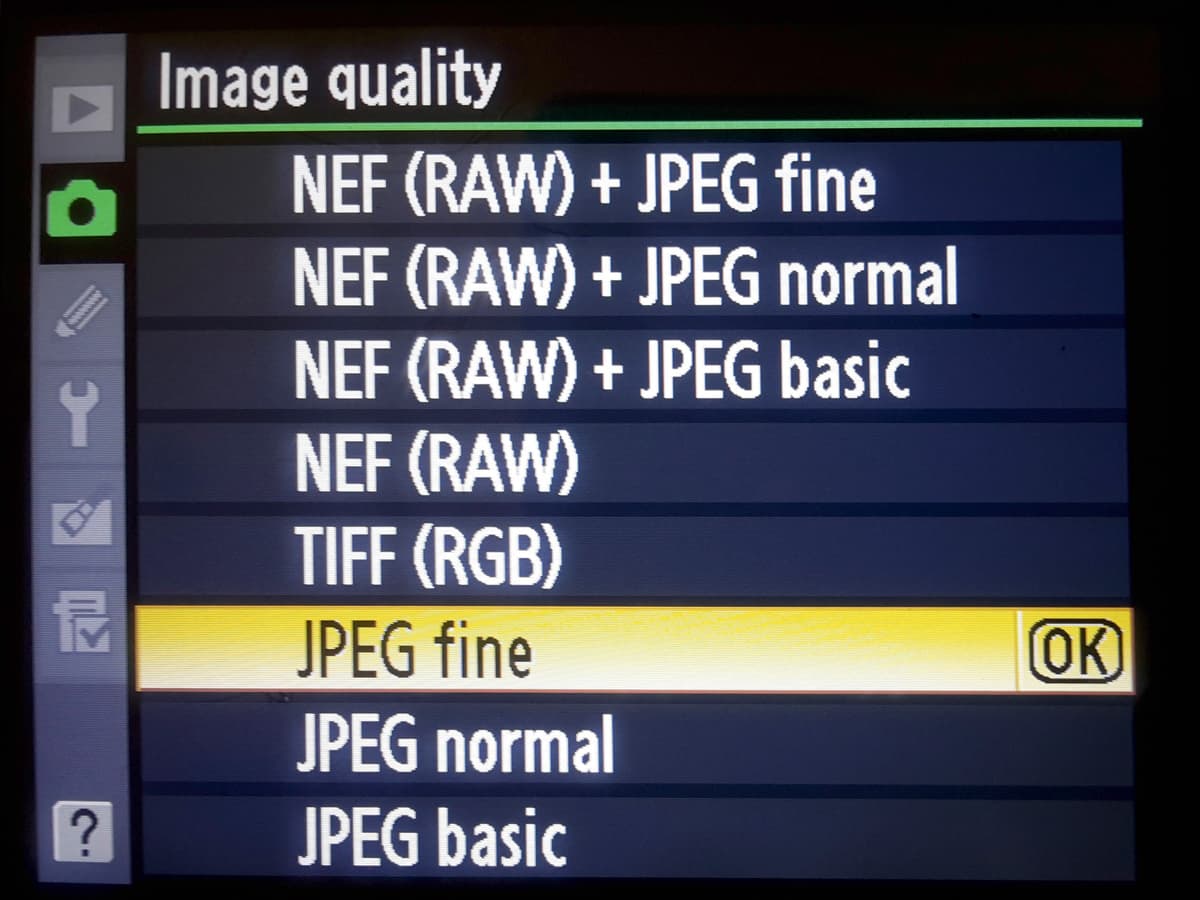
Set your Image Quality to JPEG fine
Image Size
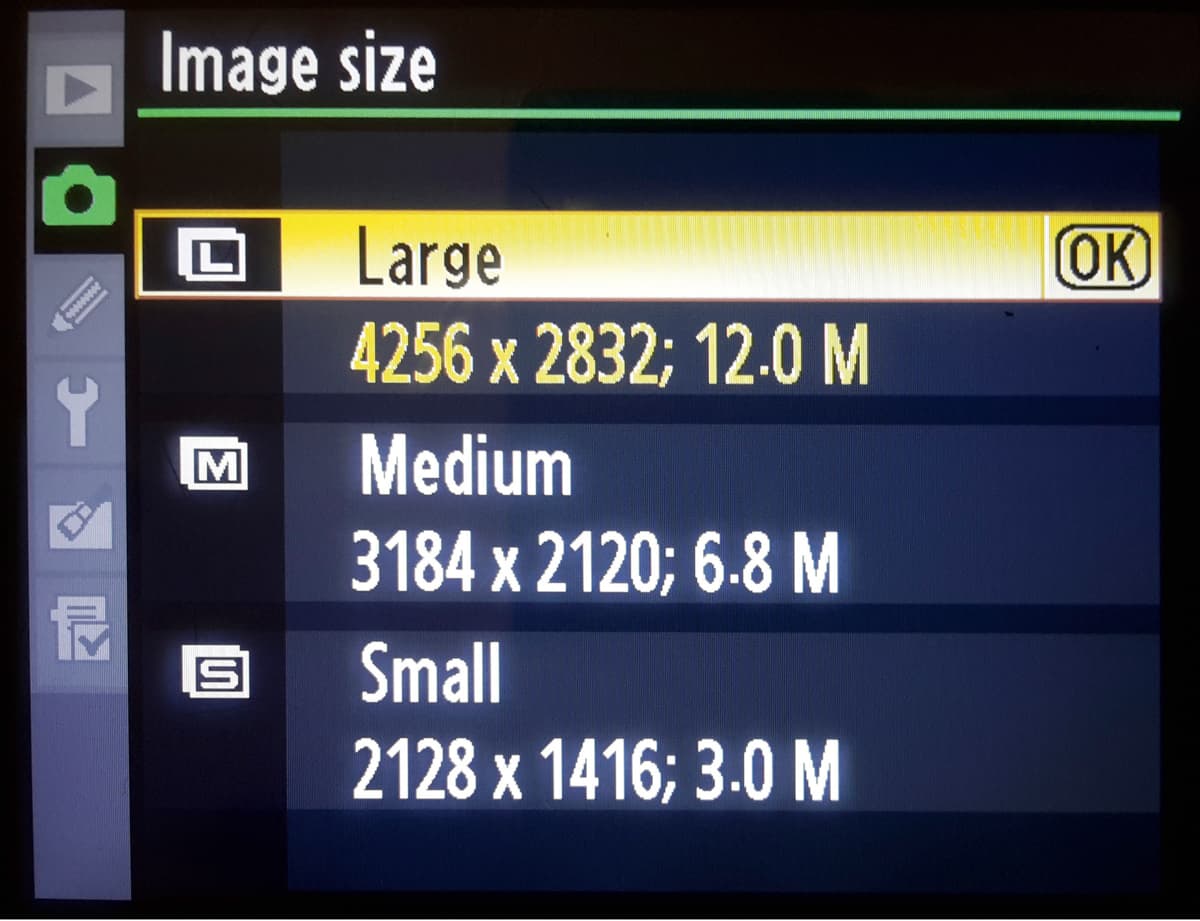
Choose the Large option in your Image Size menu. The pixel dimensions will be the biggest available on your DSLR
JPEG compression
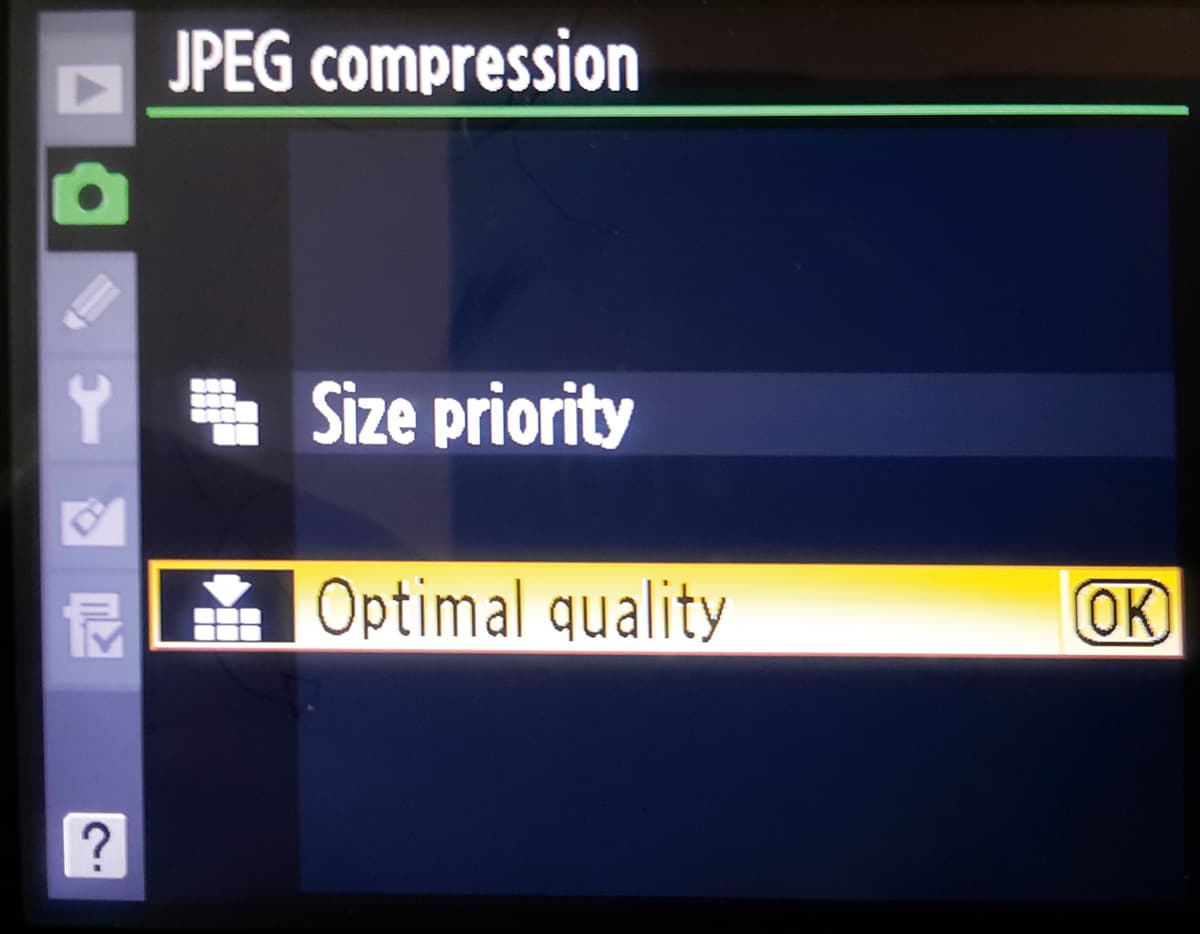
If available on your DSLR, select the Optimal quality compression setting
Colour space
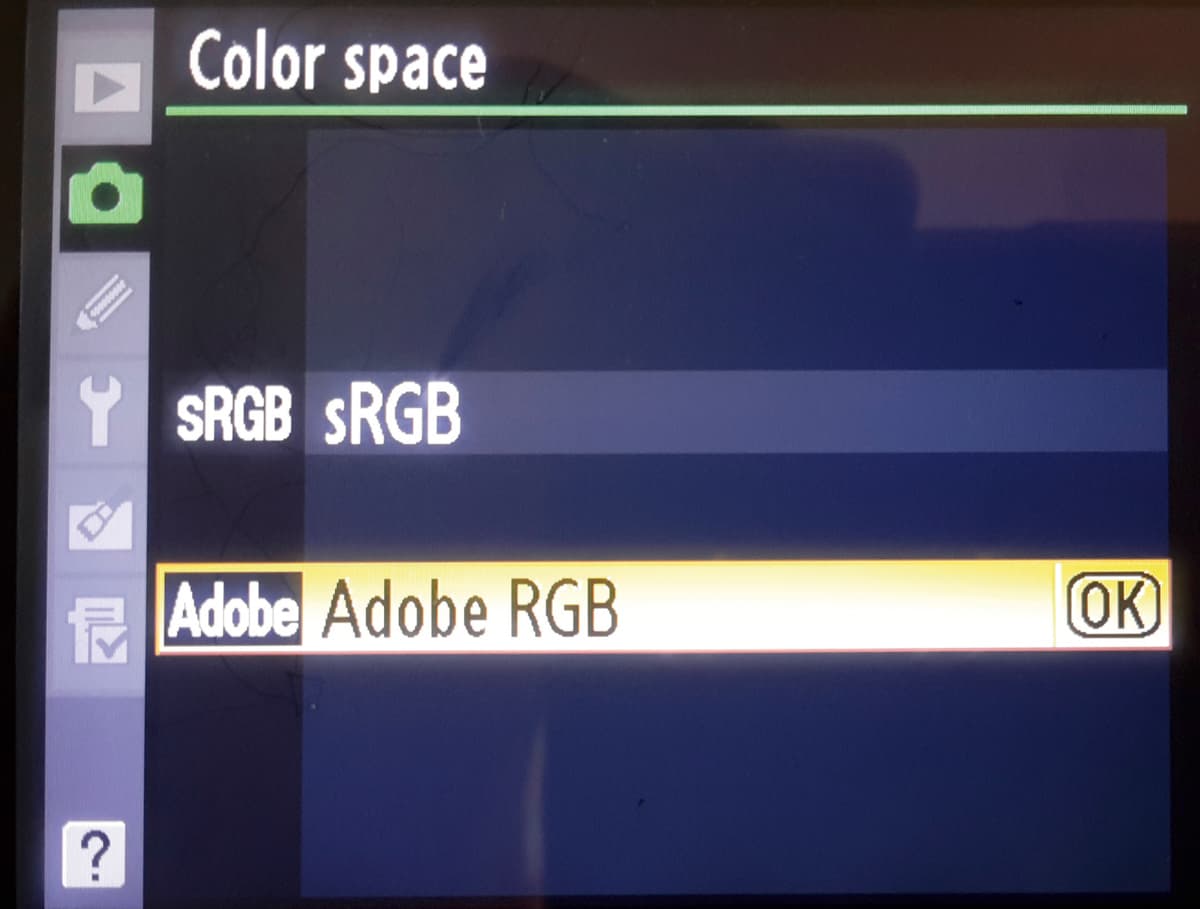
Swap your colour space to Adobe RGB – the biggest and best palette for shooting JPEGs on DSLRs
Dynamic Range adjustment
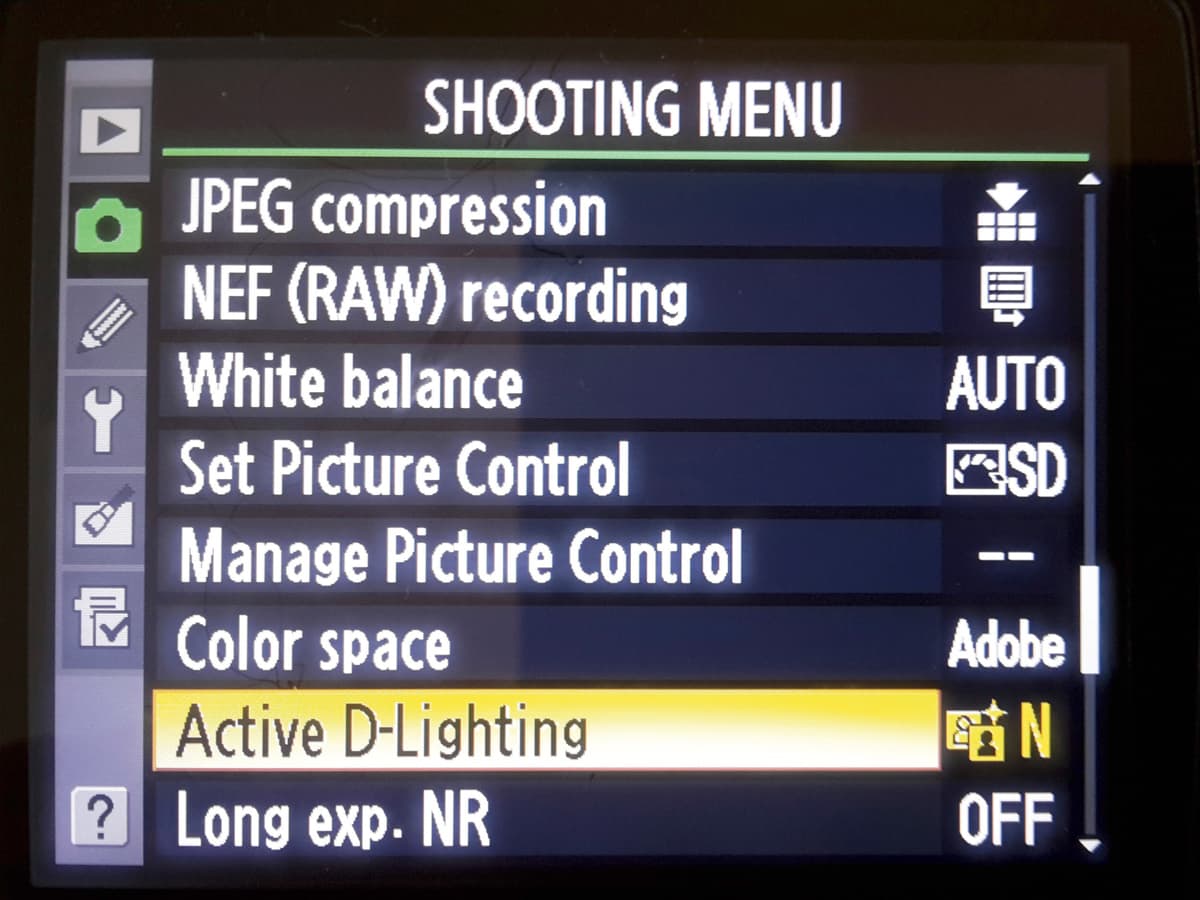
If available on your DSLR, switch your DRO (Dynamic Range Optimiser) option on. Nikon’s is called Active D-Lighting
Dynamic range adjustment level
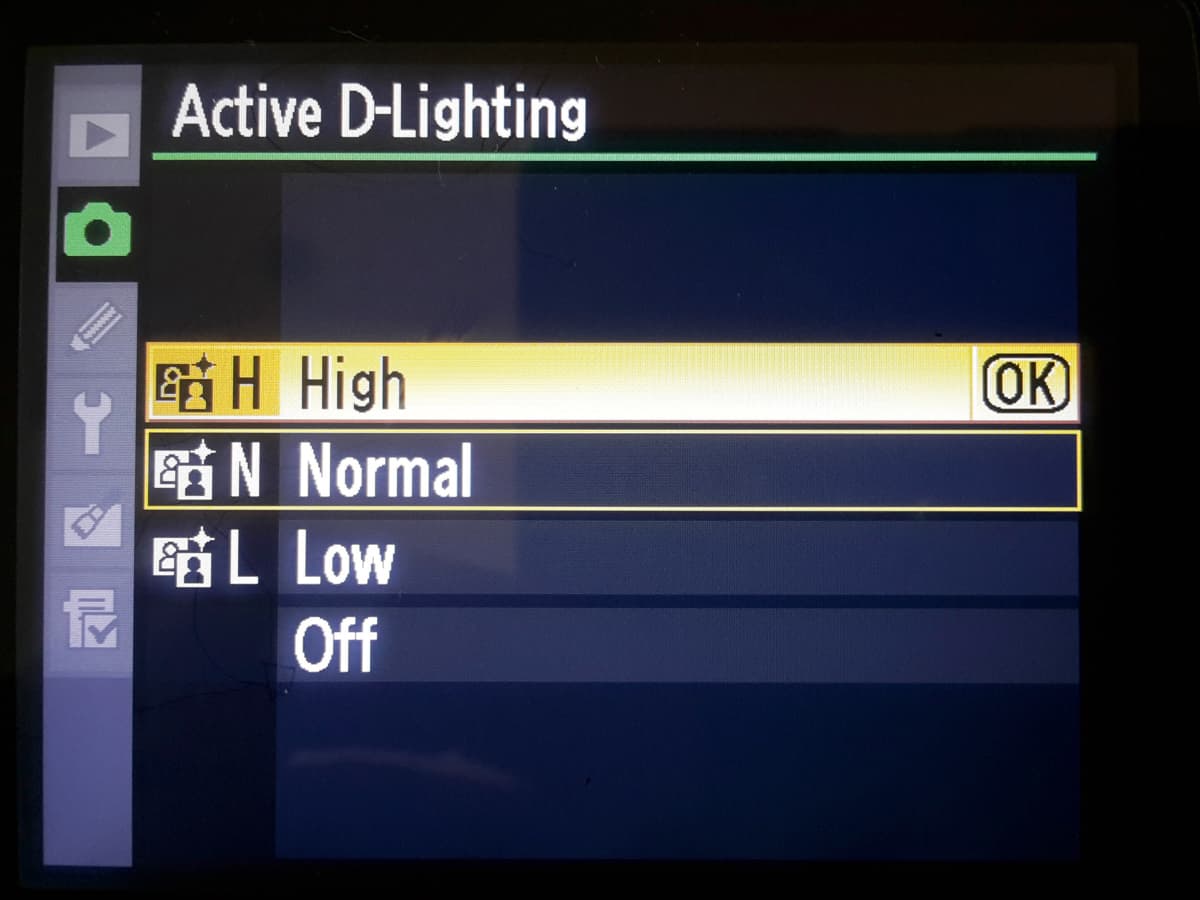
Set DRO to Normal for everyday shooting situations, or High for high-contrast scenes
DRO settings
Another option is to use the dynamic range optimisation (DRO) settings on your DSLR.
These advanced controls allow you to get the best out of deep shadow areas without losing detail in bright highlights in the same image.
Confusingly, DRO is described differently by different manufacturers: Nikon calls it Active D-Lighting, Canon refers to it as Auto Lighting Optimiser and Sony calls it Dynamic Range Optimization, for example.
DRO generally works by applying a contrast edit on the fly, reducing the density of the shadows and clipping highlights to prevent them from blowing out.
Shooting tips
Compared to raw files, JPEGs record a scene in 8-bit per colour channel rather than the larger 12- or 14-bit used by raw. JPEGs therefore can be unforgiving of minor shooting errors such as exposure and white-balance mistakes.
So, you’ll need to be spot on when measuring exposure, and cautious of dense shadow areas in your compositions.
What’s more, dark shadow areas are very difficult to edit in JPEG files, so if you are faced with a contrasty subject or contrasty lighting, make two bracketed exposures at +0.3 and +0.6 using your exposure-compensation setting, or through your DSLR’s auto-bracketing controls.
Switch off presets
Unlike raw files, camera settings are ‘baked’ into JPEGs and are impossible to extract later in your workflow, so switch off all unnecessary presets in your camera-shooting menu and keep sharpening on the lowest setting available.
Change your colour mode from sRGB to the larger Adobe RGB and you will capture more colour, too.
White balance is also baked into your JPEGs and is much less editable during post-production when compared to a raw file, with fewer tools and processes available.
For most daylight shooting situations, you can safely use the Auto White Balance setting, but for artificial lighting you should also shoot extra frames using the corresponding camera presets to see if these provide better results.
By following these steps, you’ll get the best out of your JPEGs.
How much colour do you need?
Shot in-camera, JPEGs are created from a palette of 16 million colours using the 8-bit scale of 256 steps for each red, blue and green channel.
Raw files easily exceed this using 12-bit palettes, making 4,096 steps for each colour channel, or even more. Yet, despite the advantages of raw, most subjects can be captured effectively using 8-bit JPEGs.
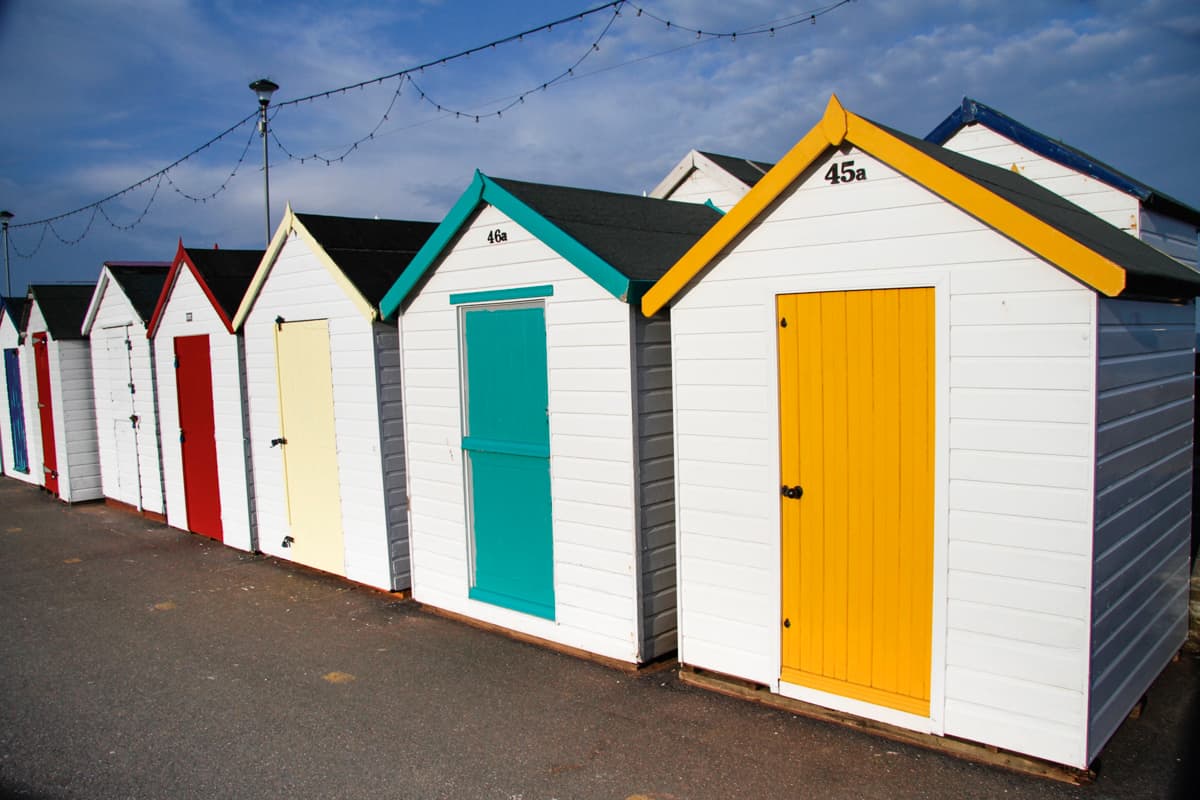
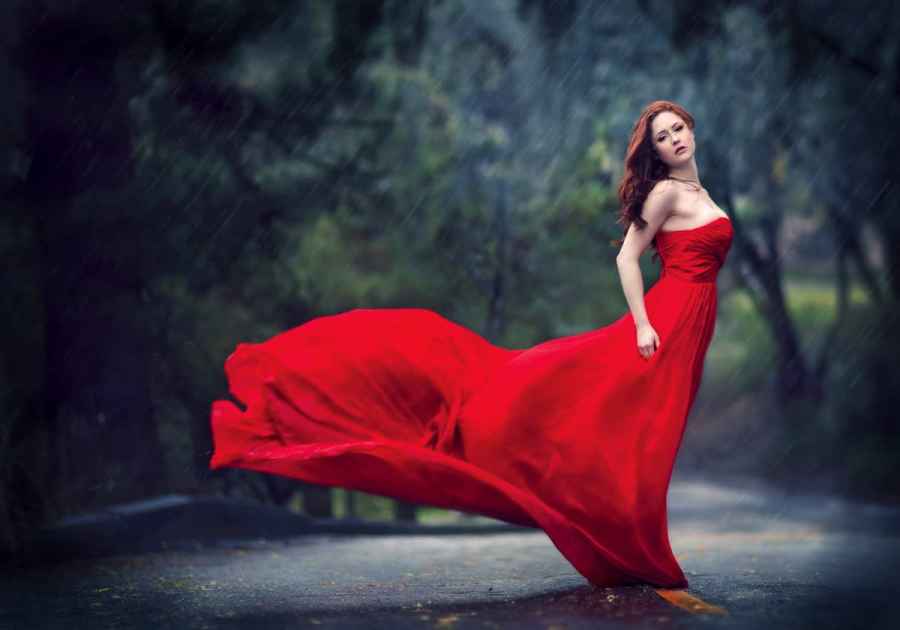
This picture was captured as a 5MB medium-quality JPEG. When it was uncompressed in Photoshop it grew to an impressive 51MB
Editing JPEGs
The most efficient way to edit JPEGs is to use Lightroom, which preserves the integrity of your original by never saving edits back onto the file.
As you edit in the Develop module, you can use the Before and After view mode to check how much noise your creative moves are adding, as blocky artefacts will become more prominent in areas that receive the most editing. The results of excessive editing become even more pronounced if you decide to make black & white conversions.
For Photoshop users, however, it’s essential to make a duplicate version of your JPEG to use solely for editing. Unfortunately, this will impact on your overall storage as your image library grows over time.
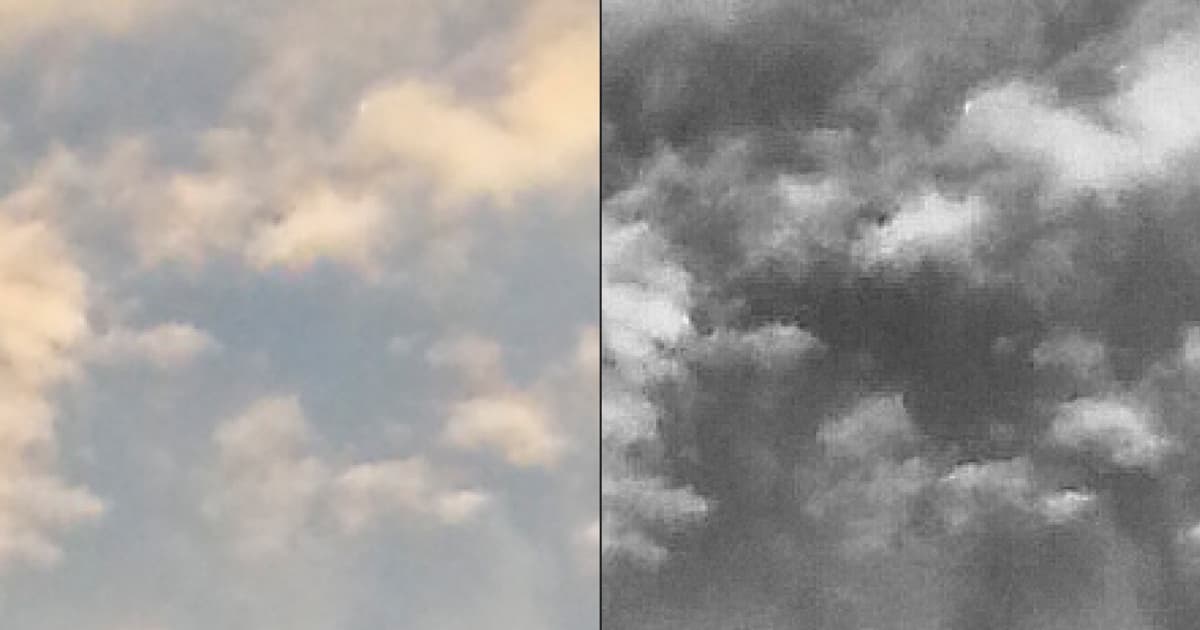
Left: JPEG artefacts magnified; Right: Black and white conversion. Excessive editing and sharpening will magnify JPEG artefacts, especially if you make black & white conversions
If you are using Photoshop, open your JPEG and immediately do a Save As and save a duplicate version of the file as a TIFF or PSD to use for editing.
If you work on your original JPEG and keep pressing Save, you will recompress it each time and create gigantic artefacts in the process.
Confusingly, the damage caused by recompression when resaving isn’t visible while the original JPEG remains open in your application during an editing sequence. It’s only when the file is closed and re-opened that you see the irretrievable damage you have caused.
JPEGs give you a limited amount of colour and tonal information to work with, so if your creative editing workflow includes either black & white conversion, drastic colour change or complex retouching, you are better off shooting raw.
Creating JPEGs in your image editor
You can turn any image format into a JPEG via image-editing software and, unlike shooting, you can preview any adverse compression effects before you commit to save.
Lightroom users can create JPEGs through the File>Export command and choose a range of quality options on a simple 0-100% scale.
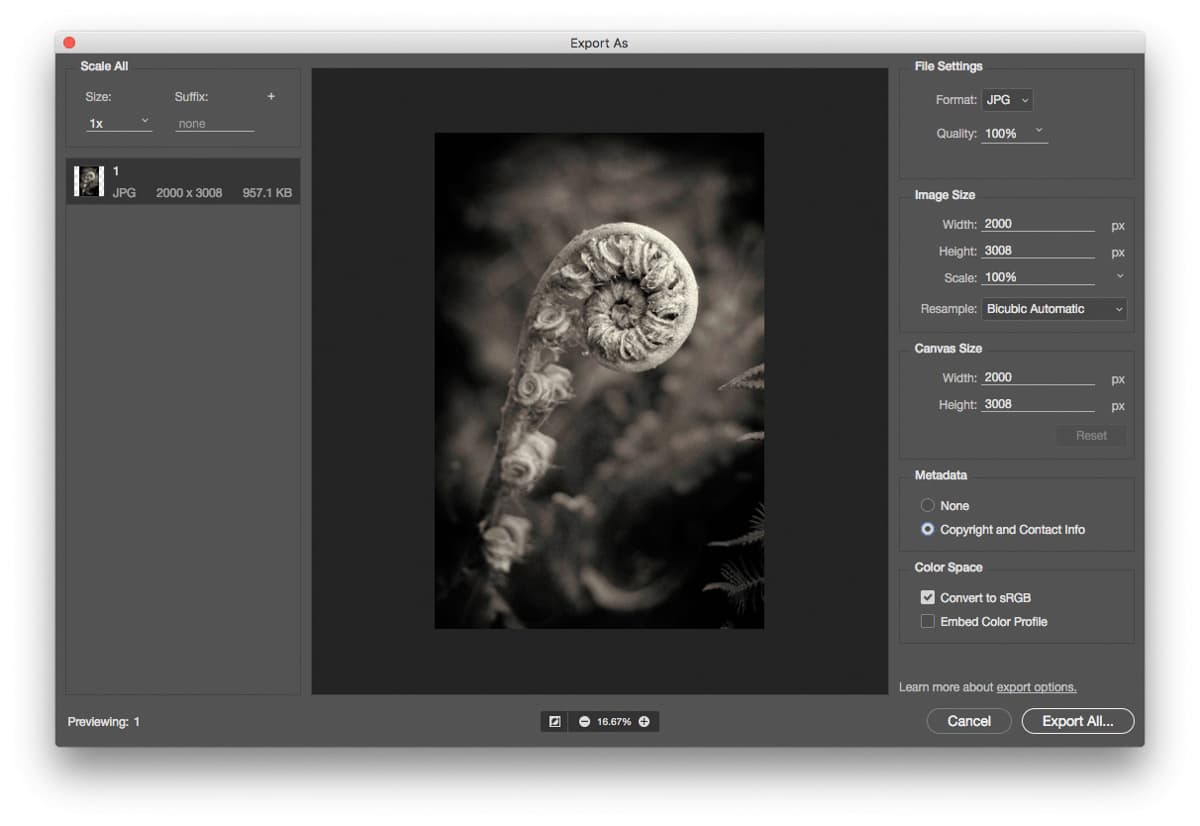
Photoshop CC’s Export As dialog, showing restricted Metadata options. You can still retain copyright and contact details, though
For Photoshop CC users, there are three methods available, each with increasing levels of sophistication.
In addition to the usual File>Save As command, the File>Export As function provides a larger dialog with options to resize and remove metadata from your file.
The File> Export>Save for Web (legacy) dialog offers the best range of tools for packaging up your work as JPEGs.
Images can be previewed in a two or four-up window, so different quality settings can be compared to each other. Current document sizes are displayed at the base of each image together with the estimated time the image would take to download on a range of different bandwidths.
The Save for Web controls give you the most control over retaining metadata, unlike Export As which, at best, strips most of the shooting information away but retains copyright and contact details.

Lightroom provides much fewer preview and prediction tools, using a basic File Settings dialog
Both of these advanced methods of creating JPEGs allow you to change the colour space of your file to the generic sRGB if your image is destined for web use. However, if you want to replace the file’s colour space with a specific print profile provided by a professional lab, you will still need to use the Edit> Convert to Profile step before reaching the Export As or Save As stage.
How to edit JPEGs in Lightroom
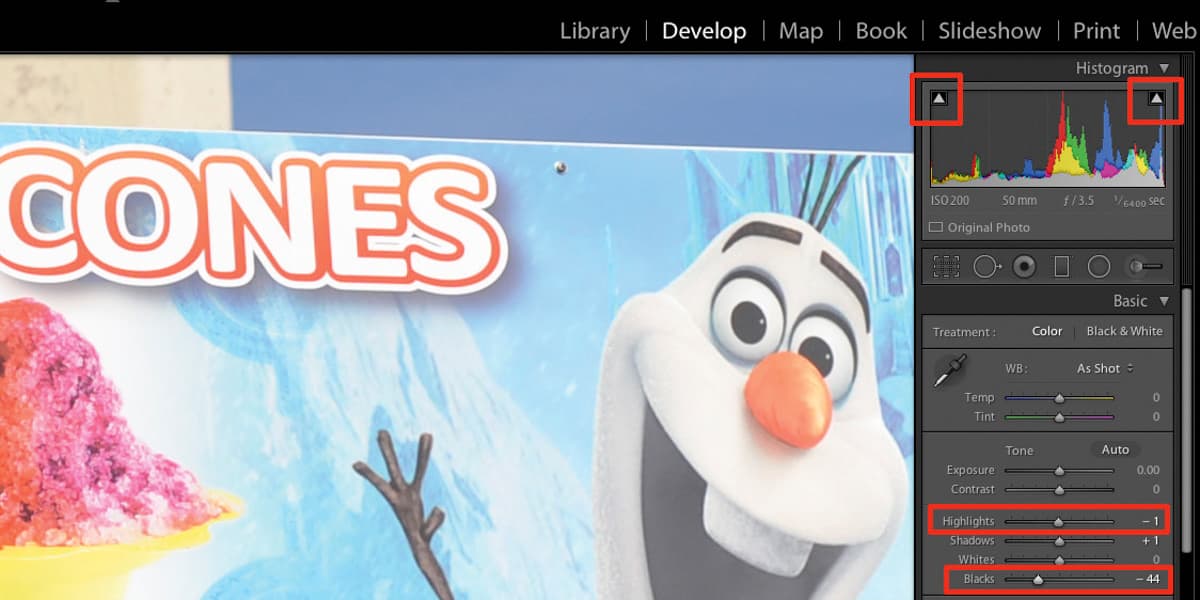
1. Make images look punchier
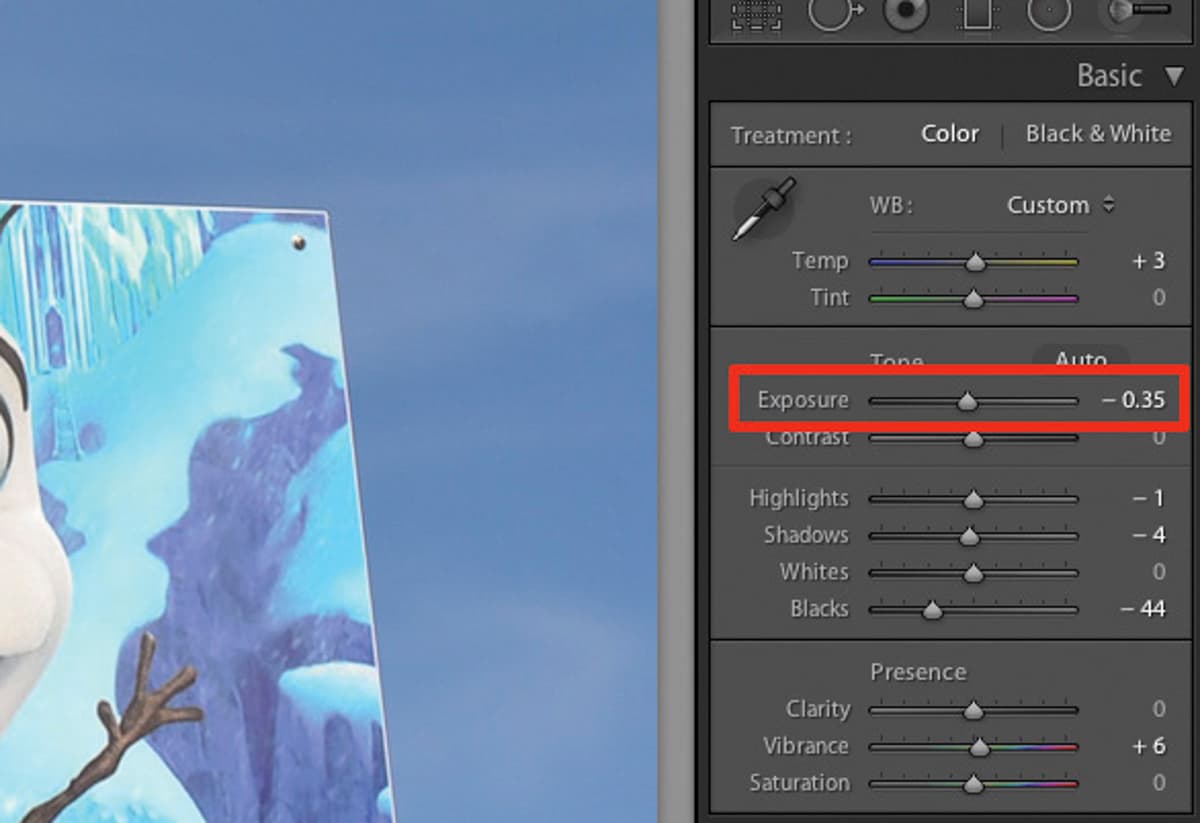
2. Fix under or overexposure
3. Tweak the white balance
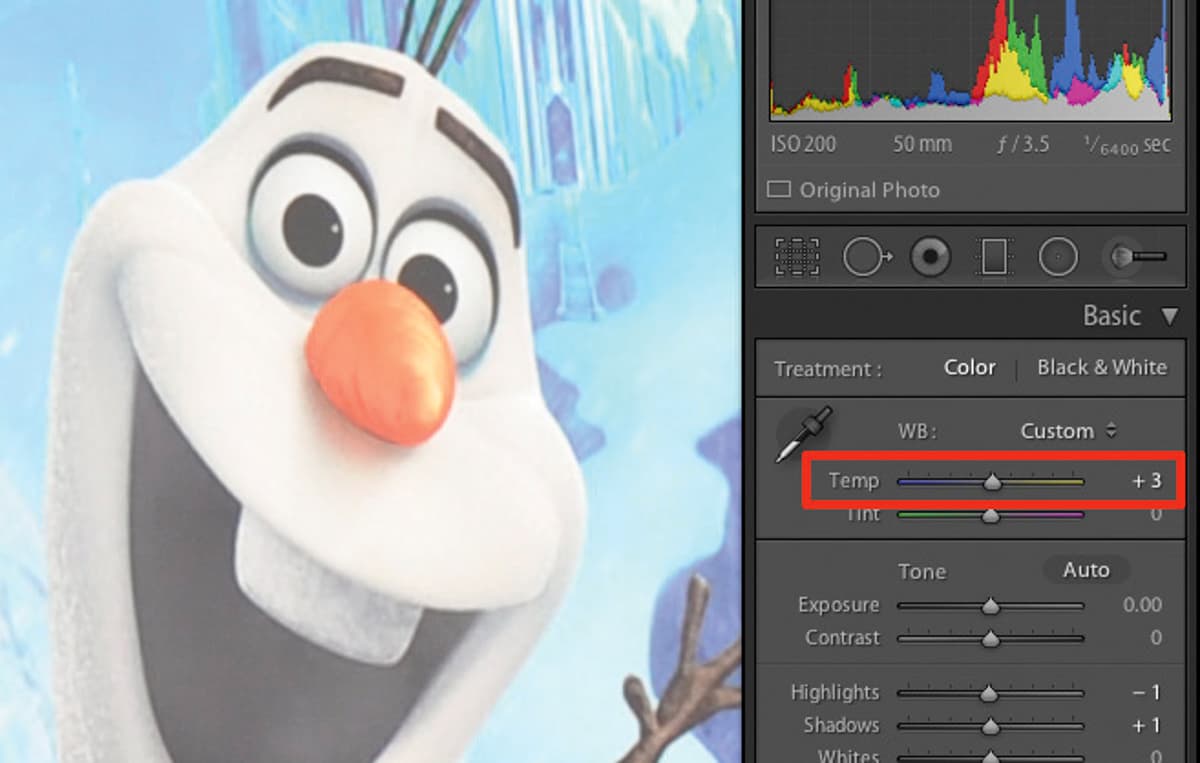
Tweak the White Balance using the Temp slider. Here I added a small amount of Yellow (+3) to make the image warmer.
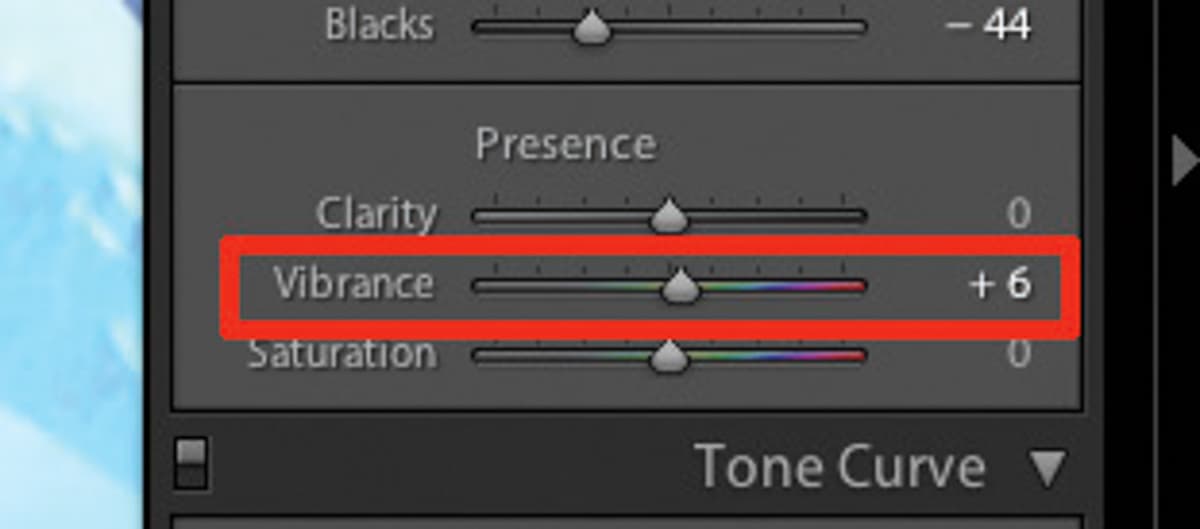
4. Add a Vibrance edit
You can rescue any washed-out colours by using a tiny Vibrance edit of +6. This will boost only the muted colours and leave the saturated ones well alone.
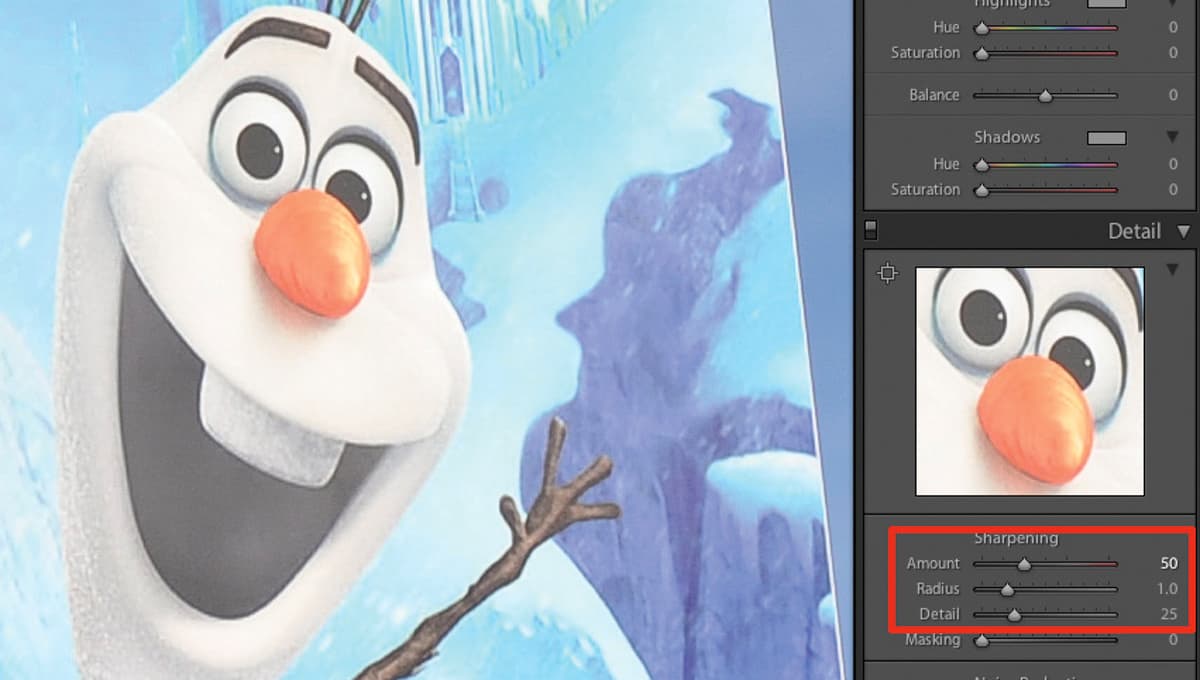
5. Tweak the sharpness
Finally, tweak image sharpness using the Detail tools. Use the following settings as a starting point: Amount 50, Radius 1.0 and Detail 25.
Packaging and dispatch
Even if you use a raw-file workflow, JPEG is the ideal format for saving and packaging images for web use, or to dispatch to an online printing service. All C-type minilabs are designed to work with JPEGs.
This process of packaging up a version of your image for a specific output means you are making a new JPEG for a single-use event. A good compromise is never to go below 20% of your original data size, so in Lightroom do File>Export and in the File Settings panel select JPEG as the Image Format and Quality at 80%.
All digital C-type minilabs are designed to work with JPEGs, so there’s no advantage in supplying TIFF files to your lab
If you are a Photoshop user, do File>Save As, then select JPEG as the Format, then set Quality to 10 (Maximum).
Once you’ve dispatched or uploaded your JPEGs, avoid reintroducing them to your workflow, as you can never extract the edits that have been ‘baked’ permanently into the files.

