Of all the firms making digital cameras, only Fujifilm has experience in colour reproduction dating back to the film days.
To highlight this, it calls its colour modes Film Simulations, and it’s no surprise that these give arguably the most appealing colour of all brands.
Yet there’s also a good range of additional settings to fine tune the output to your own preferences.
Fujifilm’s auto white balance has a certain tendency towards the cool side, but not unpleasantly so. Indeed, it often has the effect of making skies and water look a deeper blue, which can work well in landscape scenes.
Here’s how to get your best Fujifilm JPEGs yet.
Film Simulation
Fujifilm names its colour modes after some of its most iconic film emulsions.
So, in addition to the standard Provia mode, there’s also a punchy Velvia option and a gentler, more subdued Astia setting. Two ProNeg modes are designed for portraits, while Classic Chrome mimics the look of Kodachrome slide film.

Black & white shooters will appreciate the Acros mode on more recent Fujifilm models, which has an optimised tone curve and specifically designed noise-reduction algorithm that aims to give film-like grain.
It joins a set of more conventional monochrome modes that mimic the effects of using coloured lens filters.
Dynamic Range
To avoid losing highlight detail, Fujifilm includes expanded dynamic range settings in its X-series cameras.
The standard setting is DR100 with a base ISO of 200, but also available are DR200 and DR400 settings.
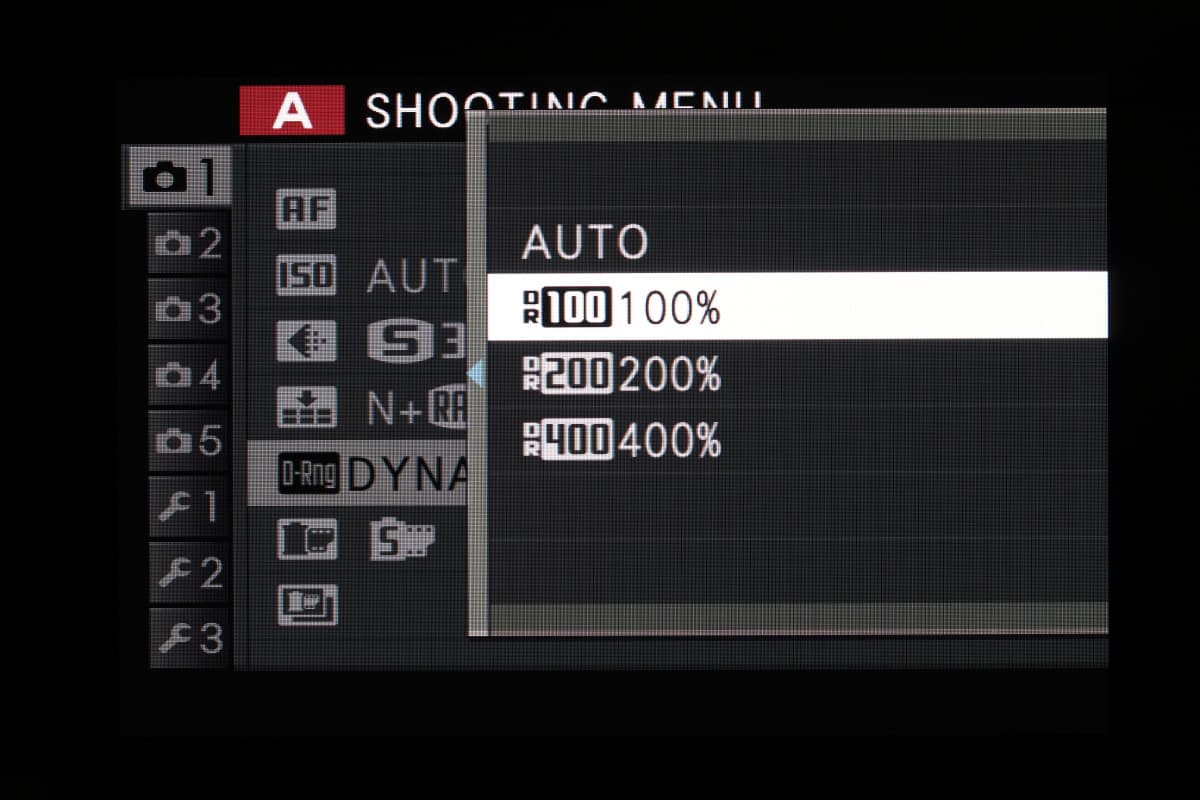
These incorporate 1 and 2 extra stops of detail in the highlights respectively, but because the process is similar to under-exposing, then bringing up the midtones and shadows in post-processing the minimum available sensitivities are ISO 400 and ISO 800 respectively.
Naturally, this comes with an increase in image noise, so while DR200 can be very useful in contrasty situations, DR400 is generally best used only to deal with the most extreme lighting.
Highlight and Shadow tone
The contrast in highlight and shadow regions of the frame can be adjusted independently, and the controls are easily accessed from Fujifilm’s excellent Q Menu.
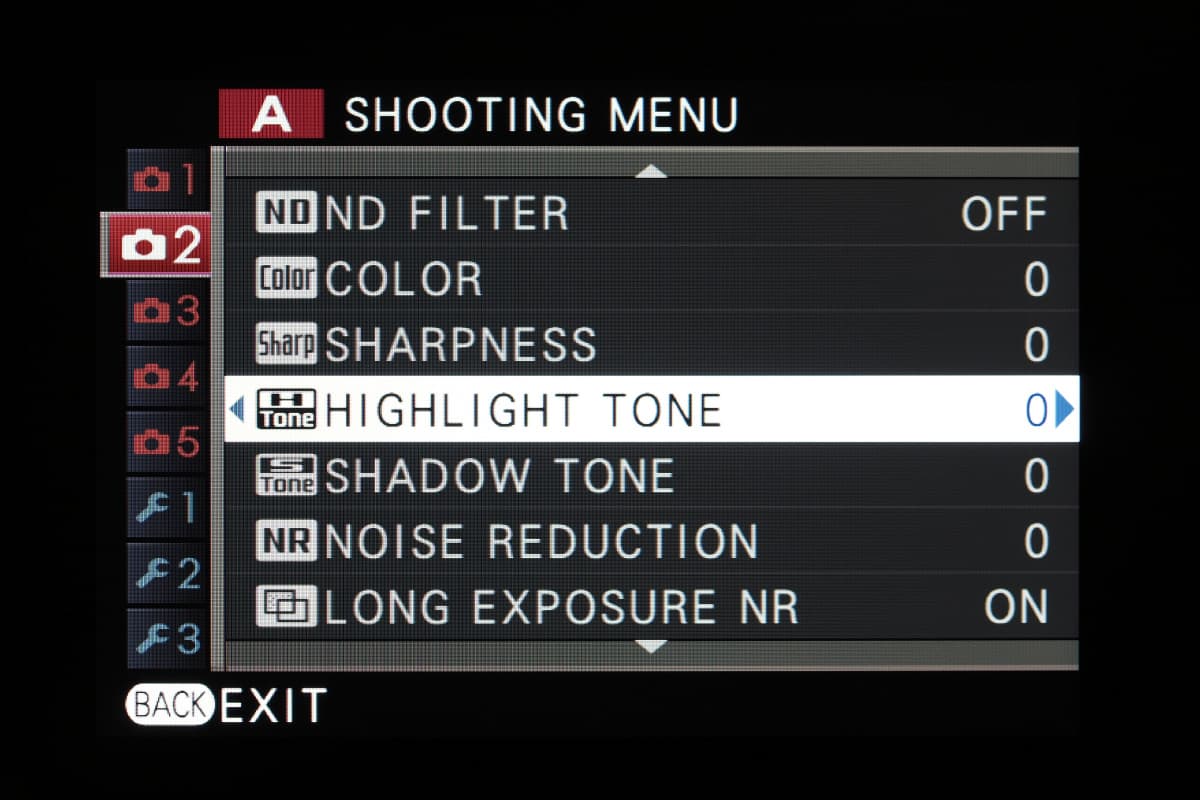
But you don’t get quite such fine control as you do from the likes of Olympus or Panasonic, and while the settings are previewed in the live view feed, Fujifilm’s interface design means you can’t directly observe the tonality changing as you manipulate the setting.
These controls don’t affect the black or white clipping points.
Colour and Sharpness
Fujifilm gives control over colour saturation and sharpness, both in five steps.
Any changes you make here are applied equally to all Film Simulation settings, so you can’t just bump up the saturation for one on its own.
Advanced filters
Users who would like to be more adventurous with their images can engage Fujifilm’s Advanced Filters.
These include the usual kinds of options – Toy Camera, Miniature Effects and Partial Colour – all previewed live on-screen.
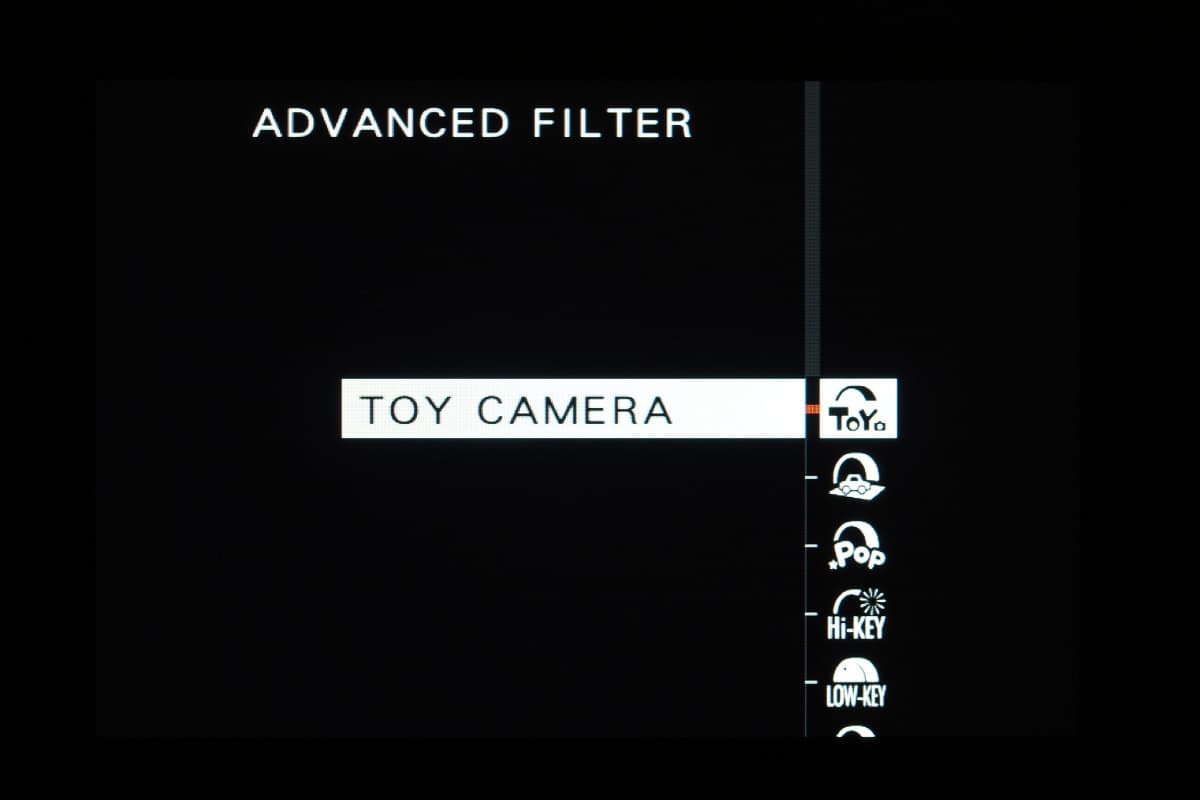
As on other cameras, they can give interesting results, but a word of warning: Fujifilm only allows you to save the filtered JPEG, not the associated raw file or a conventionally processed JPEG alongside.
This is disappointing, as the filter settings aren’t always very logically placed within the camera’s interface, and on some models they can be inadvertently engaged by changing the drive mode setting or a well-hidden menu option.

These subtle, attractive colours were captured using the Astia/Soft option
Other camera manufacturers:
How to get the best JPEG images from your Olympus camera
Our guide to the best JPEG image settings for Pentax cameras
How to get the best JPEG images from your Canon camera
How to get the best JPEG images from your Nikon camera
How to get the best JPEG images from your Sony camera
How to get the best JPEG images from your Panasonic camera