As you would expect, by default Nikon cameras give good-quality JPEGs that have strong, saturated colours.
The firm’s high ISO noise reduction is usually particularly effective, removing most chroma noise but leaving a little luminance grain behind.

Nikon’s JPEG output has strong colours, but errs towards the cool side; this was shot using the D500
The main issue Nikon users need to be aware of when shooting JPEGs is a distinct tendency for the auto white balance system to over-neutralise, giving dull-looking images in daylight.
This persists even when the Keep Warm Colours option that’s available on some cameras is enabled, as this only applies to low colour temperature artificial lighting.
A workaround is to apply a degree of fine-tuning towards amber in the AWB settings.
Picture Controls
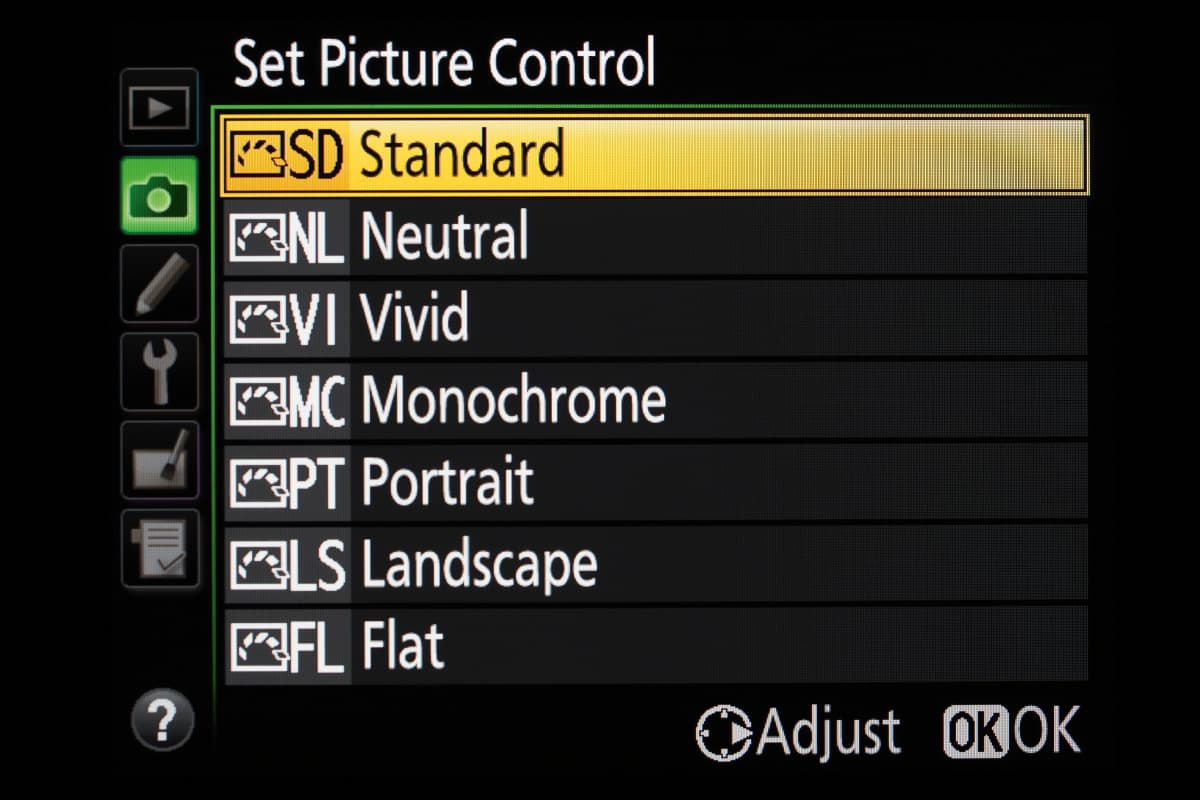
Much like Canon, Nikon includes an array of colour modes, which it calls Picture Controls.
Alongside a generally bright and punchy Standard setting they include subject-optimised Landscape and Portrait modes, as well as a Vivid mode and a Neutral option that’s designed to give colourimetrically accurate images.

Recent models also include a Flat option that’s specifically intended for further post-processing, using a low-contrast tone curve that retains as much shadow and highlight detail as possible.
All the Picture Controls can be individually fine-tuned, with a handy Quick Adjust that bumps up or tones down sharpening, contrast and saturation together.
Recent models also include a useful Clarity function that can help boost local contrast in dull or hazy conditions.
If you come across a tweaked Picture Control variant that you particularly like, it can be saved to the camera’s memory, and most usefully it can be given a descriptive name.
Your customised Picture Controls can even be copied to a memory card and transferred to other Nikon cameras.
Active D-Lighting
Nikon was one of the first companies to add a dynamic-range-enhancement tool to its cameras.
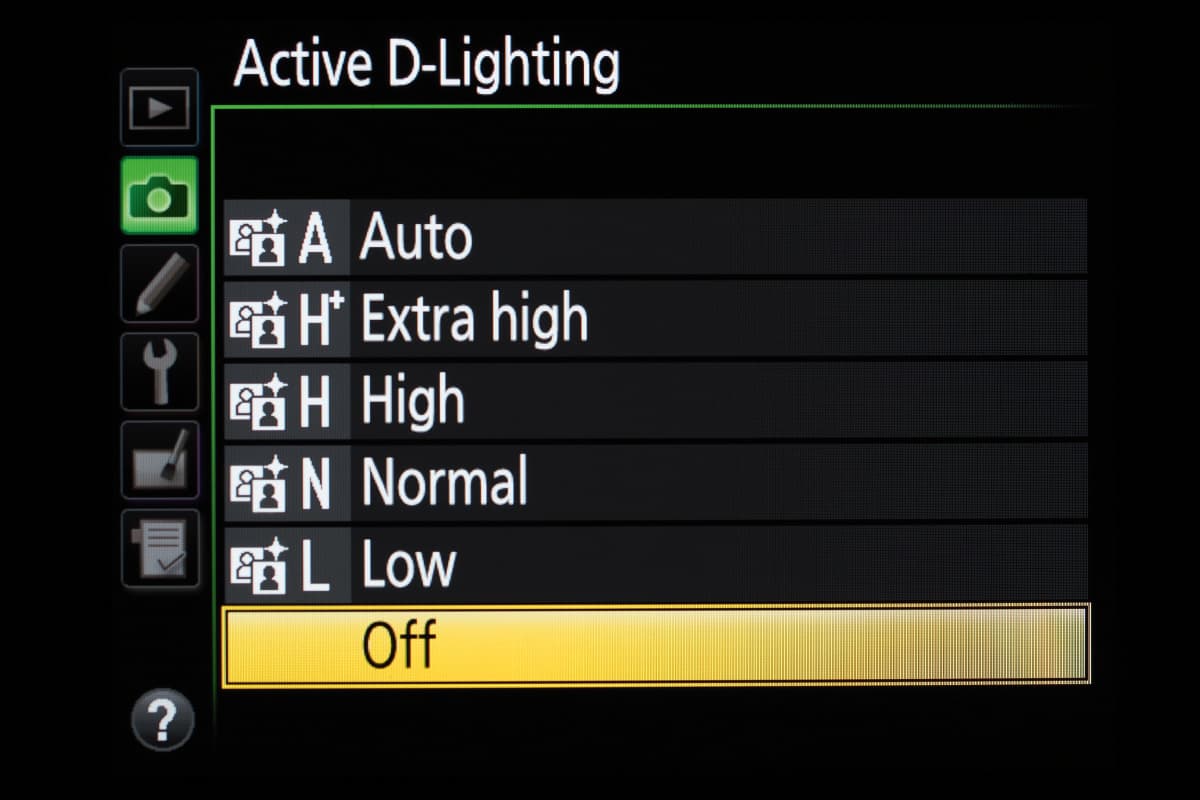
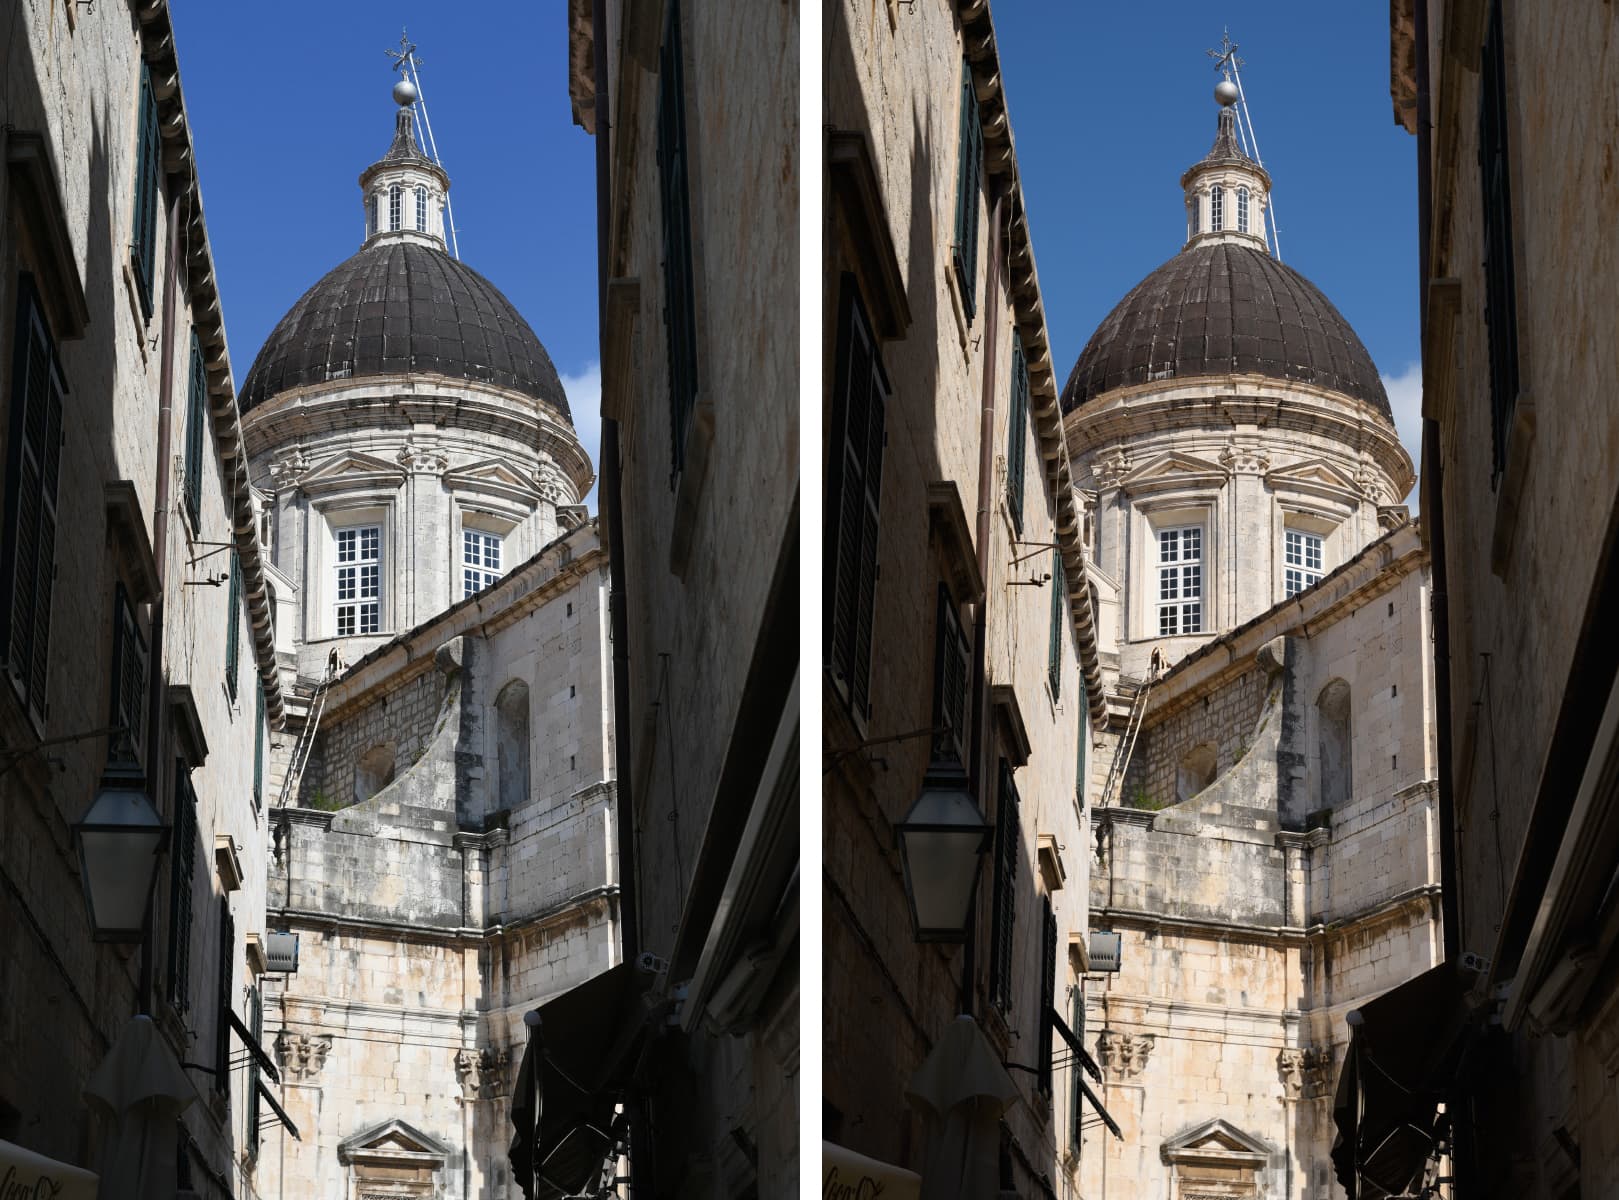
Its Active D-Lighting (ADL) behaves very similarly to Sony’s Dynamic Range Optimisation, acting by exposing to protect the highlights, then selectively lightening midtone and highlight areas.

This allows greater dynamic range to be included in the JPEG image file without sacrificing local contrast.
ADL is available in four manually selectable strengths from low to extra high, alongside an Auto setting that will choose between them based on its analysis of the scene.
It’s usually easiest to engage by pressing the ‘i’ button to bring up the on-screen settings menu.
In practice, it works well for dealing with high-contrast scenes that contain both bright highlights and deep shadows, but it’s important not to engage a setting that’s too strong. For everyday shooting, there’s a good case for leaving it set to Auto.
ADL is especially effective with Nikon’s recent DSLRs that employ sensors with remarkable dynamic range at low ISOs. This means huge amounts of detail can be pulled up from shadow regions without being blighted by excessive noise.
Other camera manufacturers:
How to get the best JPEG images from your Olympus camera
Our guide to the best JPEG image settings for Pentax cameras
Our guide on how to get the best JPEG images from your Fujifilm
How to get the best JPEG images from your Canon camera
How to get the best JPEG images from your Sony camera
How to get the best JPEG images from your Panasonic camera


