Nowadays, it seems like almost every new camera arrives with the promise of the world’s fastest autofocus for its class, which is understandable given how critical this feature is to a camera’s overall performance. Yet manufacturers haven’t overlooked the development of manual-focusing systems, with the feature gaining prominence across enthusiast and professional models.
Manual focus can be used to circumvent the weaknesses of modern autofocus systems or issues when using even advanced systems in particular conditions, such as bright sunlight, poorly lit scenes or when capturing subjects that contain fine, repetitive detail – or not enough of it.
There are many more reasons why it continues to be used today. The success of compact system (mirrorless) camera lines, for example, and the availability of various adapters have sparked a resurgence in the popularity of older optics that lack their own focusing motors. Moreover, with high-quality video recording now a prominent feature in many cameras, manual focus is needed for complete control in situations where it is not desirable to place one’s faith entirely in one autofocus system or when using lenses developed for one system on another.
Despite its usefulness, there are a number of reasons why using manual focus may fail to produce the desired result – from differences in manufacturing tolerances and maladjustment of parts to the use of inappropriate technique. The following pages examine various techniques that will help you achieve best focus when working manually.
Manual focusing with DSLRs
Manual focus is performed on DSLRs in much the same way as it was on film bodies – through a simple rotation of a lens’s focusing ring. Today this can be controlled with far greater accuracy than before, although the design of today’s DSLRs presents a few problems. One of these involves the standard focusing screens used in DSLRs and the effect they have on the viewfinder. As it’s assumed that autofocus will be used in the majority of situations, DSLRs come with a plain focusing screen that’s optimised to keep the viewfinder image bright even with slower lenses, while channelling enough light to the AF sensor to perform autofocus.
Thus, DSLRs cannot display an image through the viewfinder that shows the true depth of field at particularly wide apertures, and will instead display a depth of field at a slightly smaller one, such as f/2.8 – even when you’re using a lens with a wider maximum aperture. Not being able to exactly assess depth of field at wide apertures obviously affects your ability to accurately focus. Such assessment is difficult enough because of the potential for very shallow depth of field at wide apertures. One way around this is to replace the default focusing screen with an alternative, such as a screen designed with a split-screen indicator and microprism. This will provide you with an accurate idea of depth of field at such apertures to help you manually focus with accuracy, although the penalty will be decreased brightness in the viewfinder.

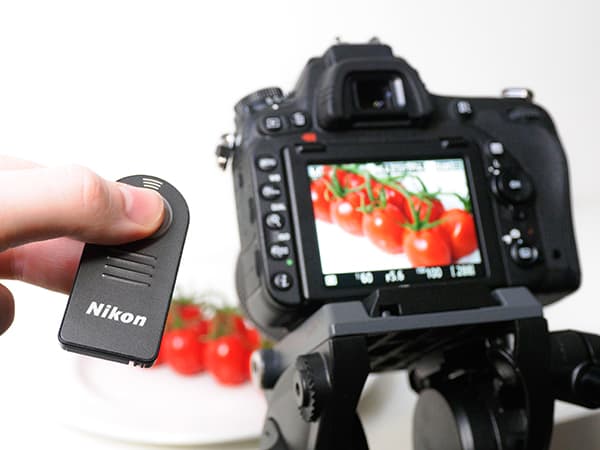
Mounting your camera on a tripod will allow you to focus accurately without fear of camera shake
Other potential complications
Modern cameras typically focus using a lens’s widest aperture, only stopping down to the selected aperture before the image is taken. This creates two issues. First, even when using smaller apertures, the image you see through the viewfinder does not display the depth of field that will result in the final image. You can engage your camera’s depth-of-field preview function as you focus, although your viewfinder will darken with smaller apertures.
Then, spherical aberration, which can be problematic in wide-aperture lenses, can result in the best point of focus moving slightly between apertures. Here, the main concerns are the difference between where the image is formed at the aperture used for focusing and the aperture used to capture the image, assuming it is smaller. Too great a shift between these can mean the focus isn’t in the optimum position at the time of capture.
Other issues mostly stem from differences in the performance of individual components (the lens, focusing screen, viewfinder, mirror, and so on), as well as any issues from using these in combination with one another. Your camera’s focusing screen or mirror could be misaligned, for example, or damaged. Or your viewfinder’s dioptre may not be set at the best point for your eyesight.
All of the above should make the advantages of focusing using live view obvious. By removing the viewfinder, focusing screen and mirror from the equation, any room for error is lessened, while the ability to view the scene at a larger size and with greater brightness and clarity than the viewfinder gives you a better idea of where you are focusing.
In live view, focusing uses the actual image projected onto the sensor by the lens, making it inherently more accurate than the phase-detect AF systems on DSLRs. It may also provide you with the option of magnifying into the scene for clarity. DSLRs are also beginning to offer focus-peaking options, although this does not feature as widely as on mirrorless models.
Manual focus on mirrorless cameras
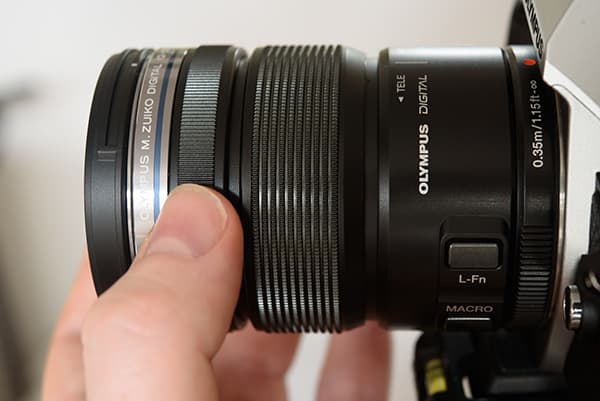
The arrival of mirrorless cameras has allowed manufacturers to craft new lens lines with a fresh perspective, both optically and with regard to external controls. The trend has been for control to shift from the lens’s barrel to the camera, and although the vast majority of lenses are still designed with focusing rings, manual focus here usually works in a different manner than that on optics designed for DSLR lines.
Traditionally, focusing rings have had some kind of mechanical coupling to the focusing group. In contrast, most lenses designed for mirrorless cameras work on a principle commonly referred to as ‘focus by wire’. Here, turning the focusing ring will instruct the camera to drive the focusing group electronically, with its response and angle of rotation determined by firmware.
Such a set-up usually means there are neither physical stops at either end of the focusing scale, nor any physical markings on the barrel for distance (typically displayed on the camera’s viewfinder or rear display). This allows for a simpler lens design, but there can be a minor lag between turning and response. In addition, as the response of the system is often dependent on velocity, it becomes more difficult to pull focus with precision when recording video. For this reason, many videographers will tend to be drawn to mechanically coupled lenses.
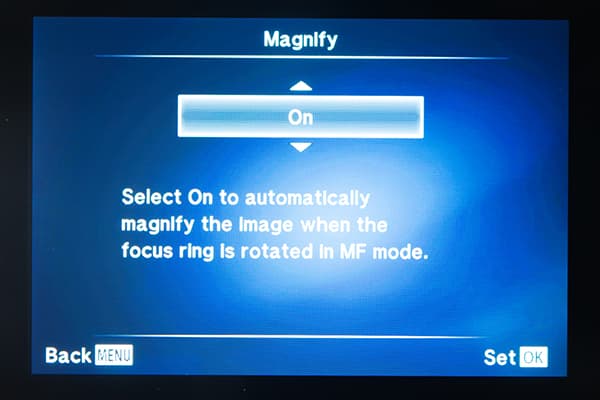
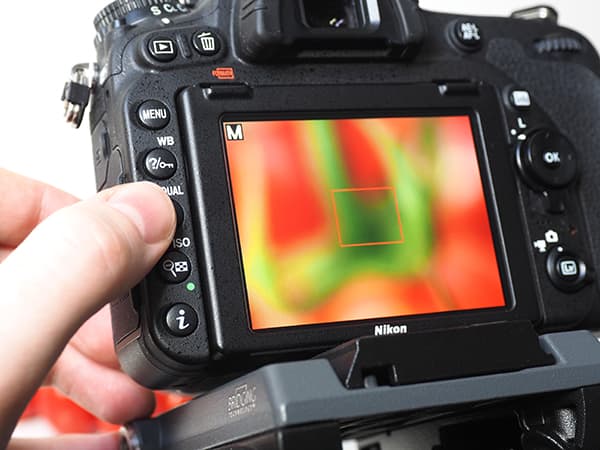
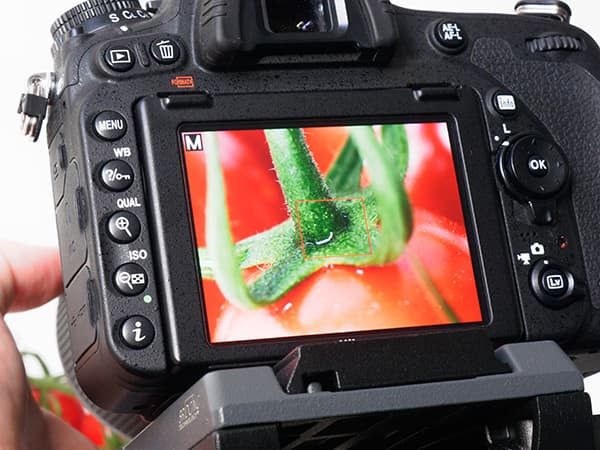
To assess focus, magnify part of the scene
Focus peaking
Focus peaking has become a sought-after feature on enthusiast and professional camera bodies, particularly on those intended for video capture (this feature first originated from video cameras). Strictly speaking, focus peaking does not provide an entirely accurate view of what’s in focus, but places highlights over details in the scene where edge contrast is highest. The correlation between the two is strong enough for this to be often relied upon as a guide to focus, although how it appears will vary with subject contrast and the lens used, among other things.
Some cameras provide no more than on/off control over this feature, although many recent models have this fleshed out with additional controls. The most common option is control over the colour of the highlight, which you may wish to change to contrast better against your subject. A default white highlight, for example, isn’t entirely useful when shooting a predominantly white flower, so a red or yellow option may be preferred.
Another useful but lesser-seen option is the peaking level, which gives you say over the contrast threshold. As a general rule it’s useful to increase this level when your scene is high in contrast, or when the lens you’re using is particularly sharp, so that the camera only displays the edges that are highest in contrast. If using a lens with an aperture ring, you may also find this useful when shooting at smaller apertures where depth of field may be greater. For the same reason, decreasing it will help you when working with low-contrast subjects and wider apertures, and when using older lenses that may optically lack the bite of more modern designs.
Magnified view
The most accurate method to assess focus is to magnify into the part of the scene that you want to render sharply before manually adjusting your focus; this will give you the clearest idea of what the sensor will capture. Many mirrorless cameras automatically do this as you begin to adjust the focusing ring when using manual focus, jumping back to the original composition once you have finished doing so. Those cameras that don’t do this may have the option of being set up in this way.
Alternatively, you may be able to magnify into the scene using your camera’s zoom-in and zoom-out controls, although you may find that at extreme magnifications the feed becomes less stable and harder to use, particularly if your camera doesn’t have some kind of image-stabilisation system.
On some cameras it is possible to use this in conjunction with focus peaking, which can give an even better idea of what is and isn’t in focus. You may find this feature useful when the subject is at a distance, perhaps when using a wideangle lens where the magnification will render the subject much smaller than if it were captured closer to the camera, or in very bright conditions where the screen may be more difficult to view.
Manual focus photography: When to use manual focus on your DSLR
Fireworks

The fleeting nature of fireworks makes them poor candidates for autofocus. When shooting fireworks, you will likely want to focus to a desired point before using manual focus to take the picture.
Shooting through obstructions
When shooting through a fence, railing or window, or when subjects pass between the camera and intended subjects, autofocus systems can become confused. Manual focus is also useful when focusing on window details.
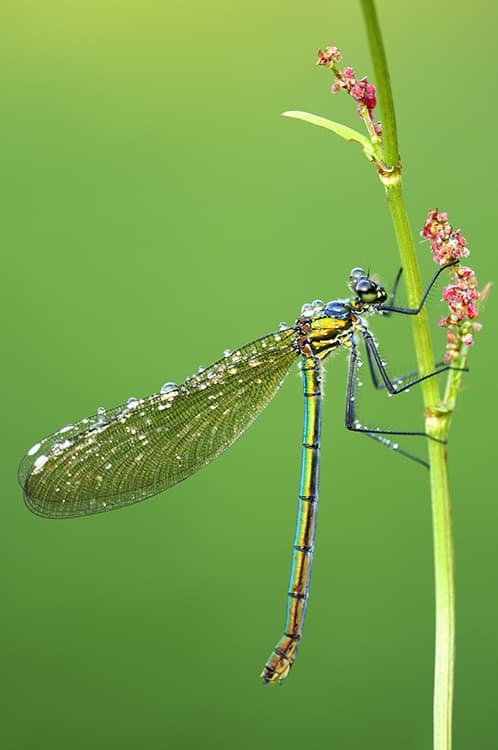
Macro

Manual focus is particularly important when shooting close up, as any small focusing inaccuracies can mean a subject’s focal point (an insect’s eye, for example) isn’t as sharp as the secondary areas.
Panning
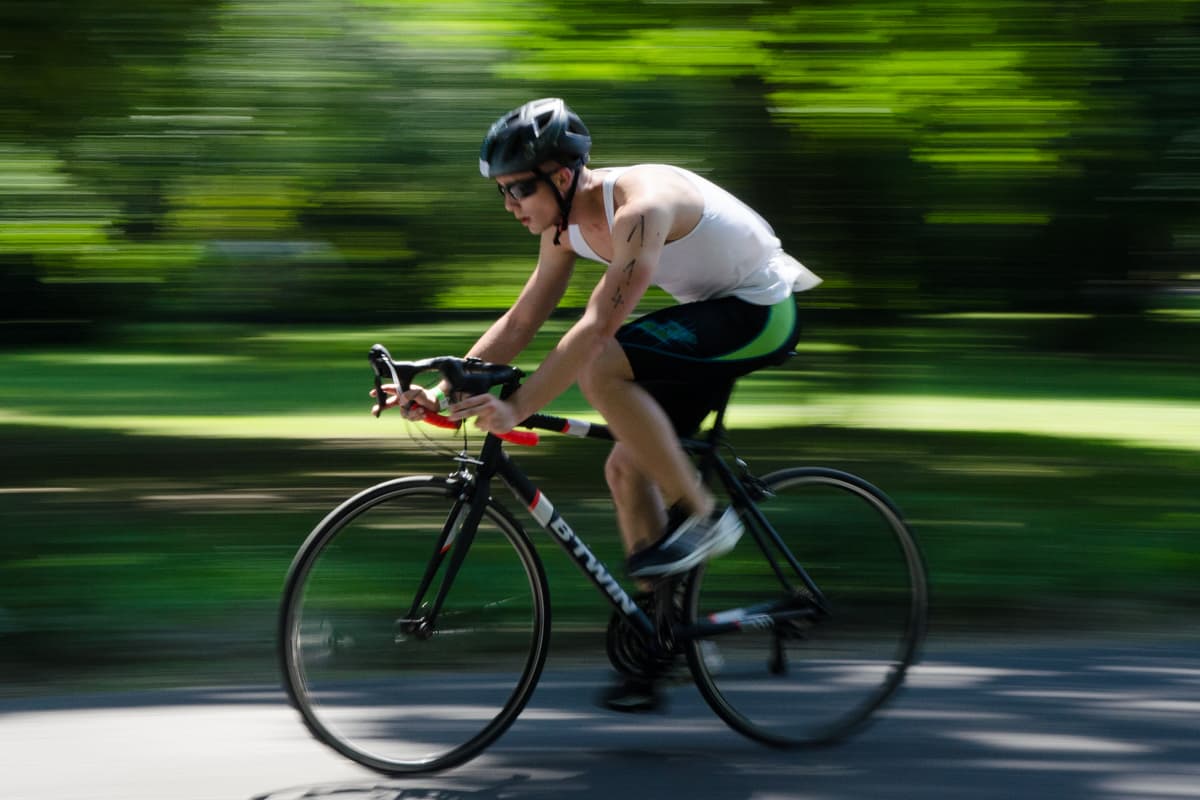
Although advanced AF systems can be used to pan many subjects, you can also fix the focusing distance manually beforehand. With this technique, you should ensure the subject remains within the focused area determined by your depth of field.
Light trails
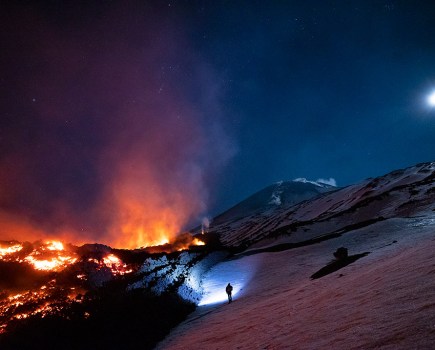
Autofocus is less useful when looking to capture light trails from traffic, unless you can focus on an appropriate fixed point in the scene. In such cases, manual focus, potentially in conjunction with hyperfocal focusing, is a common alternative.
Infrared photography
Infrared rays form an image at a plane beyond that of the visible spectrum, which means the focus has to be shifted to this point manually. Older lenses, and a handful of modern ones, may sport red markings on their barrel to facilitate this.
Using live-view focusing to get manual focus right every time
1. Set up your camera correctly
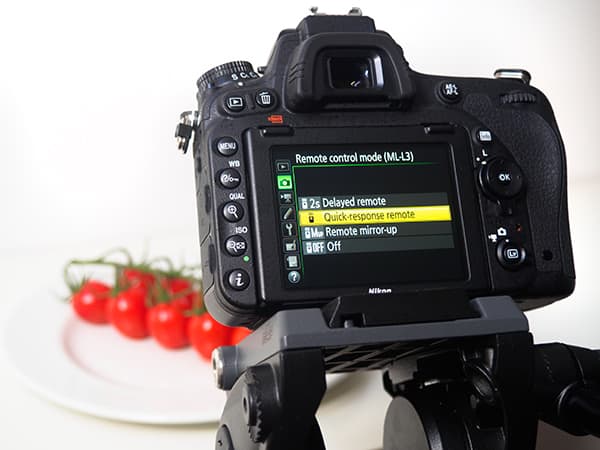
Even before you activate your camera’s live-view function, it’s worth thinking about how you will trigger the shot you wish to take, so that you can inculcate a few best practices first. For instance, you are likely to be using your camera when mounted on a tripod, in which case you should disable your camera’s (or lens’s) image-stabilisation system. The image-stabilisation system can create a cycle of vibrations and vibration correction that can compromise the image’s sharpness. You may not need to do this if you know for certain that the camera or lens has an effective means of automatically detecting that it’s being used with a tripod. For better sharpness, you should either attach a remote release to your camera or set it to recognise that a wireless option is used, if you have one. If you don’t, set the camera to an appropriate self-timer option.
2. Check aperture changes
Turn on your camera’s live-view option. Even though you can adjust aperture while using live view, it doesn’t mean the aperture physically changes, which can affect depth of field. Another way to view aperture changes is to look through the lens and see if the diaphragm changes size. On cameras that do not adjust aperture in live view, there may be the option of checking depth of field with a specific control.
3. Frame your image
To help frame your image, you may wish to use the autofocus system to get a rough approximation of focus. Depending on what you’re shooting, composing could be easier with a grid superimposed over the scene, or an electronic level if your camera has one. Also, adjust exposure settings to suit the scene.
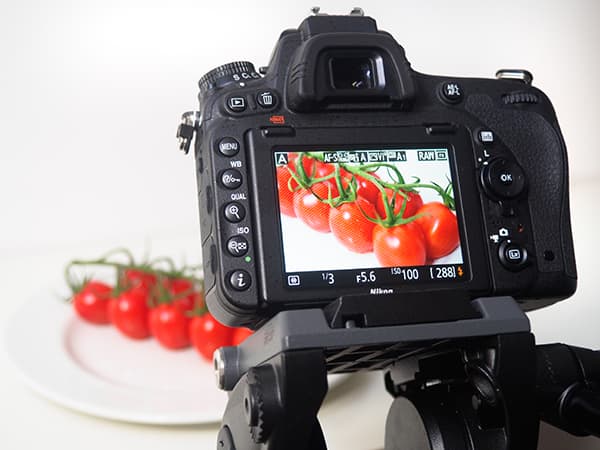
4. Go manual and zoom
Switch to manual focus. Your camera may provide 5x and 10x options or even higher zooms, or adjustment in finer increments. The choice depends on the subject and how much you need to check the subject’s details. Turn the focusing ring slowly until the subject is in focus. Very slightly, move your focus back and forth a few times to ensure accurate focusing.
5. Check depth of field and release the shutter
If you know your camera isn’t physically adjusting the aperture as you change magnification, make sure there’s some way of checking depth of field accurately, and move around the scene using your camera’s directional controls if necessary. Zoom in to your chosen subject to check any adjustments.
Visual notifications on camera
As with certain film bodies, it’s often possible to use manual focus on a DSLR in combination with visual notifications that focus has been achieved. This is typically the same focus confirmation light that’s active when using autofocus. These notifications usually appear alongside the exposure information in your camera’s viewfinder. As this feature makes use of your camera’s phase-detect autofocus system, it stands to be affected by any autofocus microadjustment you may have previously performed when checking the image. Therefore, it’s important to make sure that the AF microadjustment is correctly adjusted or disabled.
Using manual focus in conjunction with visual notifications can help you obtain maximum sharpness
Keeping things steady
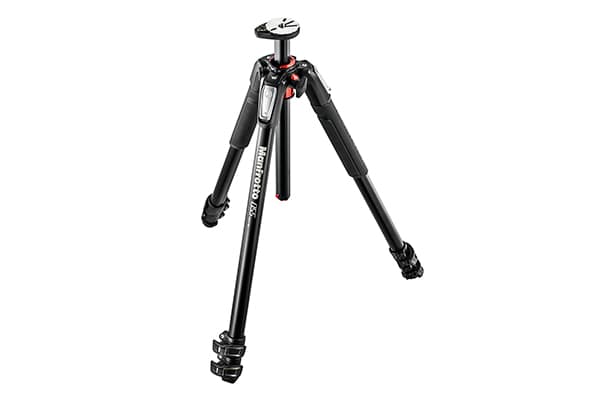
When you’re focusing manually, any movement of either the camera or subject can affect your picture. Thus, it’s a good idea to mount your camera on a firm support (and trigger the shutter remotely) to reduce the chances of camera shake, and do what you can to keep the subject steady.
Tripods with reversible central columns, such as the Manfrotto 055XPRO3, are ideal for macro photography (one genre in which manual focus is pretty common) as they enable you to switch to a horizontal position and make precise adjustments while shooting at ground level. Focusing rails (also known as micro-positioning plates) are good as they can attach to your tripod and enable precise positioning with just a touch of the fingertips.
When it comes to keeping your subject steady, less sensitive macro subjects (such as plants) can often be held steady using floristry wire or tied back with string. For a firmer grip consider investing in a Wimberley Plamp II – one end of this flexible arm clamps to the leg of your tripod while the other can be used to hold a windblown object, reflector or backdrop.
Benefits of tethered shooting for MF
The LCD monitor on the back of your camera is perfect for making major adjustments to composition, but as it only measures 3in or so it’s not always the best way to make precise adjustments to focusing. As we’ve seen, most DSLRs now allow you to select a small area and magnify it on-screen, but when you’re looking for super-fine adjustments use an external device, such as a laptop or tablet, and take advantage of the larger screen.
Controlling your camera via an external device has many benefits, aside from the improved screen size. If you’re shooting an especially flighty subject (such as a butterfly, for example), it enables you to keep further back, minimising any disturbance. What’s more, you can perform adjustments to many frequently used camera settings (including aperture, shutter speed, ISO, and so on) without physically touching the camera – this will inevitably reduce camera shake.
Guide to focus peaking
1. Enable focus peaking
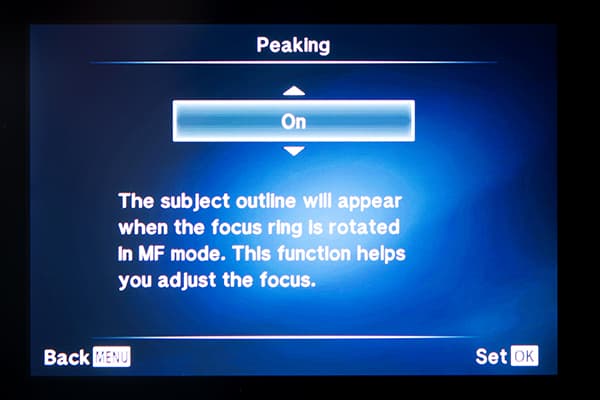
First, find the focus-peaking option in your camera’s menu system, bearing in mind that this may be under a general heading with other manual focus-assist options. If you have control over the colour, choose one that contrasts with your subject, and adjust the peaking level if you feel the need to. If you’re not sure whether to adjust this, leave it on the default setting.
2. Compose your image
Now find an approximate focus so that you can compose your image. As with the previous method you can do this with autofocus initially, before switching to manual focus, or you can simply do it with manual focus to begin with. If you’ve chosen to use manual focus, you should already see the focus-peaking function appear – if not, move to the next step.
3. Focus using peaking

Now is the time to fine-tune your focus. Switch to manual focus if you haven’t already and move the focusing ring slightly to see where the highlight appears. You want this to be at its maximum level over the key element in the scene. If your subject covers a range of distances, ensure that your depth of field is wide enough to render it entirely in focus.
4. Release the shutter

When you are happy with your focus, release the shutter. For maximum sharpness, consider using a remote release of some kind or your camera’s self-timer option. This will reduce camera shake and keep the image sharp.