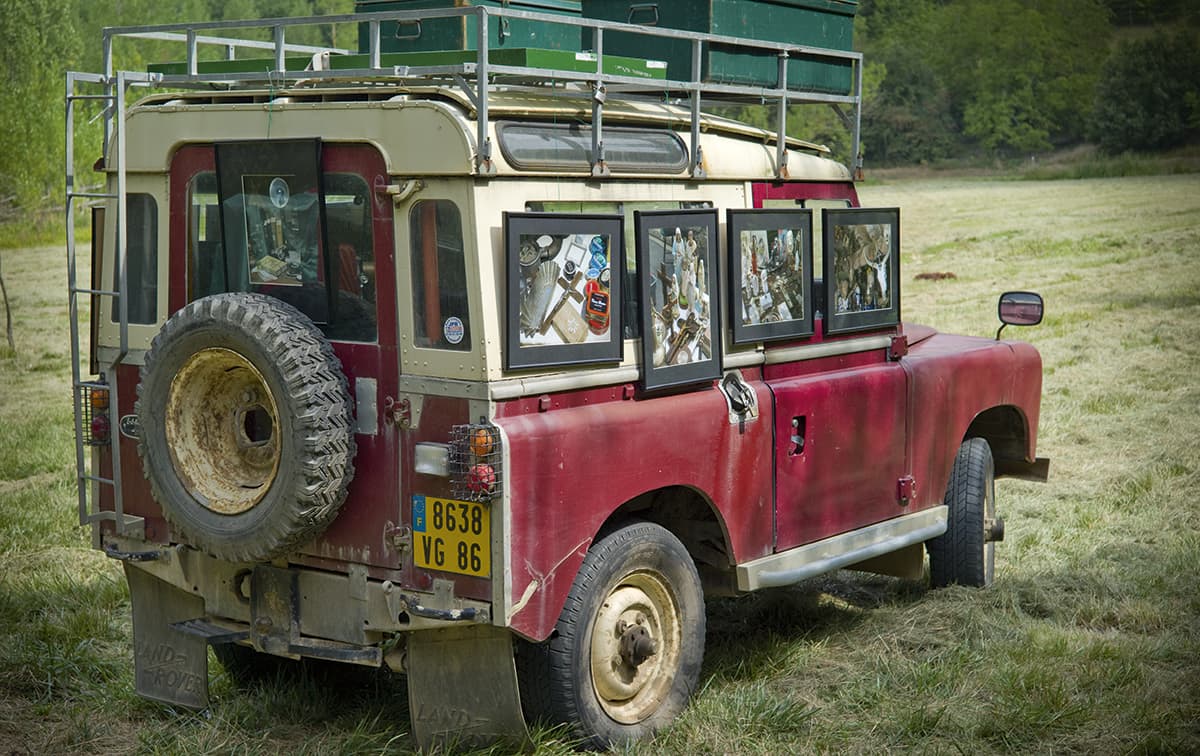
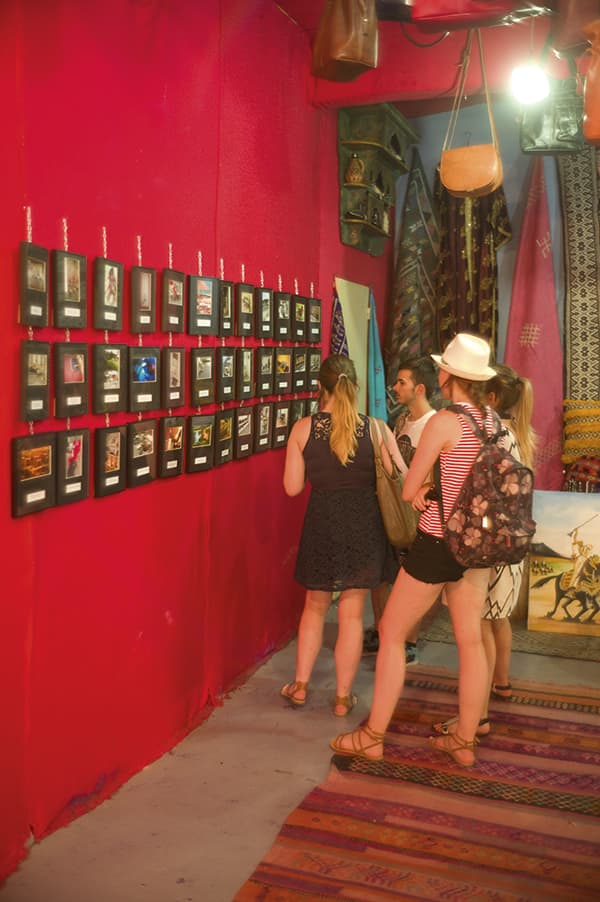
A unique way of exhibiting your photography – utilising a simple Land Rover as a gallery, Credit: Roger Hicks
You’ve made it. As you stand, surrounded by your pictures, with a glass of wine in your hand, people come up and compliment you on the exhibition. It’s a wonderful feeling. But a lot of things have to happen before that happy day.
When exhibiting your photography, you need a theme. You need to print and frame your pictures. You need a venue. You need to decide on the number of pictures, the print size, whether or not to glaze. You need to work out prices. You need to think about publicity. You need to hang the pictures, and perhaps organise the opening night. You need to accept that the chances of making any money, at least at first, are negligible.
Exhibiting your photography is a great way to improve your work. You are forced to think about what you want to say and how you want to say it. If you are looking for a voice or a style, it is invaluable. If you want to build a reputation there is really no alternative. As I’ve already said, it’s a wonderful feeling. It’s also probably easier than you think, and it need not be ruinously expensive.
Exhibiting your photography: Find a theme
The theme is the hardest part. A couple of nice landscapes, some portraits, a few flower studies, a nude, some street shots and a really good macro shot of a dragonfly almost certainly isn’t an exhibition. People are surrounded by first-class but disparate pictures every day, in books and magazines, on advertising hoardings and television. An exhibition must engage your audience. It doesn’t matter how, so long as they’re not bored, and to be honest, almost any reaction is better than none at all.
Look for themes in your own work when exhibiting your photography. What are your best pictures? What is their subject matter? Have you a distinctive style, or at least the beginnings of one?
My first-ever exhibition, at Plymouth Arts Centre in Devon in the 1970s, was one of about 20 pictures taken on the beach at Weston-super-Mare in Somerset. They were somewhat in the style of Martin Parr, except that I was shooting them at around the time he graduated. Since then, my exhibitions have ranged from as few as a dozen or so pictures (at Bristol, in around 1980) to three dozen (at Arles in 2015), and they’ve been exhibited in bars, restaurants, a community centre and a tourist office.
Exhibiting your photography: Venues
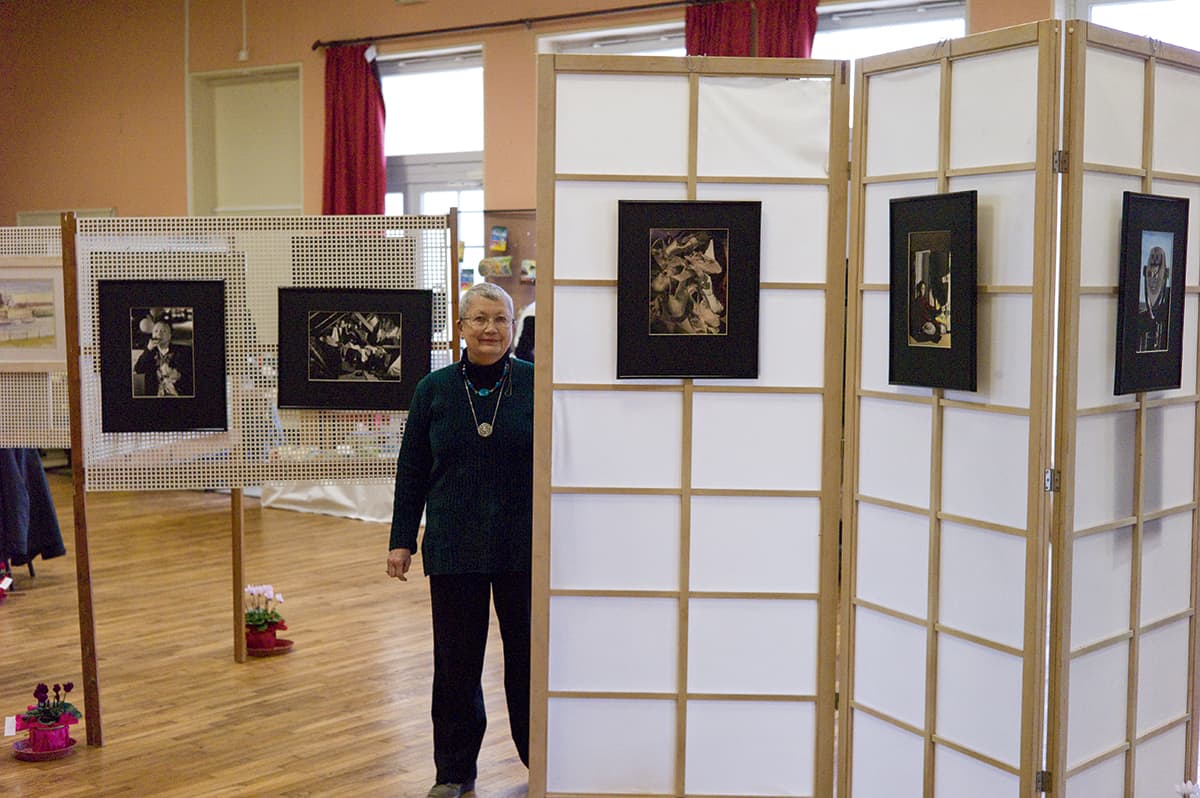
Temporary panels at a community centre in Martaize. Scouting out the venue can be extremely difficult when you are dealing with short-lived temporary exhibitions: this was a two-day Christmas fair, with half a day for hanging beforehand and decrochage on the evening of the second day, Credit: Roger Hicks
In the past five years or so I’ve had maybe half a dozen local exhibitions, plus a couple at Arles, France, and I’ve helped my wife Frances with six or seven more. Most have been exhibitions with both of us exhibiting on the same premises, usually with no other photographers. Frances is more serious about exhibitions than I am, and more willing to put in the effort and the hours, including the times when there’s nobody in the gallery and you just sit and read.
Once you are reasonably convinced that you have enough pictures for an exhibition, and have made ‘a few prints’ to illustrate the theme, you need to start scouting out potential venues. When exhibiting your photography, no not neglect anywhere that has wall space: I have heard of exhibitions in bank foyers, and seen them in a hairdressing salon. Keep your enquiries light and vague at first, such as, ‘Would you be interested in…?’ or ‘Do you ever…?’ Of course, if the venue is already a known gallery, or, for example, a bar known for hosting exhibitions, it will be a question of when or whether they can fit you in.
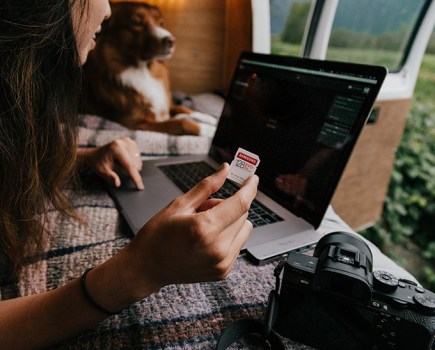
There are two important points here. One is ‘a few prints’ mentioned earlier. You need real prints, not images on the screen of your laptop or, worse still, your mobile phone. A good print has many times the impact of yet another array of pixels on a screen. It’s an earnest record of your sincerity: it shows you’re a ‘real photographer’, not just someone who has taken a few good snaps by chance. Your prints might be postcard size, little jewels that people have to examine closely, or monster enlargements – it’s your artistic choice. Beware, though, of thinking if you can’t make it good, make it big.
The other important point about scouting out venues is to help you decide how many prints you can fit in, and how they should be printed. There’s no point planning on exhibiting your photography with ten giant prints if there’s no room, and in a big venue with small prints you may be letting yourself in for a massive amount of work.
Credit: Roger Hicks
You need one kind (and perhaps size) of print for a small, intimate and perhaps poorly lit venue, and another for big, bright, high-ceilinged galleries. In any given series you want consistency of colour balance (including ‘warm’ and ‘cool’ black & whites); of surface texture (use the same paper throughout the exhibition); of saturation and/or contrast; of technique (such as Frances’s hand colouring); and usually of size.
Small variations don’t matter, but an exhibition where some prints are 8x10in and others are 20x16in normally just makes the smaller prints look miserly and the big ones normal, or the small ones normal and the big ones overblown. Frances typically prints silver halide at 8×12-10x15in (20×30-25x38cm) on 12x16in (30x40cm) paper. I print inkjet colour at anything from postcard to A3+, but only one size per series for exhibitions.
Exhibiting your photography: Framing
When exhibiting your photography, you will normally want consistency in framing too. If you make the prints yourself, frames are one of the greatest expenses in mounting an exhibition. We mostly use a French chain called GiFi, where we buy black plastic 50x60cm frames (20x24in) for €11 (around £8). When we see them on sale at half price, we buy all they have. We also recycle frames. If you buy cheap frames, buy them somewhere that you are reasonably sure will continue to stock them. We normally prefer glassless mounting (even though the frames come with glass) because we believe that surface texture is an important part of a print: behind glass, everything looks dull and sterile. The argument for glass is that it protects the pictures, but what good is a picture you can’t fully appreciate?
The more can you do yourself when exhibiting your photography – printing, mounting, framing – the more control you have and the easier it is to get good quality, affordably.
Bevelled mounts allow us to accommodate prints of varying sizes. I can cut two 30x40cm mounts from a single sheet of A3 board, bought in bulk (25-sheet graduate packs from the London Graphic Centre). If I buy 100 sheets, an A3 board costs about £1.50. I cut the mounts with an Olfa mat cutter on a Rotatrim cutting mat. The cutter and the mat each cost a bit over £50, but they last for decades and make it astonishingly quick and easy to mount prints, taking maybe 20 minutes a print. The only other tools I use are a scalpel and a straight edge. I change blades reasonably often, because overworked blades mean poor cuts and wasted mounts.
The prints are stuck to the mounts with archival tape, but the backs of the cheap GiFi frames are hardboard. This is about as far from archival as you can get, so I put a sheet of polyester drafting film between the back and the print. A roll costs about £60 but lasts for years. When the frames are recycled, the prints are stored in their mounts in clear sleeves so they can be stacked in a portfolio rack or on a table at an exhibition, so people can leaf through them and (with any luck) buy them.
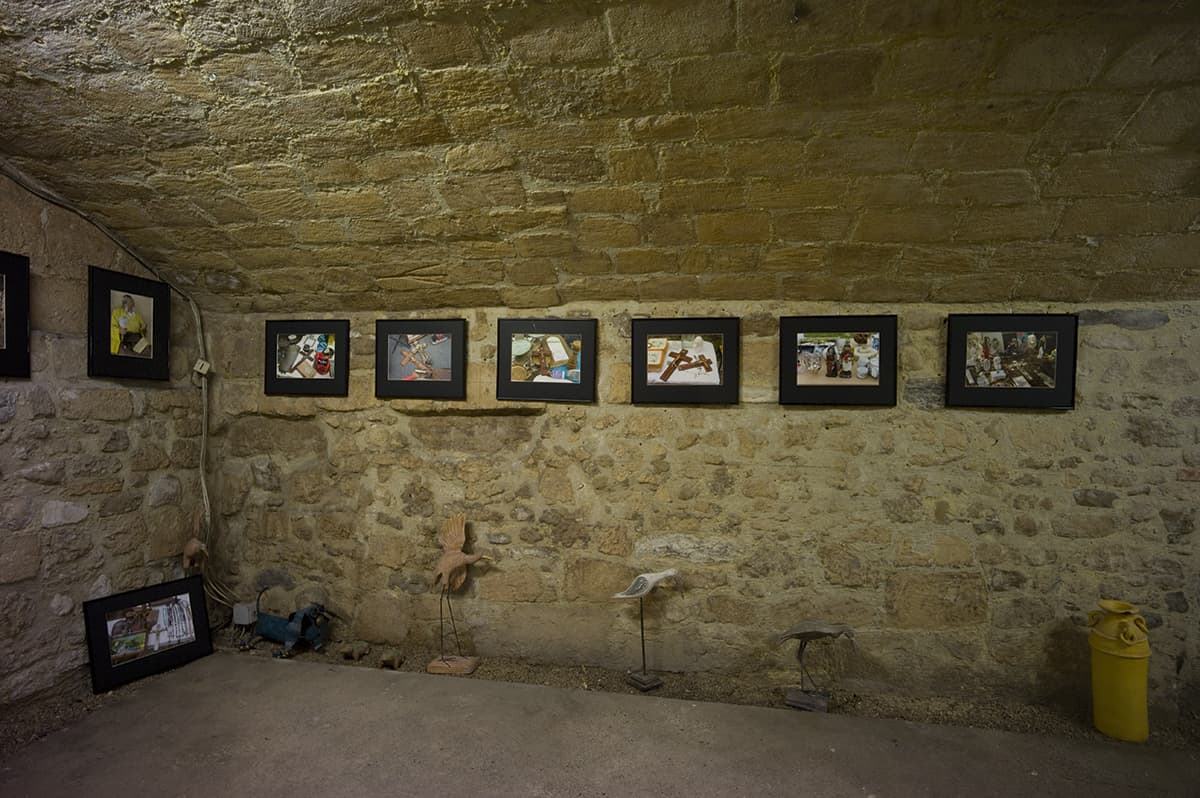
Roger’s exhibition at Arles in 2015, ‘The Secret Life of Chairs’. He was out of the cellar this time!, Credit: Roger Hicks
Exhibiting your photography: Selling
There’s a fine line between underpricing (to sell) and overpricing (to show that you’re serious). Older sleeved work is usually cheaper than new stuff on the walls, and pricing varies according to where you are. Frances normally prices hand-coloured silver-halide prints at €150-300 (£120-£250) and I price pigment inkjets at €60-180 (£50-£150), depending on size. We’ve found it easier to sell at small local venues than at Arles, even at the same price. Our theory is that at Arles, people are spoiled for choice, whereas in La France profonde (‘deep’ France), they see a lot less good work.
Make sure you agree in advance with the owner of the venue what percentage (if any) is to go to them in the event of a sale. This is normally 30-50%, although many small, local venues take nothing, or as little as 10%. Ask if they’re insured, too. If they’re not, you may want to insure for yourself.
Get the pictures up on your website so people can look at them before or after the exhibition, and send out as many emails or paper press releases and invitations as possible. Print cards that visitors can take away with them. If the exhibition is part of a festival, make sure it is in the festival’s literature.
Pictures are heavy and fragile. The frames can scratch. Frances makes bags out of cheap, heavy cotton to hold two prints face to face with another sheet of cotton in between. For hanging, chains are by far the easiest. Simple S-shaped hooks allow you to hang the pictures with very fine gradations of height.
The first night is rarely held on the actual first night. Normally, it’s at least the day after the hanging, and it can be as much as a week after. Invite the press and anyone else who can do you some good. First nights are not obligatory, though – you can perfectly well have an exhibition without one. Frances and I have paid for four ourselves, at between £80 and £150 a throw.
Finally, there’s the décrochage. Chains make this much quicker and more painless. Do it when you say you will, work quickly and clean up behind you. This makes it much easier to get another exhibition. Then, at home, you have to find somewhere to store all the unsold pictures.
Yes, it’s hard work. Yes, it’s time-consuming. Yes, it’s expensive. You will be lucky to get away with spending less than a couple of hundred pounds just for prints, mattes and frames. But compare this with attending even a modest course or workshop, or with entering a few competitions, especially the sort that charge entry fees. Depending where you are in your exciting photographic journey, you may well find exhibiting a lot more use.
How to mount your prints
Roger Hicks gives us a DIY guide on how to mount your own prints.
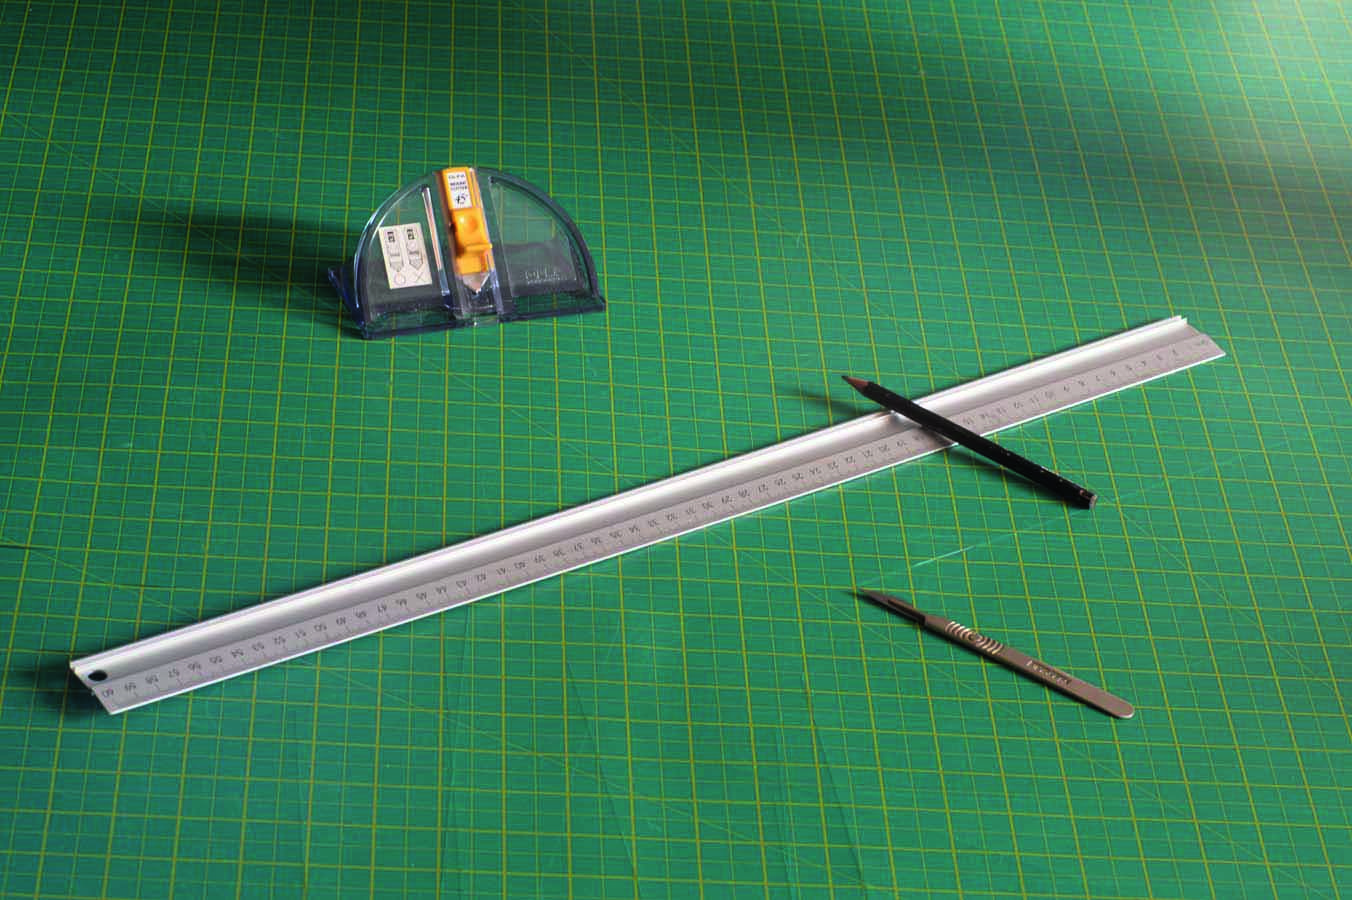
1. What You Need – You will need an Olfa mat cutter, a straight edge, a pencil, a scalpel and a Rotatrim cutting board or other cutting surface. Exhibitions are normally ‘panic stations’ as there’s never enough time or money. We cut the mounts while Frances was still working on the hand-coloured prints from her latest series.

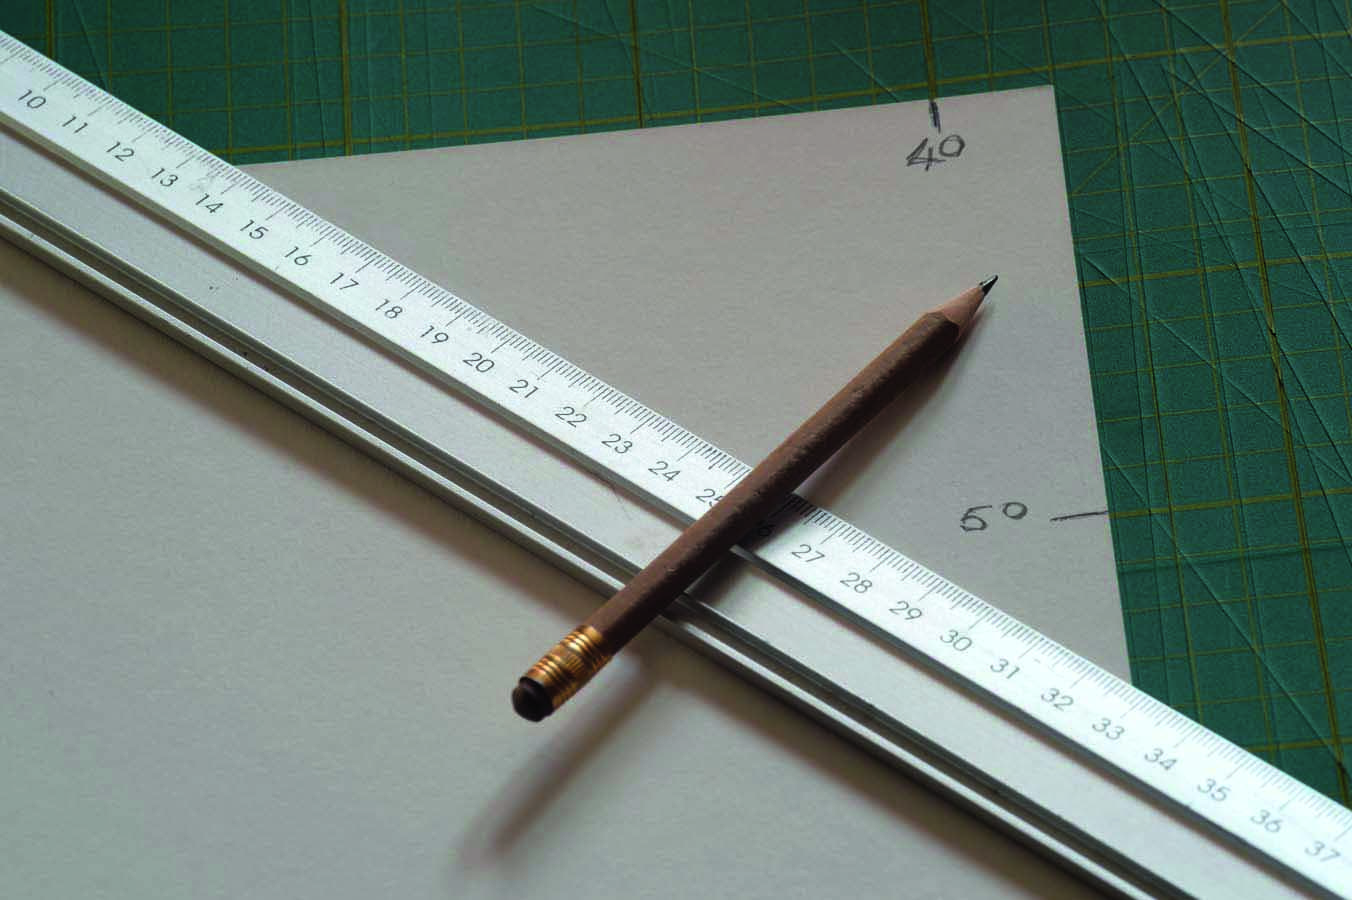
2. Measuring The Print – The image is printed 160x250mm, or about 6½x10in, on 12x16in paper as Frances wanted a wide black border. Double-check the dimensions before cutting the mounts, and make sure the pictures are ‘true’ (not tapering or trapezoidal). Measure top and bottom, left and right.
3. Mark The Board For Cutting – You can just about see how the clear lines on the Rotatrim cutting mat make it much easier to measure and to cut. One side is metric, the other is imperial. Cutting mats can be bought in a range of sizes depending on your needs. They really are one of the most useful tools you can have.
4. Cutting The Board – Some scrap card under the mount saves cutting into the Rotatrim mat and prolongs its valuable life. Our cutting mat is about 15 years old. Most of the damage was incurred in the first five years before we started using the card like this. Obviously you want to do everything you can to preserve your tools.
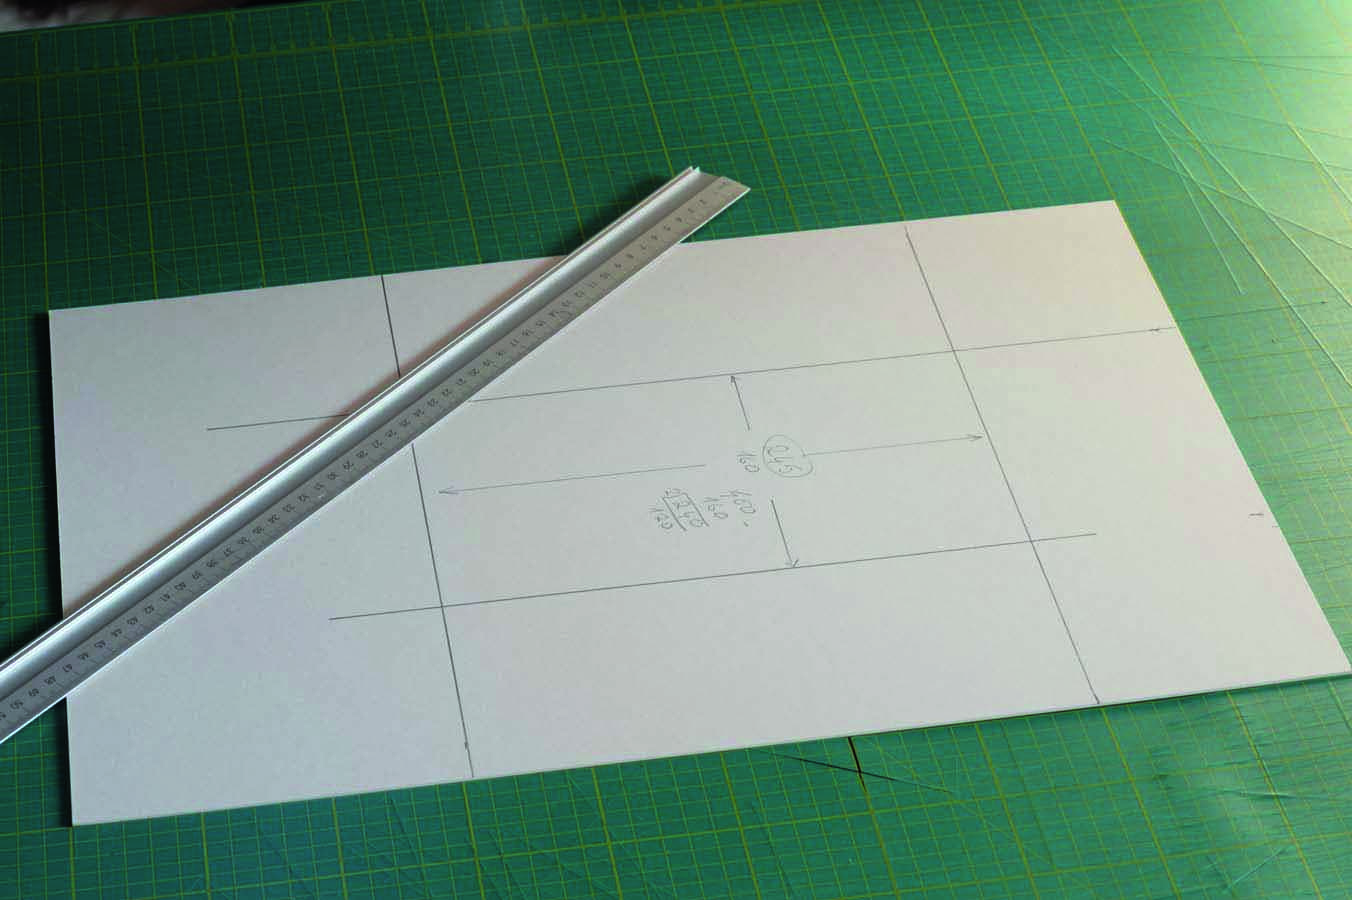
5. Marking Up The Mount For Cutting – Again, the grid on the board makes life much easier. While things like this may seem unimportant to mention, little elements such as this can save you a great deal of bother and time when arranging your exhibition.
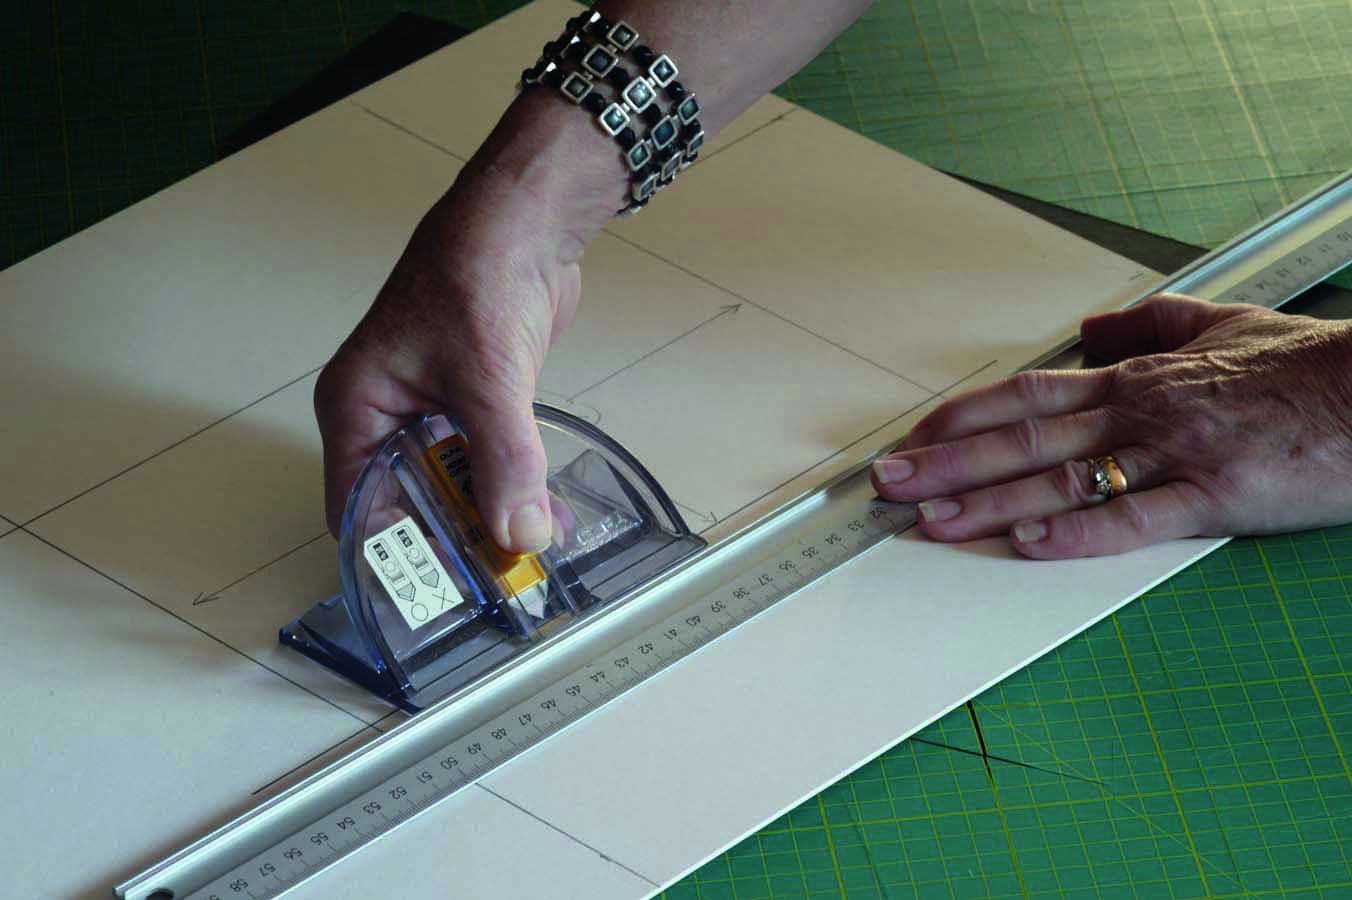
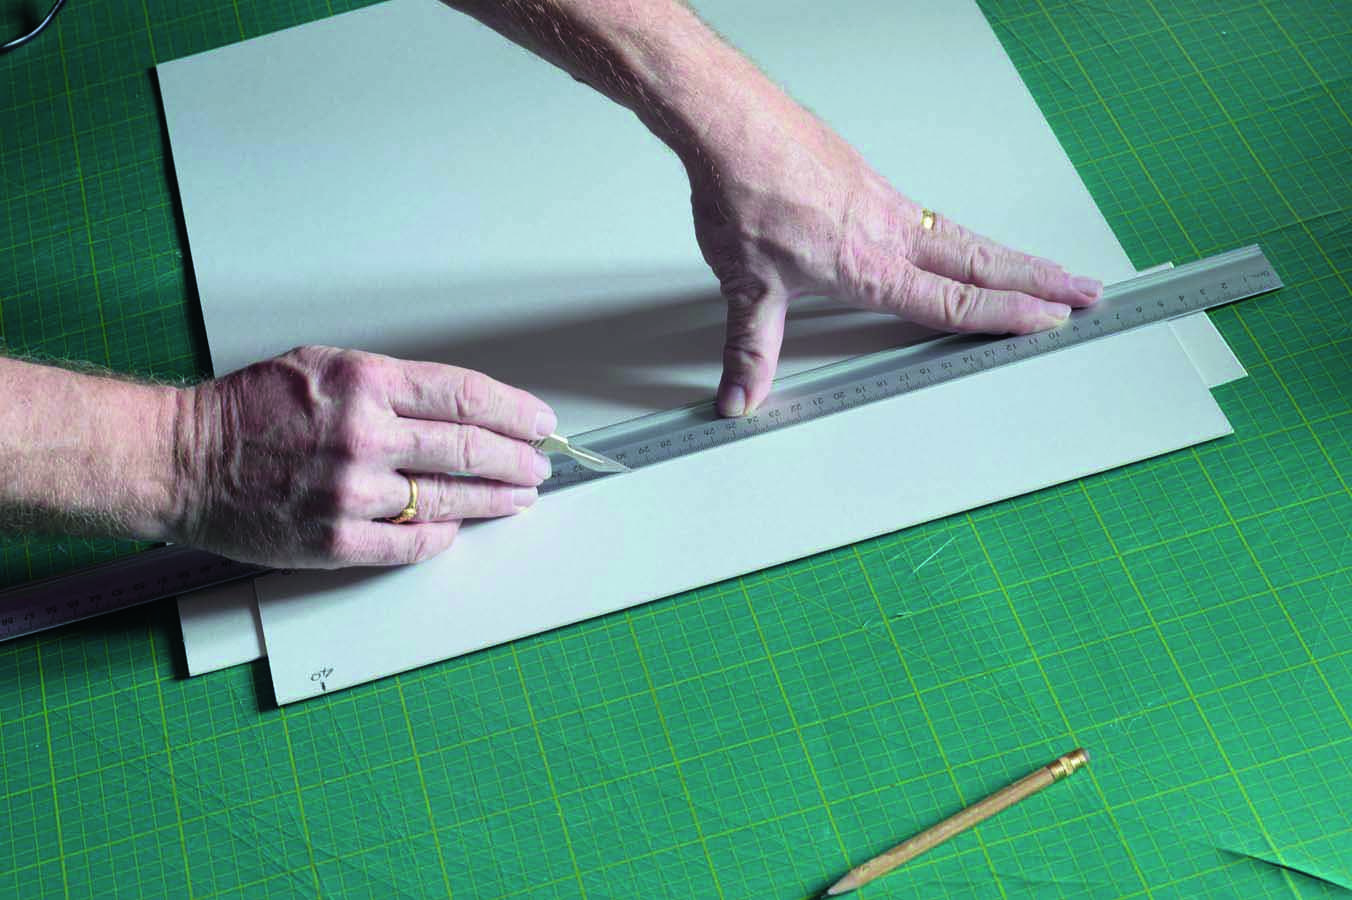
6. Cut From Inside The Frame – If you don’t cut from inside the frame, the 45° bevel will be the wrong way round. Press a bit harder on both the straight edge and the cutter than is evident here – this is just to give you an idea. Again, put a bit of scrap card under the mount to protect the mat. Make two to three cuts at increasing depth rather than a single cut.
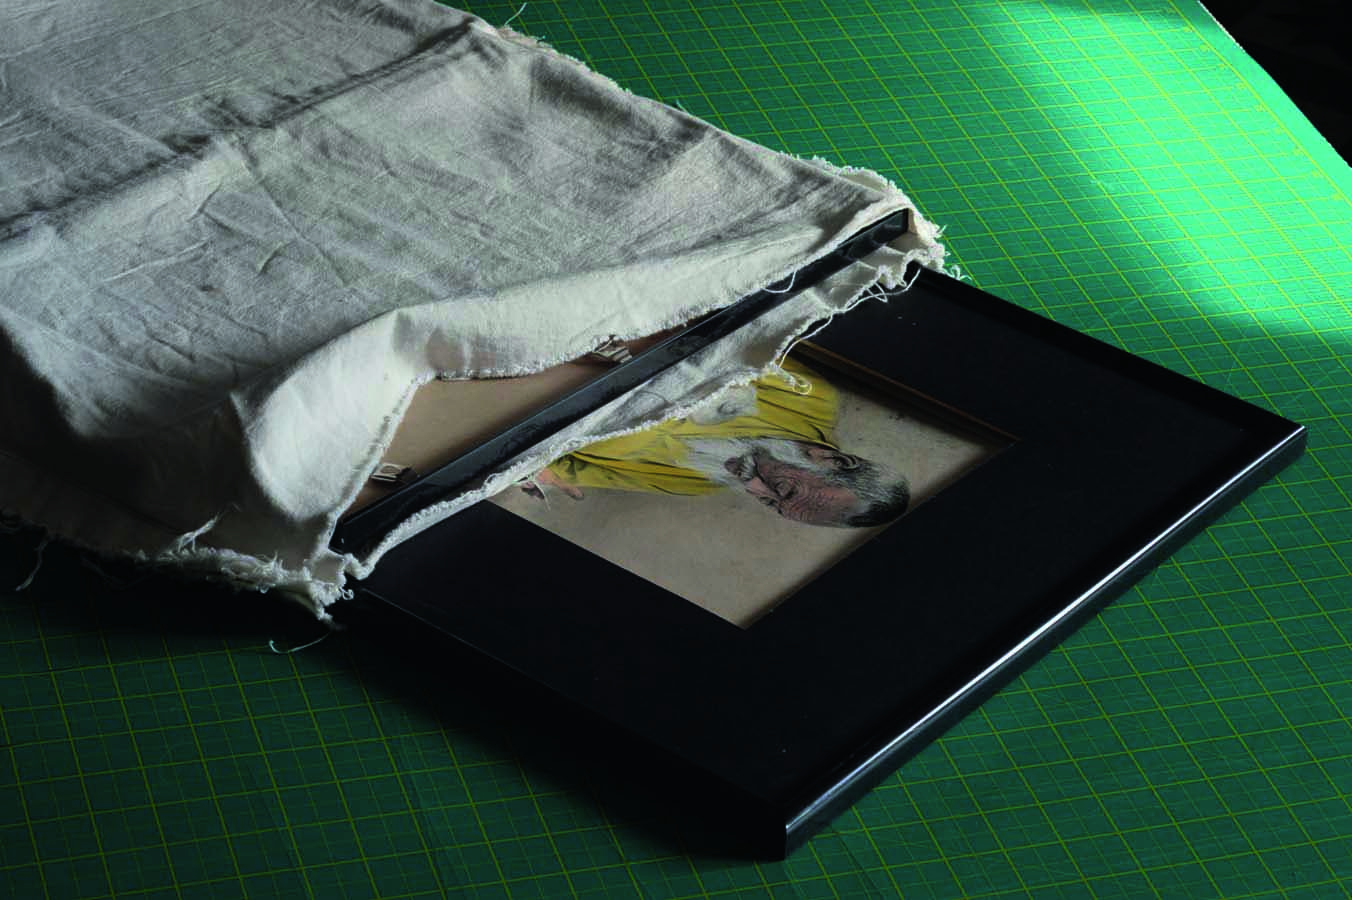
7. Carrying Bags – These bags protect the framed prints. Three sheets of cotton make a bag with an inner separator to carry two prints face-to-face. It should go without saying how important this is. It can be so easy to scratch or damage your work, so do everything you can to make sure it’s secure and protected.
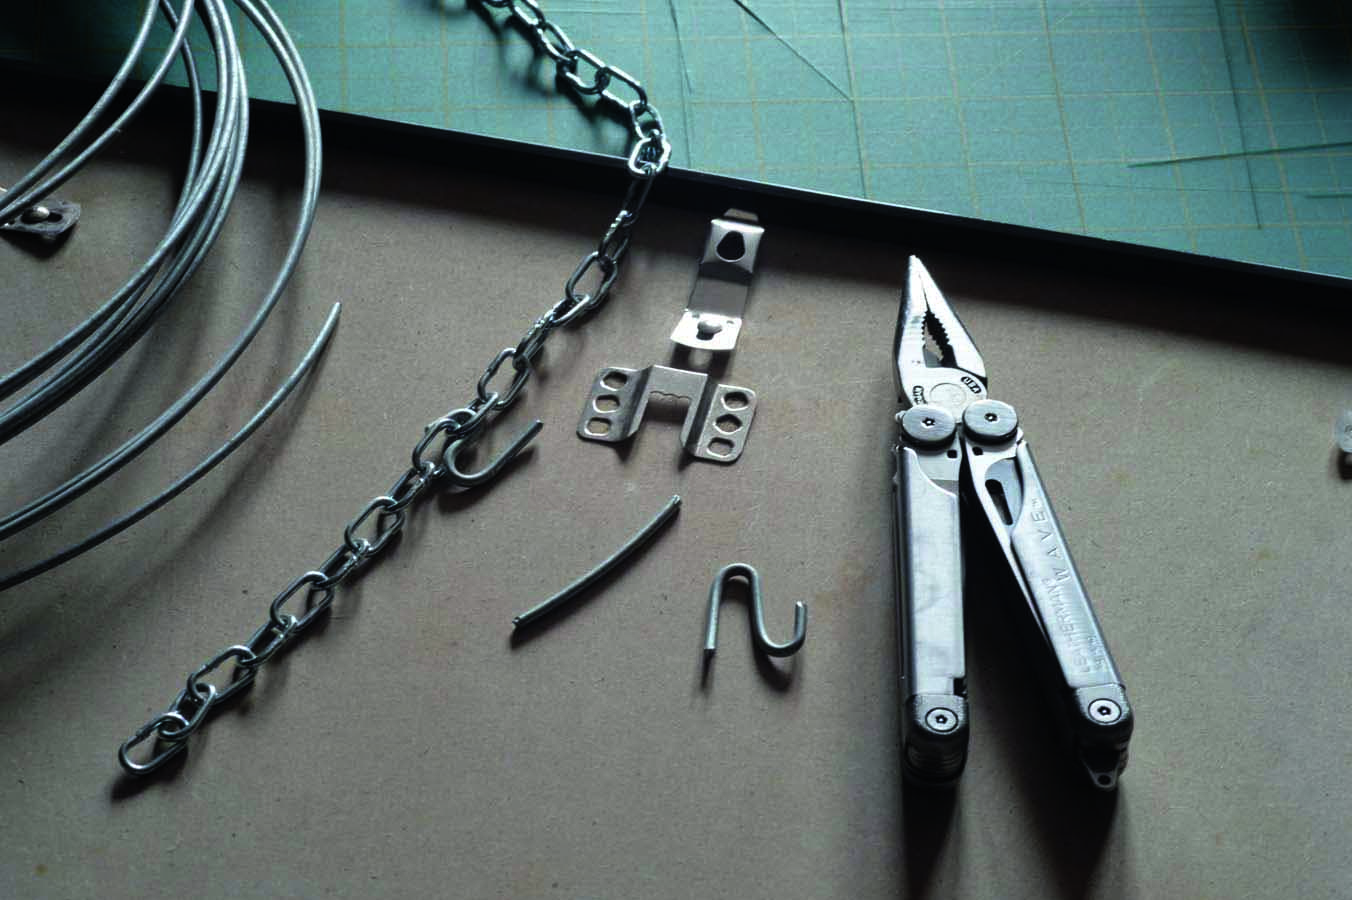
8. Hanging – You need a chain for hanging, wire for making hooks and reliable wire cutters. This wire is rather heavier than anything you would likely need for your own work, but it’s what I had handy and I didn’t want to buy any more. Better to overcompensate than undercompensate.