A little reflected light can make all the difference to your portraits. We show you how to make a three-faced reflector for bouncing light back onto your subject
Before you start
You will need:
3x A2 foamboard
Mirror card
Cloth/utility tape
Velcro
Scissors
Craft knife
Steel rule
Marker pen
Skill required: Beginner
Time to complete: 30 Minutes
Cost: £15
A reflector is one of the most useful tools a photographer can use, particularly when shooting portrait images. While there are many commercially available reflectors of all shapes and sizes, it is just as easy to make one yourself.
The design of the three-faced reflector enables it to be held by the subject of the portrait. With the light angled from above, the reflector bounces light back onto the subject’s face, helping to fill in shadows and soften their overall appearance.
As the reflector we are going to make relies on the subject holding it, it is best used for seated portraits. By adding Velcro tabs to the design, we can also use different materials to change the brightness and colour of the reflection.
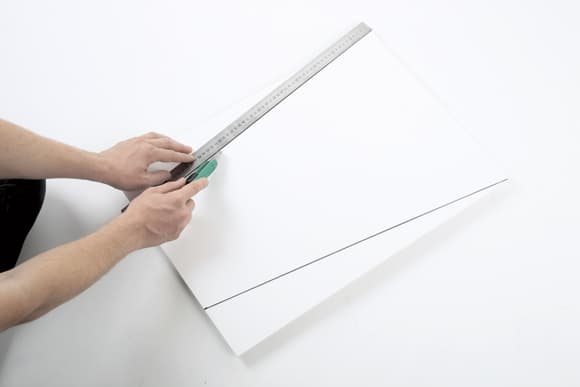
1. Mark two points 10cm from the edge of the short side of one of the A2 pieces of foamboard. Use a metal ruler and a craft knife to cut from these points to the top corner on the same side. This will make a trapezium shape, as shown in the image above. Repeat this for each of the three pieces of A2 board.
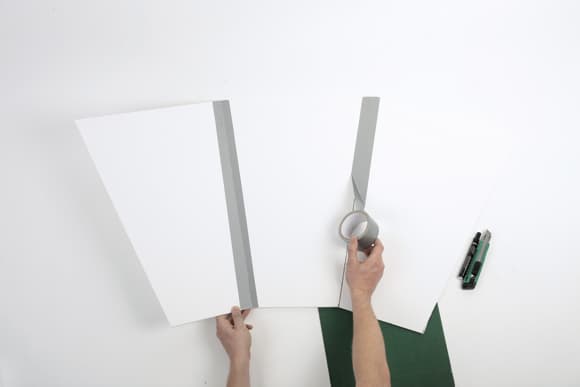
2. Align the boards next to each other so that the shortest side of each board is at the bottom. Use cloth tape to stick the long edges of the board together to create a hinge.
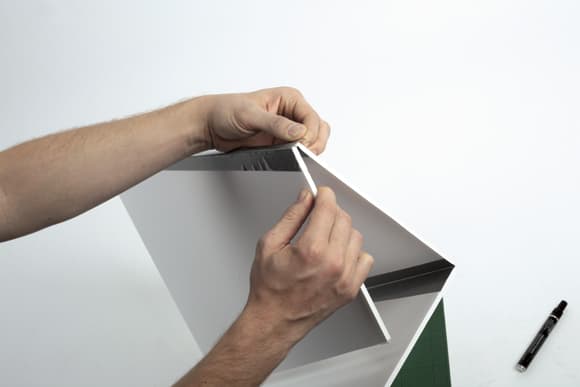
3. Fold the hinged sections and on the opposite side of each, place strips of tape to secure them on the reverse.
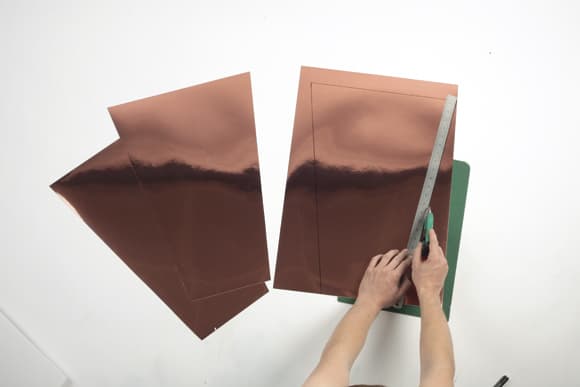
4. The reflector should now be made of three hinged sections and is ready to use. To make the reflector even more versatile, cut three A2 sheets of copper or silver mirror card in the same way as we did with the foamboard in step 1.
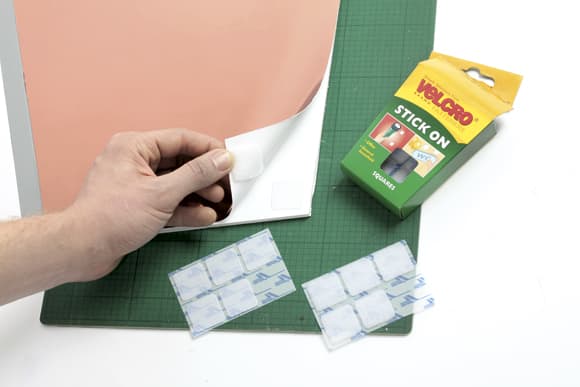
5. Apply Velcro tabs to the rear corners of the mirror card and to the same position on the front of the foamboard. The mirror card increases the reflectivity of the surface. We have chosen to use a copper-coloured card to create a warm glow, but you may wish to use silver for a neutral reflection. The Velcro allows the reflective material to be added and removed as required.
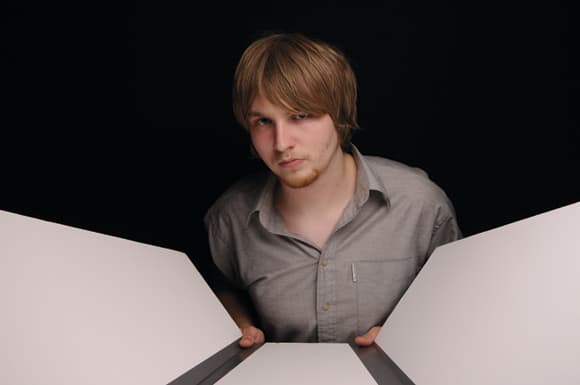
6. Now the reflector is ready to use. Ask your portrait subject to hold the reflector in front of them, between their waist and chest. Any light that falls onto the reflector will be bounced back onto the subject, creating a soft lighting effect.
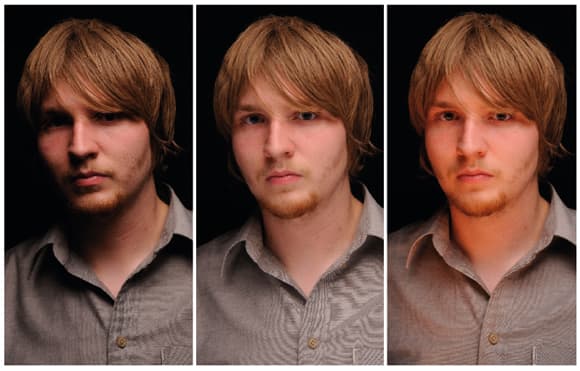
It is surprising just how much can be illuminated using just a reflector. The picture on the left was taken with a softbox placed around 45° above the subject. For the middle image, the reflector was used. It has bounced a lot of light back up onto the subject, softening the shadows. Finally, the image on the right uses the reflector, but with the copper mirror card attached, adding a warm glow to the subject’s face.

