Olympus Pen E-PL5 at a glance:
- 16.1-million-pixel four thirds Live MOS sensor
- ISO 200-25,600
- 3in, 460,000-dot tilting touchscreen
- 1920x1080p
- 30fps HD video
- New faster AF system
- 8fps shooting rate
- Street price around £599 with 14-42mm kit lens
Olympus Pen E-PL5 review – Introduction
There have been 24 Panasonic and Olympus micro four thirds system cameras since Panasonic launched the first of its type, the Lumix DMC-G1, in 2008. The compact size of both the cameras and their lenses has made the system extremely popular, particularly among documentary and travel photographers requiring discreet and lightweight kit.
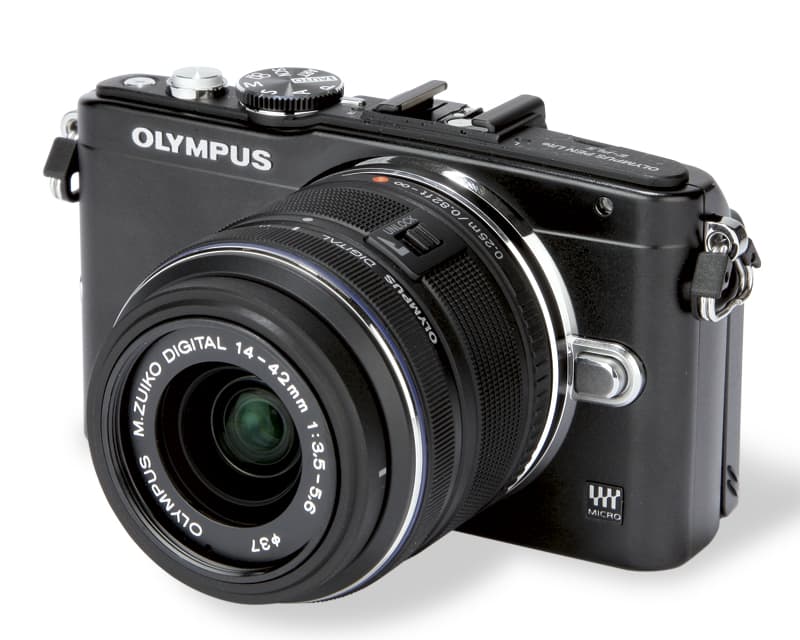
One of the latest micro four thirds models is the Olympus Pen E-PL5. It has a compact camera-style body, rather than a miniature DSLR build, and a comprehensive range of direct controls that should offer enthusiast photographers all the features they need.
However, micro four thirds cameras initially came in for criticism for their comparatively lower resolutions and noisier images than equivalent DSLRs. But technology has progressed over the past few years, as demonstrated by the excellent 16.1-million-pixel sensor of the Olympus OM-D E-M5, which was then used in the Pen E-PM2 and now in the Pen E-PL5.
In our recent review (AP 3 November), we rated the Olympus Pen E-PM2 highly, particularly for its size, features and image quality. With the E-PL5 sharing many of the same specifications, another excellent camera may well have been added to the micro four thirds system.
Features
The Olympus Pen E-PL5 carries the same 16.1-million-pixel, Live MOS, four thirds- sized sensor as the company’s own OM-D E-M5 and the more recent Pen E-PM2. All three cameras use the Olympus TruePic VI processing system and have an identical ISO range of 200-25,600. Therefore, it’s entirely reasonable to expect the E-PL5 to produce images equal in quality to those from the E-M5 and E-PM2.

Image: Image quality is very good, but JPEG images can look a little over processed
In terms of shooting features, the E-PL5 offers all those you would get with an enthusiast-level DSLR. Shots can be saved in raw or as JPEGs, and it is possible to shoot both simultaneously. There is a full complement of manual and automatic exposure modes, with shutter speeds ranging from 60-1/4000sec, along with a bulb mode that allows exposures of up to 30mins.
Impressively, the powerful processing in the E-PL5 enables shooting at 8fps, while Olympus claims that the camera can capture up to 27 raw images, or 19 raw and JPEG Normal images in a burst, with a Toshiba SDHC UHS-I Class 10 8GB SD card. However, I was able to shoot 14 raw images, and 14 raw and JPEG Normal images, when using a Sony SDHC UHS-I Class 10 16GB SD card, so it is worth bearing this in mind for anyone planning to use the camera for long bursts.
Like the E-M5 and the E-PM2, the E-PL5 has a new live bulb mode. With this selected, the rear 3in LCD screen displays an image updated every second with the current exposure. Think of it as like having a print in a developing tray: the image will appear before your eyes, showing exactly when to stop development.
In contrast to many recent releases, the E-PL5 doesn’t have built-in Wi-Fi connectivity, although it can operate wirelessly with the use of an Eye-Fi-compatible SD card or a new Toshiba Flash Air SD card. What it does have is a touchscreen, which allows for touch focusing and firing of the shutter. This screen will be discussed in more depth later.
Overall, then, the E-PL5 has a comprehensive feature set with more than enough settings to keep enthusiast photographers happy, as well as automated settings to reassure entry-level users.

Image: The pinhole camera mode is one of the more useful art filter effects. It creates a dark vignette around the edge of the image
Graduation function
One interesting feature found on Olympus cameras is the gradation function. This has four options, namely, Normal, High Key, Low Key and Automatic. Normal is self-explanatory, while High Key brightens the images, exposing the histogram towards the right. Low-key darkens the image by underexposing and darkening highlights, while Auto chooses between High Key and Low Key.
The different gradation tones are applied to JPEG images, and can help create striking pictures. However, be warned that they do affect the exposure, so if you are shooting raw and JPEG images simultaneously, you may find that raw files are under or overexposed. Remember to switch back to the Normal setting when not in use.

Image: The graduation feature can be used to create Low Key or High Key images
Build and handling

The body and button layout of the E-PL5 remain largely unchanged from its predecessor, the E-PL3. The camera has a compact-style body, with a reasonable complement of buttons for direct access to important functions and settings. A drive-mode dial sits on the top-plate, making changes between exposure modes very quick. However, most changes are made via the on-screen shooting menu, which is accessed by pressing the OK button.
There are a few changes to the body of the E-PL5 compared to its predecessor. The first is the introduction of a screw-in handgrip. Like the E-PM2, this attaches to the camera’s side. In my view, the camera looks better without it, but that said, assured handling is more important than pleasing aesthetics, and the accessory does afford necessary extra purchase.
Another improvement is to the camera’s screen. The previous tilting mechanism has now been adapted so it can fold around and face the subject. It is also a touchscreen.
Overall, the E-PL5 comes close to encapsulating what the micro four thirds system should be all about. The camera is small, but with all the features expected of a DSLR, although it may take an extra click or two to access them via the E-PL5’s menu. What I enjoyed about using the camera was that its size and design didn’t restrict the images I wanted to take. In fact, it was occasionally a great help. Using the articulated screen to compose low-angled images is easy, and as it can carried in a coat pocket the E-PL5 can always be on hand when a photo opportunity presents itself.
Metering
During the course of my test, I found that the E-PL5’s 324-zone ESP evaluative metering had a tendency to underexpose slightly, by about 0.6EV. This is not generally an issue, however, and, if anything, it helps to maintain detail in the highlight areas.
By now, I’d imagine most readers are familiar with the extra metering modes on Olympus cameras. Evaluative, spot and centreweighted metering are available, as well as highlight and shadow spot modes. The latter two allow a point in the image to be specified as the highlight or shadow, and the exposure is then calculated so that these points remain as highlights or shadows, regardless of the rest of the image.
What I like about the Olympus metering system is the way it seems to be designed with dedicated photographers in mind. Of course, the camera can produce good images for those who just want to point and shoot, but with a variety of metering options it is flexible enough for enthusiast photographers, who can really choose how they wish to meter and expose their images.
Autofocus
One compromise of early compact system cameras was the speed of their contrast-detection autofocus. Since then, processing power and sensor readout speeds have increased and improved the speed of this type of AF, and it is no coincidence that Olympus calls its latest AF system ‘FAST AF’.
I found the 35-point autofocus system to be fairly snappy, and much better than that on first-generation CSCs. However, it doesn’t react quite as quickly as a phase-detection system. It is still fast enough, however, for most types of situations for which an enthusiast photographer will use the E-PL5.
Although not really designed for fast-moving subjects, the AF tracking feature works very well, locking onto a target and keeping it in focus. This will be useful for some wildlife photographers, for whom the 2x crop factor of the small micro four thirds lenses is particularly appealing. Similarly, it is useful for quick focus and recomposing techniques when shooting documentary images.
For really precise focusing there is a manual option. As is now standard, a twist of the lens barrel prompts the rear screen to show a magnified view of the area being focused, with more than 800 different precise areas available.
The main new focusing feature of the E-PL5 is the fact that the touchscreen can be used to select the AF point. While I am not a fan of touchscreens for selecting onscreen menu items, it is very useful to be able to simply touch a subject on screen and have the camera focus on it.
The E-PL5 can also be set to focus and take an image, although this doesn’t feel entirely natural and is likely to introduce camera shake due to having to slightly press the camera at the time an image is taken. As both hands aren’t supporting the camera, using the touchscreen to take an image simply doesn’t offer the stability of shooting with the camera in both hands.
Dynamic range

Image: Although the dynamic range of the Olympus Pen E-PL5 is good, to recover the most highlight detail it is necessary to shoot raw files
When combined with careful exposure, I found the dynamic range of the E-PL5 to be good. In the past, four thirds sensors have been criticised for having a restricted dynamic range compared to the APS-C format. However, improvements in technology, combined with a sensible sensor resolution of 16.1 million pixels, means that the dynamic range of the E-PL5 is comparable to that of an APS-C sensor.
Generally, the evaluative metering tends to slightly underexpose, which helps to retain detail in highlights. Although this darkens shadow areas, it is possible to recover some detail without drastically increasing noise.
Noise, resolution and sensitivity
 These images show 72ppi (100% on a computer screen) sections of images of a resolution chart, captured using the Sigma 105mm f/2.8 macro lens. We show the section of the resolution chart where the camera starts to fail to reproduce the lines separately. The higher the number visible in these images, the better the camera’s detail resolution is at the specified sensitivity setting.
This is the third time we have seen a 16.1-million-pixel sensor in an Olympus camera, with both the Olympus OM-D E-M5 and Pen E-PM2 including the same unit. In both cases we have been impressed with the image quality produced. Although other cameras may use higher-resolution sensors, 16.1 million pixels is a good compromise that allows the E-PL5 to produce detailed images while keeping noise to a minimum. This means it is possible to make decent-sized prints from the digital images.
Generally, the E-PL5 does an excellent job of reducing chroma noise in the JPEGs it creates in-camera. Speckled colour is largely non-existent, even when shooting at high sensitivities. Luminance noise is far more difficult to reduce, however, but the E-PL5 controls it quite well in-camera up to around ISO 800. At ISO 1600, there are hints of speckled noise and this increases with the sensitivity. The camera tries to correct this by smoothing out some of the noise, but this also reduces detail. Having said that, at the sensitivity settings most photographers will use – ISO 200-1600 – noise shouldn’t be too problematic.
One thing the E-PL5 is guilty of is overprocessing JPEGs. In some images taken at ISO 200, edges are slightly oversharpened, which is noticeable due to a hint of luminance noise. Slight image artefacts appear occasionally in shadow areas, although these aren’t noticeable in raw images. I would suggest reducing the in-camera sharpening of whichever image style you are working in, and also using the Super Fine JPEG settings. Strangely, this is tucked away in the custom menu, rather than in the JPEG/raw menu. It is odd that Olympus has always left this setting in the custom menu in its E-series DSLRs and micro four thirds cameras. Why not make it far more obvious? After all, it improves the quality of JPEG images by compressing the image less.
 Opening raw files in Olympus Viewer 2 makes it clear that some processing of raw files is going on in the background. Even with the noise reduction set to Off, it still seems that some basic luminance noise reduction is applied. The latest updates to Adobe Camera Raw 7.3 and Lightroom 4.3 include support for the E-PL5 and give a clearer idea of what the raw files look like, and they are very good.
Luminance noise is obvious, but colour noise is well controlled and is easy to remove almost completely. I tend not to apply too much luminance noise reduction as it reduces detail. I found that just nudging the luminance noise reduction slider to about 5, and then applying a slight sharpening and a touch of local contrast with the Clarity tool, created just the right compromise between luminance noise and detail, particularly in ISO 800 images.
At lower sensitivities, just a slight sharpening and tweak to the contrast was about all that was needed.
In terms of resolution, the 16.1-million-pixel sensor is about on a par with other 16-million-pixel cameras we have tested, reaching around 28 on our resolution test chart.
Image: Taken at ISO 400, this black & white shot shows very little luminance noise in the shadow area
White balance and colour
One of the things I like most about Olympus digital cameras is the colours they produce. Even in the Standard setting, colours are bright, with good levels of saturation and contrast. I would suggest that most photographers will rarely need to use any of the other colour settings available. However, those preferring more subtle colours can turn to the Muted option, while those with a hankering for punchy images will be satisfied by the Vivid mode. I find the default Vivid mode too saturated, creating almost solid blocks of colour in certain conditions. Thankfully, each of the default colour settings can be fine-tuned, and users have the option to save one personalised custom colour setting.
The E-PL5’s monochrome image style is just as customisable, with a choice of neutral, red, green, yellow and orange filter effects, as well as the ability to adjust contrast and add a slight colour tone.
Auto white balance works well, and if anything is a little too clinical in its default mode. Shooting indoors under artificial light, the AWB mode removes all trace of amber/yellow lighting, and even turns beige walls a light grey. Obviously, there are people who prefer completely neutral lighting, especially when shooting studio-style portraits, but tucked away in the custom menu is the option to leave warm colours when shooting in AWB mode. This is great for leaving in some ambient colour when shooting indoors.
Viewfinder, live view, LCD and video
For those who require a viewfinder, the E-PL5 has an accessory socket on its rear to allow the Olympus VF-2 or VF-3 electronic viewfinder to be attached. The key difference between the two EVFs is resolution: the VF-2 LCD has 1.44 million dots, while the VF-3 has 920,000 dots. As a result, the lower-resolution VF-3 costs around £160, while the VF-2 is priced at around £200. I would recommend using one of these EVFs because it does change the experience of using the E-PL5, making it much more like a conventional rangefinder-style camera.
Of course, most people will use the rear 3in, 460,000-dot screen. That the rear screen is articulated is a big bonus, and as it fits quite neatly on the rear of the camera, it doesn’t add much to the E-PL5’s depth. Also useful is the screen’s ability to be rotated to a position above the camera’s top-plate, facing the subject, which should prove useful for the odd self-portrait.
The screen’s 460,000-dot resolution is good, although not as detailed as the 920,000-dot displays we are more used to seeing. The screen has a 16:9 widescreen aspect ratio, whereas the images produced by the E-PL5 are 4:3. The live view is therefore shown in the centre of the screen, with shooting settings displayed to either side. While this keeps the live view image relatively clutter-free, it means that the image is smaller than it would be on a non-widescreen display. Overall, it is a reasonable compromise between size and making the best use of the screen-space available.
It is when shooting video that the 16:9 screen comes into its own, with the entire display taken over by the video capture. The E-PL5’s video offering is quite impressive, with full HD 1920×1080-pixel capture at 30fps with a 20Mbps data transfer speed. Sound is recorded in stereo using small built-in microphones either side of the hotshoe, but an external microphone is available and can be fitted to the accessory socket.
The competition

Image: Sony NEX-5R
Both the Sony NEX-5R and the Panasonic Lumix DMC-GX1 are in the same price range as the Olympus Pen E-PL5, and all three cameras have 16-million-pixel resolution and touchscreens.
The Sony NEX-5R has the advantage of a larger APS-C-sized sensor. This is a sensor we have seen in numerous other cameras, where it performs extremely well. The NEX-5R also has built-in Wi-Fi capabilities.

Image: Panasonic Lumix DMC-GX1
However, the compact system camera market is extremely competitive at the moment, and the NEX-5R and GX1 aren’t the only competition. Enthusiast photographers will be sure to find the 16.3-million-pixel Fujifilm X-E1 very appealing, particularly if the image quality matches the excellent Fujifilm X-Pro1 (see AP 8 December issue).
Our verdict
Like the Olympus Pen E-PM2, I was impressed with the Pen E-PL5. The camera is well built, straightforward to use and full of features for enthusiast photographers, particularly those who want a pocketable system camera for documentary or travel photography.
The image quality is very good, although there is still some room for improvement. I would recommend that anyone shooting with an E-PL5 use raw capture where possible to really get the maximum from their images, or at least adjust the JPEG parameters. However, for those more interested in getting a great shot than peeping at pixels, the colours, tone and contrast of images are superb.
As stated in my test of the E-PM2, it really feels like the Olympus Pen series cameras have come of age with this latest generation. Increasing the resolution has helped to place the E-PL5 on a par with its competitors, but with the advantage of having smaller lenses.

Olympus Pen E-PL5 – Key features
Mode dial
One of the big differences between the E-PM2 and the E-PL5 is the mode dial on the E-PL5’s top-plate.
Accessory port
The AP2 port allows the connection of the small FL-LM1 flash, an electronic viewfinder, MAL-1 Macro Arm Light or SEMA 1 microphone adapter.
Direct video record
The E-PL5 has a direct video capture button that is neatly positioned for easy access while shooting.
Control dial
This wheel rotates around the control buttons to allow menus and images to be scrolled through quickly.
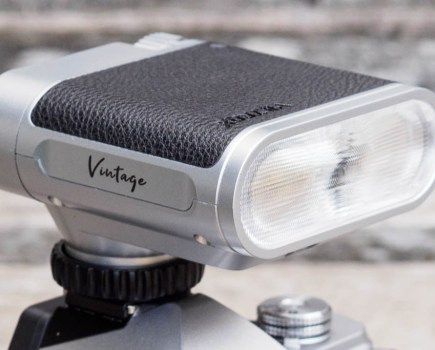
Flash
The Olympus Pen E-PM2 and E-PL5 don’t have a built-in flash. Like the Sony NEX cameras, a small external flash unit, the FL-LM1, is included with the cameras. This small pop-up flash can also act
as a wireless controller for compatible Olympus flashguns.
Lens stabilisation
As well as in-camera, sensor-shift stabilisation, the E-PL5 can also take advantage of the Panasonic micro four thirds lenses that have built-in lens stabilisation. This feature can be switched on in the camera’s menu.
Histogram
One useful feature tucked away in the custom menu is the ability to change the clipping points in the histogram display. By setting the highlight point of the histogram to 250 rather than 255, you can use the histogram to make sure that blown-out highlights are completely avoided.
Raw editing
It is possible to edit raw images in the E-PL5 and save them as JPEG images. However, it is now also possible to save two preset raw development settings and apply them when converting images to JPEGs in-camera.