Photography is a fantastic pursuit. If you enjoy shooting landscapes, owning a camera gets you out into the great outdoors, and if you’re shooting portraits or street photography, then you get social interaction with people. In so many ways, photography is a wholly positive hobby or way to make your living. However, photography doesn’t always come cheap. The latest cameras and lenses can prove to be a serious investment, and that’s before you even start pricing up lighting and all the other accessories. But what if we told you there were ways to save some serious cash – tips, hacks and cheats (many of which are used by professionals) to bypass these heavy transplants from your wallet? Well, we’re sharing 20 of the most useful and cost-saving tips that will not only bring something new to your picture-taking, but will also help make the process of photography easier too. Let’s get started.
Credit: Matty Graham
1 Create reflections using a smartphone
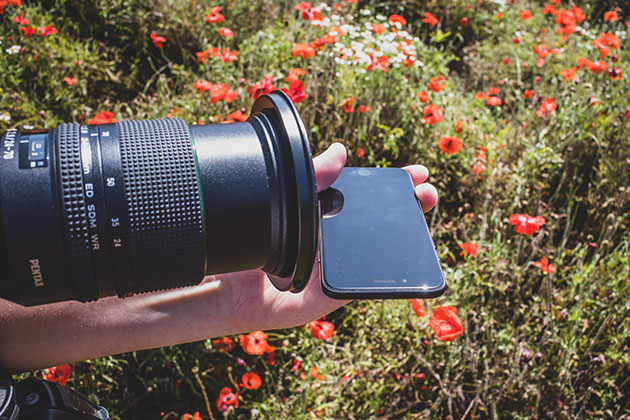
Many photographers shell out big money to add a sprinkle of creative magic to their images, but the truth is that you’re carrying something small in your pocket right now that can make a big difference to a landscape scene. Place your smartphone facing up at the bottom of the lens and it will add a reflection effect to your scene. For best results, make sure the screen is smear free and remove any bulky case beforehand.
2 Keep organised with a label maker
Fumbling around for kit will cost you time and slow down the creative juices. Using a standard office label maker to print the name of the lens will help you to identify it quickly so you can speed up your workflow. You can also add an email address just in case you ever mislay the item of kit and it can be returned to you.

Credit: Matty Graham
3 Add flare with a CD
Let’s face it, nobody uses CDs any more, but before chucking them out in favour of your MP3s, slip one into your kit bag. The surface of a CD can be used to catch the light and add a creative flare into your frame.
4 Spray water to fake rain
Create a drama-heavy portrait by taking the back off a large photo frame or use a window. Have your subject hold the frame/sit behind the window so you can compose their face in the middle. Use your water atomiser (see Hack 14) and spray the glass to recreate the look of rain.
Credit: Matty Graham
5 Combat flare with a coffee
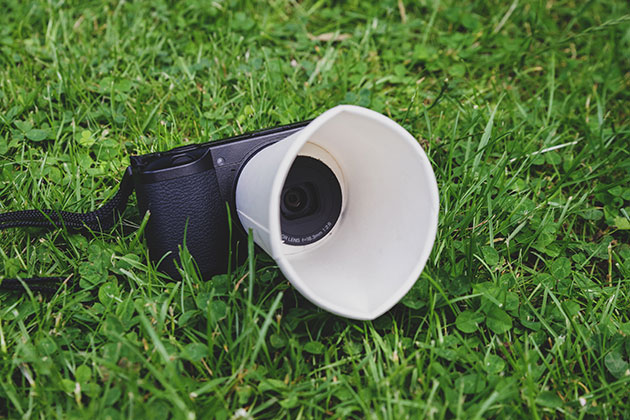
Lens flare can intrude into a frame when light hits the front element of your optic and creates specular halos. While this can be used creatively, many photographers prefer to prevent it by using a lens hood. However, what if you’re out and about and haven’t brought the hood with you? Well, there’s a solution: stop for a coffee and pick up two paper cups (one for your coffee and one to slip over your lens). Turn the cup over and use your keys to pierce a hole in the base. Keep expanding the hole until you can snuggle the cup over the lens.
6 Use basic kitchen appliances to add a touch of steam
Take food photography to the next level by using a kettle to introduce steam into the frame. Try to backlight the steam as this will make it more visible in the image.
Credit: Matty Graham
7 Steady support on a shoestring
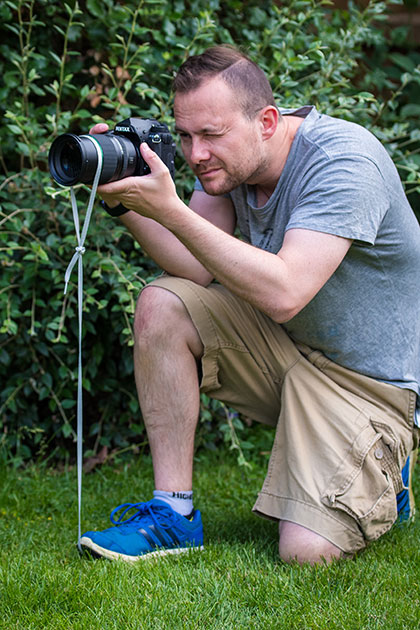
One way to create a makeshift camera support is to pull out the lace from your boot, make a loop and place it over your lens. Place the other end of the shoestring under your foot and lift the lens to keep the string taut – this tension will keep the camera steady. While maybe not suitable for ultra-long exposures, this DIY hack certainly does the trick when shooting in low light.
8 Use a CD case and Vaseline for soft focus
Pack one half of a CD case and some Vaseline in your kit bag and when you reach your location, smear the Vaseline around the borders of the CD case, which will create a soft-focus ethereal-looking effect to the frame.
Credit: Matty Graham
9 Studio-style shots with an LED
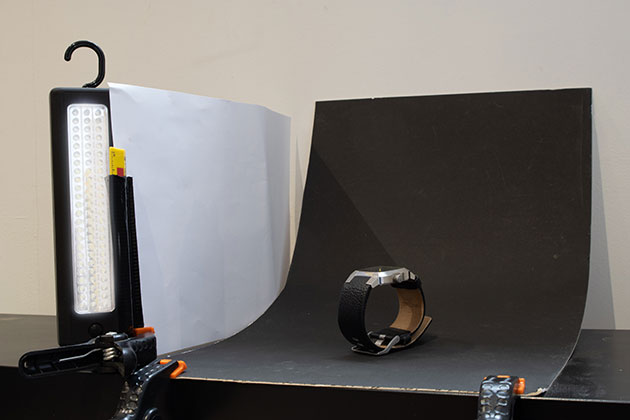
Head down to any pound shop and you’ll be able to find an LED light. Combine this with a sheet of A4 paper to diffuse the LED and place your subject on a sheet of curved card and you’ll be able to create high-quality product images. Turn off ambient light sources and set the camera to manual so you can control the exposure for a low-key look – if you need to fill shadows, use a second sheet of paper to bounce the LED back towards the subject.
10 Use sunglasses as a filter
One of the advantages of shooting with a small camera like Ricoh’s GR III or the Sony RX100 is that you can head out for a day’s photography without needing to cart around a bag of lenses and filters. However, what if the lighting conditions change and you wish you were using a camera with a polariser filter? Well, before you head out the door, pop a pair of sunglasses on your head. You can use the sunglasses as a makeshift polariser thanks to the small dimensions of the camera lens – if you were using a DSLR the optic would likely be too big.
Credit: Matty Graham
11 Banish frozen fingers
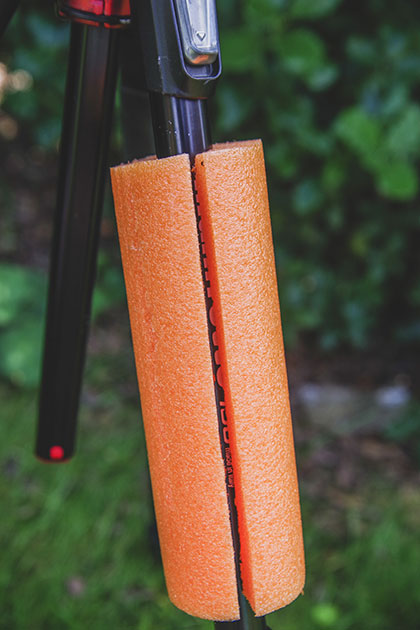
Ever picked up a tripod while out shooting landscapes on a frozen morning? The metal legs can turn your fingers to icicles, but there’s a quick solution. Pick up a foam pool noodle for a couple of quid and cut a length off. Make a slit down one side and slip it over the tripod leg. If you need it to fit more tightly, wrap some gaffer tape around the foam.
12 Go discreet with tape
Got a brand new camera but nervous about taking it out and about, particularly into crowded urban areas? The solution to turn your shiny new camera into a nondescript, ultra-discreet object that won’t raise any eyebrows is a roll of cheap black tape. Using the tape to cover badges and model names will not only disguise the camera, but also give an additional level of splash protection.
Credit: Matty Graham
13 Use a laptop for amazing backdrops
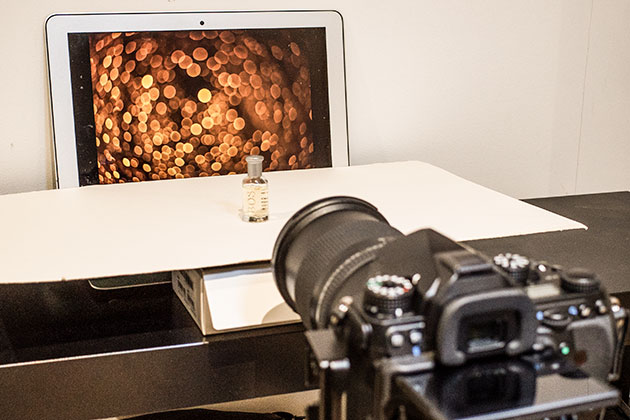
Think you need a huge studio and deep pockets to create impressive backgrounds? Well, actually all you need is an internet connection. Google the type of background you are after whether that be re, bokeh lights, a colour or texture. Set up behind your subject and use a shallow depth of field, keeping your subject in the foreground pin-sharp to create a blurred and soft effect.
14 Fake morning dew with a water atomiser
Flowers look so much better when captured in the morning light, with a dusting of dew droplets clinging to the petals. However, you can bypass the early alarm wake-up call by using a standard garden water atomiser bottle, which can be picked up for a couple of quid, to recreate the look of morning dew.
Credit: Matty Graham
15 Use a suitcase for long lens
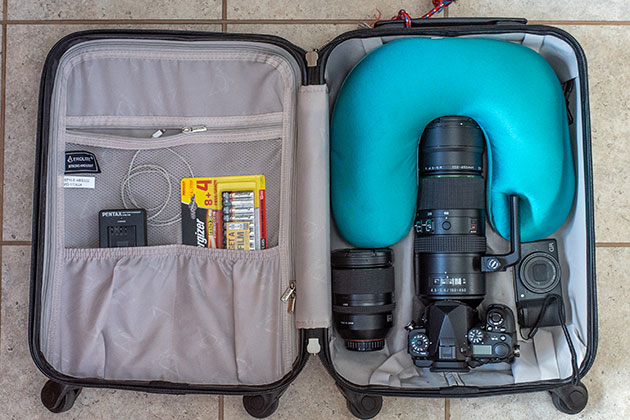
Roller cases for larger telephoto lenses can be on the expensive side and, after all, if you’ve just shelled out on a lens like a 300mm prime or a 150-450mm zoom, it’s likely you may be watching the pennies. One solution is to pick up a cabin-luggage size hard-plastic roller suitcase, for as little as £20 – around a tenth of what you may expect to pay for a professional version. Add foam to hold the camera/lens set-up in place and you’ll be able to transport your pride and joy in a protective shell.
16 Fill a ziplock bag with rice as a support
Beanbag supports are great for propping up the camera when shooting from an ultra-lowdown position or when you are shooting from the seat of a car, as they steady the camera and provide a buffer between the camera and the ground or the paintwork of your car. While not the most expensive of accessories, you can still save a couple of quid by finding a ziplock bag, the kind you keep freezer food in, and filling it with rice.
Credit: Matty Graham
17 Use plates when shooting with a tripod on a beach
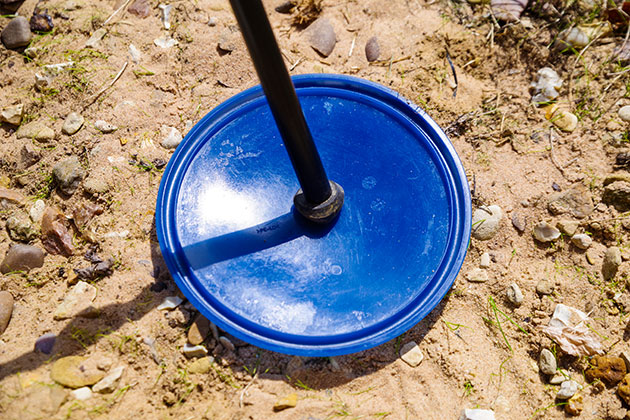
Anyone who has tried to use a tripod on wet sand will know how frustrating it can be when the feet sink down. The solution is to slip three paper plates into your kit bag. Using one beneath each foot will spread the weight of your gear evenly and stop any sinking. This is useful when shooting a long exposure which would otherwise suffer as the tripod sinks into the ground, ruining the image.
18 Use a sieve to add texture
There are many objects you can make use of, to recreate the look of what are referred to by professionals as ‘gobos’: essentially objects that go between the subject and the light source. For tight portraits, a standard kitchen sieve will introduce an interesting texture, while for wider shots, something like garden furniture will create the same effect.
Credit: Claire Gillo
19 Diffuse light with a milk bottle
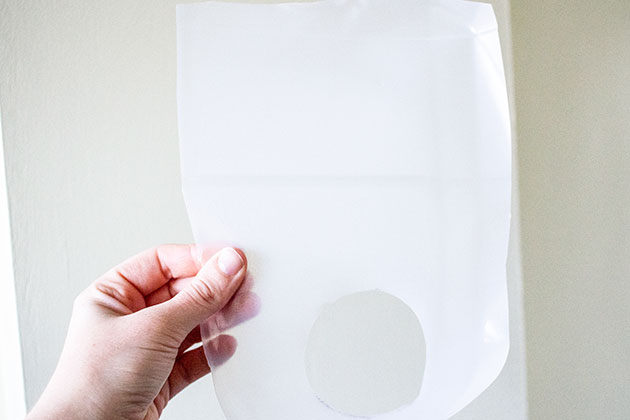
Yep, we know plastic bottles are bad, but you can recycle a plastic milk bottle by cutting off the top and sliding it onto the end of your flashgun, which will do a great job of diffusing the light. Just remember to drink the milk first.
20 Use a box to create a flash grid
Is the light from your flashgun a touch too harsh? You can use a simple cardboard box to modify the light. Use a box that has corrugated cardboard and cut strips that match the length of your flashgun head. Stack the strips and secure them with some tape so that the light has to pass through the corrugated cardboard before it hits your subject. You can find plenty of other cheap DIY light modifier ideas on the internet.

