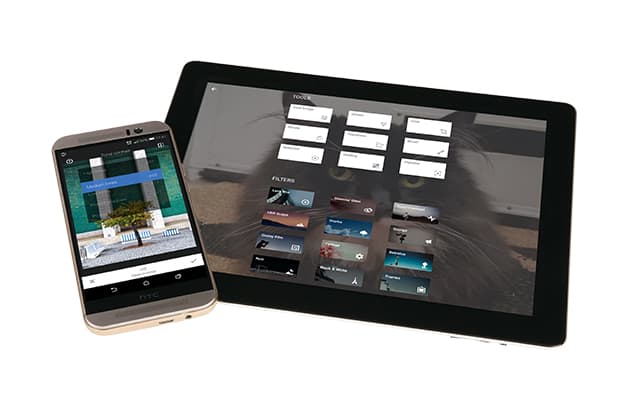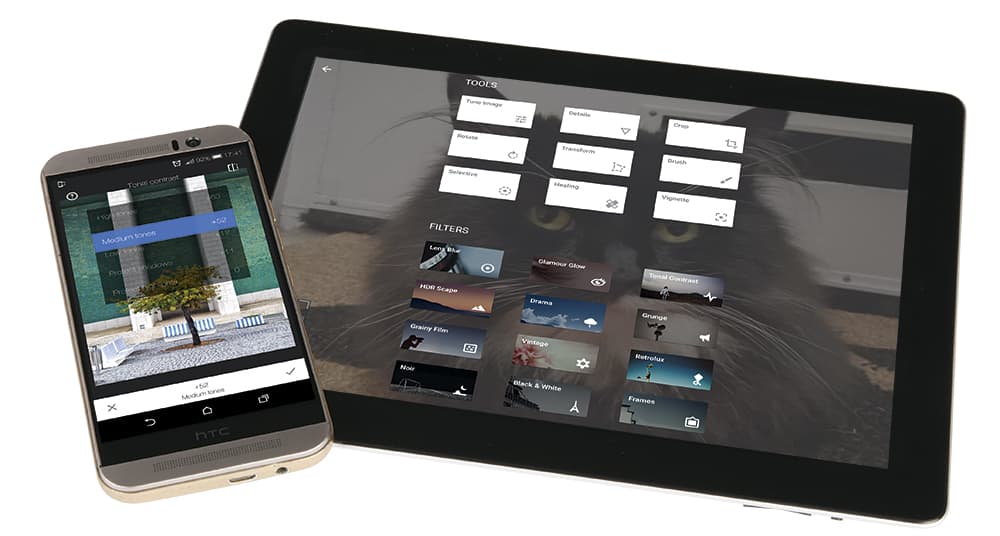
Snapseed is available for Android and iOS, and can be used on smartphones or tablets
Nik Software has been developing a range of excellent plug-ins and standalone software for photographers since the 1990s. Most famous for its image-editing program Snapseed, the company was acquired by Google in 2012 and its focus was steered towards mobile image editing. The desktop version of Snapseed was dropped in 2013 and the mobile app began having bigger and better updates.
Skip forward to April 2015 and Snapseed 2.0 was released in the Google Play and Apple App Store. This new update was a complete overhaul. The user interface changed and the toolset became more comprehensive than ever, making it one of the most sophisticated editing apps available – all for free!
It’s available on iOS and Android, and both versions work similarly across both platforms, with the same feature set. The interface is also consistent between tablets and phones. Once the app is open, users can edit images from albums on their smart device. When an image is open, there are a few options. By double-tapping the screen, users can zoom into the image and move around using the navigator in the bottom left of the screen. When zoomed out, users can toggle a histogram on or off in the bottom-left corner. In the top right is a menu that allows users to undo, redo, revert a recent adjustment, share the image, or look at the details of the file including camera, shutter speed, aperture and more. The most important element, though, is the Pencil icon in the bottom right, which marks all the editing functions available. These are in two sections: Tools and Filters.
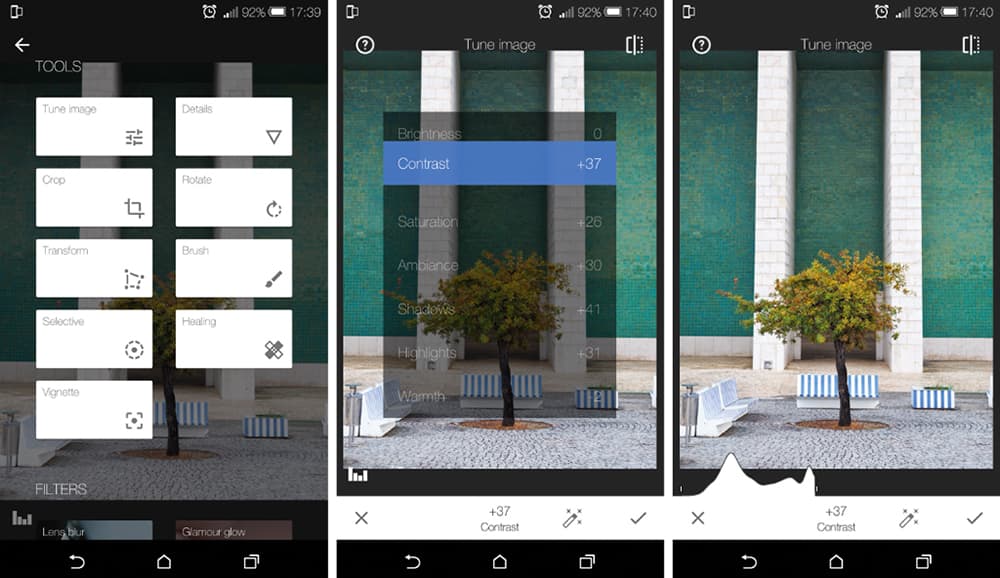
In the top right of the screen, users can toggle how the edit looked before and after. There’s also a question mark in the top left that allows users to have a quick demo of each of the settings
Tools
In Tools there’s Tune Image, Details, Crop, Rotate, Transform, Brush, Selective, Spot Repair and Vignette. The first tool I open, and probably the most important one, is Tune Image. This allows users to adjust the brightness, contrast, saturation, ambience, shadows, highlights and warmth. These can all be adjusted from ±100 values by swiping your thumb left to turn the effect down and right to increase it.
Alternatively, there’s an Auto Adjust button at the bottom that will evaluate and change the values it thinks suit the image. By dragging your thumb up and down, users can quickly access a different editing option. For example, if I were changing saturation, I could move my thumb upwards on the screen, select ambience and begin editing that. I find this makes editing very easy.
Under the Details section are two separate options called Structure and Sharpening. Sharpening makes the finer detail appear sharper, while the Structure is a bit like the Clarity slider in Adobe Lightroom, boosting local contrast to give the subject a more defined look. The Crop and Rotate tools are both self-explanatory, allowing users to free-crop or use a number of preset aspect ratios. The Rotate tool allows you to correct the tilt angle of the image left or right.
Transform is a little more advanced, with the ability to adjust vertical and horizontal perspective, as well as rotate. However, the best thing is that when you adjust the perspective and the image moves out of the crop zone, Snapseed will automatically fill those areas. It samples areas nearby to generate new content rather than leaving black space. On the whole this feature works really well, and if something looks amiss you can tidy it up using one of the other tools, such as the Spot Repair brush. Just like the automatic fill, this brush samples the area and generates content to replace it. This is useful for removing unwanted objects in landscapes or blemishes on skin.
The Brush tools allow users to dodge and burn, adjust exposure, colour temperature and saturation, selectively using a brush and painting the area with a stylus or a finger. Users can select how harsh or strong they want the effect and then brush it on, and also erase the areas they don’t want to see the adjustment on. Selective is another tool similar to the brush. However, this tool allows users to selectively adjust the contrast, saturation and brightness of a circular area. By using a pinch gesture, users can select how big or small they want their circle to be and then make an adjustment exclusively inside that area. Vignetting allows adjustments of both outer and inner brightness, giving users the ability to either add or correct vignetting.

Turning up saturation, ambience and contrast adjustment was sufficient here
Filters
Inside the Filters section are 12 options, but strangely, they’re not really what you would consider filters. There’s Lens Blur, Glamour Glow, Tonal Contrast, HDR Scape, Drama, Grunge, Grainy Film, Vintage, Retrolux, Noir, Black & White and Frames. They all work in a similar way, giving users the ability to tweak them up and down, controlling things such as saturation, vignetting and brightness. Overall, I find the Filters to be fairly weak compared with other apps. While I sing the praises of Snapseed for its core editing function, I always transfer my Snapseed-edited images into my VSCO Cam app to give it some colour toning.
The Lens Blur feature allows users to selectively blur areas to make it look out of focus, and this can be controlled and adjusted; it can also be moved to be either circular or straight. Glamour Glow smooths everything out and makes everything glow – a very similar effect to a soft focus filter or a tacky 1980s pop video.
HDR Scape adjusts the dynamic range and sharpens the image to give an HDR effect. Frames is fairly self-explanatory, giving users the ability to add frames to their images. I saved the best for last – Tonal Contrast. I use this on most of the images I edit in Snapseed. It allows users to control the contrast of high, medium and low tones independently of each other. If there’s an image where the main focal point is in the midtones, upping the contrast gives it a bit more punch.
Sometimes boosting the contrast of shadows or highlight can cause loss of highlight or shadow details. To combat this, Snapseed 2.0 has included a Protect Shadows and Protect Highlights slider in the Tonal Contrast Filter editing options.
Once an edit is done, users can just select the little tick at the bottom of the screen to apply the change. Each change is saved in a history log, and it’s possible to go back and change each individual process at any time. Users can also delete any edit they have done at any point in the process. So, if I started by adjusting tonal contrast, but after making a couple of other changes found that it was a bit over the top, I could go back and rein it in. If I decided it wasn’t needed, I could just go in and delete it without altering any of the editing I had done after I had made that change. This non-destructive working is a very advanced feature, and it’s fantastic to see this level of editing capability on a free app.

I transferred ten or so images to my phone from my Olympus OM-D E-M5 II and selected this one to edit
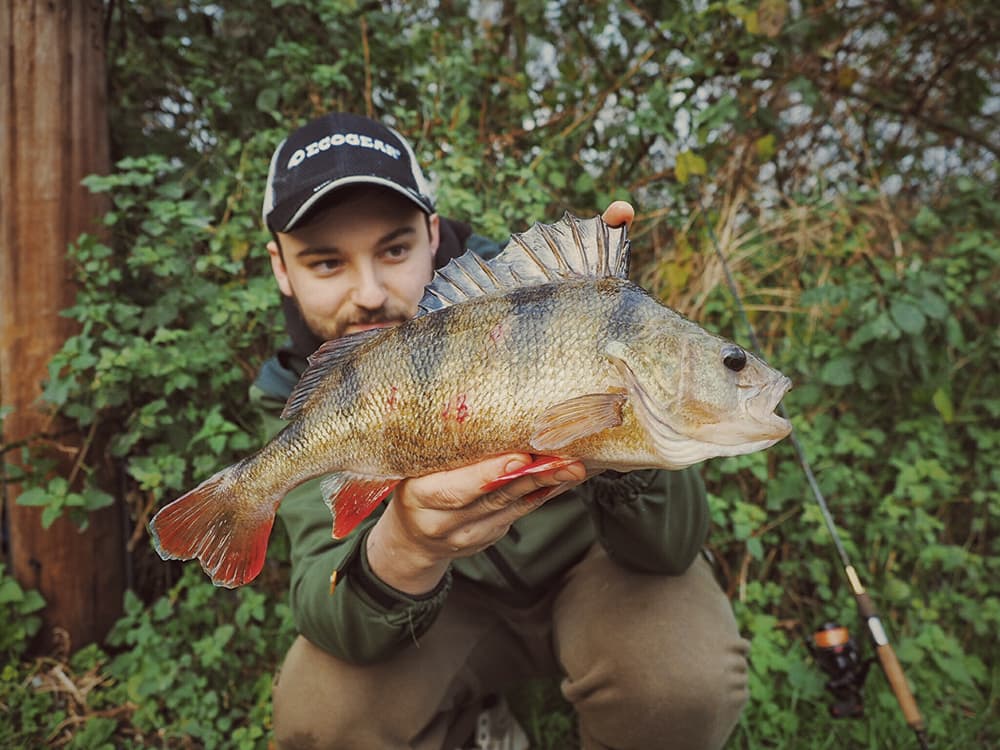
Brightening the shadows, darkening the highlights, adding some more contrast and adjusting the tonal contrast really made this image pop. I then used the KK2 filter in VSCO to give a better colour tone
Our verdict
I’ll begin with my limited points of criticism towards Snapseed 2.0. Primarily, the filters just aren’t that good. There are lots of options for overcooked HDR and over-processed images, and it just lacks subtlety. I find that Instagram has a better range of filters than Snapseed. Personally, I don’t find any of them actually improve the look of the original image. For toning, I export my images to the VSCO Cam app, which has a selection of beautiful filter presets with fantastic tones. I also find myself doing some split toning of shadows and highlights in VSCO Cam, which is missing in Snapseed.
While these few points are an issue, that’s about it as far as criticisms go. The toolset the app offers is outstanding. Having tested many different applications, I find that the way it performs tasks such as lifting shadows and dulling down highlights is about the best of any app. The feature set is far more advanced than many editing suites, and to have this for free on a mobile device is fantastic. I shoot with a lot of Wi-Fi-enabled cameras, and when I have a casual day out with my camera I pick one or two photos and edit them on my smartphone using Snapseed, then I give them a little tickle in VSCO Cam. Unless I have shot something really important, I don’t need to transfer it to my PC/Mac and work on it extensively. Everything I need is right there in Snapseed. It’s easy to use, has heaps of functionality and does a sterling job. And it’s free!

Using a Wi-Fi camera I can transfer, edit and upload an image in minutes

