£79 (Essential edition) | £119 (Elite edition) | Mac & PC | dxo.com
At a glance:
- PC: Intel Core 2 Duo, AMD Athlon 64 X2 (Intel Core i5 or higher recommended), 4GB RAM (8GB recommended), Windows 7 SP1 (64-bit), Windows 8 (64-bit), Windows 8.1 (64-bit), Windows 10 (64-bit)
- Mac: Intel Core i5 or higher, 4GB RAM (6GB recommended), OS X 10.10 (Yosemite), 10.11 (El Capitan)
- Free trial: A fully-functional trial version of DxO OpticsPro 11, good for one month, is available from www.dxo.com/en/photography/download
DxO Optics Pro is not a regular image editor. It’s not designed for complex image manipulations, special effects or creative photomontages. Instead, it fits into a much earlier stage of the photographic workflow – taking images straight from your camera and correcting a whole host of aberrations, defects and flaws that you might have thought were unavoidable characteristics of your cameras and lenses.
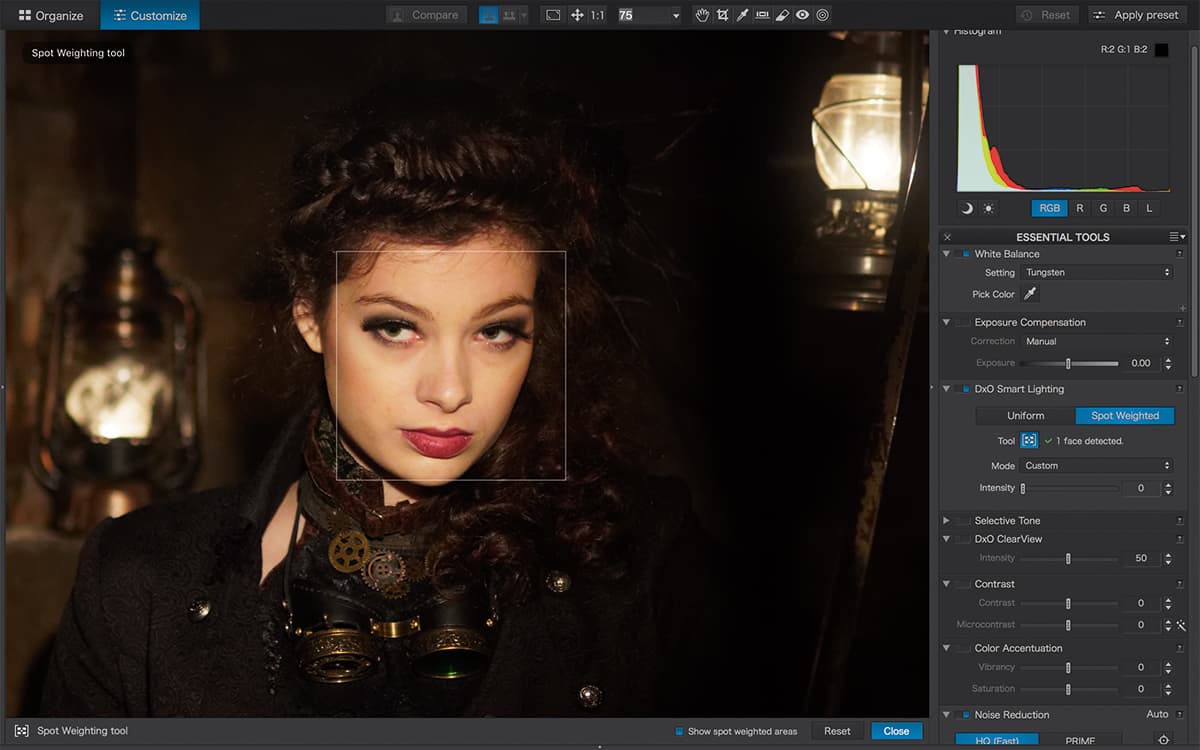
DxO OpticsPro 11 supports over 300 cameras, more than 950 lenses and over 30,000 camera and lens combinations
It does this in two ways. First, it applies a set of lens corrections developed by DxO’s own optical testing laboratories for the lens you’ve used – it can identify this from the EXIF data embedded in the image. It corrects distortion, chromatic aberration, corner shading and edge softness, and it’s a hands-free process, whereby the software looks up and applies corrections automatically when you open a folder full of images.
Second, it applies DxO’s own raw conversion process with ‘Smart Lighting’ tools to recover highlight and shadow tones and advanced noise reduction for super-smooth high-ISO shots. You can use DxO OpticsPro on JPEG images straight from the camera to get the benefit of its lens corrections, but you only see its full power with raw files.
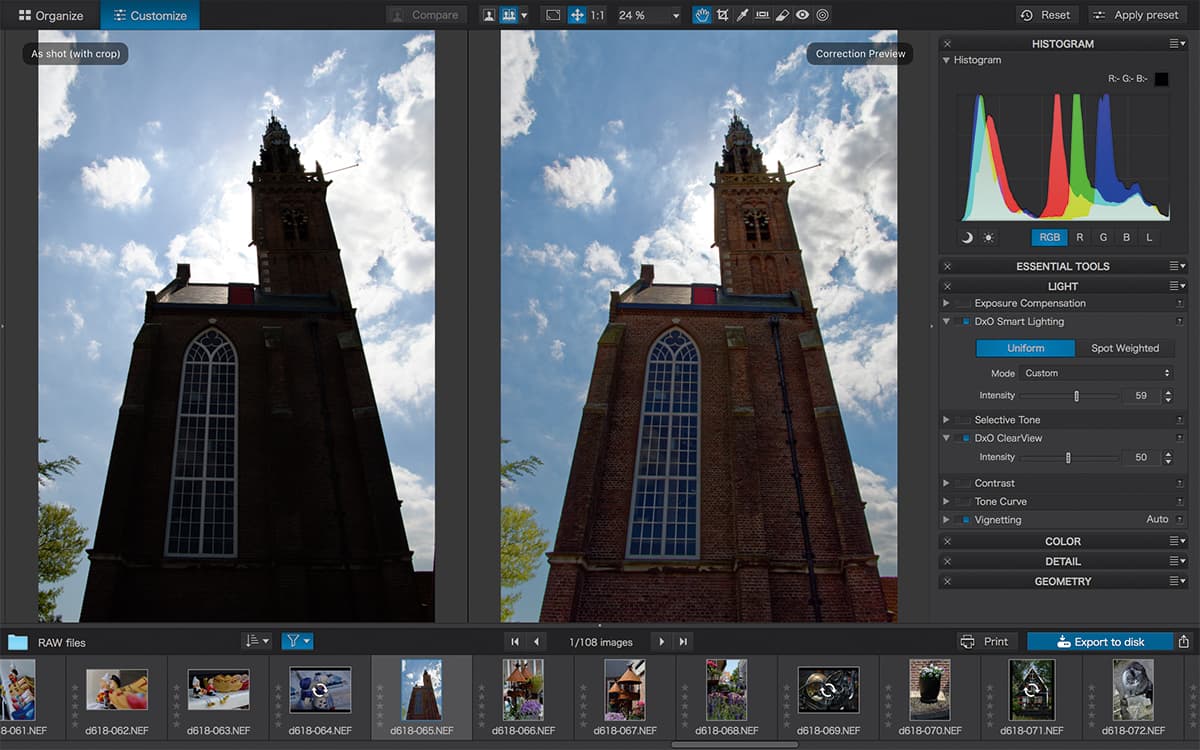
DxO’s Smart Lighting tools do a good job of pulling back highlights and bringing out shadow detail
OpticsPro has always been split into standard (Essential) and Elite editions, but before version 10 these were split according to whether you had a consumer-type camera or a professional model. Now, both versions cover all the same cameras and lenses, but the Elite edition adds more advanced tools including high-quality PRIME noise reduction, ClearView contrast enhancement, an anti-moiré tool, support for colour-managed workflows and more control of presets. The cheapest option is DxO OpticsPro Essential, but if you want the full range of tools you’ll need the Elite edition.
If you want perspective corrections and analogue film effects, too, you should go for the DxO Photo Suite bundle, which adds in DxO ViewPoint 2 and DxO FilmPack 5.
How does it work?
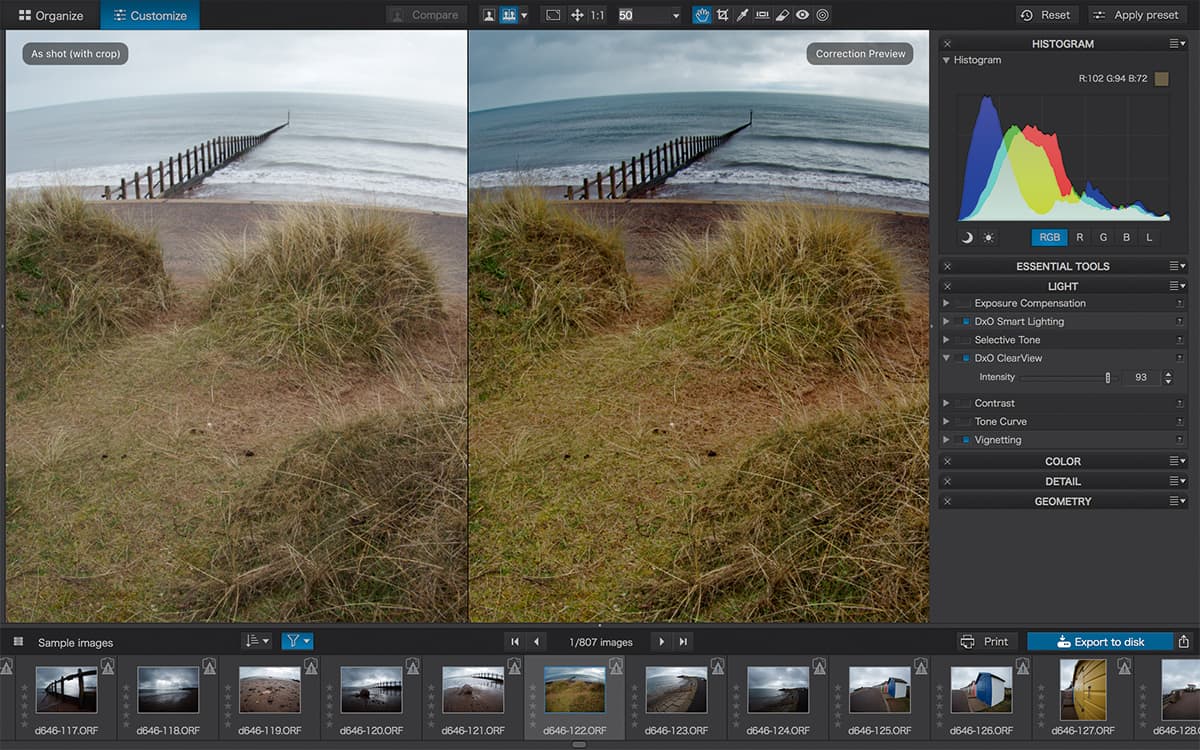
This example shows the effect of the ClearView tool – it adds depth and contrast to the sky and sea in the distance
OpticsPro has two basic operating modes – Organize and Customize. In Organize mode you use a Source Browser panel on the left of the window to locate the folders containing the photos you want to convert. OpticsPro isn’t a full-on cataloguing tool like Lightroom. It’s more like Adobe Bridge – a relatively simple folder browser – though you can create ‘virtual’ projects to pull together images from different locations without actually moving them on your hard disk. You can filter out RGB (JPEG and TIFF) images from raw files and add ratings and flags to help highlight your best shots or pick out those you want to process into JPEG or raw files.
In Customize mode you still have the filmstrip along the bottom, but the left side of the screen reveals image and EXIF information and on the right side you’ll see a stack of adjustment panels.
These are pretty complex, but you may not need them, because OpticsPro automatically applies a ‘DxO Standard’ preset that identifies and applies the right lens correction profile and its default raw processing settings, which include DxO’s Smart Lighting technology to subtly recover highlights and boost the shadows.
Quite often, you’ll want to check your edited image against the original, and for this you press and hold the Compare button at the top of the screen. This is a great way of seeing what a difference the lens corrections have made, and the transformations can be startling – your lenses are often worse than you thought!
Manual control
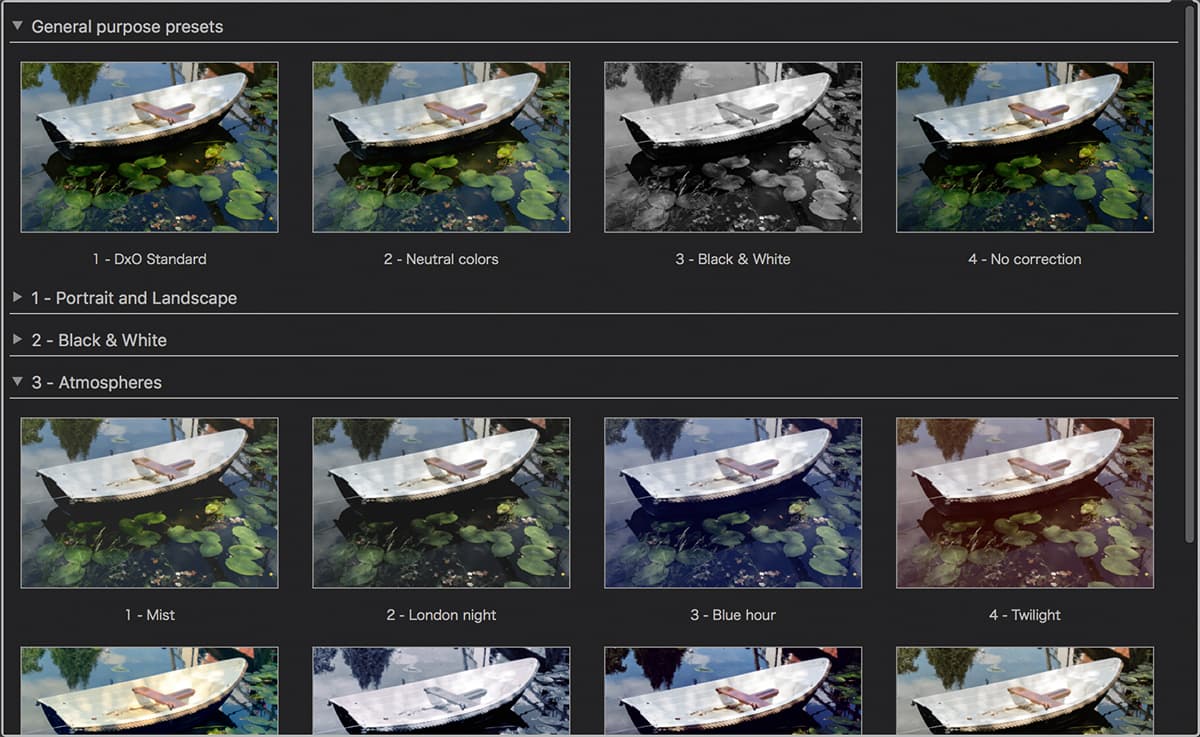
You can make manual adjustments to your images, or you can select one of OpticsPro’s many preset image effects
When you start applying manual adjustments, OpticsPro becomes more complicated. There are six panels: Histogram, Essential Tools, Light, Color, Detail and Geometry. The Histogram panel is just a graphical display and there’s nothing to do here. It’s in the Essential tools panel that the work starts. Here you get expandable sub-panels for White Balance, Exposure Compensation, DxO Smart Lighting, Selective Tone, DxO ClearView, Contrast, Colour Accentuation, Noise Reduction, Horizon and Crop.
What’s slightly confusing is that these tools also appear in the other panels further down, so it’s easy to lose track of where you need to be in order to make specific adjustments.
DxO’s Smart Lighting tools are a little difficult to fathom too. You can adjust the strength from Slight through to Strong, but this seems to act on both ends of the brightness range, not just the shadows. You can also recover blown highlights with the Exposure Compensation slider, and this seems the quickest solution for overexposed images.There’s a whole lot more to explore besides this. DxO’s ClearView tool is designed to reduce haze or fog but it’s useful for much more than just landscape shots, adding a vivid ‘punch’ to any flat-looking image, and it’s a lot subtler than Adobe’s Dehaze tool in Camera Raw and Lightroom.
The Color panel offers more than just saturation and vibrancy adjustments. It has a sophisticated Multi-Point Color Balance tool for powerful, localised colour tweaks and a Color Rendering sub-panel where you can choose different film renderings. This is where DxO FilmPack’s tools slot in when it’s installed, otherwise you get a relatively limited selection of tools, though still enough to try out a range of effects.
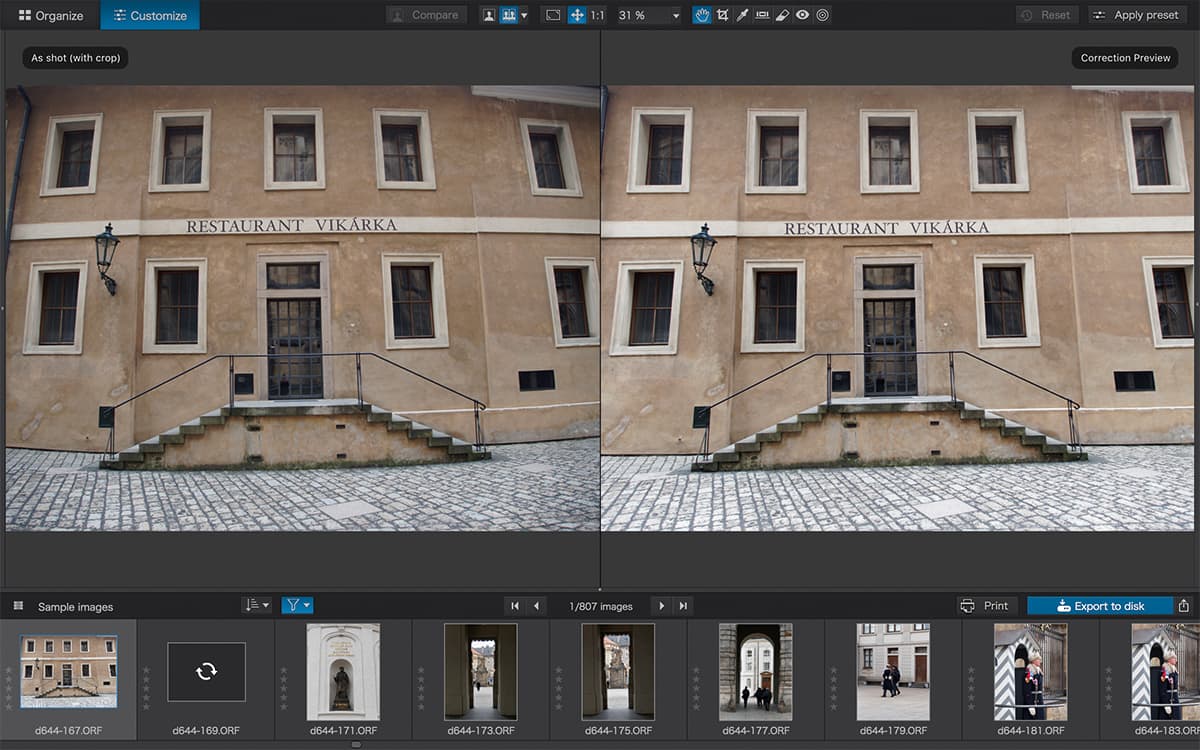
OpticsPro 11 seems to exaggerate the distortion of the ‘before’ shots for some cameras and lenses
The Geometry panel is pretty thinly populated, too, with Horizon, Crop and Distortion tools (just in case you want to adjust the distortion correction manually). This is where the much more advanced perspective control tools of DxO ViewPoint appear if it’s installed. OpticsPro’s whole raison d’être is powerful optical corrections, and without the DxO ViewPoint add-on, OpticsPro 11 does feel rather incomplete.
Moving on to the Detail panel, this is where you’ll find a powerful PRIME noise reduction tool. The default HQ (Fast) process is very good at balancing noise reduction and image detail, but the PRIME engine goes a lot further. The disadvantage is its processing demands. While the regular noise reduction process is applied ‘live’ to the image preview, the PRIME mode previews a small area of the screen, and the de-noise process is only applied when you export processed JPEG or raw files.
Clicking on Export to disk marks the final stage in the workflow. This opens a dialog where you choose, create or modify export presets, with options for the file format, quality/compression, destination, resolution and more.
What’s new?
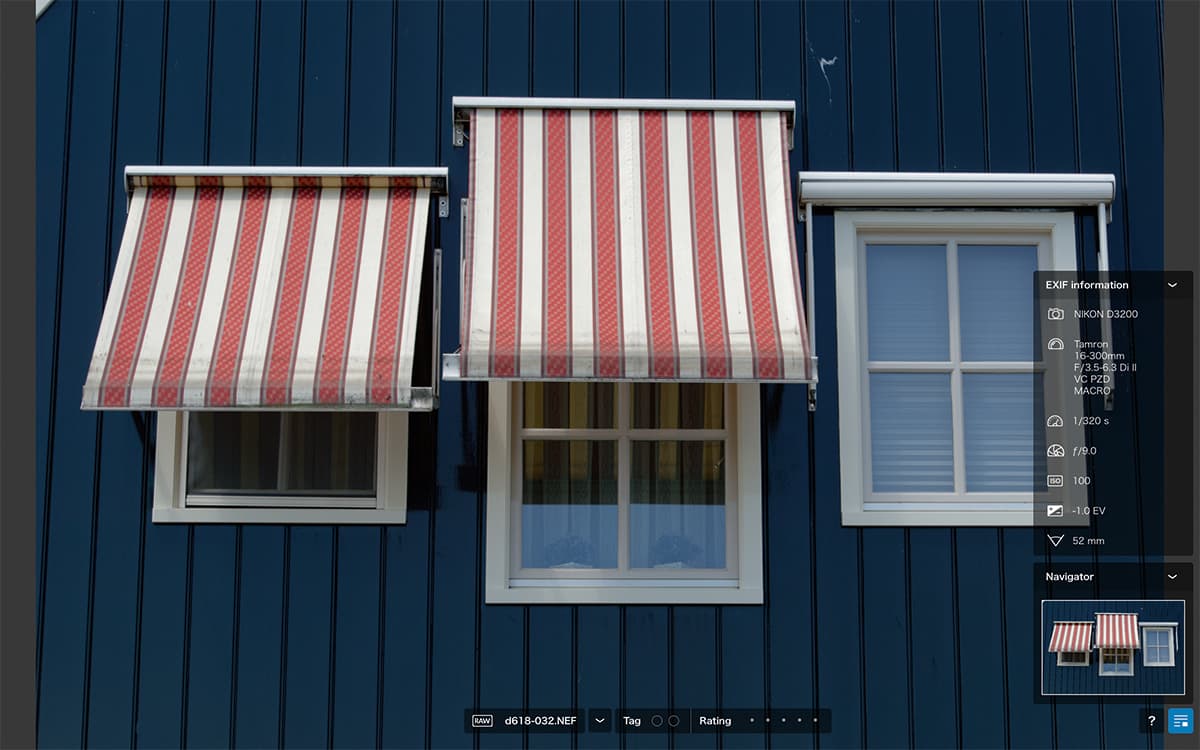
OpticsPro 11 offers users a new full-screen display mode. It’s useful for viewing and inspecting your images with minimum on-screen distractions
The PRIME noise reduction process is claimed to be smarter and more powerful according to DxO, and although you’re still restricted to a small preview window, it doesn’t take as long to process large batches of images.
OpticsPro 11 also adds a Spot Weighted button to the Smart Lighting panel. With this selected, Optics Pro will look for faces in the frame and base its automated adjustments on those, but you can also manually select an area of interest, which is a good way of matching the adjustments to key areas of the scene.
Version 11 offers auto red-eye correction and Auto Microcontrast, which emphasises details and outlines but leaves facial features and higher-ISO images alone. This is effective at bringing out details and textures in areas of flat tone. It’s not unlike the Clarity slider in Lightroom and Camera Raw, but seems less prone to the ‘glow’ and ‘halo’ effects you get with the Adobe tool.
There’s a new, full-screen display mode too, which is handy given that Optics Pro has a pretty busy interface, and should make life easier on laptops and smaller displays. There are also some new filter options and rating shortcuts.
Apart from that, the only other improvements are faster sliders – up to twice as fast, DxO says – to provide a ‘frictionless’ editing experience. Overall, it’s a pretty modest set of improvements over DxO OpticsPro 10.
Verdict
DxO OpticsPro 11 has some significant drawbacks when you compare it with Lightroom or even Capture One Pro – its two main rival, professional-level raw converters.
One is that it doesn’t allow you to perform localised adjustments. You have to work with the image you shot, and any kind of local adjustments will have to wait until you convert it to a TIFF or a JPEG and open it up in some other image editor.
Another is that it doesn’t support Fuji X-Trans sensors, though admittedly this is only an issue if you own a Fujifilm camera.
It’s also rather complex and confusing to use when you start to probe beneath the surface of its tonal/exposure/lighting adjustments, but these niggles are easy to forgive once you see what OpticsPro can do. Yes, Lightroom and Capture One can both apply automatic lens corrections too, but OpticsPro’s transformations are so instant, so complete and so good that it still feels like the best. The quality of its raw conversions are excellent too, delivering a noticeably better combination of sharp detail and low noise than Adobe Camera Raw’s default settings and squaring up pretty well against the much more expensive Capture One Pro – but at a lower price and with support for a wider range of lenses.
To get the best from this software you really do need DxO ViewPoint 2 too (and FilmPack 5 if you’re into analogue effects). That’s when you get the full benefit of DxO’s strengths: optical precision and control, and ultimate image quality.
If you’re undecided, you should download the trial version and see what it can do. If you use a file browser such as Adobe Bridge you’ll adapt to it quickly, and although the tonal adjustments can be perplexing, it’s worth persevering to find out just what this software is capable of.
The bottom line is that DxO can reveal a level of image quality and optical precision that you never imagined your camera and lenses were capable of.


