
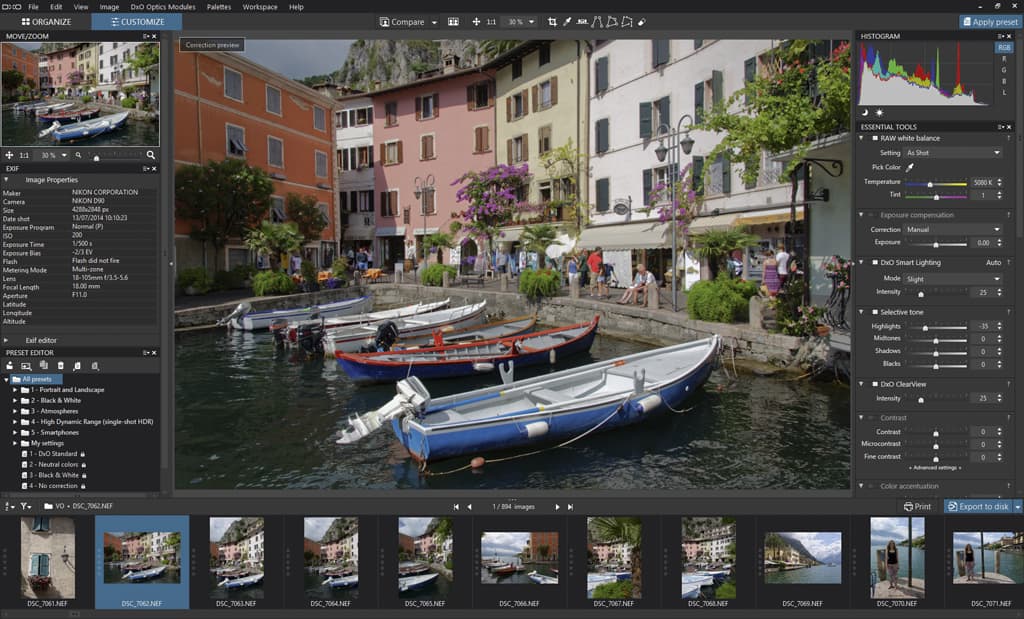
The DxO OpticsPro 10 interface
DxO OpticsPro 10 – at a glance:
- DxO OpticsPro 10 Standard Edition is available from shop.dxo.com, priced £99; the Elite Edition is priced £159
- A fully functional one-month trial version of the software can be downloaded from www.dxo.com/intl/photography/download
- Mac and Windows compatible
To get the best results from a digital camera, you really need to shoot in the raw file format. However, processing raw files can be time-consuming. For years, DxO OpticsPro has made raw-file editing easier by using corrections that can help photographers to apply edits to their images quickly and easily. The latest is version 10, and it adds a number of new tools and optimisations to the existing features. The software should make it even easier to make optical and geometric corrections, optimise exposure and contrast, reduce noise reduction and maximise colour and detail.
Image organisation
When you first launch DxO OpticsPro 10, you are greeted with the Organizer mode interface. This displays a hierarchy of your computer’s folders and, once a folder is selected, all the images contained within it are displayed in the Navigation panel at the bottom of the screen. The Organizer mode is very similar to the Library modes found in other raw-editing software, such as Adobe Lightroom. If you don’t like the Navigation panel being at the bottom, it can be repositioned anywhere on the screen, or viewed on a second monitor. Supported file formats include JPEG, raw, TIFF and DNG (8-bit and 16-bit), but sadly not Photoshop PSD and other application native formats.
The real key to DxO, and one that has until recently separated it from the likes of Adobe Lightroom, is that DxO has more than 20,000 camera and lens combinations in its database. By reading the Exif information for each image, the software can optimise your images based on the camera and lens used. If the software detects that your camera and lens combination isn’t available in its database, it will automatically connect to the DxO online database and download the relevant module. Of course, an internet connection is required to do this. Most current cameras and lenses are supported and new cameras are added regularly.
Editing images

Before and after screens make it easy to see the changes you make
In the Editing workspace you will find all the main image-processing features, such as Histogram, Essential Tools, Light and Colour, Detail, and Geometry and Optical Corrections. These are on the right side of the screen. Each of the tool palettes can be expanded to reveal the individual adjustment tools. At first glance, the number of palettes and adjustments may be overwhelming, as many of the tools appear in more than one palette. However, the workspace is customisable, so palettes that you don’t use can be hidden. There is even the option to create your own custom palette of the correction tools you use most often.
Many of the adjustments can be applied with an on or off switch, with the software using its correction profiles to analyse the image and ascertain which corrections are necessary. These include lens corrections for optical distortions such as barrel and pincushion, vignetting, lens softness, and lateral and longitudinal chromatic aberrations. Noise reduction and sharpening can also be automatically applied based on the ISO sensitivity setting.
Presets
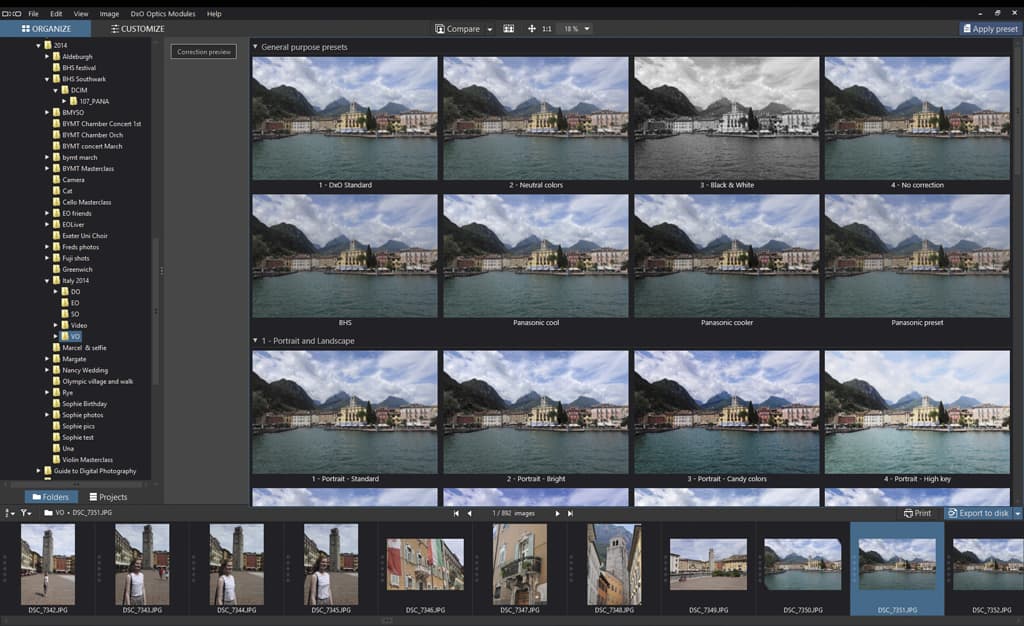
Preset previews on a selected image
One of the most useful features is the Preset Editor palette. This enables you to apply a built-in preset, import or export presets, create your own custom preset, or edit a pre-defined preset. This makes batch-processing images quicker and easier, although it is a little slower than using Lightroom.
OpticsPro 10 offers a library of 30 presets that include portrait, landscape, black & white, high dynamic range (HDR), atmospheres and smartphones. Presets can appear in a visual presets window as large thumbnails displaying the effects applied to the image being worked on, and you just click on a preset to apply it. From here you can make further adjustments and then save the settings as a new preset, which will be added to the library for future use. Any image corrections or enhancement adjustments that you make can be saved as a custom preset – just right-click on the image and select ‘Create preset from current settings’. So if you regularly use the same camera and lens, and make the same basic corrections, these can all be saved as a preset to save you a lot of time.
Improved features
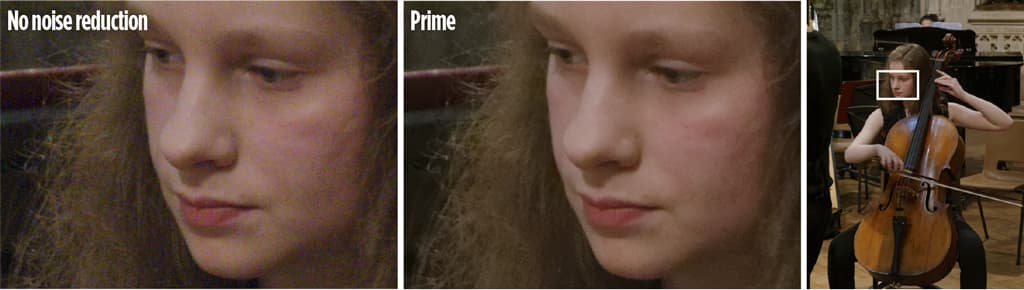
The Prime noise reduction reduces shadow noise. (Photo shot at ISO 1600 for noise-reduction samples)
PRIME (Probabilistic Raw Image Enhancement) noise reduction is a feature that was introduced in version 9, but has now been improved with faster processing times. PRIME analyses the structure of raw images and differentiates between noise and fine detail, which produces a noticeable gain in image quality. This enables you to shoot at a higher ISO sensitivity and get similar results that are obtained by shooting at a lower ISO. PRIME noise reduction removed the visible noise in our test image, although some fine detail such as hair can look softer than in the original. PRIME is only available with raw image files; for JPEG files you can still obtain excellent results by using the High Quality setting. Compared to other dedicated noise-reduction software, PRIMe reduced noise excellently, managing to preserve colour saturation particularly in shadow areas and maintaining a high level of texture detail.
Other improved features include DxO Smart Lighting and DxO Lens Softness optimization. The Smart Lighting palette has five settings: slight, medium, strong, DxO OpticsPro 7 and Pro 9, plus a custom setting. A slider enables you to vary the intensity from 0 to 100 (or 200). This recovers highlights and unblocks shadow details that may have been previously thought of as lost. This filter works best with raw files, but will also work with JPEGs. I wasn’t overly impressed by this: it worked up to a point but lacked fine control beyond the slider.
However, the user manual suggests that the Smart Lighting filter can be fine-tuned when used with the Selective Tone palette or Light and Colour – Advanced palette. Using the combined filters produced a much better result, so I would have liked the controls to be available within the Smart Lighting palette rather than having to go to another tool palette. The Lens Softness tool adds sharpness to photos from the centre to the edges to produce a crisp-looking image, with adjustment sliders including Global, Detail and Bokeh.
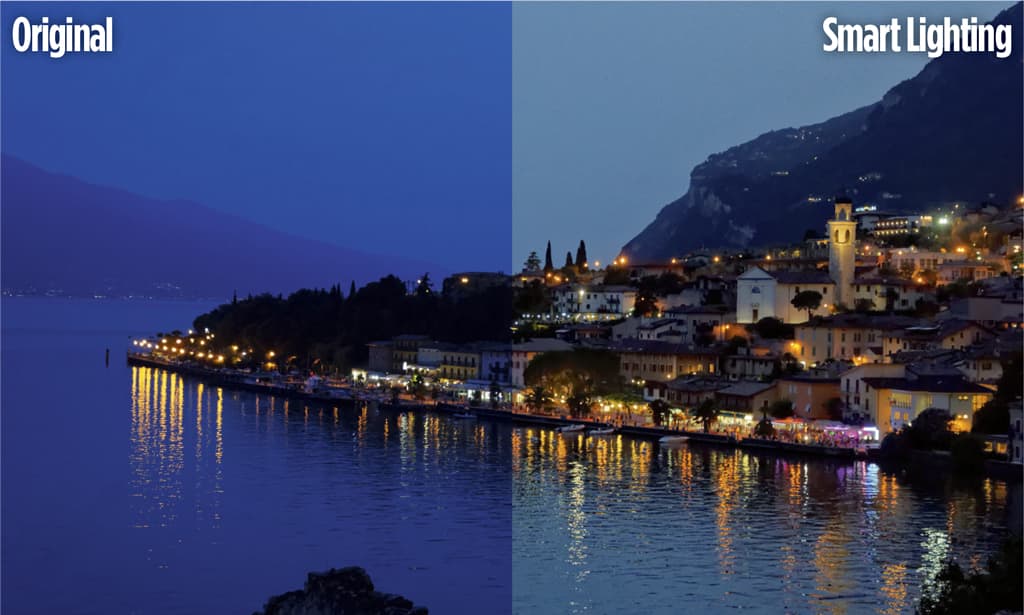
Photo with Smart Lighting applied and colour temperature adjusted
The Single Shot HDR preset produces a similar effect to that obtained by shooting multiple exposures that are then combined to make up an HDR photo. The options include HDR Realistic, HDR Artistic, HDR Backlight and HDR B/W. The effects are perhaps not as pronounced as those obtained by shooting multiple exposures, but each one added something extra to the photo, which can be useful as a starting point.
When you have finished processing images you can Export to Disk, which generates JPEG, TIFF and DNG files to a folder of your choice. You can export the same file in different file formats or image dimensions to separate folders or drives with a single click, although this is only available in the Elite edition. The Export to Application option sends the processed photo directly to your selected image-editing application as a JPEG, TIFF or DNG file.
The next two options are Export to Facebook and Export to Flickr, which are self-explanatory and allow you to add tags and privacy options. Finally, there is the option to export your image to Lightroom.
The last feature is Print. This allows you to send a file directly to an installed printer, with plenty of options available including ICC profile selection for colour-managed printing. One notable missing feature is the ability to centre the image on a page, although by carefully altering the margins and image size you can manually reposition it.
As the Standard edition of DxO OpticsPro 10 does not include ClearView or Prime technology, we would recommend the Elite edition to get the most out of the software.
DxO ClearView
DxO ClearView eliminates atmospheric haze in landscape photographs and smog in urban scenes. Haze is a phenomenon that is encountered when photographing landscapes in the mountains and near the sea. It is seen as an opaque veil that alters the contrast, colours and the textures in an image. Click the ClearView button in the Essentials tools palette to activate it, and then use the Intensity slider to bring out distant colours and details in a photo.
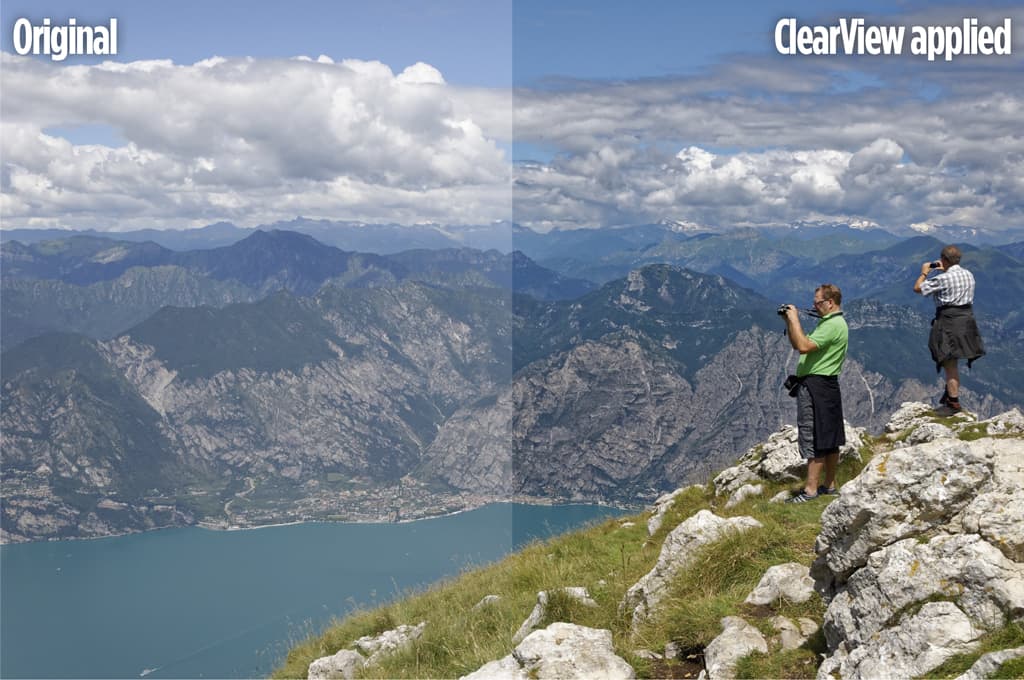 ClearView analyses the colours in an image (RGB) to evaluate the amount of light diffusion affected by haze. ClearView then cuts through haze by adding micro contrast to the affected areas of a photograph, particularly in distant mountain shots where the haze can take on a blue cast. The ClearView filter gives you full control over how much strength and image intensity you want to achieve.
For urban shots, it adds dynamic contrast to architecture by bringing out details that you may have previously thought were lost. The results are spectacular – a clear winner as a tool for use by both landscape and architectural photographers. The results of using ClearView are more pronounced than using a UV or haze filter on a camera lens.
Our verdict
DxO OpticsPro 10 is a feature-rich image-processing application that produced excellent results on every image throughout our test. OpticsPro 10 offers significantly more control than Adobe Camera Raw, and the results speak for themselves. Although it may lack some of the image-management and cataloguing features of Adobe Lightroom, OpticsPro 10 is excellent at its primary task: getting the very best from your raw images as quickly and easily as possible.
Score: 5 out of 5
System requirements
- Microsoft Windows 8/8.1 or 7 (64 bits). 4GB RAM (8GB recommended), 2GB disk space (6GB recommended). Intel Core 2 Duo, AMD Athlon 64 X2 or higher. DirectX 9.0c-compatible graphics card with 512 MB of video memory to handle GPU acceleration.
- OS X 10.8, 10,9, 10.10. 4GB RAM (6GB recommended), 2GB disk space (6GB recommended). Intel Core i5 or higher. Graphics card with 512MB of video memory to handle GPU acceleration.


