Corel PaintShop Pro X7 – at a glance:
- Magic Fill content-aware feature
- Faster brushes
- Easier-to-use Text and Shape Cutter tools
- Enhanced colour selection tools
- Price £79.99 Ultimate edition (on offer for £63.99 at time of writing), £59.99 Standard edition (on offer for £47.99 at time of writing)
- A free trial is available at www.paintshoppro.com
Corel has updated its Windows-only PaintShop Pro to X7. This version is a fully featured image-editing application that is capable of accomplishing most of the things that Photoshop offers, plus a number of extras. Here we take a look at X7’s new features.
Palettes
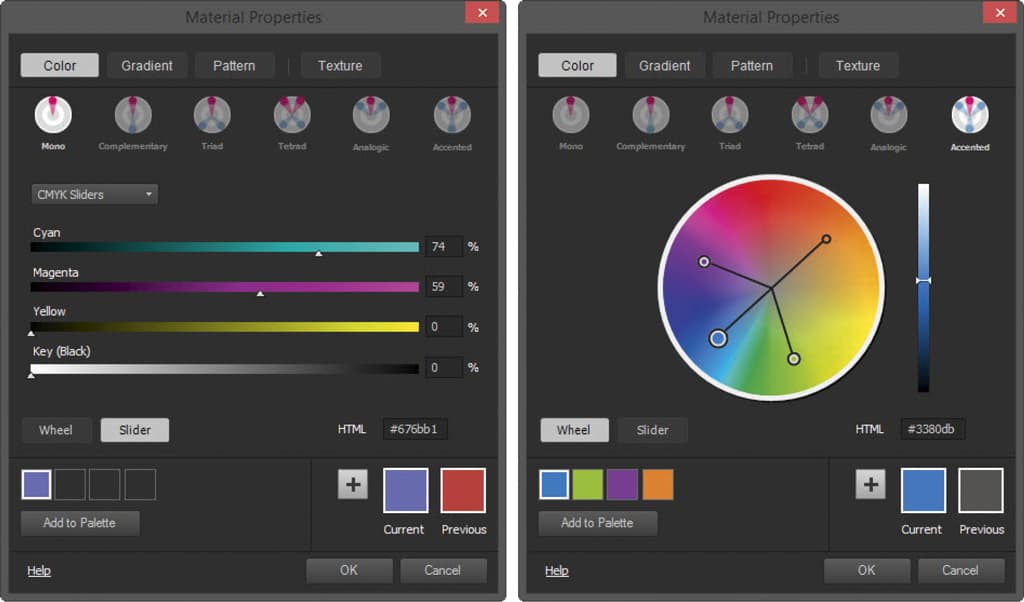
The Materials palette has had a major overhaul. You can select colours, textures or gradients by clicking on the icons, or clicking on the foreground colour swatch to launch the Materials properties. From here, use the wheel of colour or use the following sliders: RGB, CMYK, Grey Scale, HSL, Lab and Web safe colours. Other tabs, such as Gradient, Pattern and Texture, are also available here, and there is the option to create your own custom colour palettes. This is probably the best colour picker I have seen on any image-editing application.
The new Layers palette enables you to drag and drop layers between open images. This is not quite as easy or as intuitive as it would seem. You need two images open as tabbed windows. Now click the layer you want to copy and drag it to the tab of the image you want to drop it into – this makes the recipient image active. You then drop the layer into the layers palette of the new image, which is a clumsy way of doing things. A better way is to highlight the layer, press Ctrl+C to copy, then activate the other image and press Ctrl+V to paste it in as a new layer. Layers can have their stacking order changed by dragging any layer up or down the stack. One annoying bug is that you can lock a layer, but if you use the arrow keys the layer will still move.
When you first open an image, the new Start Screen lets you choose a new document size to perfectly match a photo frame, mobile device, a Facebook cover or profile photo. The Start Screen includes several predefined categories, including photo, paper, www, mobile, cards, presentations, social media and your own user preset.
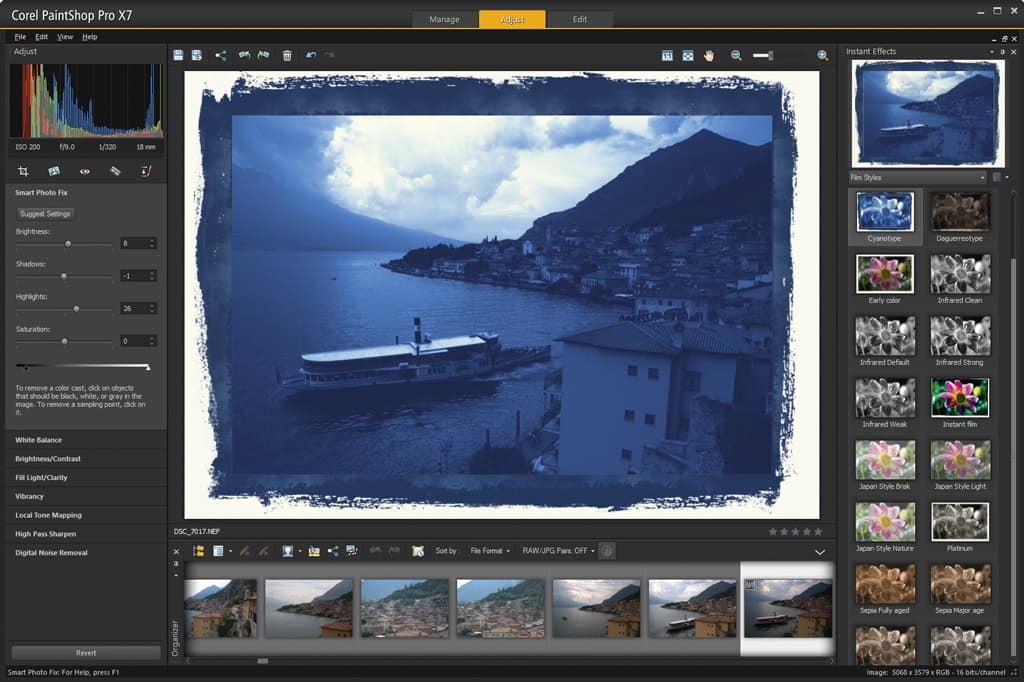
Also new is the Quick Preview feature, which makes seeing the Instant Effects image presets,
well, instant. There are several categories of presets, including artistic, black & white, film styles, landscape, retro, portrait, traditional and user defined.
The Text Cutter and Shape Cutter tools are now easier to use. Create a photo object by using text or a shape to clip an underlying photo or image. The result is a photo object (new file) with a transparent background that you can paste or drag onto any image as a layer.
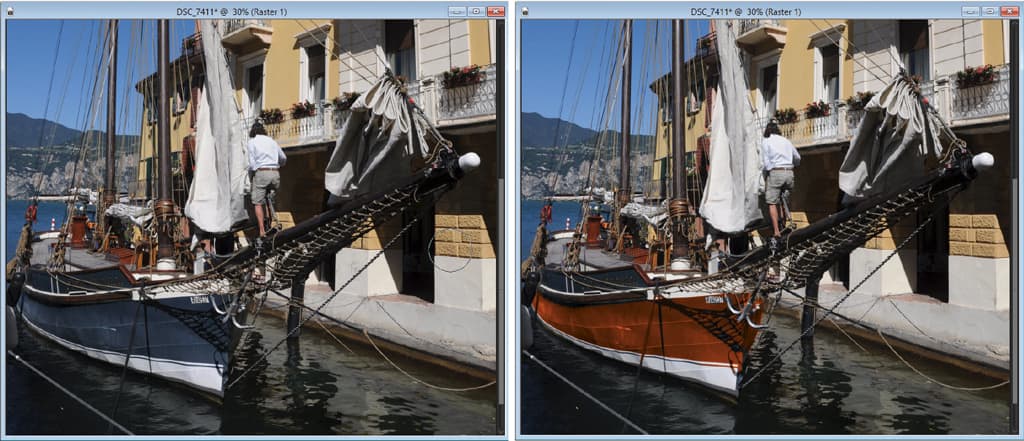
Brushes are 30% faster to use and have content-aware Smart Edge technology to apply precise brush strokes without the need to create a selection or path. This is a useful feature if you want to change the colour on an area in a photo without having to make a selection first. The brush samples the underlying colour and then applies the foreground colour to that area. Make sure the brush Blend Mode is set to Colour to preserve the image details.
PaintShop Pro X7 can also now read and import data saved in the XMP files that are created by many raw image-editing programs.
Workflow
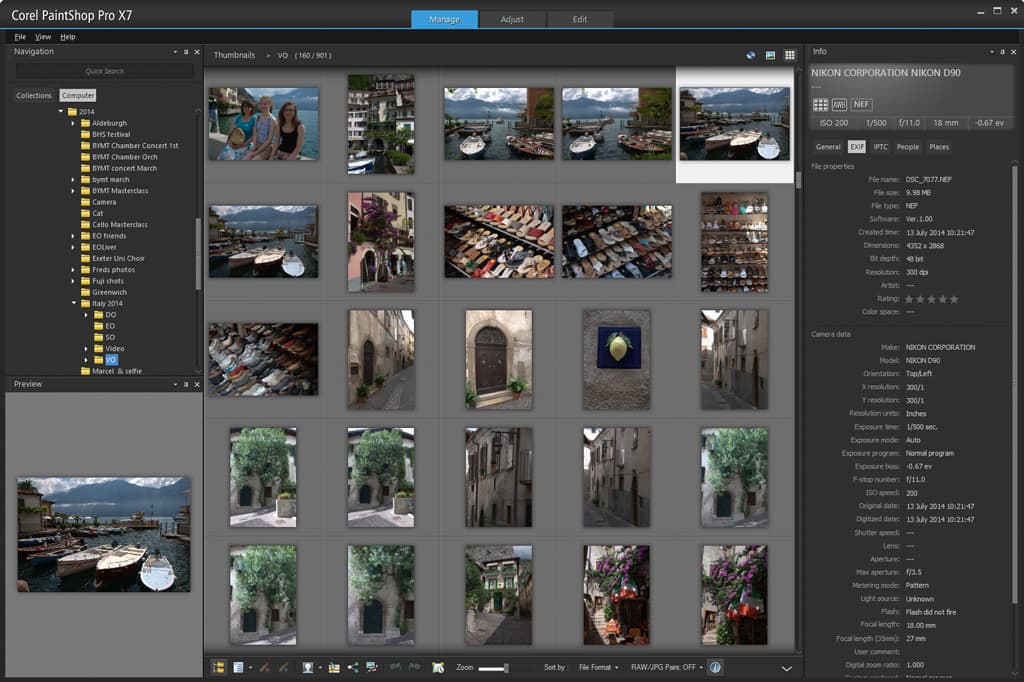
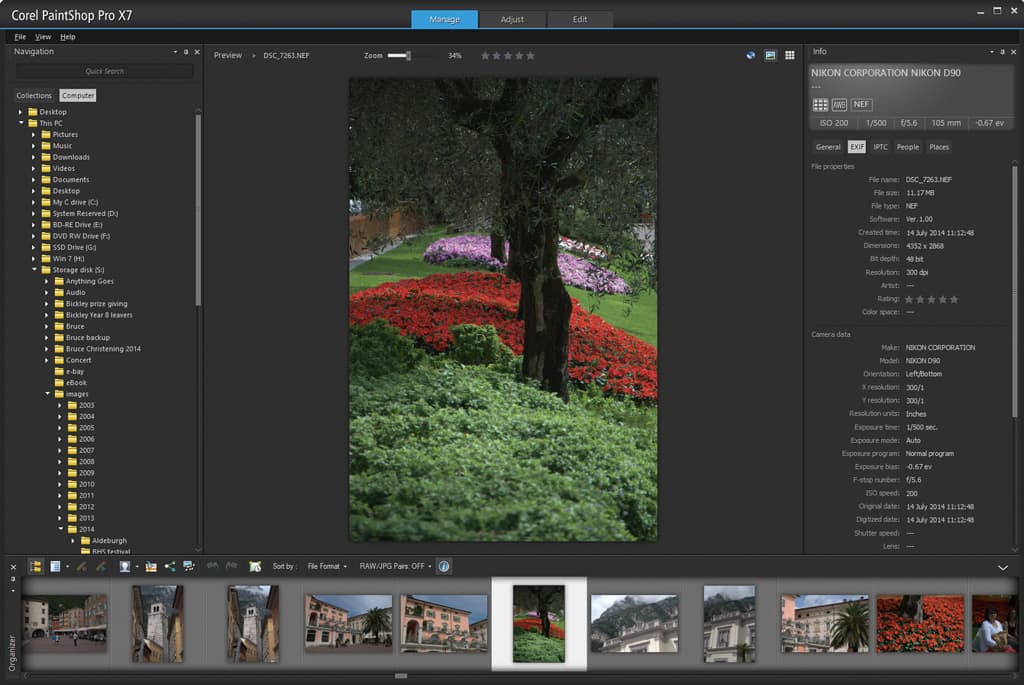
Upon launching X7, you are presented with the Manage tab, which displays the image files on your hard drive either as thumbnails or as a full-screen preview. Select the image you want to work on, then go to the Adjust screen tab, which launches a simple-to-use interface that gives you plenty of options to adjust the image tonality and cropping, as well as apply Instant Effects. To apply an Instant Effect, just click on the effect thumbnail and see the preview located above the thumbnails or double-click the thumbnail to apply the effect to the image. This worked very well, but I would have liked to see the thumbnails display the image currently being worked on rather than a generic stock image.
You can bypass the Adjust tab and go straight to the Edit tab, which launches your image into the full X7 interface. All the features that are in the Adjust tab are still available, but you have to go through the various menus to find them. The advantage here is that you have finer control over every aspect of the image.
By default, the palettes are docked to the edges, but they can be dragged to the screen to become floating palettes. Docked palettes have an Auto Hide option. Once activated, the palette collapses as you move the cursor away and opens again when the cursor hovers over it, keeping the work area free from clutter.
Open images can be displayed in a tabbed format across the top of the workspace. This has to be set via Window>Tabbed Documents, then click the desired tab to activate the image.
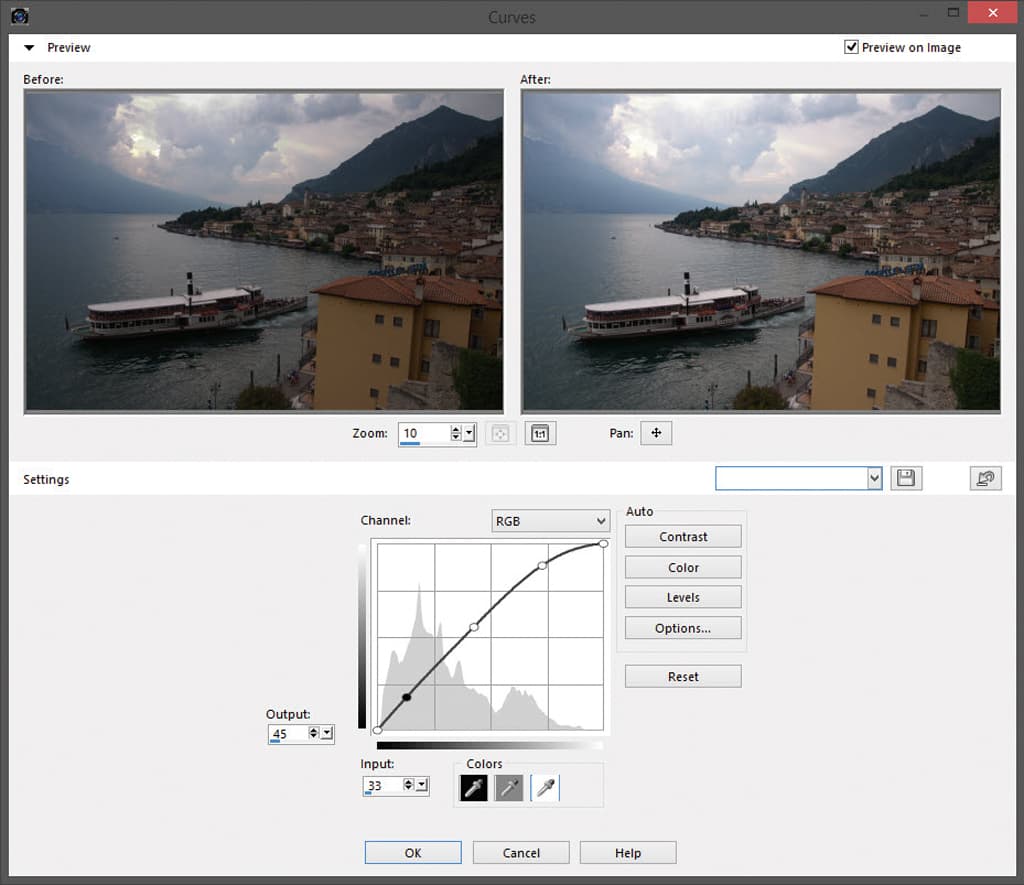
The History palette keeps a track of everything that has been done and allows you to go back to any point. I like the Quickscript feature (blue arrow icon), which memorises the history of the image and can apply it to another. The only limitation is that when you save the Quickscript, it overwrites the previous saved Quickscript. You can, of course, record your actions as a script using the Script toolbar and recall this at any stage for use on other images. This is the same as Actions in Photoshop.
PaintShop Pro X7
All the usual imaging tools are located in a palette on the left, which can be dragged away and reshaped, or you can create your own customised Tools palette. Compared with Photoshop’s tools, those of X7 are slightly clunky. The Clone tool is easier to use, though – just right-click on the image to select a source point and then move the cursor to a destination to apply the cloning.
I like the Perspective control. A rectangle appears in the centre of the frame, the edges of which can be moved to align with your subject matter. You press the Apply tick and you have a perspective-corrected image. I tested this on an extreme example in an attempt to fool it and to my surprise it corrected the image perfectly, although the picture did require trimming. The Scratch Removal tool acts in a similar manner to Photoshop’s Healing Brush – just paint over a scratch and it disappears as if by magic.
One tool in X7 that Photoshop doesn’t have is the Picture Tube or Image Spray tool. This sprays a series of small images onto a picture, which is handy for adding extra flowers to your garden pictures. You can use any of the preset images, download extra sets from the Corel website or define your own. It’s great fun to use and can add a new dimension to any picture or border.
Raw image support
You can open unprocessed raw images from advanced digital cameras. However, the level of raw support offered by X7 is basic and does not come close to being a substitute for most manufacturers’ own software, or, for that matter, Adobe Camera Raw.
Using workspaces
PaintShop Pro X7 allows you to customise your workspace to suit your preferred way of working
A good workspace for any image-editing application is crucial to productivity, as you need to be able to access the tools you want quickly and easily. PaintShop Pro X7 supports many shortcut keystrokes. For example, press the letter C to instantly select the Clone tool, B for the Brush tool, M for the Move tool, and so on. These keystrokes are worth learning, as they will help you work faster.
You can also define your own custom keystrokes for often-used menu items. X7’s fully customisable interface means you can design it to your own preferred way of working. You can also create tool palettes for specific tasks, which is handy if you want to do some retouching or vector drawing perhaps. Once you have customised your palettes, you can save the workspace and recall them by going to the menu and selecting File>Workspace.
Magic fill tool
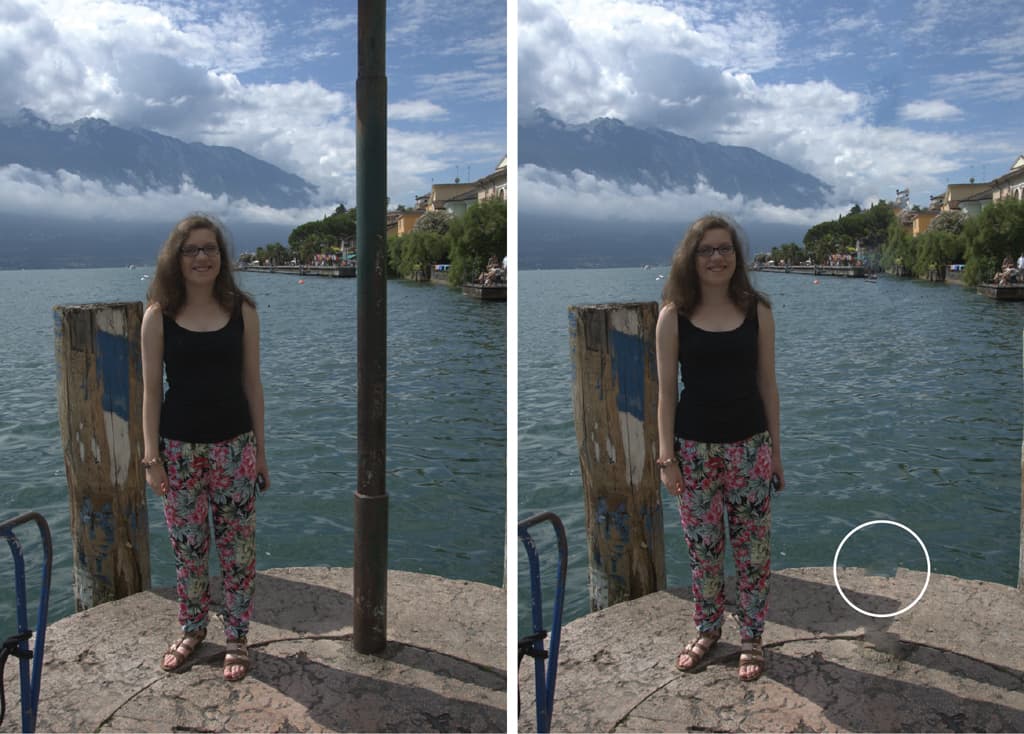
To use the Magic Fill tool, select an object you want to remove using any of the selection tools, then press the Magic Fill eraser icon on the top toolbar and the object vanishes. The erased detail is replaced with a background that matches the surrounding area. This worked extremely well on most photos, although some more complicated areas may need a second go or retouching with the Clone tool. The Object Remover tool makes a reappearance in X7, and this works in a similar way.
Our verdict
Corel’s PaintShop Pro X7 is, without doubt, a very powerful application, with a large worldwide user base. Although X7 is not Photoshop, it is nevertheless an excellent image-editing application. I would not have any problems using X7 for any image-editing work, even though it does lack some of the finesse of Photoshop, especially in the colour-management sector.
We reviewed the Ultimate edition of PaintShop Pro X7, which includes plenty of extra add-ons, brushes and filters that can be downloaded from the Corel website. The installation comes in either 32-bit or 64-bit versions, and if you have a 64-bit system then X7 flies – it really is very fast. Although X7 is an improvement over previous versions, it is not a major overhaul. Nevertheless, I have no reservations recommending this as an excellent buy.
Score: 4 out of 5
System requirements
- Microsoft Windows 8/8.1, Windows 7, Windows Vista or Windows XP with latest service packs installed (32-bit or 64-bit)
- Intel or AMD 1.5GHz processor with SSE2 supported (multi-core processor recommended)
- 2GB RAM (4GB+ recommended)
- 1GB hard disk (2GB recommended)
- 1024 x 768 resolution with 16-bit colour display (1366 x 768 resolution with 24-bit or higher colour display recommended)

