- £788.40
- www.benq.co.uk
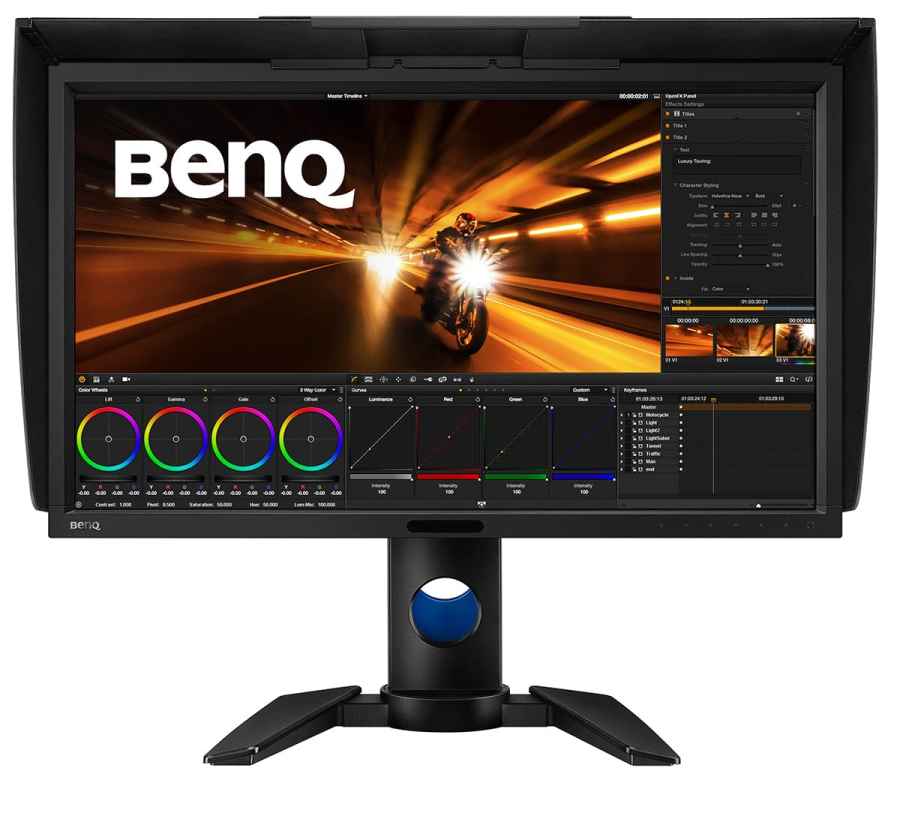
In today’s multimedia world creatives have to be proficient not only with digital stills capture and digital manipulation, but also with video capture and video editing. To ensure accuracy in the editing stage a high quality monitor should be high on any list of essential equipment. In this review we look at the BenQ PV270 27-inch monitor, which could be the ideal choice for both video and stills editing. At first glance the PV270 may appear to be a basic monitor without all the bells and whistles, but power it up and you have a display that can’t fail to impress even the most demanding of professionals…
Features
The PV270 is a 27-inch LED backlight monitor with a display area of 596.7×335.7mm. The screen has a native resolution of 2560×1440 pixels with an aspect ratio of 16:9 – ideal for video editing and for displaying more open windows in other applications. The monitor is capable of producing 1.07 billion colours, but not all can be displayed at once, and it has a contrast ratio of 1000:1/250cd/m2 with a dynamic contrast ratio of 20000000:1.
The monitor also has a USB 3.0 port which connects with supplied cable to a computer, this provides 1 upstream and 2 downstream ports. An SD card reader together with the two USB ports are located at the side of the monitor. The monitor can be tilted up or down by -5⁰ to 20⁰, swivelled left or right by 45⁰, height adjusted by 135mm and pivoted 0⁰ to 90⁰ clockwise (this could be useful for portrait orientated photos, or desktop publishing applications). A monitor hood is supplied for shading the screen from ambient light.

Setting up
The monitor is supplied in a large flatpack box and has to be assembled but a well-illustrated step-by-step ‘quick start’ guide is supplied. For the most part assembly is straightforward, although the multi-section shading hood may require a bit of patience to assemble and fit. The monitor stand comprises both a base section and supporting arm; the screen clicks onto a supporting arm bracket but once in place make sure you don’t press the quick release button to avoid an expensive crash. Next connect the supplied cables: Power, DVI-DL, USB 3.0 and HDMI cable (not included). These all connect to a rear overhanging section which can be awkward, especially the DVI-DL cable, but rotating the screen to the upright 90⁰ position will make it easier to connect each cable.
Power up & controls
Once connected to a computer turn on the main power supply switch (located at rear of monitor), then turn on the monitor using the power button on the front panel. The monitor can be easily positioned to your desired angle with tilt, swivel and height. The supporting arm is spring-loaded and balanced to keep the monitor in position. Next, the screen resolution needs to be set from your computer; the PV270 has a native resolution of 2560×1440 pixels, so ensure that your graphic card can support this.
The monitor control keys are located on the front control panel and are touch sensitive rather than physical buttons. Press any key to access the main menu, a set of icons appears above each key which are now lit. The first four buttons are pre-programmed as hot keys to give you access to Input, Colour Mode, Brightness and Contrast. The keys can also be customised to provide you with other functions such as Gamma, Colour Gamut, Black point and PIP (Picture in Picture). The last two keys are Main Menu and Exit. When an option is selected the touch keys act as navigation keys; this enables you change the options or fine tune the settings.
When our review monitor was first switched on there was a message saying ‘No Cable Connected’. Just press a control key and select the icon that represents the connection you are using (DVI-DL in our case); now the screen displays your Normal Window/Mac screen. Inputs can be changed using the first hot key, you can connect a camera directly using a HDMI cable etc. A second input device can be displayed using the PIP option; in effect you could view photos that are on a digital camera whilst working in your editing application.
Colour modes & settings
The Colour mode offers several options including Standard, Adobe RGB, sRGB, DCI-P3, Rec 709, D50, D65, Calibration 1, Calibration 2, Custom 1 and Custom 2. For photography work select sRGB or Adobe RGB. sRGB will be the preferred choice if you are printing using an inkjet printer or intending to display photos/video on websites or for on-screen presentations. Adobe RGB has the wider gamut and will display more colours the PV270 will display 99% of Adobe RGB colours with great accuracy. However, the web does not support Adobe RGB so your photos may look dull when uploaded to the web. Most inkjet printers and commercial labs use the sRGB colour space, some high-end printers will use Adobe RGB.

DCI-P3 is a colour space for digital movie projection used by the film industry; it covers most colours albeit with drawbacks in the green-blue range. Rec.709 is an ITU Recommendation, that sets out the standards for HDTV. The Rec.709 RGB Colour Space is identical to sRGB colour. The D50 is warm daylight set to 5000K and D65 is daylight set to 6500K.
Out of the box the PV270 produced excellent colours with an even illumination from corner to corner, there’s no need for any warm up period before doing colour correction work. For the photographer who demands accurate colour calibration the PV270 has a facility for hardware calibration – this allows you to adjust the monitor’s image processing chip without changing the graphics card output data. The monitor is supplied with X-Rite Palette Master software and this can be downloaded from the BenQ website. Use a Colorimeter to create a calibration/profile (the USB 3.0 ports are ideally located at the side for connecting a Colorimeter). The calibration data is stored in Colour Mode > Calibration 1. For image editing a recommended calibration brightness is 120cd/m2 or less.
The monitor has many advanced features such as a colour temperature sensor, which detects the light conditions around the monitor and adjusts the colour settings accordingly. The software for this has to be downloaded from the BenQ website. The backlight can also be adjusted automatically. The monitor has a light sensor, which detects the light condition around the monitor and adjusts the monitor backlight automatically. This is to protect your eyes from overexposure to bright light. If the light is sufficient, the monitor brightness is increased. If the monitor is in a poor light, the monitor brightness is decreased. This can also be adjusted manually as the colour performance may be compromised if the light sensor is enabled.
Verdict
We found this large monitor a pleasure to work with and minor adjustments are easy to apply. The screen does take up extra desk space, but photographers who are currently working with two monitors may find that a single 27-inch display will be more than sufficient. For video editing work it would have been good to have some audio facility or headphone socket. The screen has a good viewing angle of 178⁰ left/right and 178⁰ up/down, and such a good viewing angle is essential for correction work. The BenQ PV270 is a well-specified monitor with plenty of features for accurate colour correction and grading work that should satisfy any professional. For video work BenQ has provided both Rec 709 and DCI-P3 colour modes and is Technicolor certified, but BenQ has missed a vital feature; 4K display. However, for stills, HD and Full HD work and internet display this monitor is ideal. Highly recommended.