£72 | aurorahdr.com
At a glance:
- Requires Intel Core 2 Duo processor from late 2009 or newer]
- Minimum 4GB RAM
- OS X 10.9.5 Mavericks or newer
- 2GB free space on hard drive
- Display resolution 1280×800 or higher
- Retina displays supported
Macphun is a software developer that specialises in making plug-in and standalone software for photographers. It has a variety of great programs available, and we have featured Macphun Noiseless and Macphun Tonality in the past. As the name suggests, it’s Mac-only software. At least for now, there’s no PC support.
Recently, Macphun teamed up with Trey Ratcliff, one of the most famous HDR photographers in the world, to produce a plug-in and standalone piece of software specifically for creating HDR images. Ratcliff’s social media following is quite phenomenal. He has over 8.5 million followers on Google+, where, at the time of writing, his images have been viewed 123,754,457,940 times. He’s passionate about HDR and he knows his stuff, so if there were one person you’d want to help design your software it would be Ratcliff.
What it does
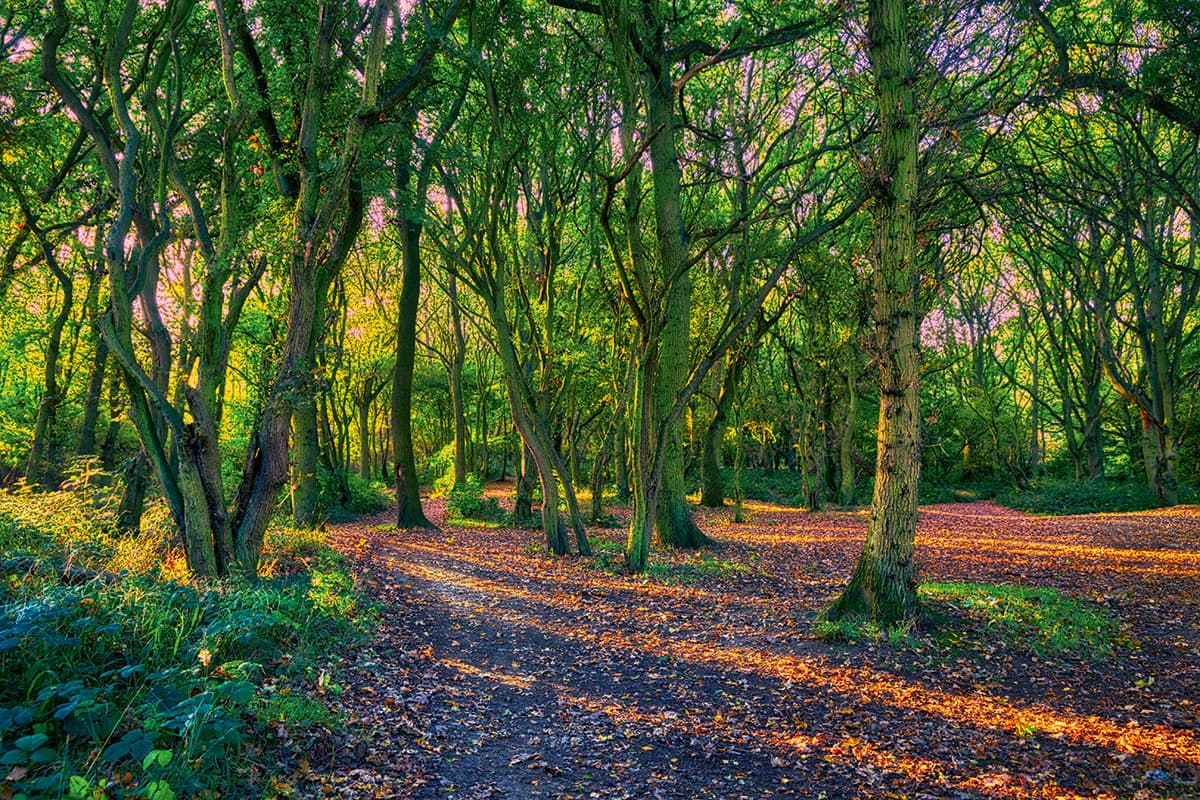
If you want to ad HDR punch to your images, Aurora HDR Pro can provide it
There are two options for Aurora HDR. The standard version costs £29.99 and is available only from the Apple App Store for Mac OS. This version limits users to JPEG, TIFF and PNG (not raw files), and has many of its features cut back.
The second option is the Aurora HDR Pro. It boasts all the functionality you could wish for and a lot of presets. It also allows users to use Aurora HDR as a plug-in for Adobe Lightroom, Adobe Photoshop and Apple Aperture, as well as being a piece of standalone software.
Aurora HDR Professional allows users to create HDR and tonemapped images with a single shot or multiple bracketed images. It can read PNG, 8-bit and 16-bit TIFF, GIF, PSD and raw files. As the software is rather new, it supports the vast majority of raw files currently in use. Aurora HDR Professional also features a comprehensive toolset that allows users to make a variety of different image adjustments, as well as the HDR merging.
Starting out
The first screen is where you load your images. You can select to load a single image or a series of bracketed images. Once selected, you are given the option of alignment, ghost reduction and chromatic aberration reduction. Chromatic aberrations are commonplace when the brighter exposure of a bracketed shot is merged, so it’s a handy feature to have. Also, when ghost reduction is selected, you are given an amount you can reduce the ghosting by on four different strength settings, as well as the option to select a reference image for more accurate merging.
Once an image, or series of images, is loaded and processed, you can start working on the file. The layout is very similar to Adobe Lightroom, and it works much the same, but this software is HDR-specific.
Tool run-down
Down the right-hand side is a selection of tools. The first of these is Tone, a toolset for basic adjustments, including highlights, shadows, midtones and blacks/whites. Next is Structure, which allows users to control the strength of the high-contrast HDR look and the clarity. It’s easy to overdo it in this panel, so it’s worth tweaking this part the most. When you lighten shadows extensively you can introduce a lot of unwanted noise, so Macphun has provided a denoise tab that allows users to control the intensity of denoising and smooth out areas.
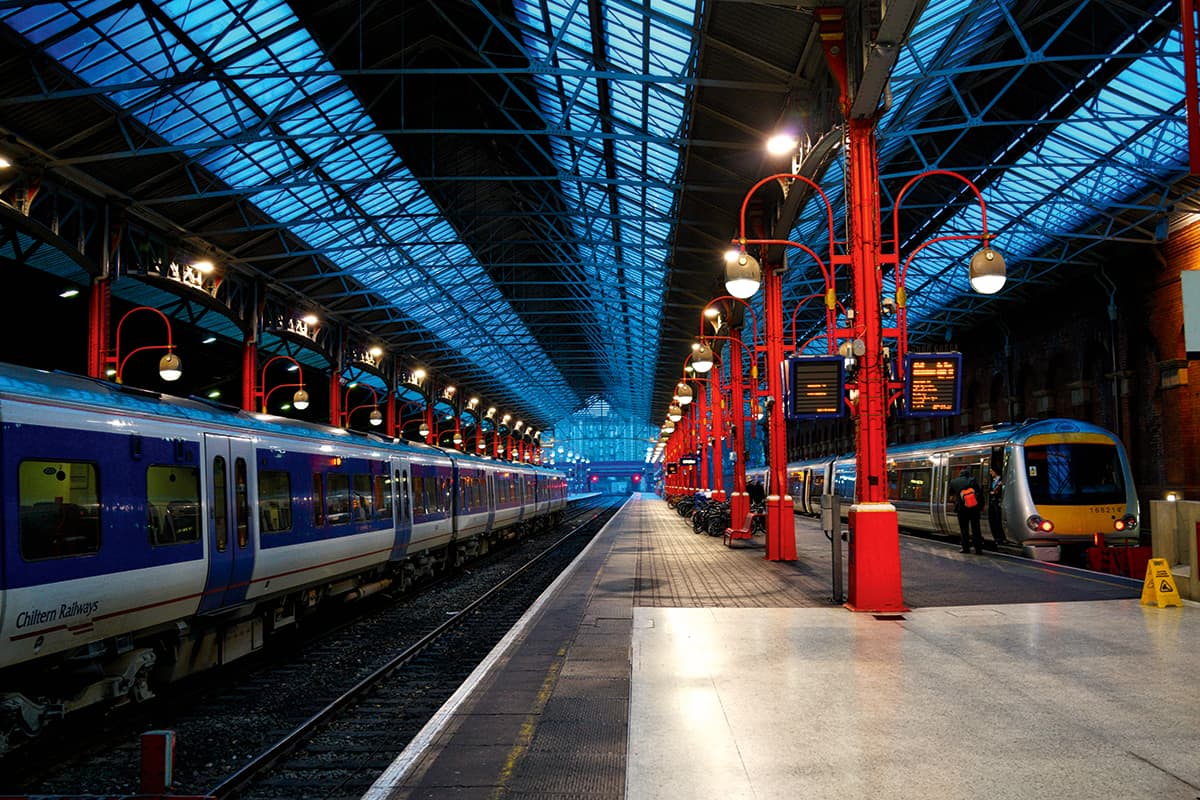
Aurora HDR can be used for more subtle adjustments to enhance your images without going too far over the top
The Image Radiance tab lets users give their image highlights a more radiant, glowing look, but it also includes a colourising portion inside the tab for users to change the warmth and colourise the light end of the midtones, through to the highlight portion of the image. Below this is a colour tab for saturation, vibrance and colour temperature changes.
The Details tab allows users to sharpen either small, medium or large areas of detail, and each can be controlled individually, localised to either highlights, shadows or globally. Glow tab is much like image radiance, doing what it describes and making the images glow. Below this is a tab called Top & Bottom Lighting, which I found very useful. It allows users to control the exposure from the top half of the image and make it lighter or darker. The same can also be applied to the bottom half. This is especially useful for balancing landscape images.
The Tone Curve tab is simply a curves adjustment, while the Color Filter tab allows users to control the saturation and luminance of different colour channels. Colour Toning tab is a bit like Lightroom split-toning. It’s intended for users to tone the highlights and shadow areas. At the top of the tab are some handy presets to try out. Below is Vignetting, which lets you put a vignette on or tame an existing vignette, while at the bottom is Layers. This tab allows users to blend all their edits with the original HDR merge, and vary the strength of their adjustments. It can also be used when creating other layers.
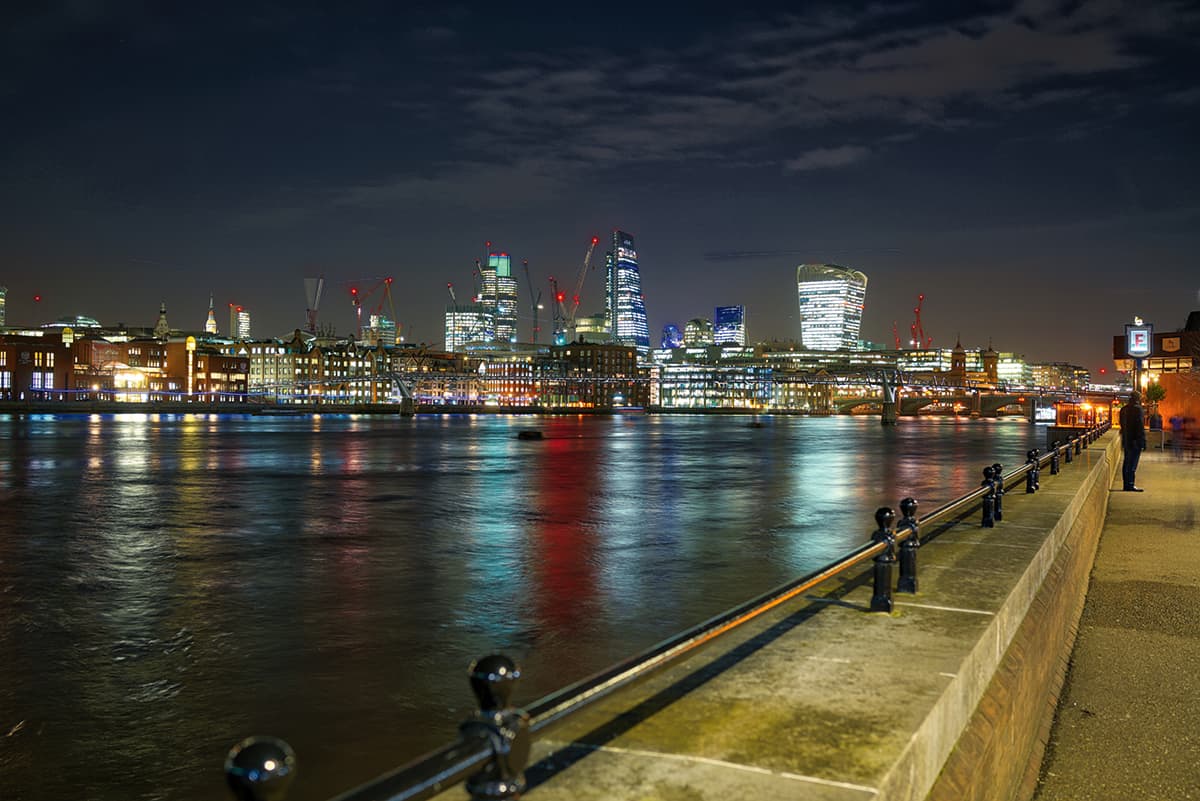
Images with a lot of dynamic range can be pushed quite extensively
There are a couple of useful tools along the top bar of Aurora HDR Pro. One compares images before and after changes. It can be set up to split the screen or view the versions side by side. There are zoom tools for checking specific areas of an image, a move tool for moving the enlarged images around, a rotation tool for rotating the image, a crop tool, a full-colour histogram, two buttons for importing and exporting images, and a masking brush and layers.
Creating a new layer is a lot like creating an adjustment layer in Adobe Photoshop. Users make their adjustments as mentioned previously and then, using the masking tool, paint in where they want their adjustment to be applied. The brush can be refined and is controllable. Confusingly, there’s a graduated filter simulator inside the brush menu, too, but it is very useful in allowing users to quickly make an adjustment mask to a graduated part of the image. It can be tilted, rotated and feathered, allowing foreground and skies to be darkened or lightened. Also, in the layers there is the option to use blending modes such as Soft Light, Hard Light and Color, to name a few. These allow users to blend effects and make more dramatic images.
HDR presets
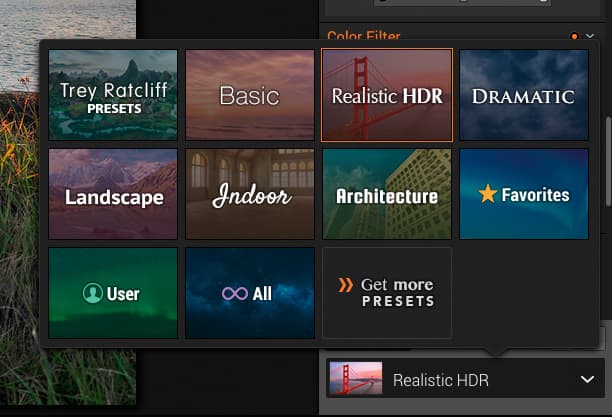
Along the bottom of Aurora HDR Professional is a variety of presets that can be selected by category. Categories include ones for landscapes and architecture, as well as Trey Ratcliff’s own preset collection. Users can also save their own presets.
Many of the presets are quite strong, giving a heavily processed look, and for many shots they’re dependent on a specific type of scene such as a cityscape with bright highlights. Often, many images don’t work with a lot of presets, but there will usually be one or two that do work well.
In use
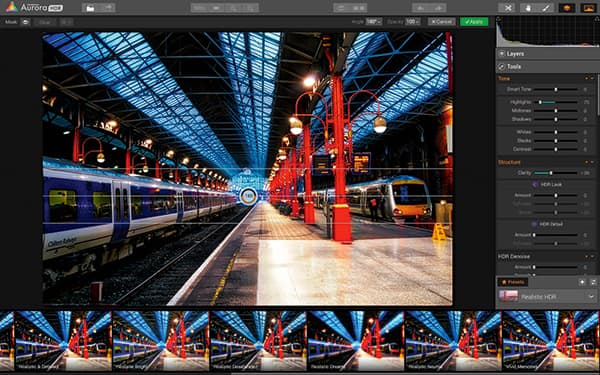
Any users who are familiar with Adobe Lightroom will feel right a home with Aurora HDR Pro, as there are presets, plus an editing panel that’s located on the right hand side. It also boasts some of the same slider-style editing as Lightroom, with similar native adjustments available, too
I tried using a variety of images with the Aurora HDR Professional, including ones from Olympus, Sony, Canon and Fujifilm, mixing it between full-frame, APS-C, Four Thirds and compact camera sensors in order to get a well-rounded user experience. I also tried using single exposures and bracketed exposures, as well as a mix of raw and JPEG files.
The first thing that bugged me was that even when using a camera with a lot of dynamic range – meaning there is lots of information in the shadow areas – Aurora HDR Professional pushes it so hard that an awful lot of noise is introduced to the shadow areas. The Denoise tool tries to combat this but tends to smudge a lot of the finer detail. If you’re planning to print the image, that level of processing really has an adverse effect on the final image quality.
Next, I found that certain colours become intensely oversaturated to the point that they become a glaring distraction. Inside the tools menu there are options to turn this down, but even when corrected it seems like there’s a lot of colour depth that becomes lost. It becomes rather difficult to get the aesthetics of an image right.
The range of tools and the layout of the software are great. Everything is laid out well and is easy to find. Sliders are a tried-and-tested way to edit. I found it really easy to use and there’s plenty of support and learning material.
Changing settings was easy enough, although it does make you wait for a while to see what’s going on, especially with bigger files. A single adjustment can take three or four seconds to render, so it’s not especially quick like Photoshop, which usually updates in real time.
Verdict
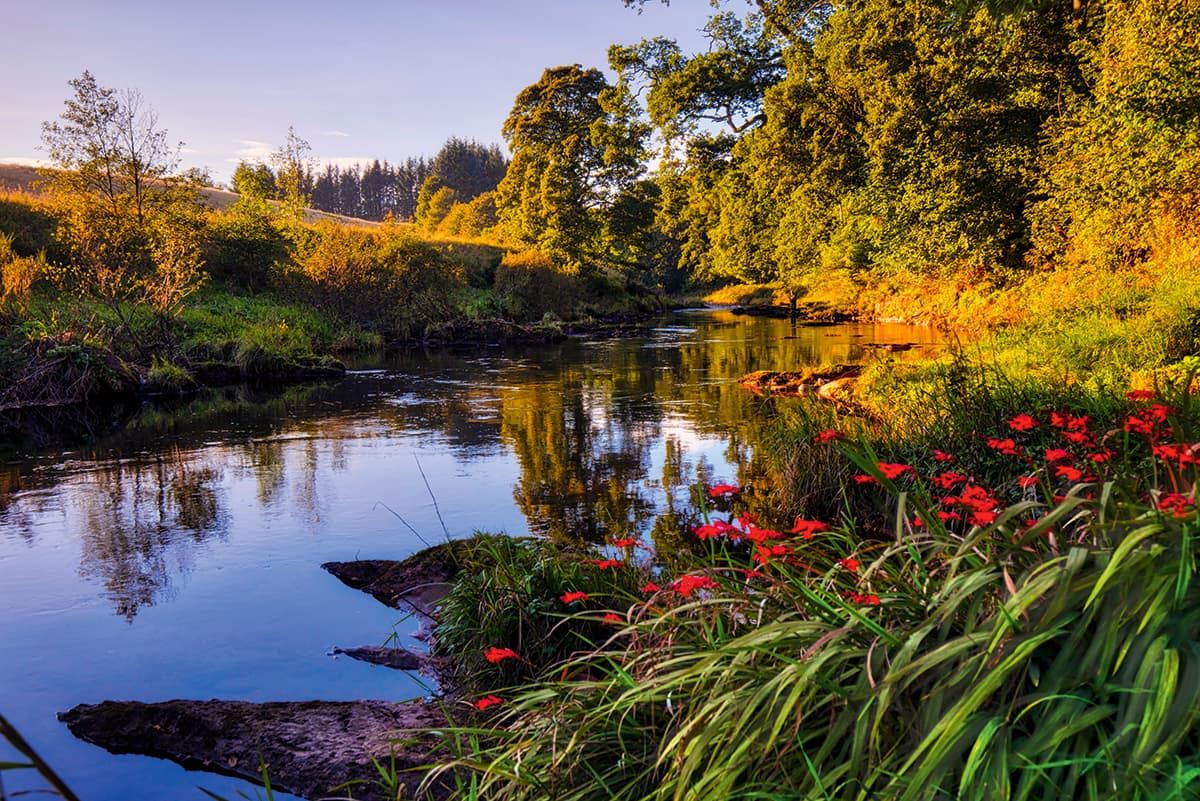
Even with a lot of tweaking, the bright yellow areas and red flowers in the foreground of the image are distracting
I will start by saying I don’t like the overbaked HDR look, but I will cast aside my opinions for an honest and untarnished verdict. I find in many cases that Aurora HDR Professional introduces a lot of technical flaws into your image. In many cases, the software achieves a really punchy image with strong contrast, lots of detail loss and lots of oversaturated areas. There are image-noise issues in overworked shadows, too.
I find the presets are seriously overdone. They can work wonderfully, but only on very specific images. With software such as Adobe Lightroom I can usually import a reasonably average shot and make something half decent with a few of my presets. With Aurora HDR Professional you really have to start with an incredibly strong composition and image in order to convincingly carry off the extensive editing that it goes through.
Sometimes I imported an image into Aurora HDR Professional, tweaked a few presets and came back with something that was much better than the original, but the success rate certainly wasn’t as high as I was expecting.
All in all, Aurora HDR Professional isn’t a bad piece of software. It’s a little sluggish and it isn’t the one-stop shop for instantly amazing pictures at two clicks of a mouse that it’s made out to be. But it’s well laid out, intuitive and you get a lot of software for £72.
