Speed, ease of use and powerful effects are seductive promises when it comes to photo-editing software. Until now, landscapes – one of the most popular genres of photography – required a huge amount of editing knowledge and time-consuming techniques to make images look their best, but all that has finally changed.
If you’re familiar with the software PortraitPro, you’ll know just how quick and easy it makes smoothing skin in portraits and changing the shape of facial features. Just a few markers placed here and there, and the software takes care of the rest. It’s this type of quick and easy editing that Anthropics has brought to landscape photography with LandscapePro – a photo-editing program aimed directly at landscape, cityscape and architecture photographers.
LandscapePro’s features are aimed at both beginners and more experienced photographers alike. The software allows you to take control of standard settings, and provides a number of innovative controls to apply a range of creative effects, including replacing skies and adjusting mood, changing light and the time of day. You can even change depth of field.
There are two versions of LandscapePro, and the one you’ll need depends entirely on whether you’d like to work with raw and DNG files, read and write 16-bit tiff files, work in different colour spaces and use the software as a plug-in for Photoshop, Elements and Lightroom. If these are the types of features you need, the Studio version will be best for you, but if you don’t need this functionality, the Standard version will be ideal. There is currently an introductory offer where both versions are on sale with 50% off, which makes Standard £29.95 and Studio £49.95.
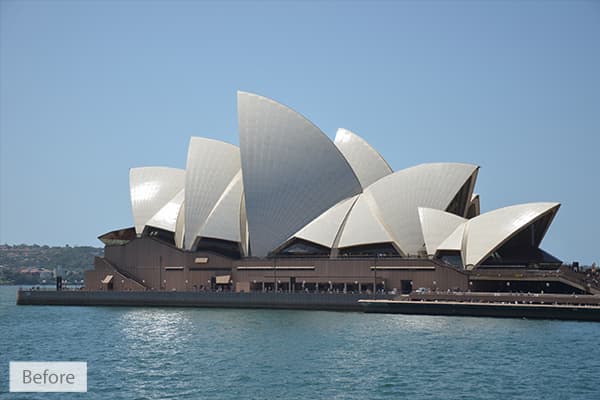
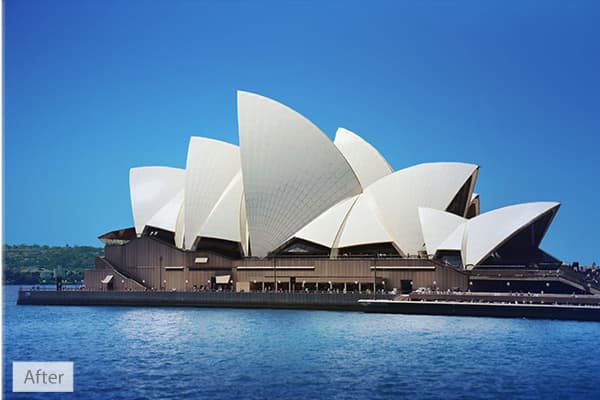
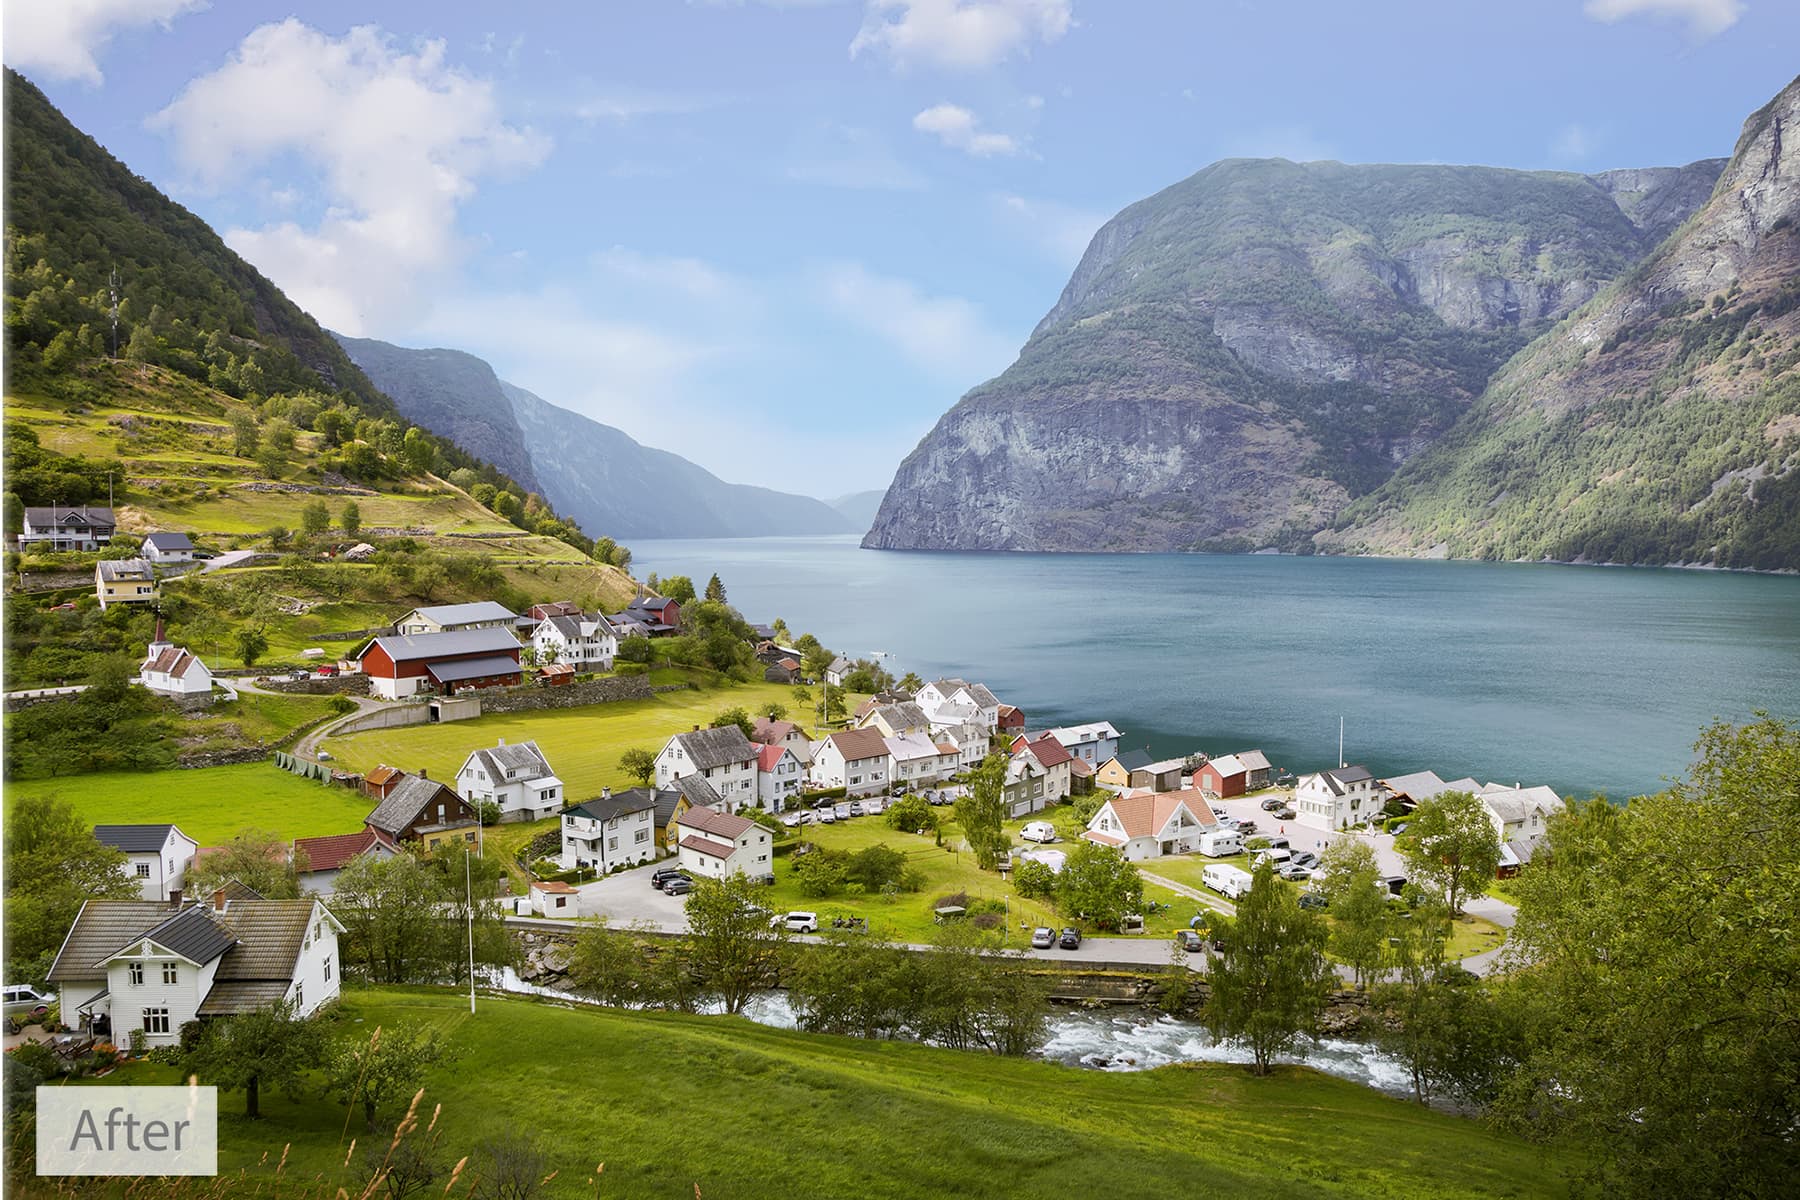
Making drastic tonal changes to images requires no experience and the results can be very good
A new workflow
The software is indeed easy to use, with a simple and intuitive interface, and its controls are where you’d expect. Like any new software, it does take a little time to get used to everything, and the workflow is probably different to anything you’ve used before. This immediately becomes apparent, because rather than jumping straight in with image editing, you have to label all the different elements within your image, such as sky, water, grass and rocks, before selecting these areas by painting over them. It’s only once you’ve done this that you can actually move on to making the adjustments themselves.
When you open the software, you’re presented with a simple welcome screen offering a number of options. The first is to open your images, but there are also buttons to work on example images, watch a selection of 40-second tutorial videos and one for help and feedback. The tutorial videos are definitely worth a look, and make getting started with some of the tools much quicker and easier.
Once you’ve selected an image, you’re taken through to the Add & Edit Areas window. Here, you drag labels from the left of the screen over the corresponding elements in the image. At first, everything seems strange, but as you go along there are hints to let you know what you need to do, including when you hover the mouse pointer over the tools that are on offer.
When the labels have been positioned, hit Continue and they disappear, to be replaced by a set of tools, with the different objects in your image gaining a colour coding. At this stage you’ll need to use the Pull tool to refine the colour masks by left-clicking your mouse and dragging the mask over the desired part of images. The software is fairly intelligent and can, for the most part, identify different objects, but there are times when a chunk of another area will be masked. When this happens you can zoom in for finer control. It’s simple, but making masks perfect can be time consuming.
As well as replacing skies with a long list of preloaded options, you can import your own just as easily
The Pull tool covers roughly 95% of the masking process, and to aid with this there are a number of additional tools. The Soften brush is used to draw along object edges to graduate the borders of masks for a better blend between the two. It’s most successful when you set the smallest brush size and the image is fully zoomed in. If you make a mistake or would like to revert to the hard mask edge, you can do this using the Unsoften brush or by pressing the Undo button.
The two most impressive tools that are used to deal with complex objects are Tree & Sky and Object In Sky. With these brushes, you paint over the object to separate it from the sky by applying an intelligent mask. They’re certainly powerful tools, but when you zoom in you may find that masking isn’t perfect. That said, though, these complex selections are far quicker to make in LandscapePro than they are in any other editing software.
The remaining tools are Horizon Line and Small Objects. Horizon Line allows you to quickly mark the position of the horizon for a perfect sky to land or sea mask. Small Objects deselects small objects in a larger labelled area such as a boat in water.
These tools make the process of creating masks easy, but it still takes time to mask every element within a scene if this is what you want to do. One thing worth noting is that you can either mask the whole image, or just the elements that you wish to work on.
Making adjustments
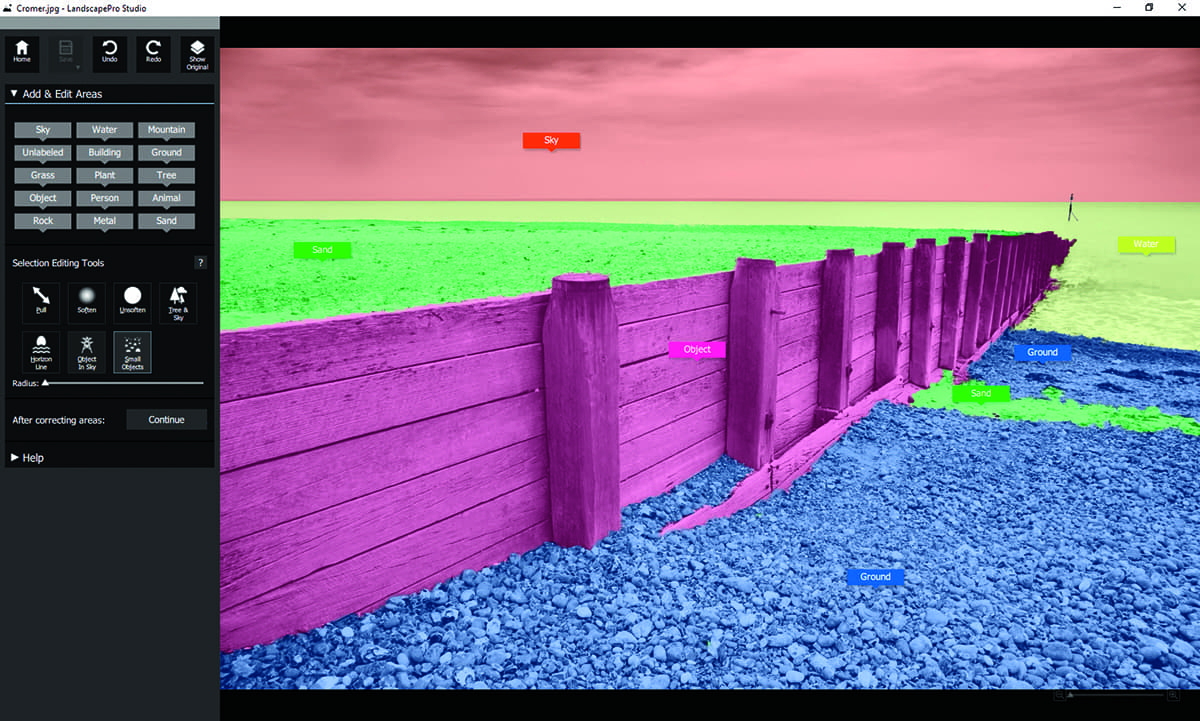
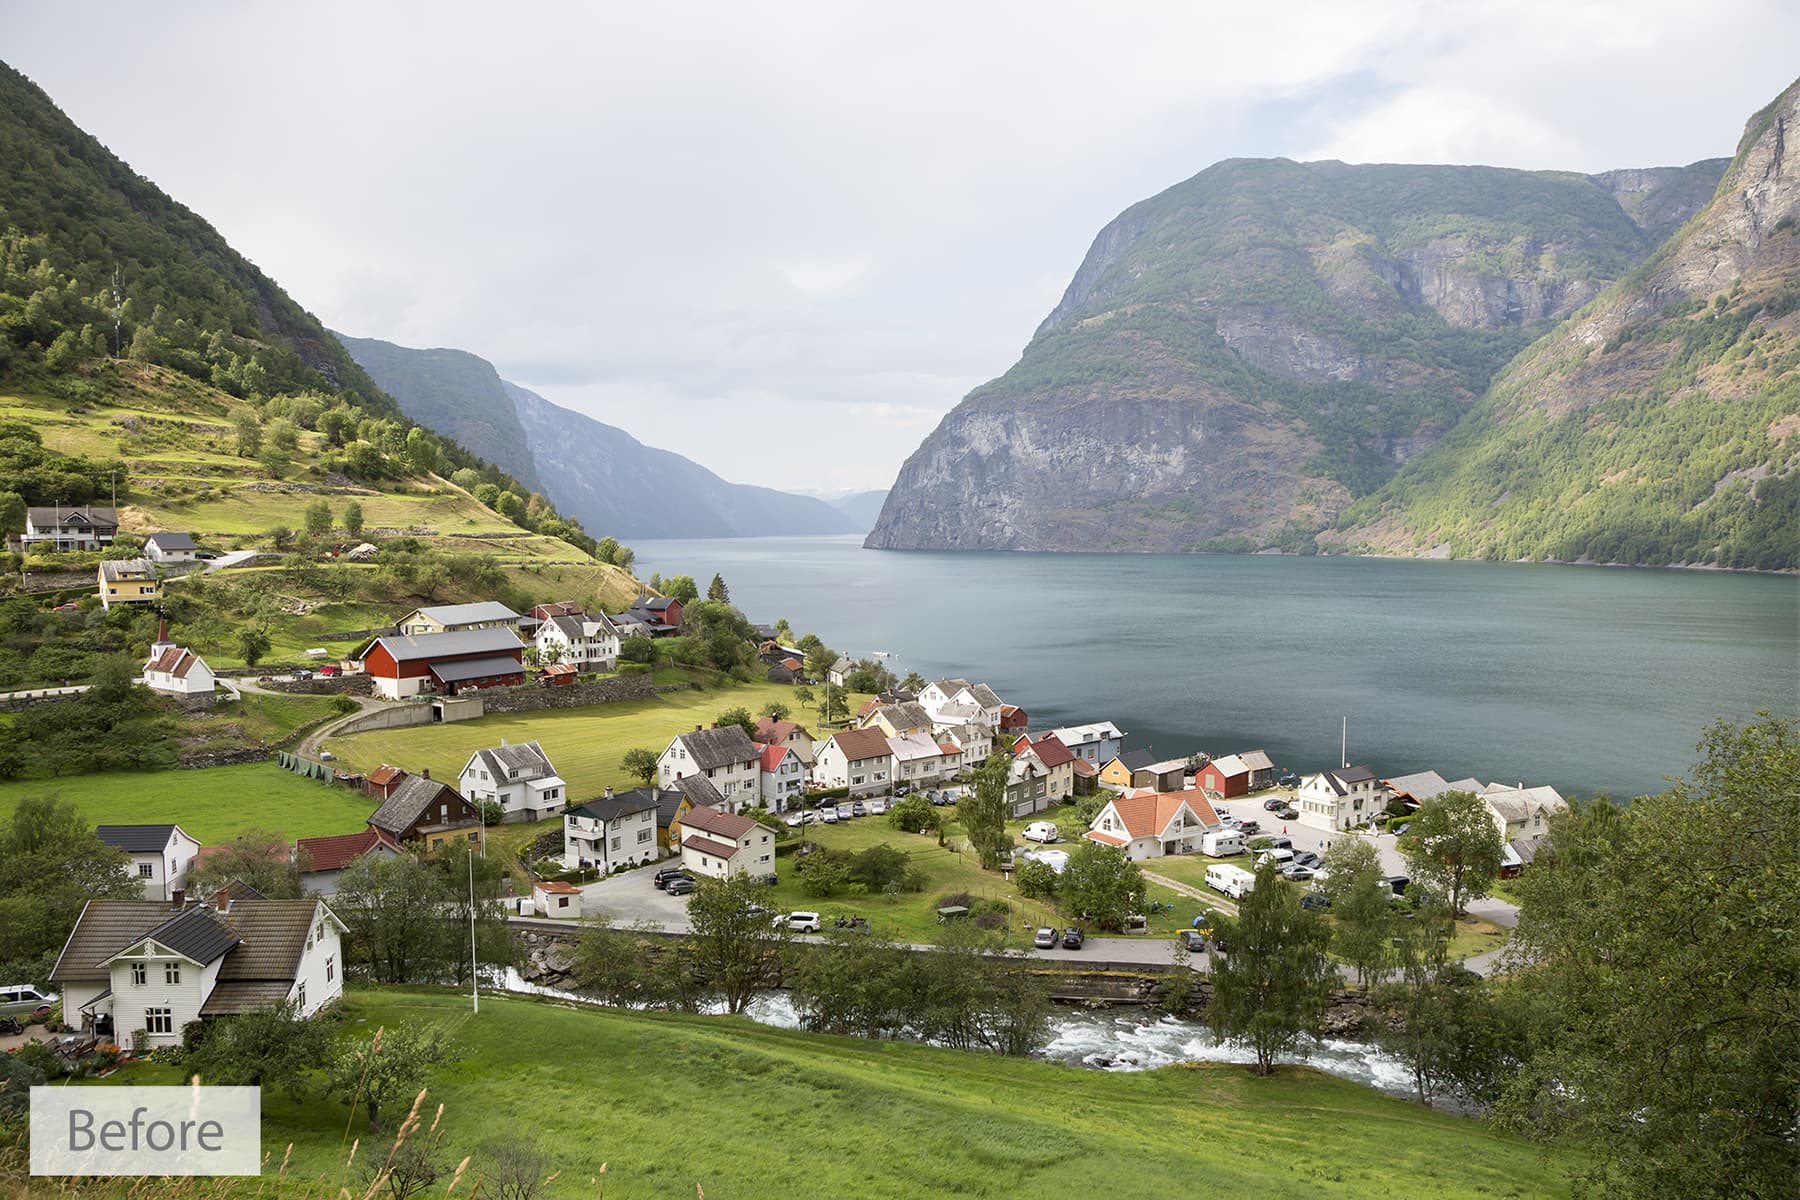
LandscapePro turns the workflow on its head by requiring different elements within the image to be selected before editing takes place
Once you’ve masked the image, it’s time to move on to making adjustments. If you labelled and masked all parts of the image, these will appear as dropdown menus on the left. If you only masked a few areas, anything not masked will be called unlabelled.
Each individual section is clearly labelled, and there are also dropdowns for global image adjustments and lighting. Within these areas there are sliders for taking manual control, alongside presets in some of them for instant one-click effects. You could make drastic changes at this stage, but don’t get carried away. A little reserve definitely goes a long way with this piece of software.
LandscapePro allows you to make adjustments that are as big and bold, or as subtle as you like. It ultimately comes down to what you want to achieve. As a dedicated landscape photographer, could it serve all your needs? Probably not – with a lack of cloning tools, you’re always going to need Photoshop or Elements. But what it does offer is a new way of working that will almost certainly appeal to some photographers.
Our verdict
LandscapePro redefines the way photographers can edit their shots with a new workflow, and has powerful algorithms for selecting/masking elements within images, as well as performing tasks such as relighting a scene.
The results from LandscapePro may not appeal to purists, but if you want to make dramatic changes to your shots without the need to learn complicated editing techniques, this software is definitely for you.
£29.95 | www.landscapepro.pics