One of the best ways to draw the viewer’s eye to an area of a photograph is through the use of selective focus. This can be done using a lens at its widest aperture to achieve a shallow depth of field, but you can also blur an image in Photoshop at the post-production stage. Although the Filter menu has 16 different blur filters, only the Lens Blur and Blur Gallery filters are capable of simulating how a photograph should look when the lens is out of focus. This is because for a blur to look convincing, the filter must recreate what happens when light entering the lens creates a defocused image.
Blur Gallery filters
The Blur Gallery filters in Photoshop provide a simpler interface and faster processing for the post-production of images. This is because they are able to make use of the computer’s Graphics Processing Unit (GPU) to provide speedier preview updates. There are several different filter modes you can apply, but to simulate a Lensbaby-type look I find that the basic Field Blur mode offers the photographer the most control. By adding multiple Field Blur pins, you can precisely determine which areas you wish to keep sharp and which you would like to appear blurred and by how much. As you tilt a Lensbaby lens you can also distort the perspective. I therefore find it helps to use the Camera Raw filter to apply manual Transform adjustments to simulate the effect you get when the lens is tilted at an angle to the sensor plane, and combine this with a Blur Gallery effect.
1. Convert to Smart Filter
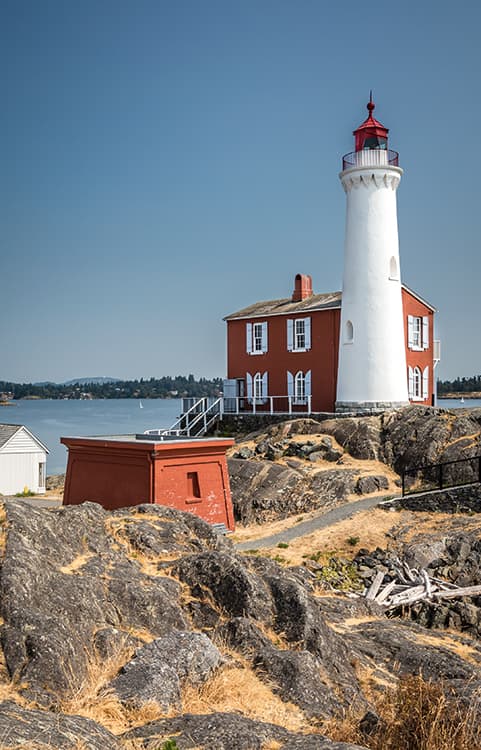
I started with this picture of a lighthouse, which was photographed with a Canon EOS 650D using a wideangle zoom lens. The original photo was shot using an f/9 aperture, which created a large depth of field. I went to the Filter menu in Photoshop and converted the Background layer to a Smart Filter.
2. Transform Panel
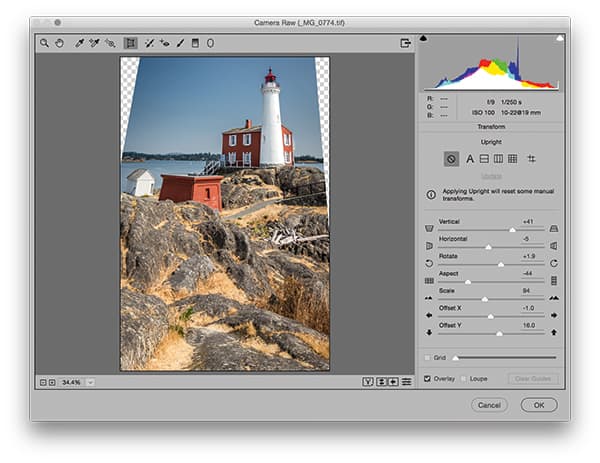
From the Filter menu, I chose the Camera Raw Filter, and from this dialog box I clicked the Transform tool to reveal Transform panel controls. I adjusted the Vertical and Horizontal sliders for perspective distortion. I adjusted the Scale and Offset sliders to resize and reposition the image.
3. Field Blur
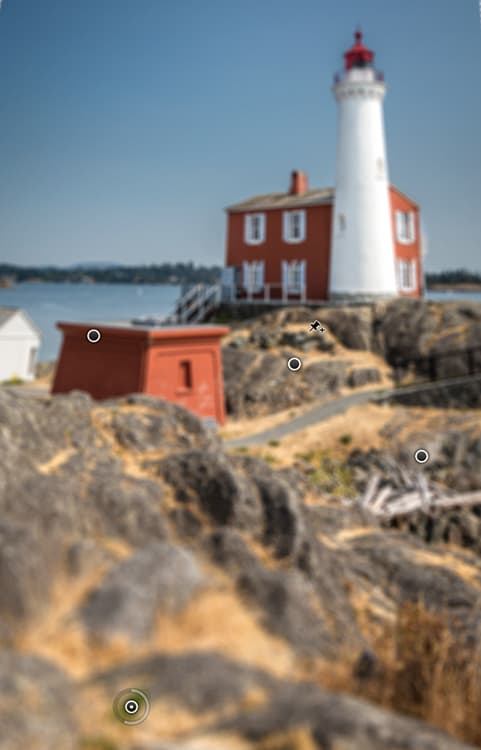
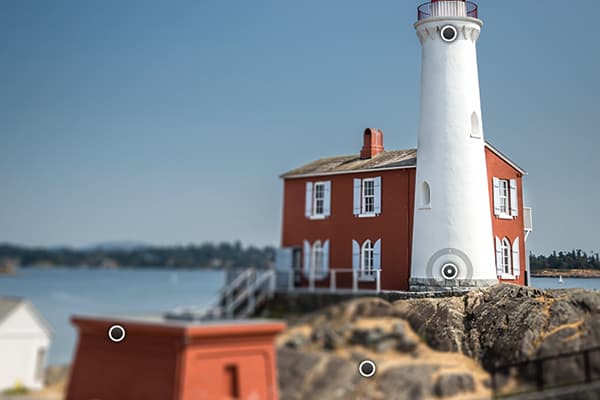
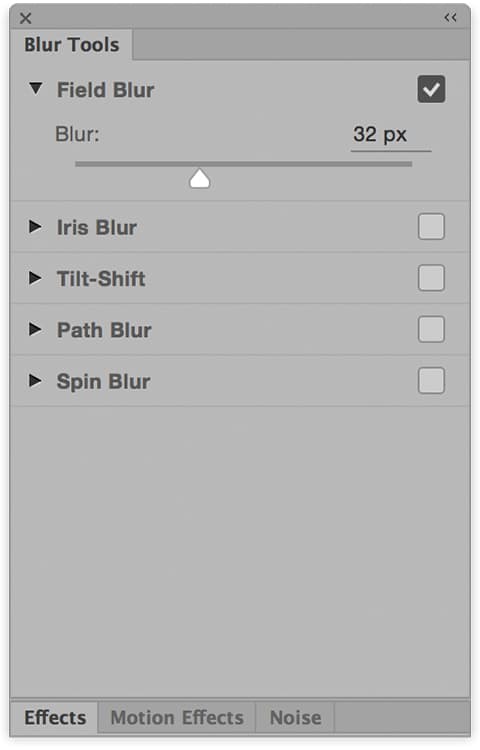
I clicked OK to apply the Camera Raw Filter and then chose Filter>Blur Gallery>Field Blur. In this step I added several Field Blur pins to which I applied varying amounts of blur. In this screenshot you can see how I added the greatest amount of blur to the bottom of the frame.
4. Adding more pins

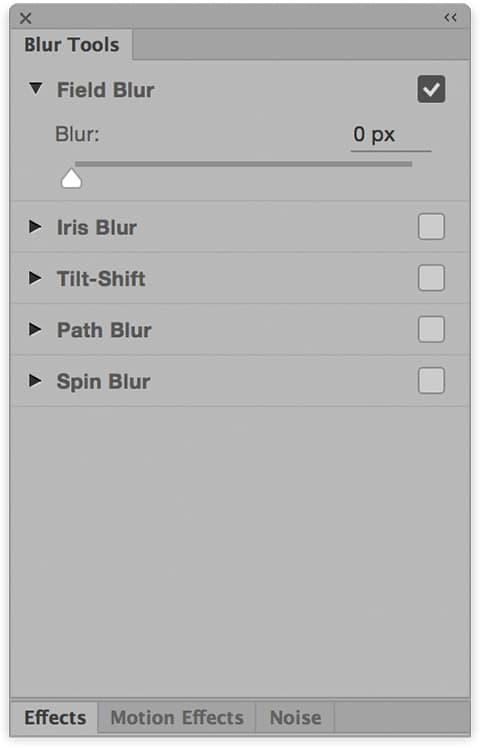
Finally, I added two more Field Blur pins – one at the bottom of the lighthouse and one at the top. This time the Blur amount was set to zero, which meant these areas of the photograph (and the areas between) remained sharp. Because all these steps were applied to a Smart Filter layer, the settings remained fully editable.
Additional Gallery filters
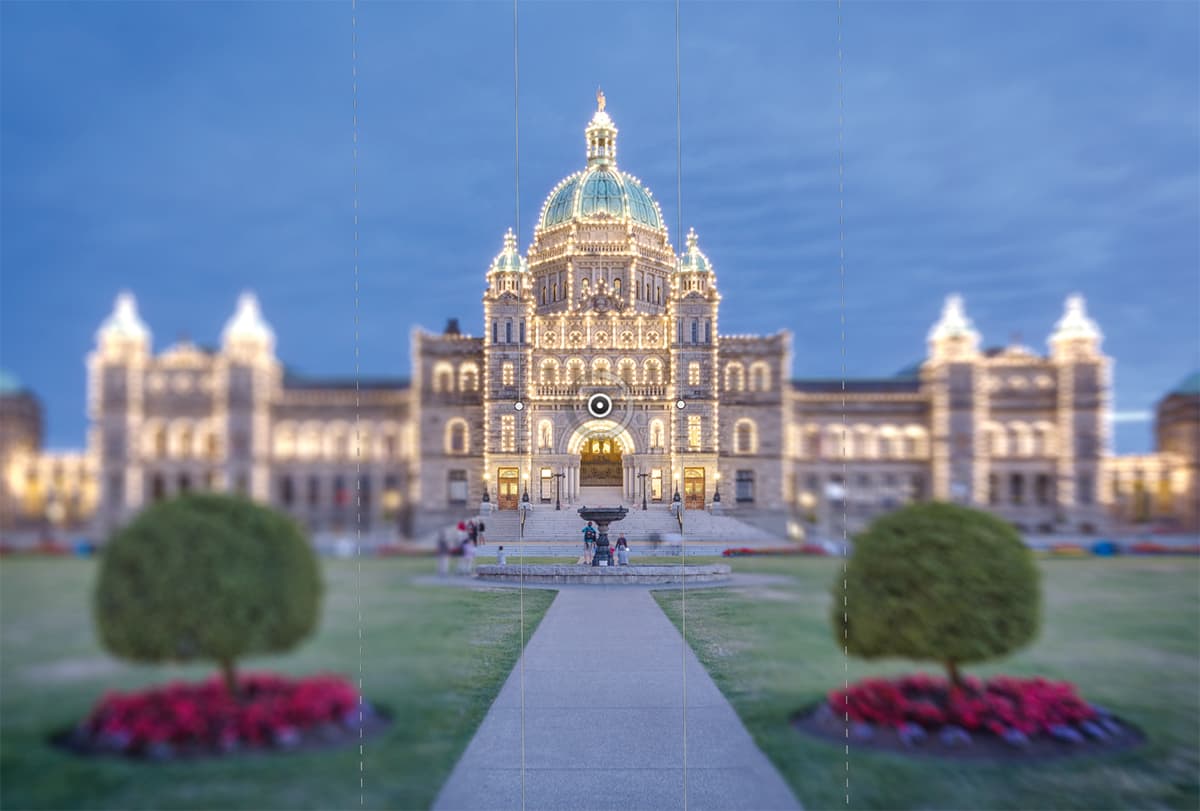
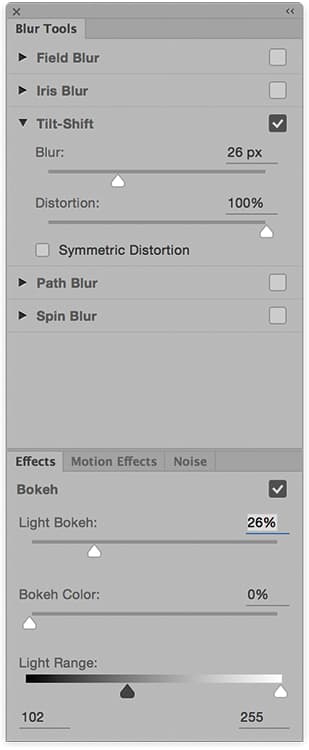
The Tilt-Shift Blur Gallery filter has simple controls to simulate a tilt-and-shift lens. Here, I adjusted the Bokeh sliders in the Effects panel to make the specular highlights blow out slightly
Additional Blur Gallery filter controls are available in the Effects, Motion Effects and Noise panels. When you adjust the Light Bokeh and Light Range sliders, the filters convert the image data into a pseudo HDR edit space and use this to calculate a realistic- looking lens blur effect. With the Tilt-Shift and Iris Blur filter modes, the filter overlay controls can be adjusted to determine the angle and width of the blur effect and transition areas. Both these filters are good for creating quick blur effects. You can combine different Blur Gallery filter effects as well.
Lens Blur filter

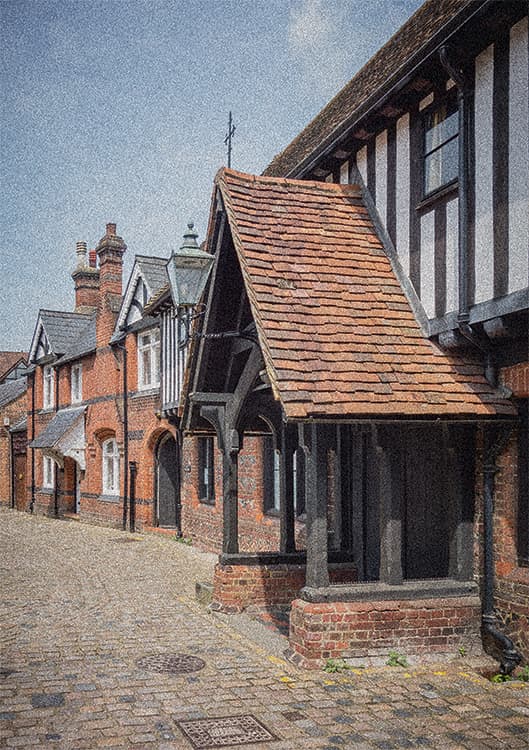
The Lens Blur filter has various controls to create realistic blur effects. Because of the complex processing involved, it tends to run quite slowly, but you can make the filter preview update quicker by selecting the Faster mode. This filter has been largely superseded by the Blur Gallery filters, but still has some unique features. For example, if you create and save an Alpha channel mask, you can use this as a blur focal-distance depth map. The Lens Blur filter can be used to adjust the lens aperture iris shape, which will affect the appearance of out-of-focus highlights. The following example shows how an Alpha channel mask was created to determine which parts of the photograph would remain sharpest, using the default Iris slider settings.
1. Black-to-white gradient and using the Brush tool for more detail
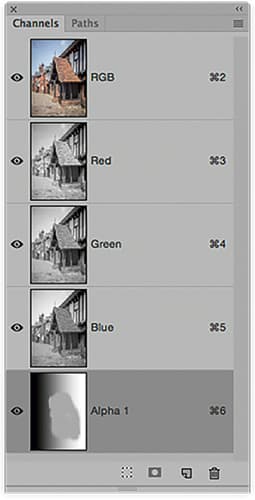
In the post-processing of this photograph I clicked on the Channels panel and added an empty new channel (Alpha 1). After selecting this new channel, I added a black-to-white gradient. Next, I sampled a light-grey colour from the gradient and painted on the mask using the Brush tool. This helped to define the porch entrance.
2. Apply the Lens Blur filter
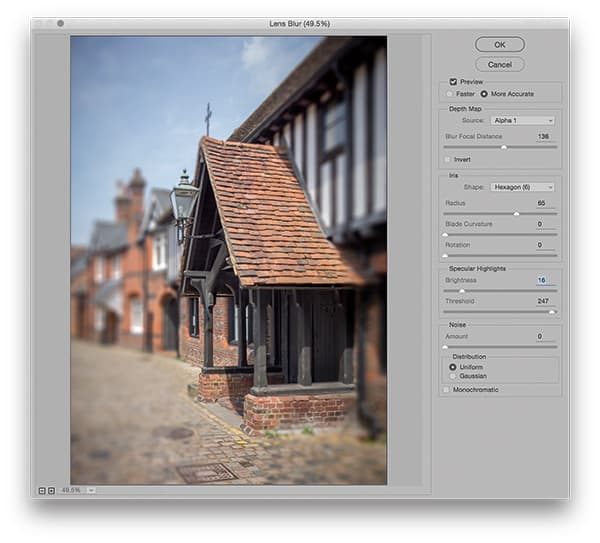
With the RGB composite channel selected, I went to Filter>Blur >Lens Blur filter. Selecting the Alpha 1 mask as the Depth Map Source, I set the porch in the image as the sharpest point of focus. The Blur Focal Distance slider adjusted accordingly.
Martin’s top tips
Strong blur
While it is possible to simulate blur effects in Lightroom by adding localised negative Sharpness adjustments, you really need Photoshop if you want to create strong blur effects like the ones shown here.
Faster processing
The Blur Gallery filters in Photoshop are generally more effective than the Lens Blur filter. This is because the Blur Gallery filters make use of the Graphics Processor Unit to speed up the preview rendering.
Adding noise
If you add a Blur Gallery effect to an image that has a lot of noise, you can add matching noise to the blur effect via the Blur Gallery Noise panel.
Realistic blur
To make lens blur effects look more realistic, it can help to use the Light Bokeh slider to add sparkle to the out-of-focus specular highlights.
Keeping effects editable
Convert the image layer to a Smart Object/Smart Filter before you apply a blur effect. In this way, the effect settings will remain editable.
Plug-ins for Smart Filters
To allow the Lens Blur filter to work on Smart Filter layers, search for ‘EnableAll PluginsForSmartFilters.jsx’. Find this Adobe script and learn how to install and enable it in Photoshop.

