Zoner Photo Studio X: At a glance
- Raw converter and image editor
- For Windows computers only
- $4.99/month or $49/year (1-person license)
- One-month free trial available
- www.zoner.com
This review was originally published on 17th June 2021, and substantially revised on 2nd December 2021 to take into account the program’s major Autumn 2021 update. All of the sample images, and where necessary the screen shots, have been updated to take into account the new version’s expanded feature set and significantly improved raw processing capabilities.
Zoner probably isn’t the first name that will trip off most photographers’ tongues when it comes to image editing. But the Czech-based company is long established, with its Photo Studio program first appearing way back in 2004. Since then, the program has developed into a uniquely comprehensive imaging package.

Zoner Photo Studio X has all the tools you need to make attractive raw conversions. Canon EOS RP, RF 24-105mm F4L IS USM, 1/100sec at f/8, ISO 100. Developed using Zoner Photo Studio X (Autumn 2021 update)
Indeed in what is a very crowded market, Zoner Photo Studio X (ZPS) stands out for its sheer breadth of capabilities. To describe it as a raw converter and image editor is almost to do it an injustice, because it promises to do pretty much everything you might need once when you get home from taking pictures. It can be used to download and organise pictures from your camera, develop and edit raw files, and then build web galleries, design photo books and buy prints. It’ll even integrate with external services such as Dropbox and Facebook.
ZPS is, however, only available for Windows, so Mac users can stop reading now. It works on a subscription basis only, with no option to buy a one-off license, which might not endear it photographers who are looking for an alternative to Adobe software. But it costs much less, at $4.99 per month, which at the time of writing equates to about £3.50, compared to £10 for Adobe’s Photography Plan.
ZPS is capable of excellent output. Olympus E-M5 with 12-40mm f/2.8 Pro at 18mm, 1/250sec at f/5, ISO 200. Developed using Zoner Photo Studio X
While some people reject the subscription model on principle, its big advantage is that you continue to get all the latest updates and new features for as long as you keep on paying. Zoner also plays nicely if you decide to end your subscription, as you get a 30-day grace period during which the program continues to work fully. After that, its editing functions will stop working but you’ll still be able to browse your images and export them to standard formats, meaning you should never lose your work.
ZPS X: Camera support
Zoner supports a decent list of cameras, but it’s not as comprehensive or as quick to support new models as Adobe. However, if you install Adobe’s free DNG Converter, ZPS can use it in the background to decode raw files that it doesn’t natively recognise. The only catch is that you want to support a shiny new camera you’ve just acquired, you’ll probably have to install the latest DNG Converter version manually.
Zoner Photo Studio X – Autumn 2021 update
In mid-September 2021, Zoner released a major update to Photo Studio X. From a photographer’s point of view, the most significant change is that the raw development process has been substantially updated, with the firm promising up to 6x faster photo editing. Crucially, Zoner has also revised the noise reduction algorithms, which is very welcome as I found them to be a weakness before.
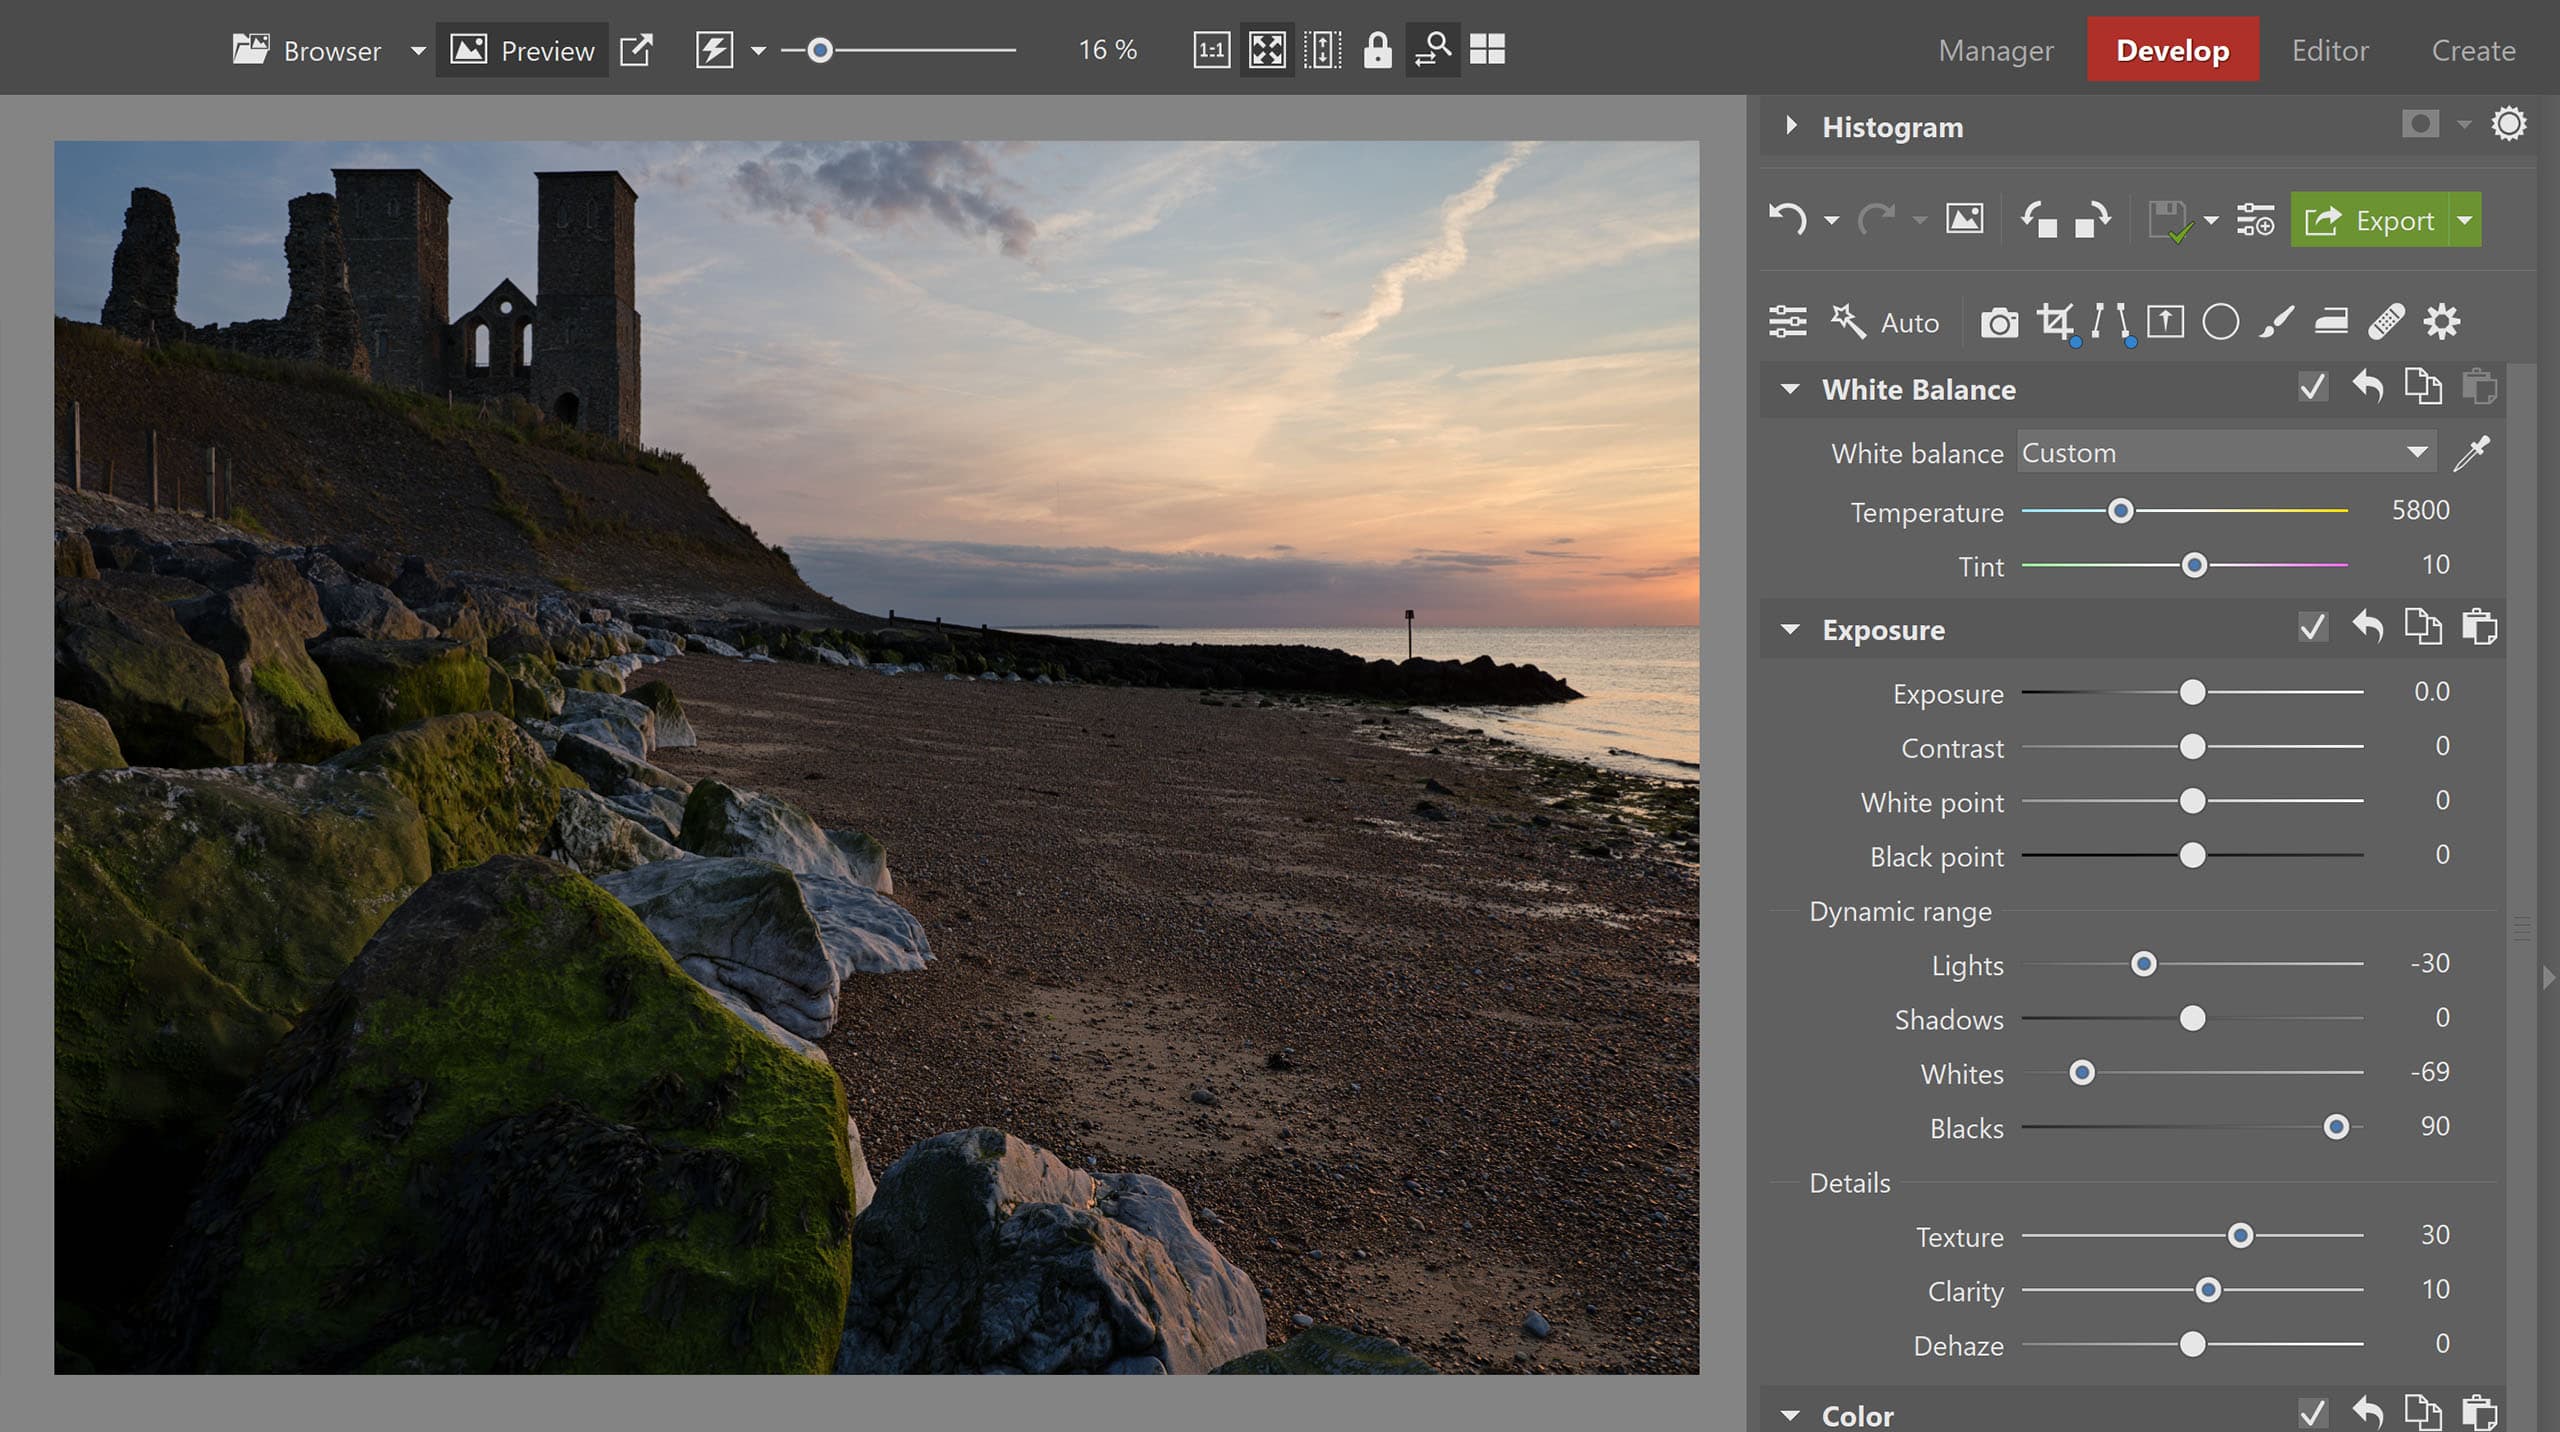
ZPS X’s new Whites and Blacks controls bring extra flexibility compared to the usual Shadows and Highlights. There’s now also a Texture slider for enhancing detail
You also get significantly improved control over tonality, with a new Dynamic range section that adds Whites and Blacks sliders, alongside the usual Highlights and Shadows (and in addition to conventional White point and Black point controls). In addition, an Adobe-esque Texture setting is now available to accentuate detail, without affecting the overall contrast. Zoner says it’s also improved how the Clarity control works.
Using Zoner Photo Studio X
As already mentioned, ZPS’s scope is so broad that it’s impossible to touch on all of its features. At heart, it’s perhaps best seen as a non-destructive raw editor of a similar ilk to Lightroom, but it also has a degree of Photoshop-esque layered editing built-in. However, if creative photo-art is your thing, it doesn’t go as far down that route as Skylum Luminar. It’s designed to provide maximum flexibility to advanced users, which means it’s packed full of options and user preferences.
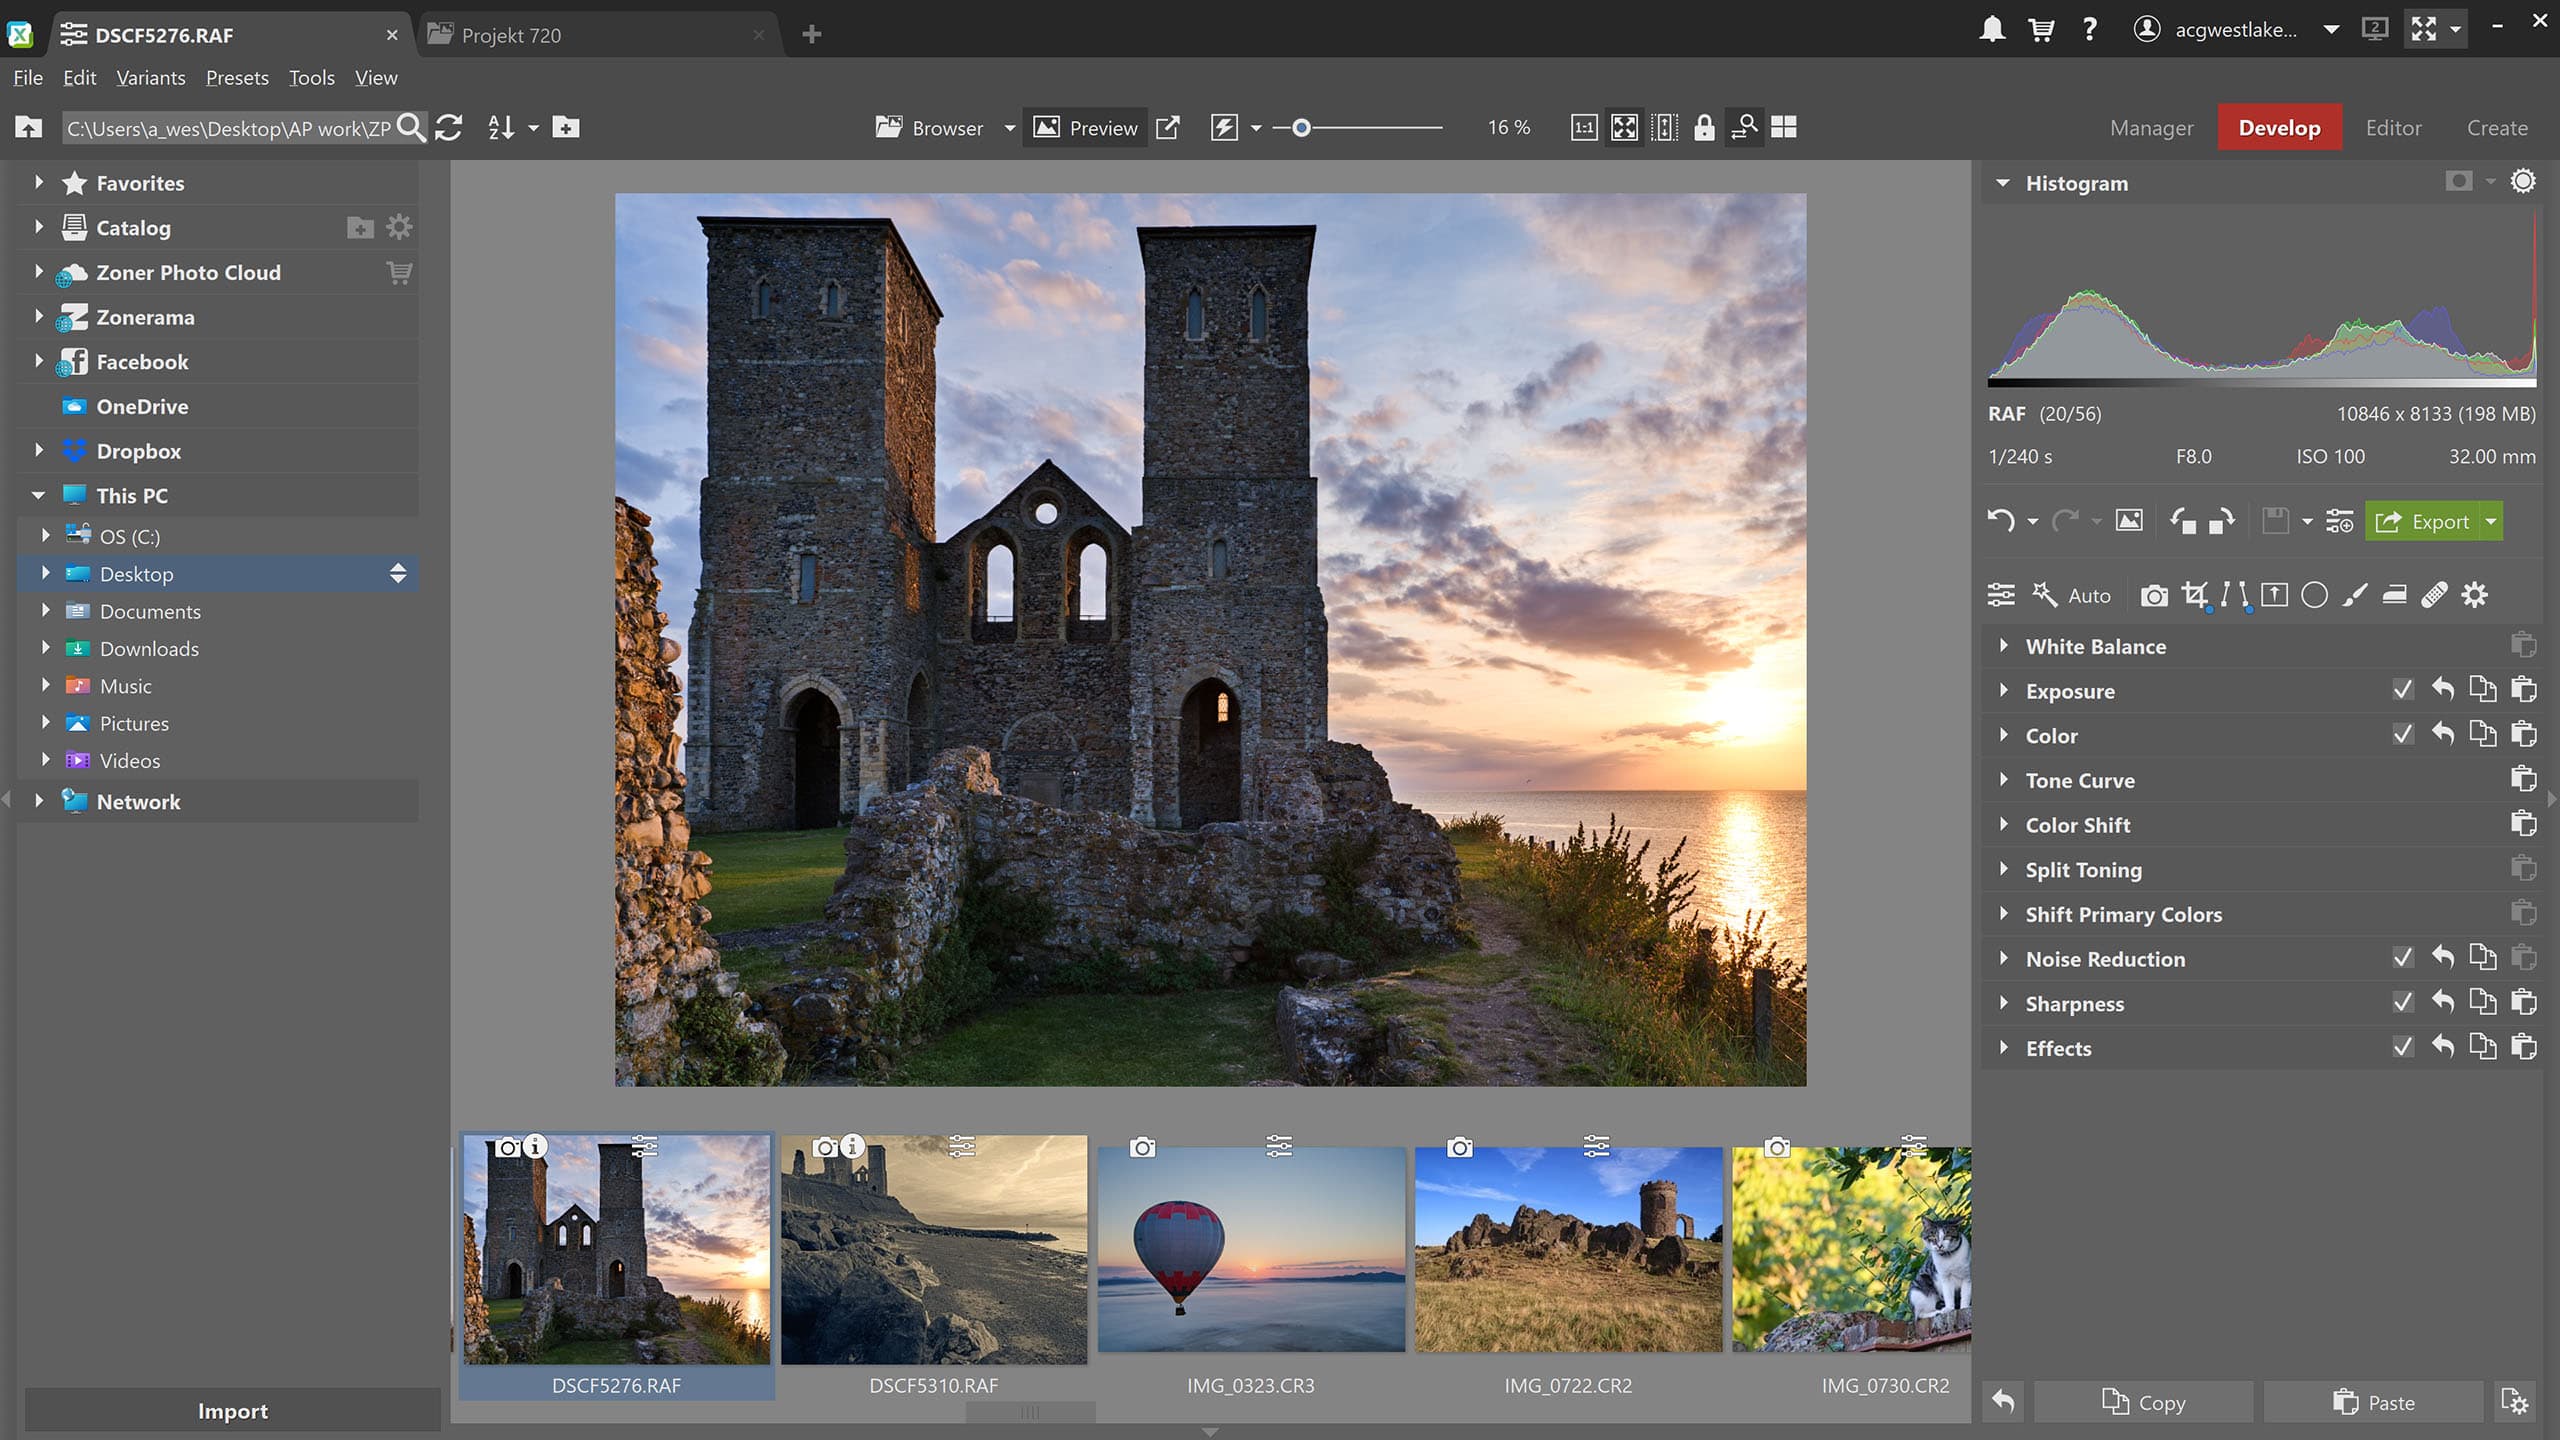
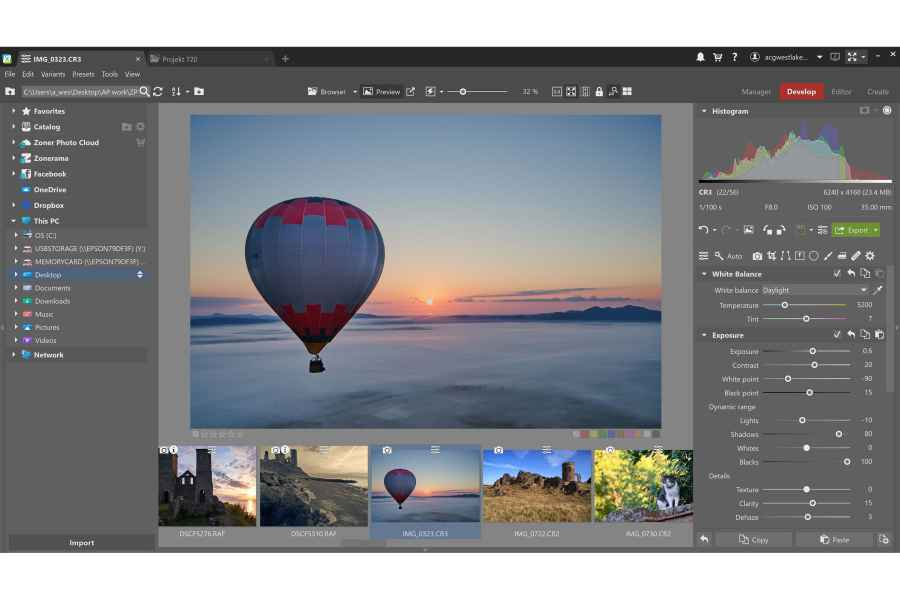
Zoner Photo Studio has a file browser on the left, an image viewer section in the centre including a thumbnail strip, and a control panel on the right
When you start the program, you’re presented with a conventional-looking main window that’s arranged into three sections. On the left is a browser panel that groups together both local folders and external locations and services. Unusually, ZPS can be used with a databased catalogue of images, Lightroom-style, or by simply pointing it towards a folder full of images, like Adobe Bridge. This can be handy for keeping specific projects separate from your main catalogue.
In the middle of the screen, you get a large preview of the image you’re working on, with a toolbar of viewing options above it, and a thumbnail strip below that displays the files in your selected folder. Double-clicking on the preview toggles to an expanded thumbnail browser, which makes it easier to find your desired images, while clicking a small arrow at the bottom of the screen hides the thumbnails to display the image you’re working on as large as possible.
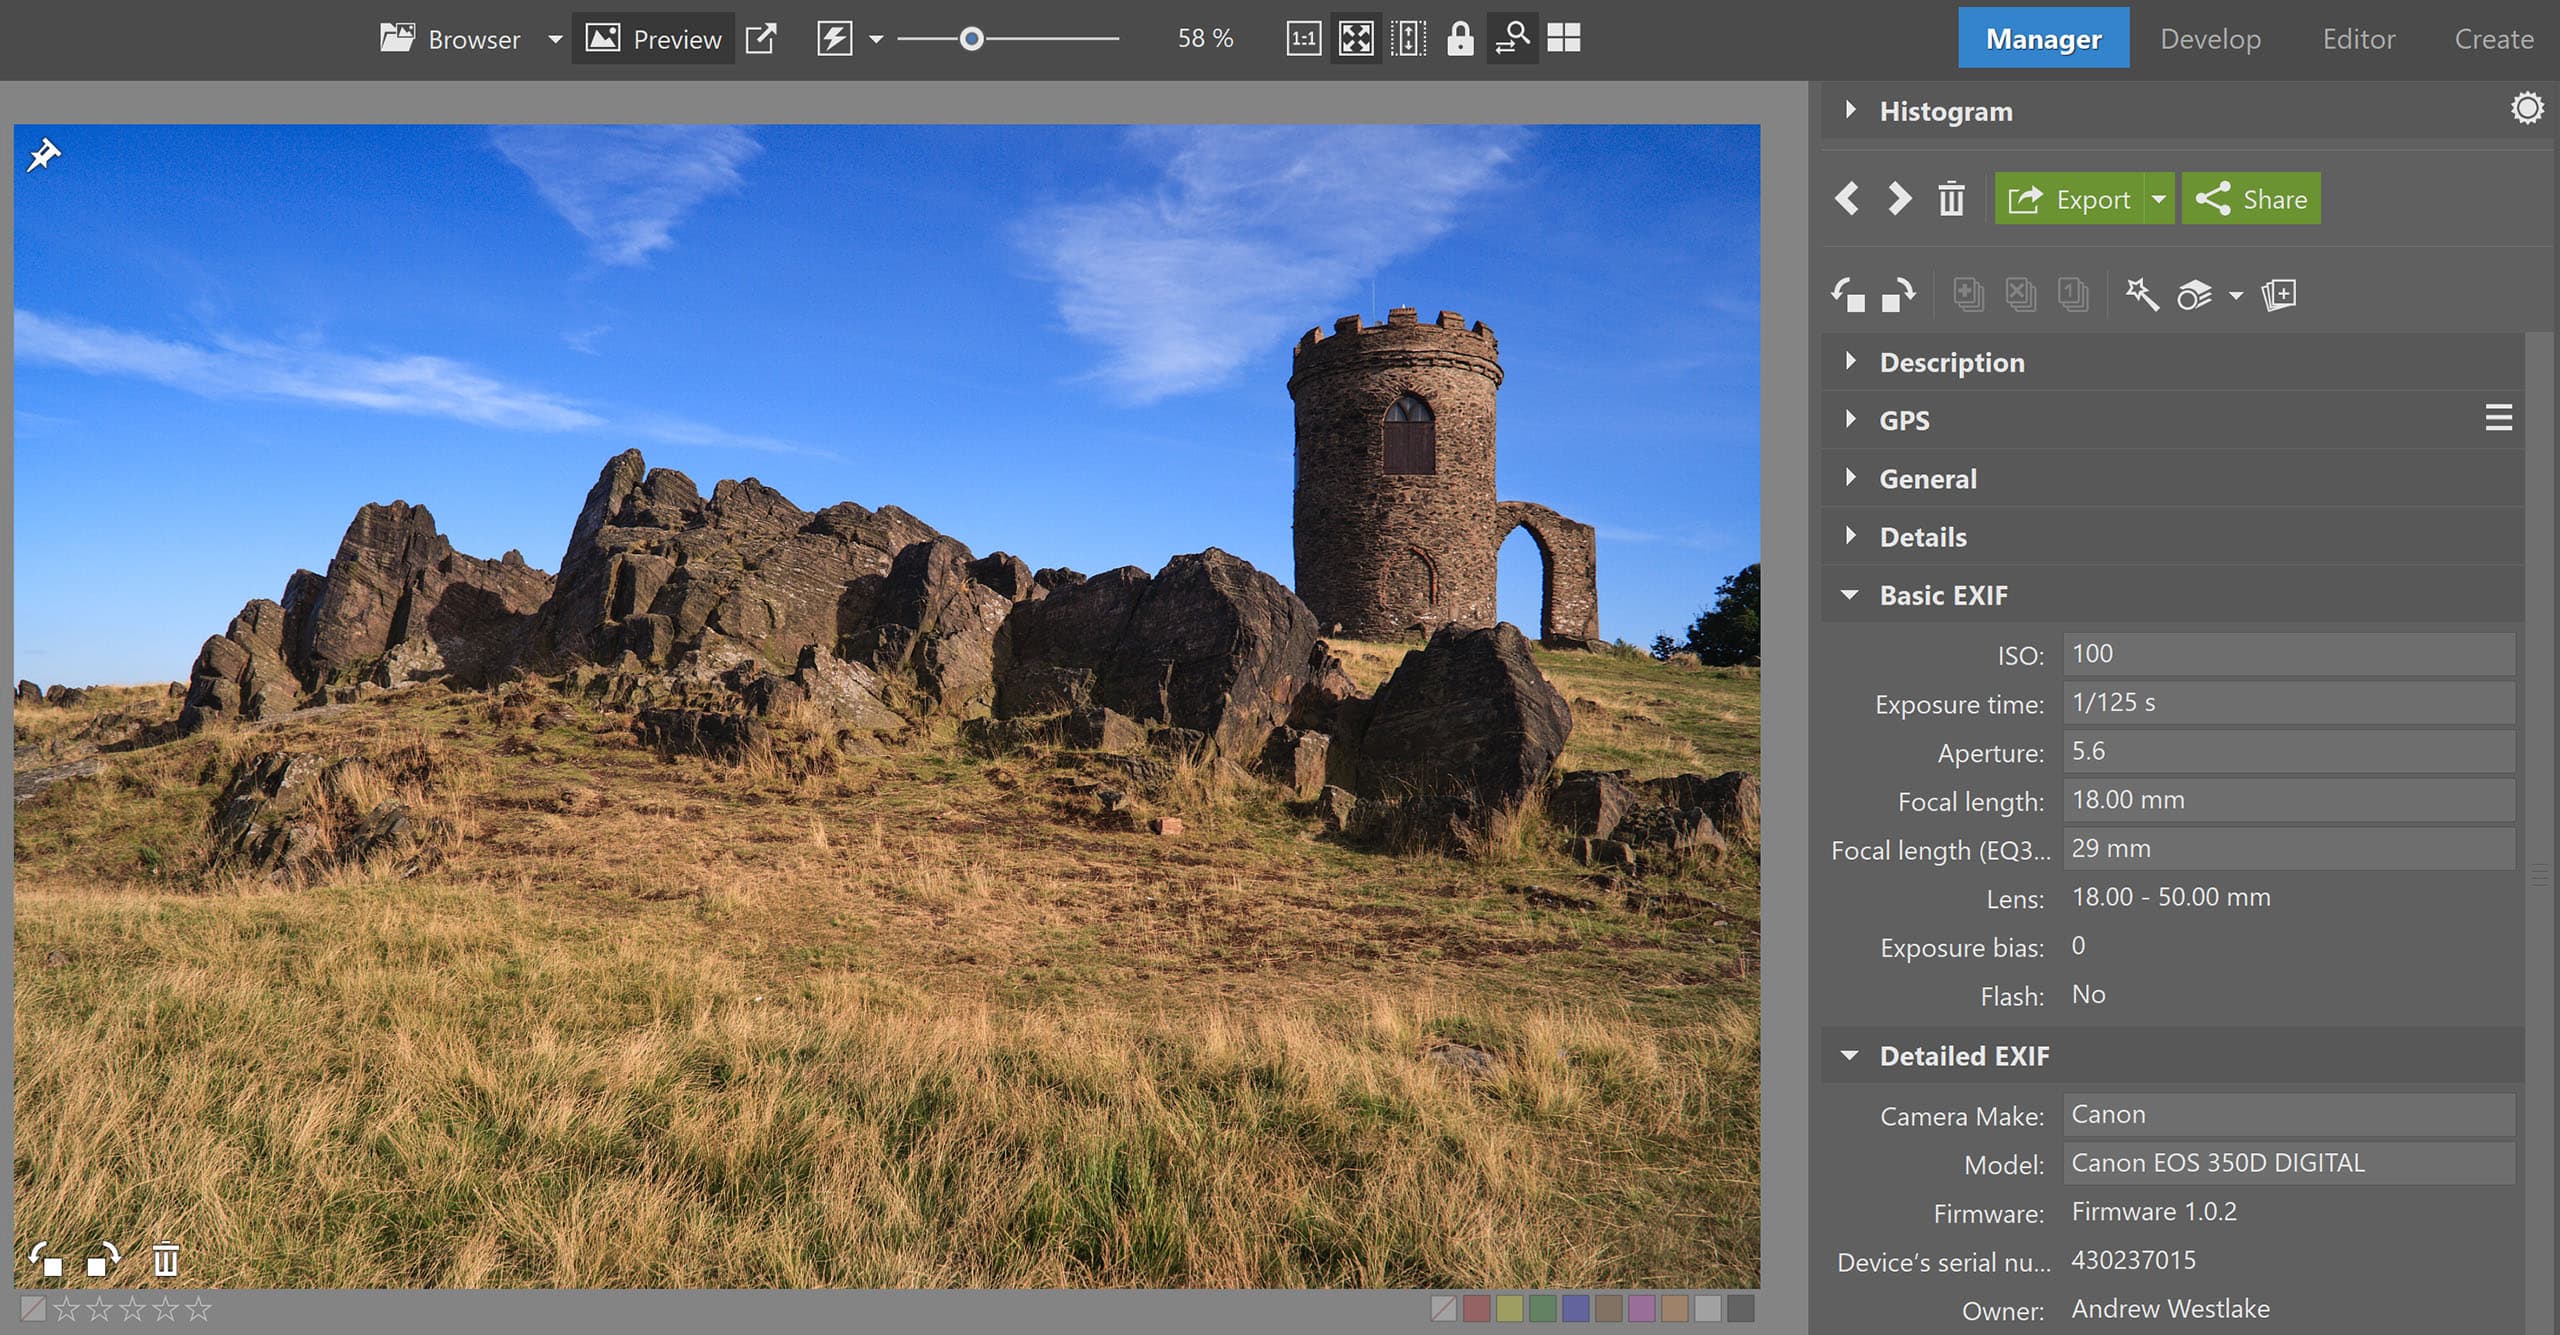
The Manager tab allows you to add keywords and view EXIF data
One particularly neat feature is that you can open multiple folders and images at the same time as tabs, which makes it easier to switch between projects compared to using multiple windows. Overall, it’s probably the best laid-out image editor that I’ve used for photographers who shoot and process raw files.
The business end of the program is located on the right side of the screen, with four sections labelled Manager, Develop, Editor and Create. The first of these provides a range of digital asset management (DAM) functions: you can edit the title, description and keywords, view GPS locations, and examine EXIF data. It’s possible to assign both colour labels and star ratings, which can then be used to filter your images in the browser. Scrolling through images is extremely quick, thanks to ZPS exploiting the JPEGs that are usually embedded in raw files.
Importing images
ZPS has a well-designed module for ingesting images from your memory card. It can organise imported files into folders by the date they were taken, and automatically add information such as the author name, copyright, and keywords. Crucially, if you then take some more pictures using the same card, ZPS will only import the new files.
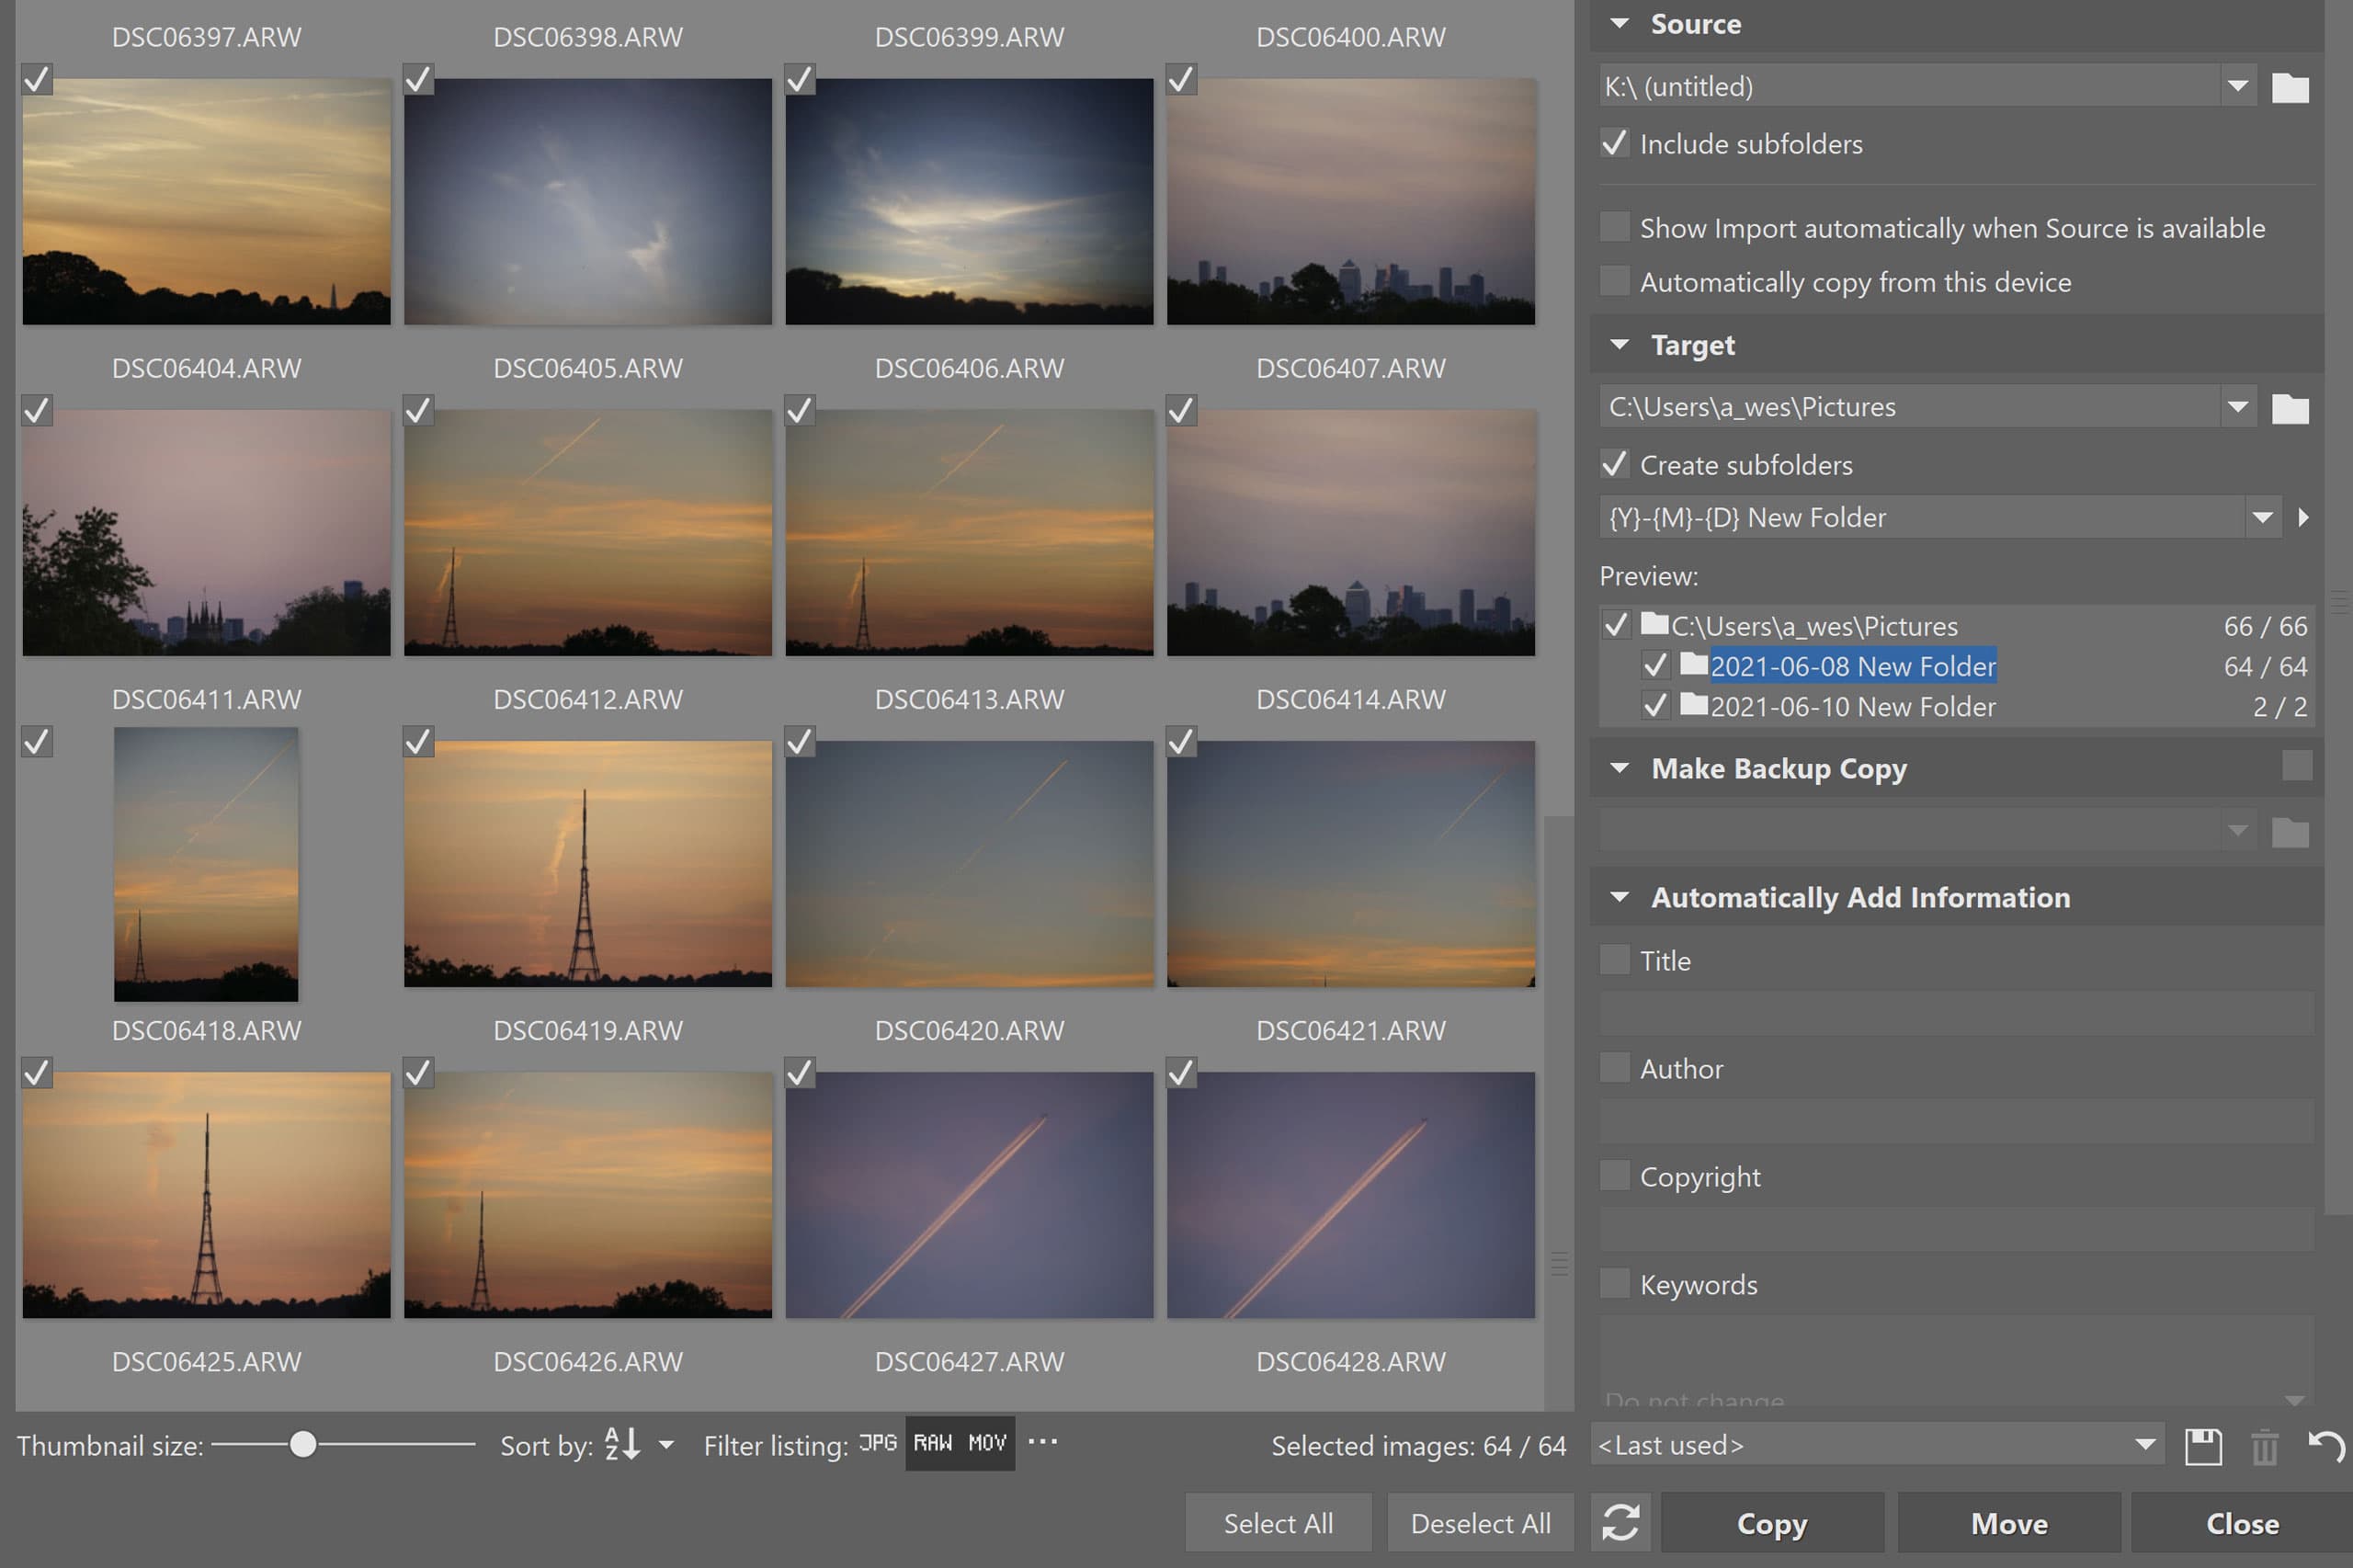
ZPS provides a good set of options for importing images from a memory card onto your computer
It’s also possible to auto-rename images as they’re imported, using the information you’ve added along with the date, time and sequence number. This could be handy for automatically labelling all of the images shot for a specific project or event with a meaningful filename, rather than just the one generated by the camera.
Raw development
Once you’ve picked a file to work on, switching to the Develop tab brings up a full set of raw editing tools that either match or exceed what you’ll find in similar programs. Alongside a comprehensive array of colour and tonal adjustments, there are gradient, radial and brush filters for local adjustments. One notable option you won’t find elsewhere is a Polarization slider, which does a very creditable job of selectively enriching blue skies and foliage in landscape scenes. Obviously, though, it can’t control reflections off surfaces such as glass in the same way as a polarising filter on your lens.
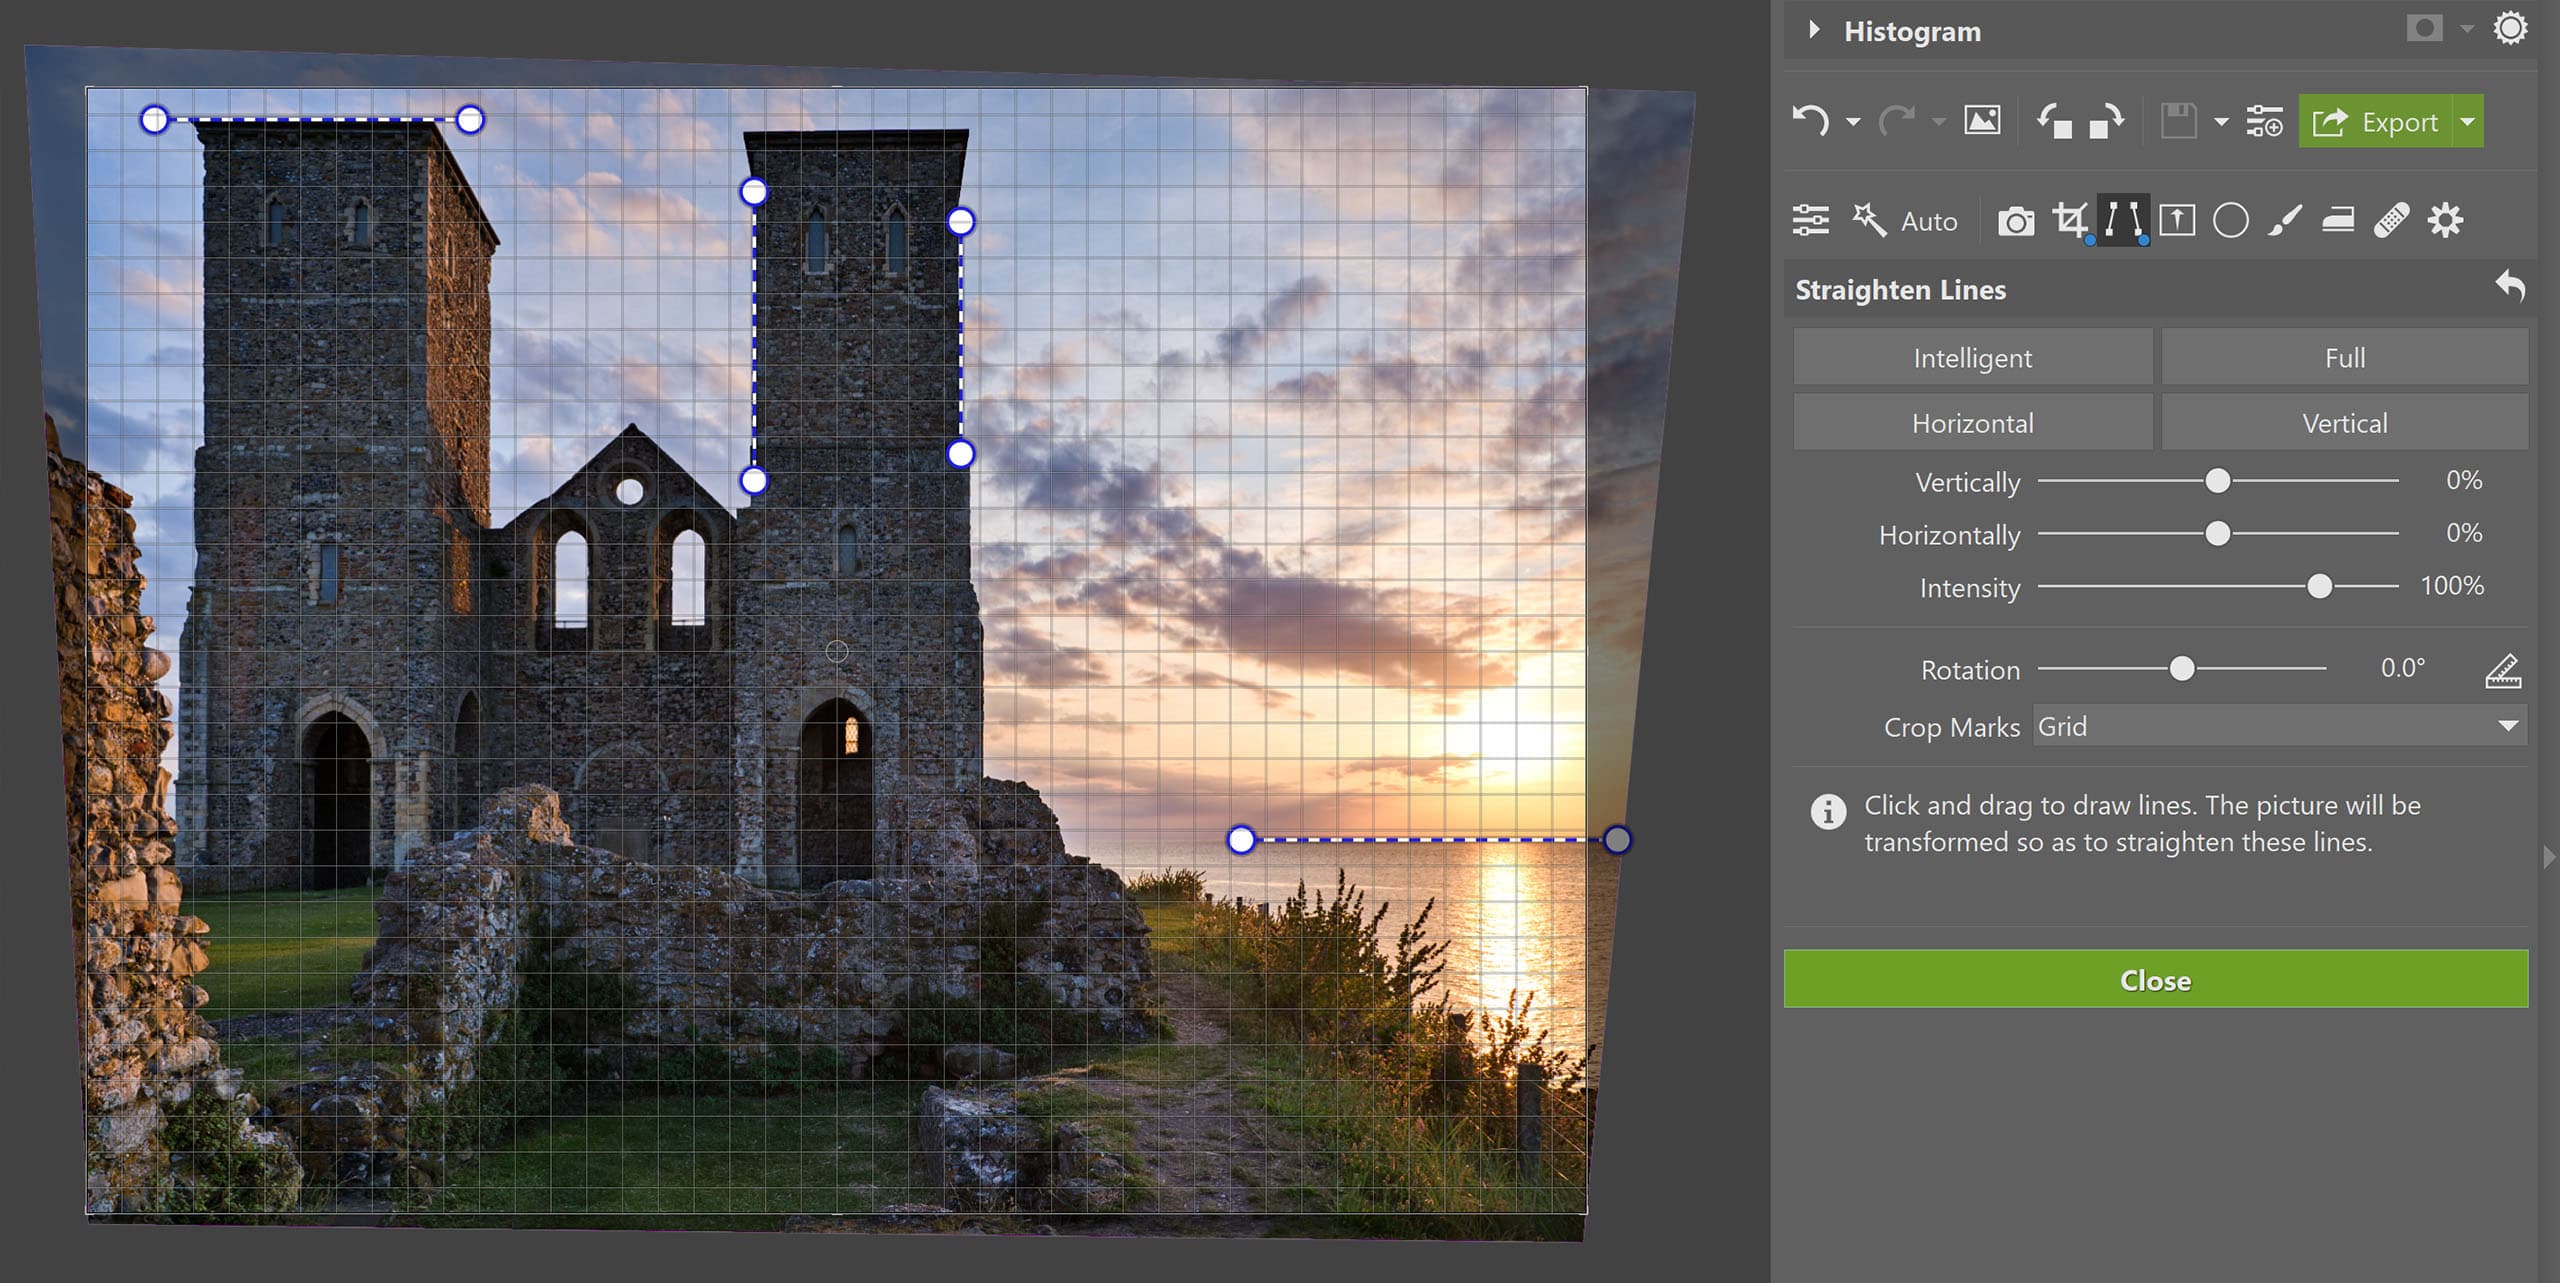
Clicking the Intelligent button in the Straighten window does a great job of correcting perspective distortions
Healing and cloning tools are on hand to deal with sensor dust spots or other unwanted blemishes, and if you use a graphics tablet, it’s possible to set the pen pressure to control various parameters such as the brush size or opacity. A special shout has to go out to Zoner’s excellent perspective correction tools, which do a fantastic job of automatically correcting converging verticals and horizontals, while leaving scope for the user to tweak the results.
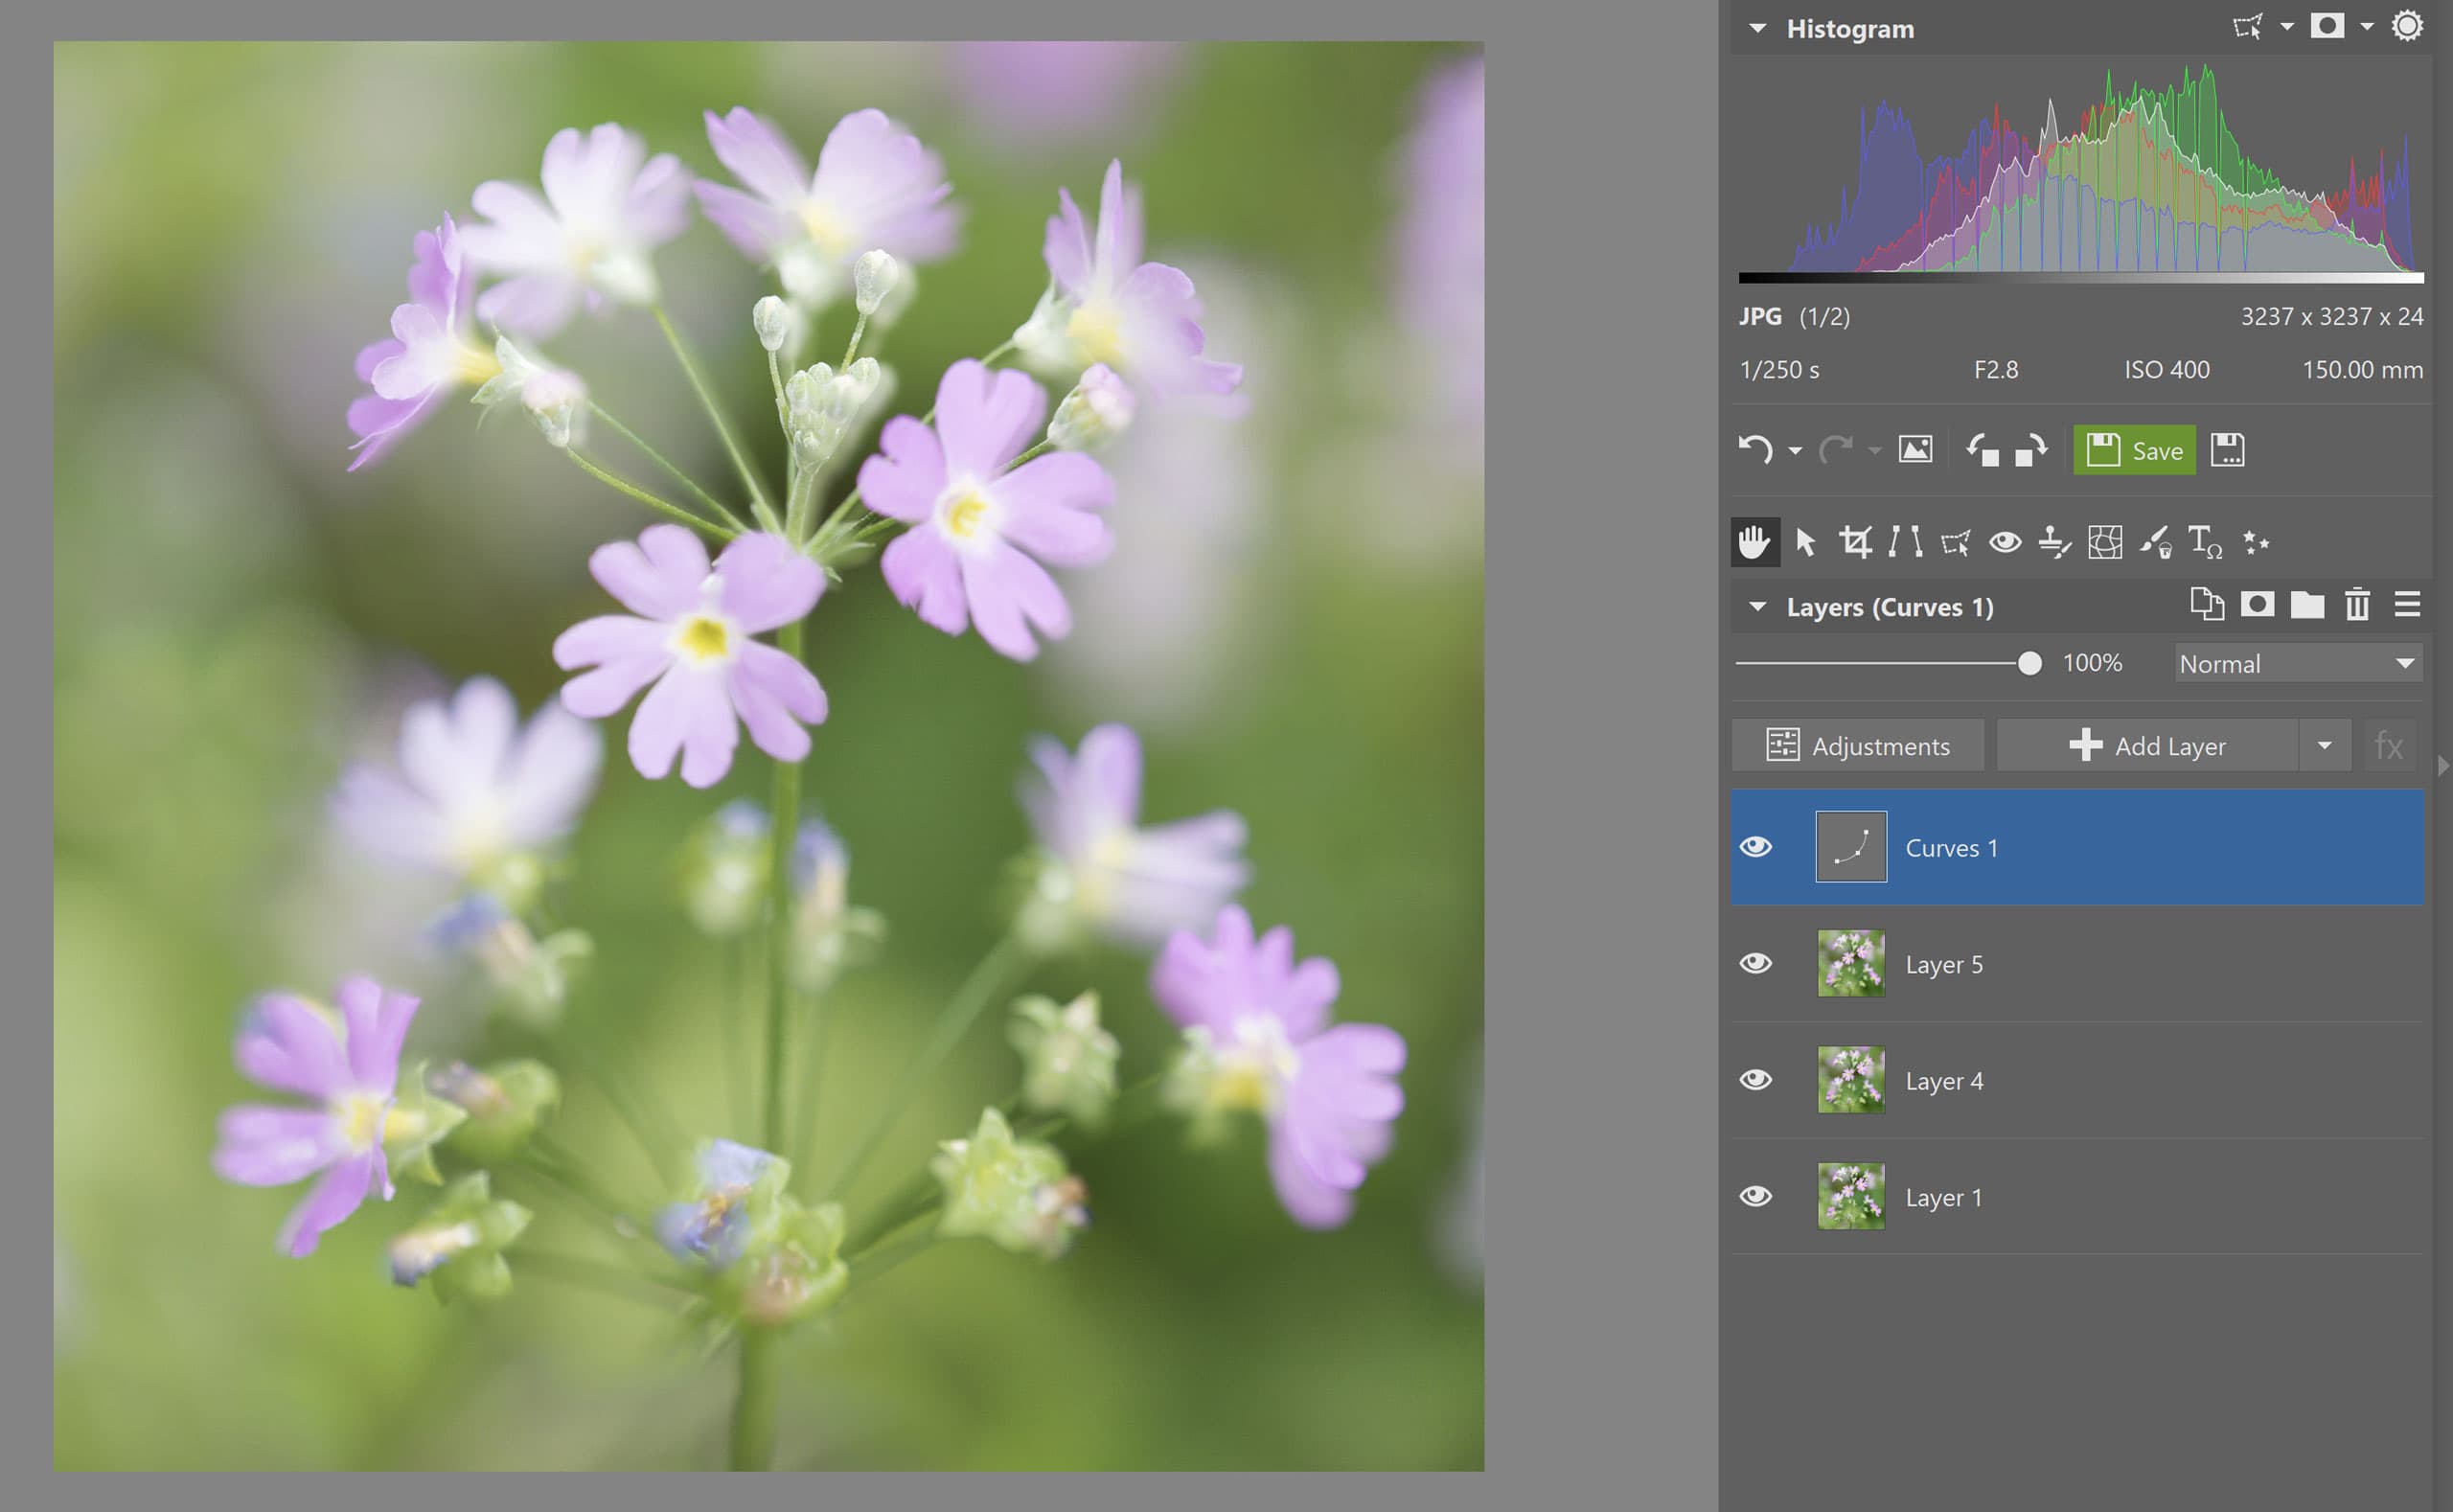
In the Editor module, you can create layered composites
Switch to the Editor tab and you can create layered composites using multiple files, or add graphical elements including text and shapes. While it’s nowhere near as comprehensive as Photoshop, it has the main tools that photographers are likely to need.
Sharing images
Open the Create tab, and you’ll find an extensive set of options for making all kinds of physical output, including photobooks, calendars, prints and postcards. A wide range of templates are built in and impressively straightforward to use. You can either print your creations at home, output them as PDF files, or order them via Zoner’s own online printing service.
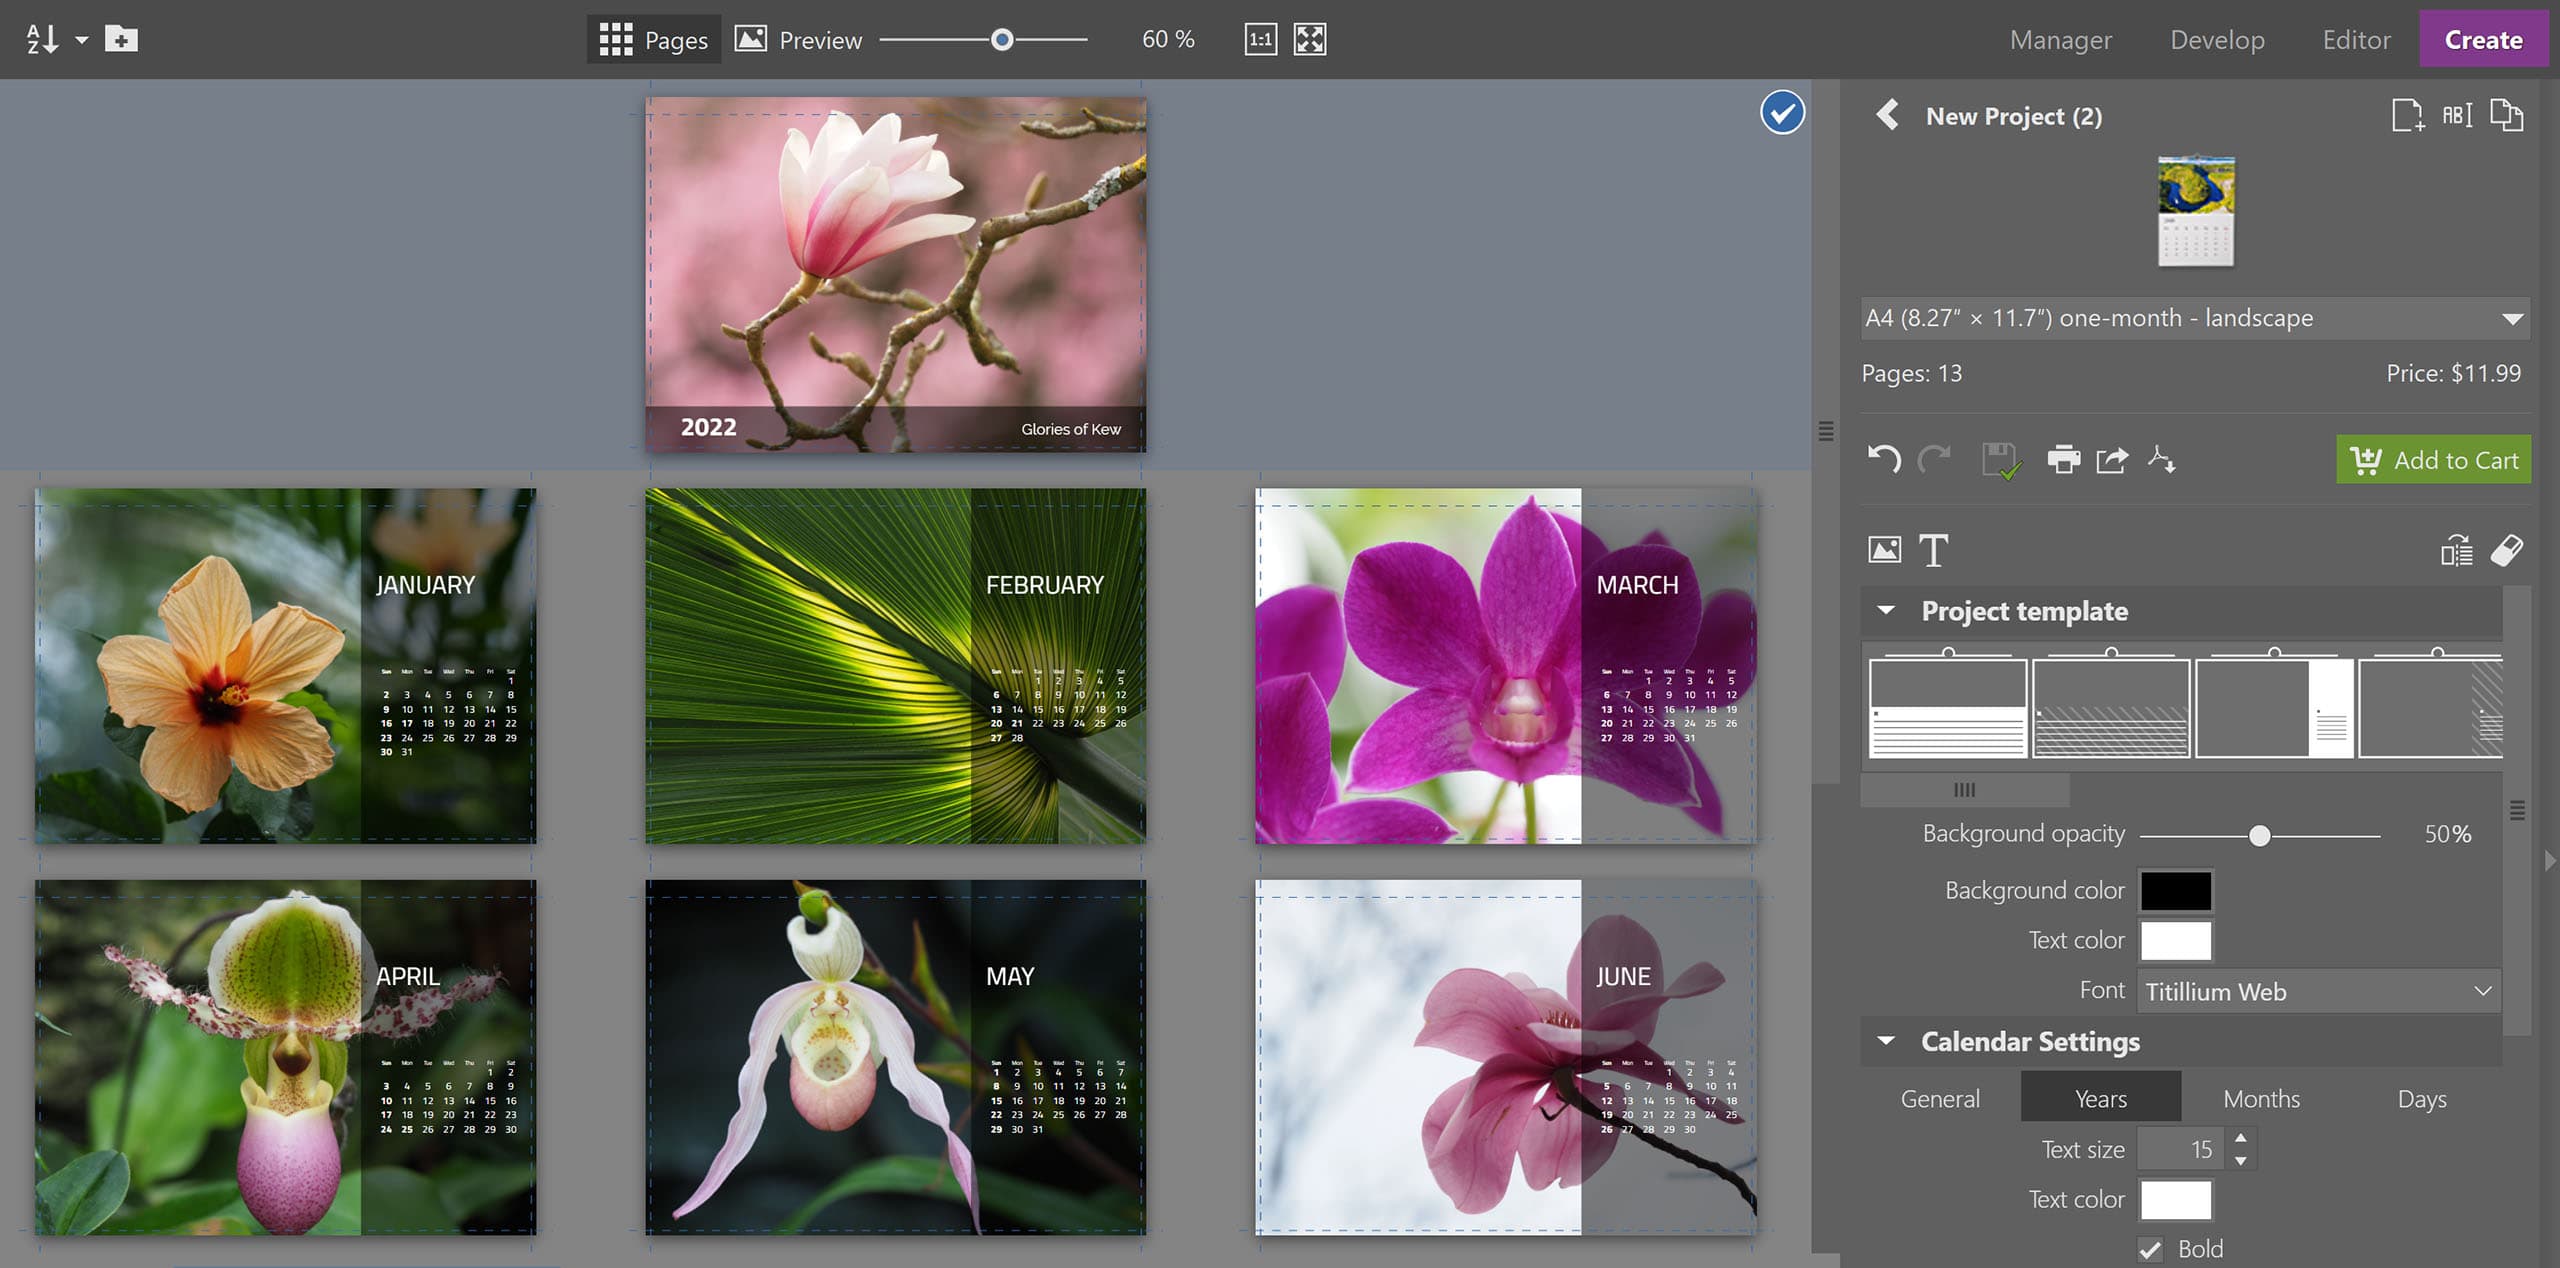
A vast range of built-in templates are on hand in the Create tab for making printed output
ZPS also makes it incredibly easy to share your photos as online albums via the firm’s Zonerama service, which is accessed from the left-hand browser panel. All you have to do is create a new folder in your Zonerama space and copy a selection of images across. Once they’re uploaded, they automatically appear as a nicely-designed gallery, complete with the ability to display images fullscreen or as slideshows.
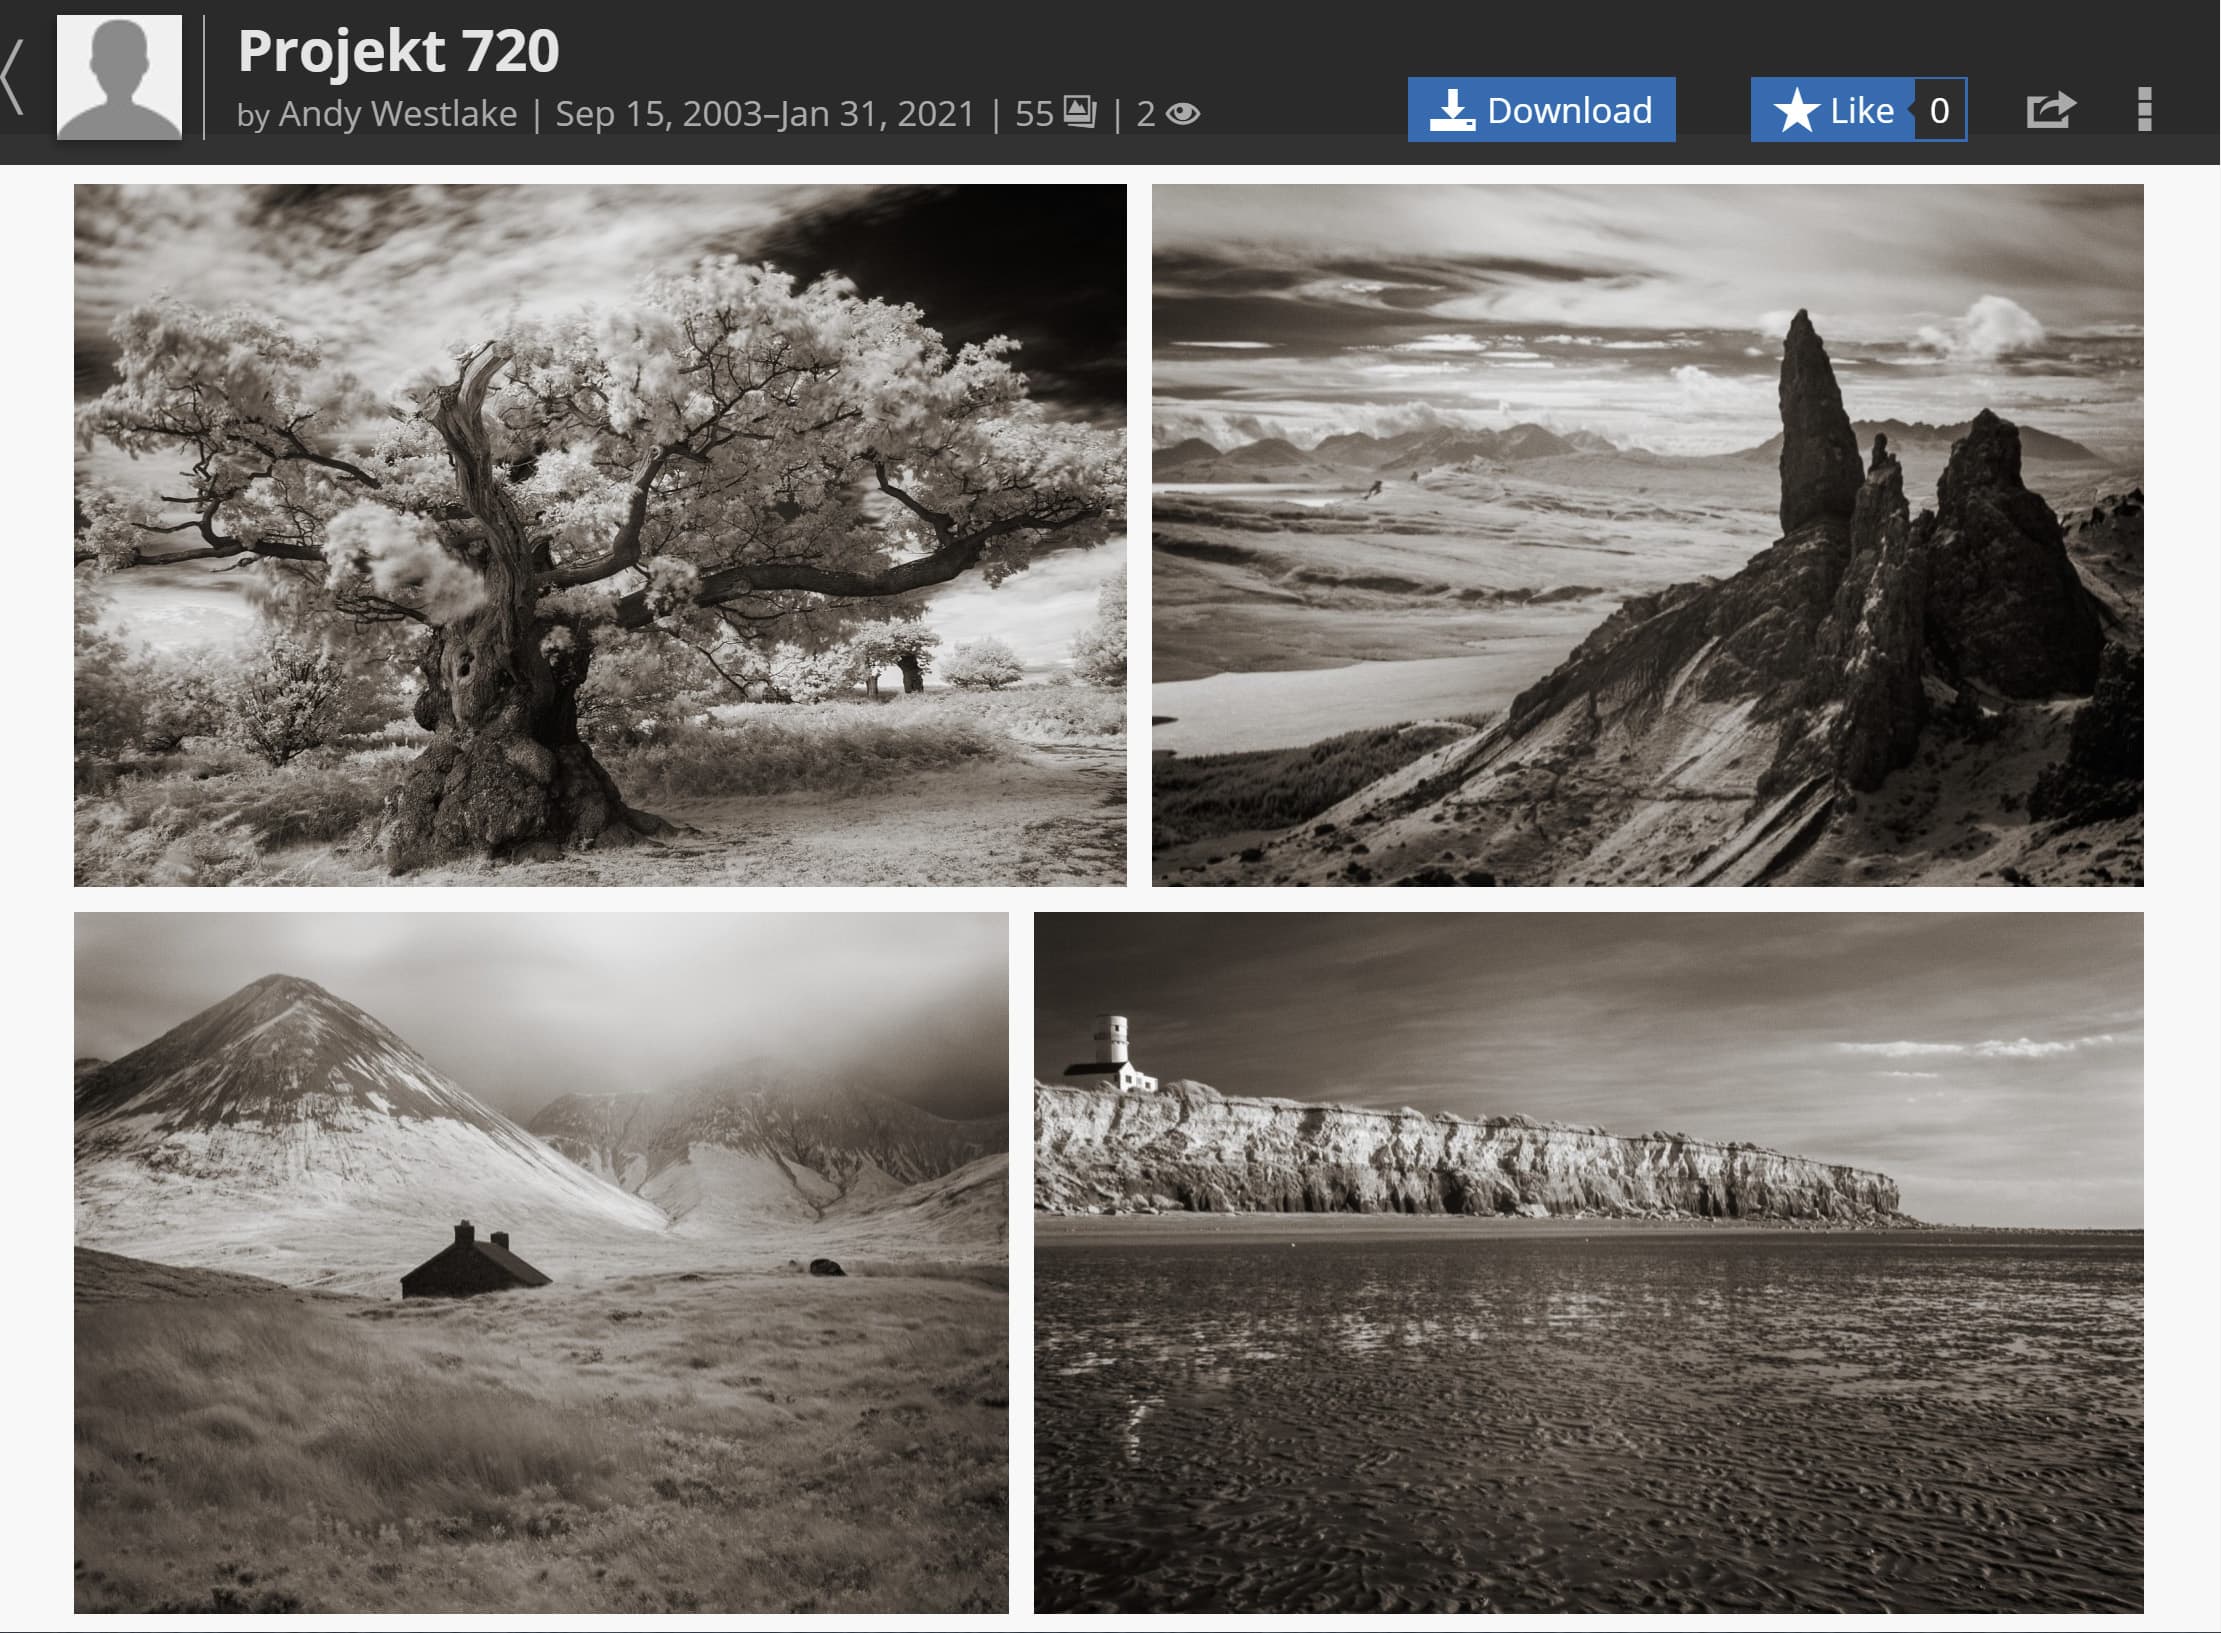
Zoner makes it extremely easy to create and share web albums via its Zonerama service
Galleries can either be made public, or hidden but shareable via an obscure URL. It’s possible to rename and edit files in a Zonerama browser window just as if they were in a local folder. Overall this is a a really easy way to present your images online in an attractive fashion, especially for those who are web-phobic and don’t to deal with the complexities of laying out their own website.
ZPS X: Output quality
With the 2021 Autumn update, Zoner has made significant updates to its raw processing, giving considerably improved output quality. This elevates ZPS X from being a competent raw processor to one that’s really very good indeed, and a strong competitor to Adobe Lightroom.

Zoner Photo Studio X now allows you to make huge tonal adjustments quickly and easily, with natural-looking results. Fujifilm GFX100, Fujifilm GF 32-64mm F4 R LM WR at 25mm, 1/240sec at f/8, ISO 100
Let’s look at this in more detail. Previously, ZPS’s default raw development settings erred very much to the neutral side, with low contrast and somewhat muted colours. But now, the 2021 process starts off punchier and more vibrant, making it closer to print-ready from the off.
However, while Zoner’s colour signature is generally very attractive, it’s worth noting that the firm doesn’t provide its own camera-matching colour profiles. Thankfully ZPS does understand standard DCP profiles, many of which are installed alongside Adobe DNG Converter. You just have to identify one that matches your camera manually.
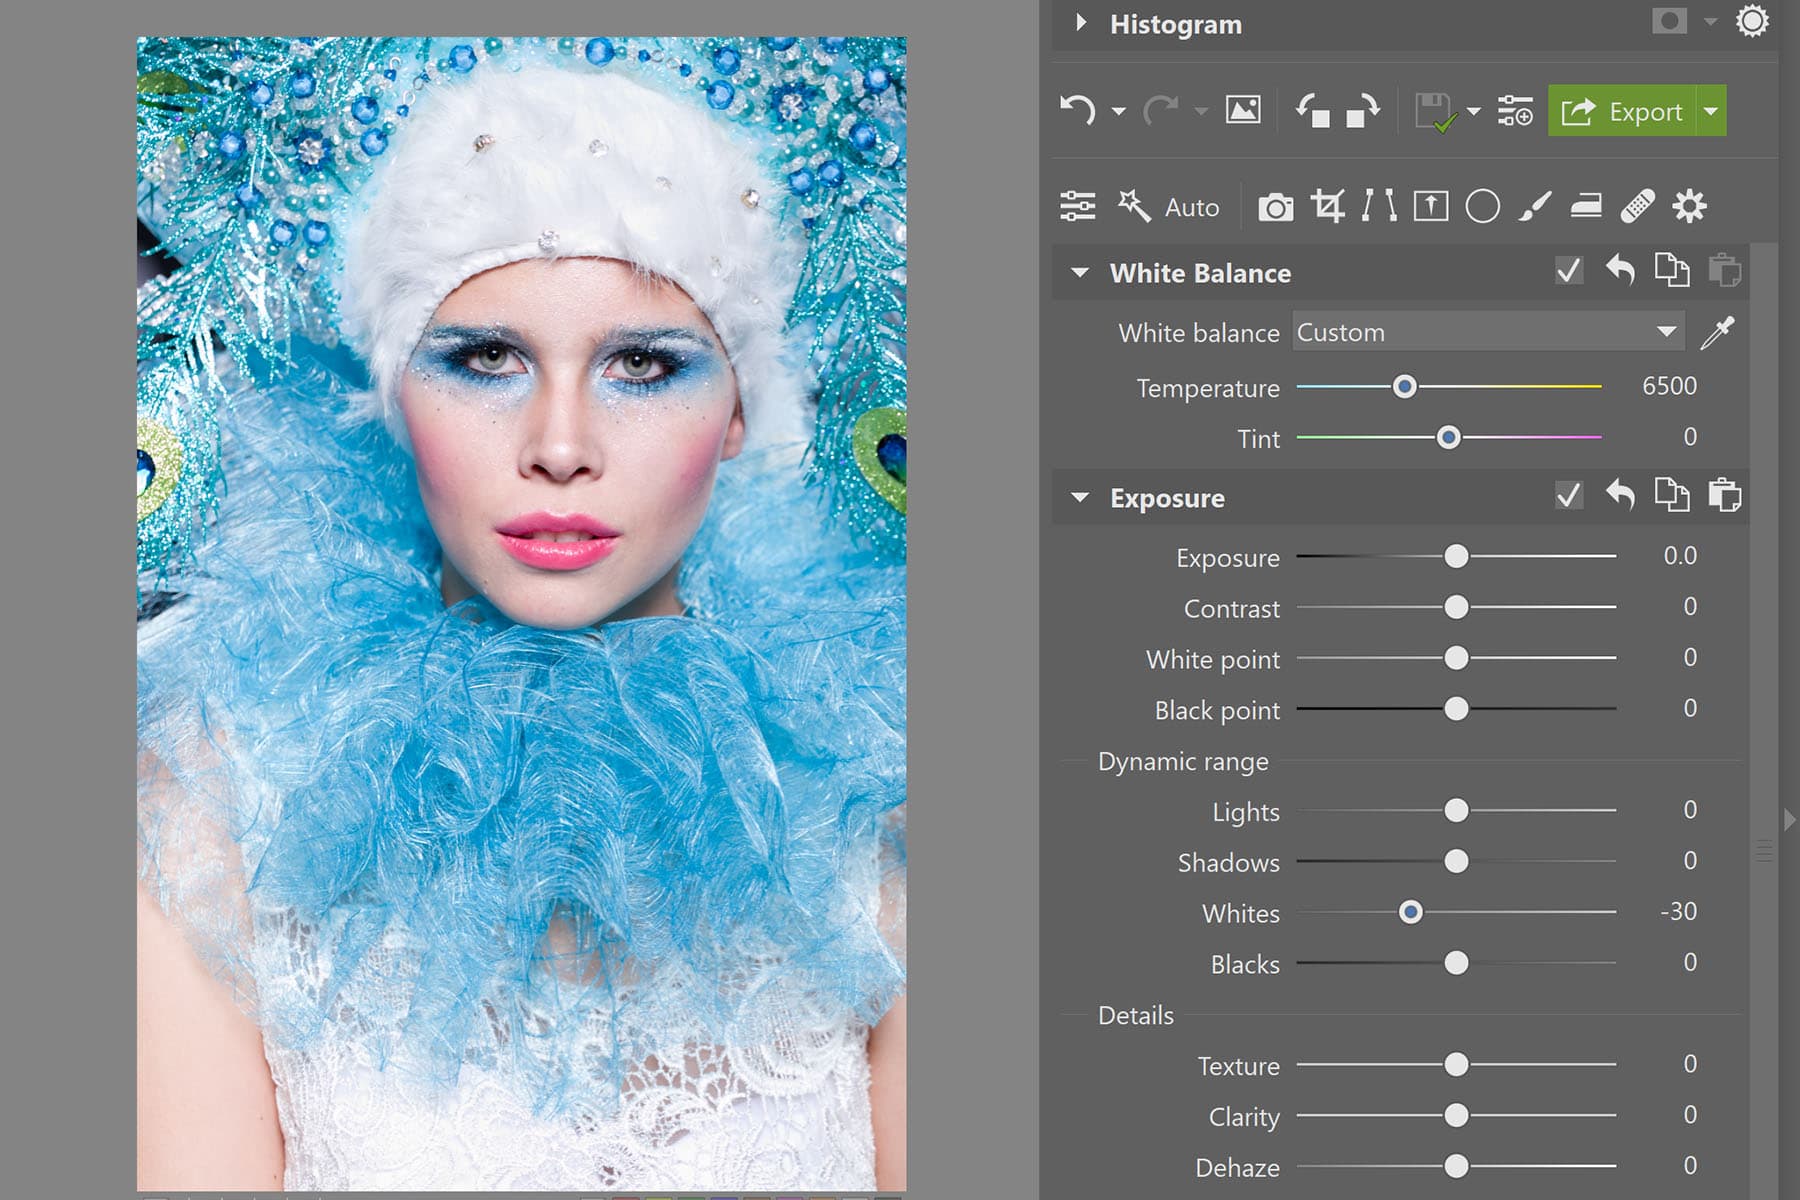
Zoner’s new Whites and Blacks sliders in the Dynamic range section provide impressive, and very useful additional control over tonality
But the real magic happens when you start playing with the sliders in the new Dynamic range section of the Exposure tab. As their names suggest, Whites works selectively on the brightest tones of your image, while Blacks manipulates the deepest. The Lights and Shadows controls also affect the same areas, but their influence extends across a wider range of tones.
Crucially, Lights and Shadows don’t interact with each other or affect the overall image brightness, so there’s no need to fiddle around with iterative adjustments.
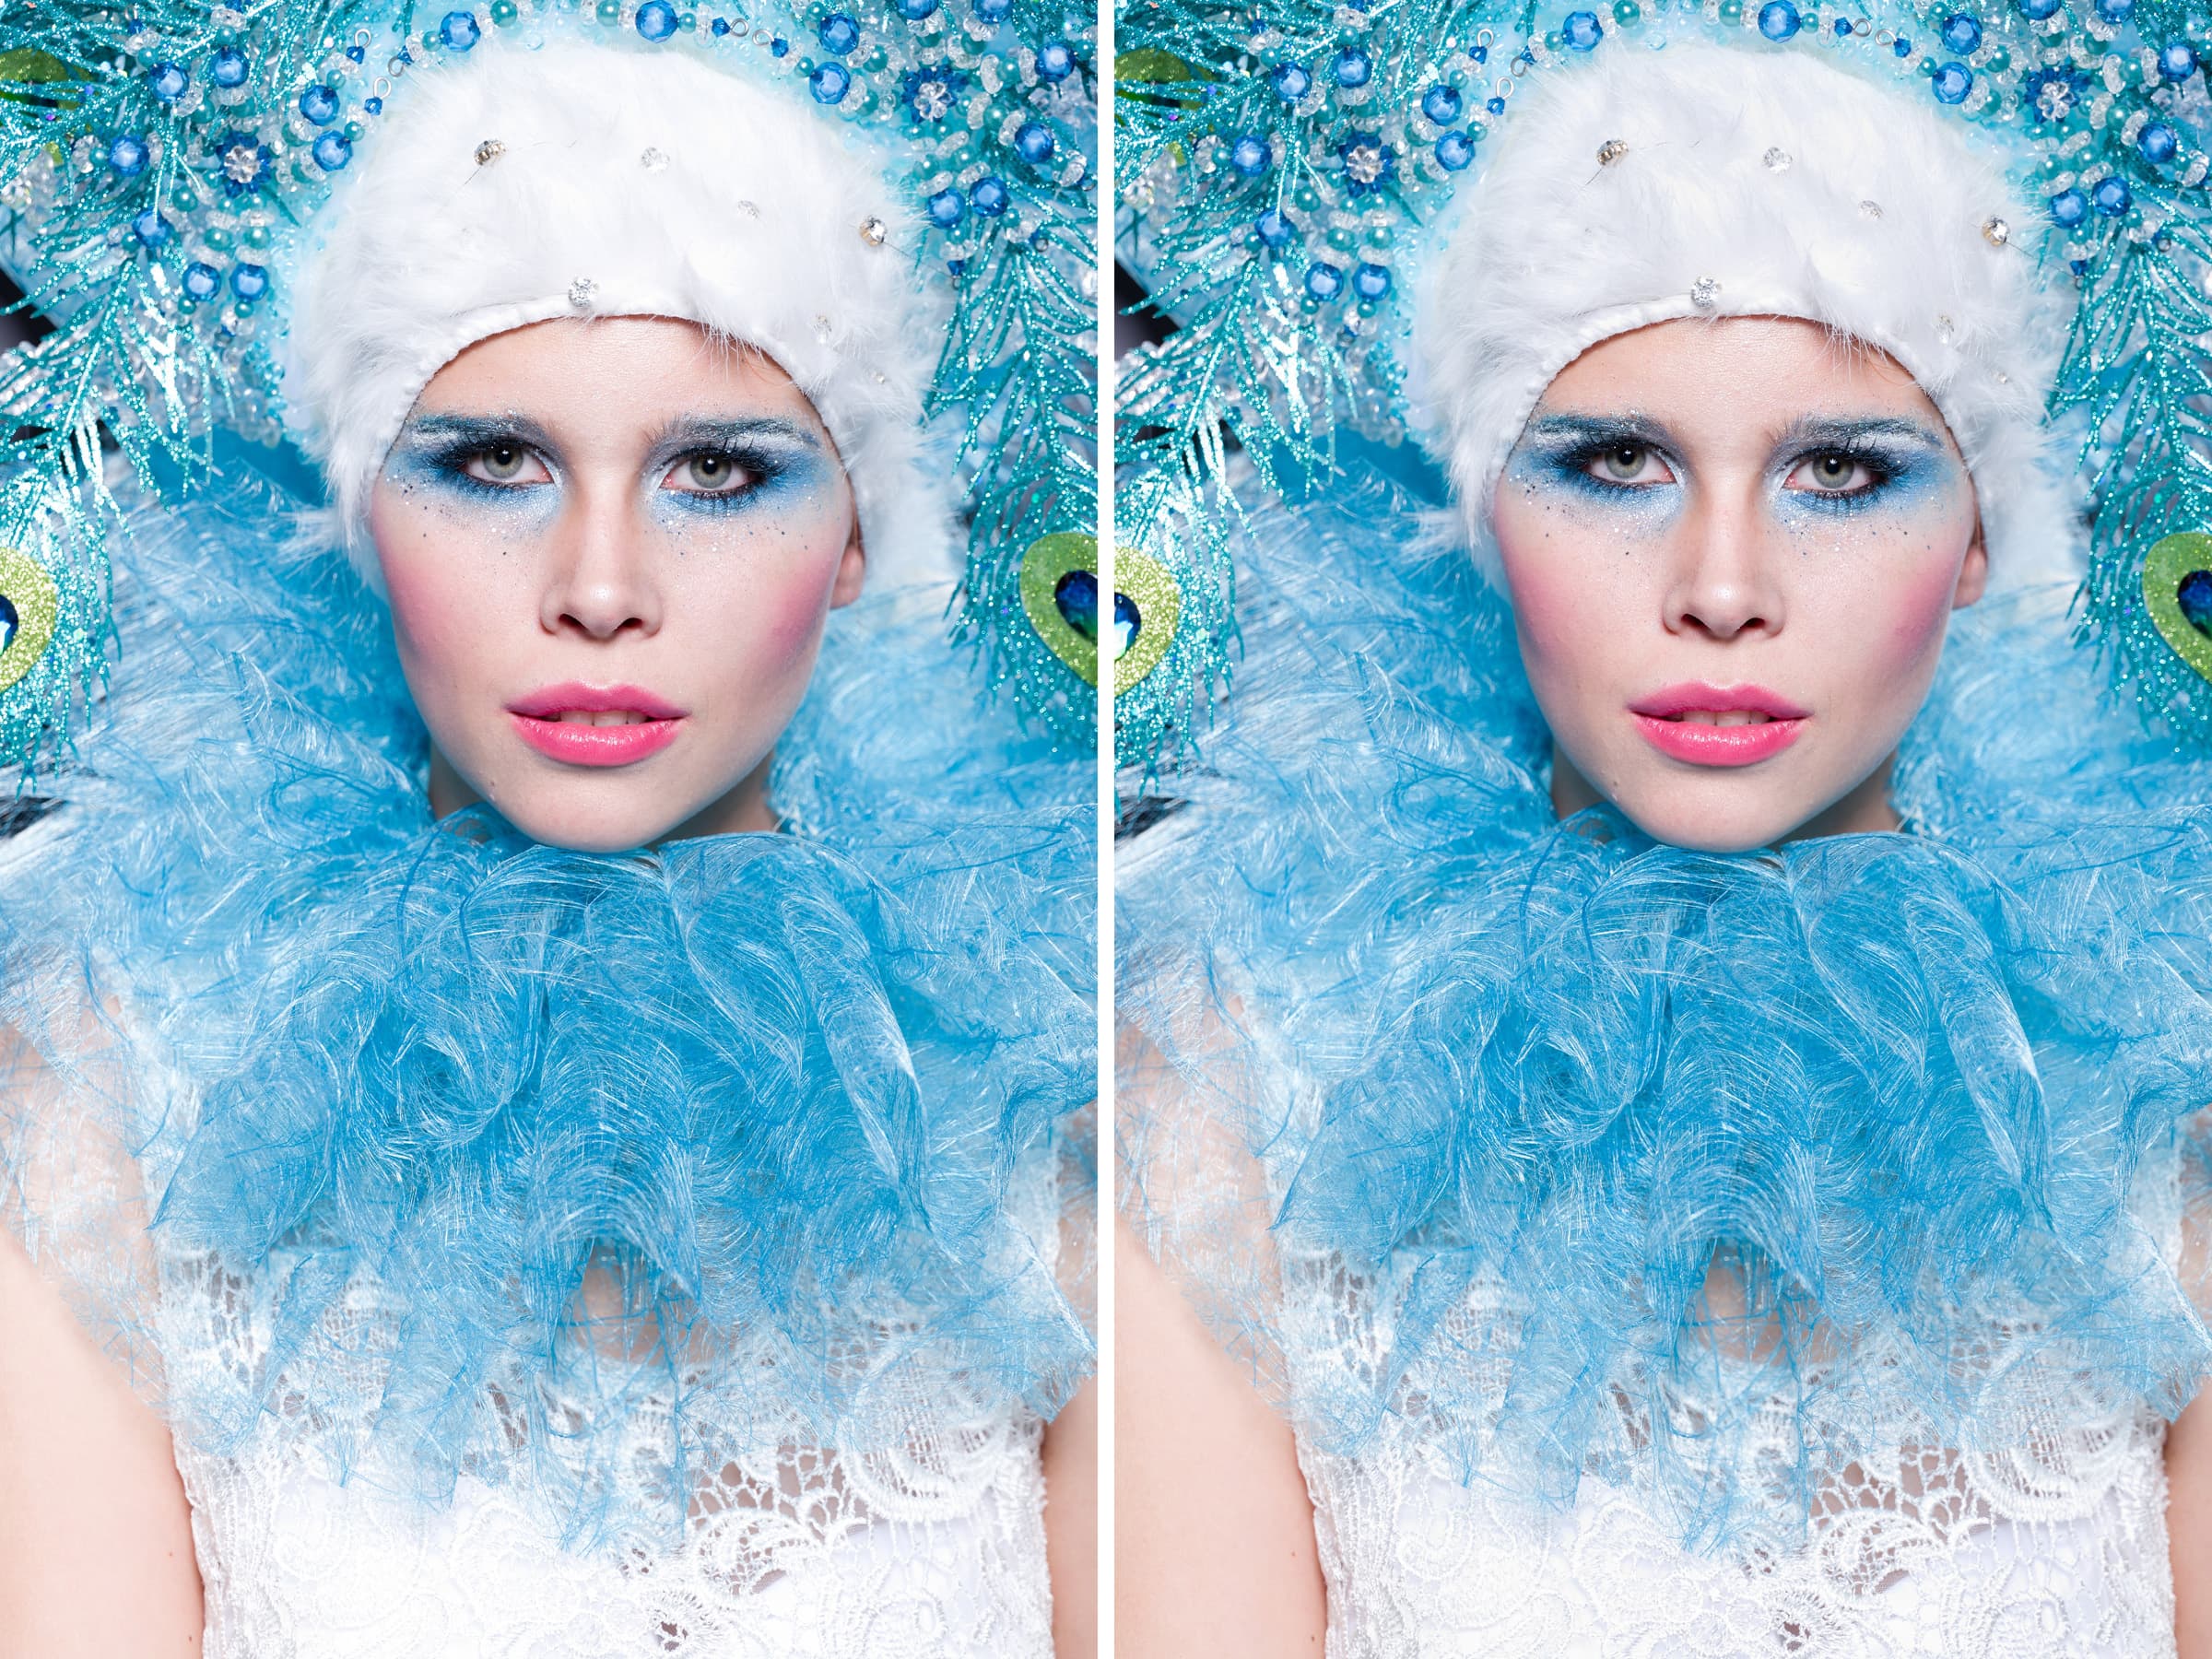
Left – no Whites adjustment; Right – Whites set to -30. Using the Lights slider instead would also affect the model’s skin tone. Leica SL, SL 24-90mm F2.8-4 at 90mm, 1/250sec at f/5.6, ISO 100
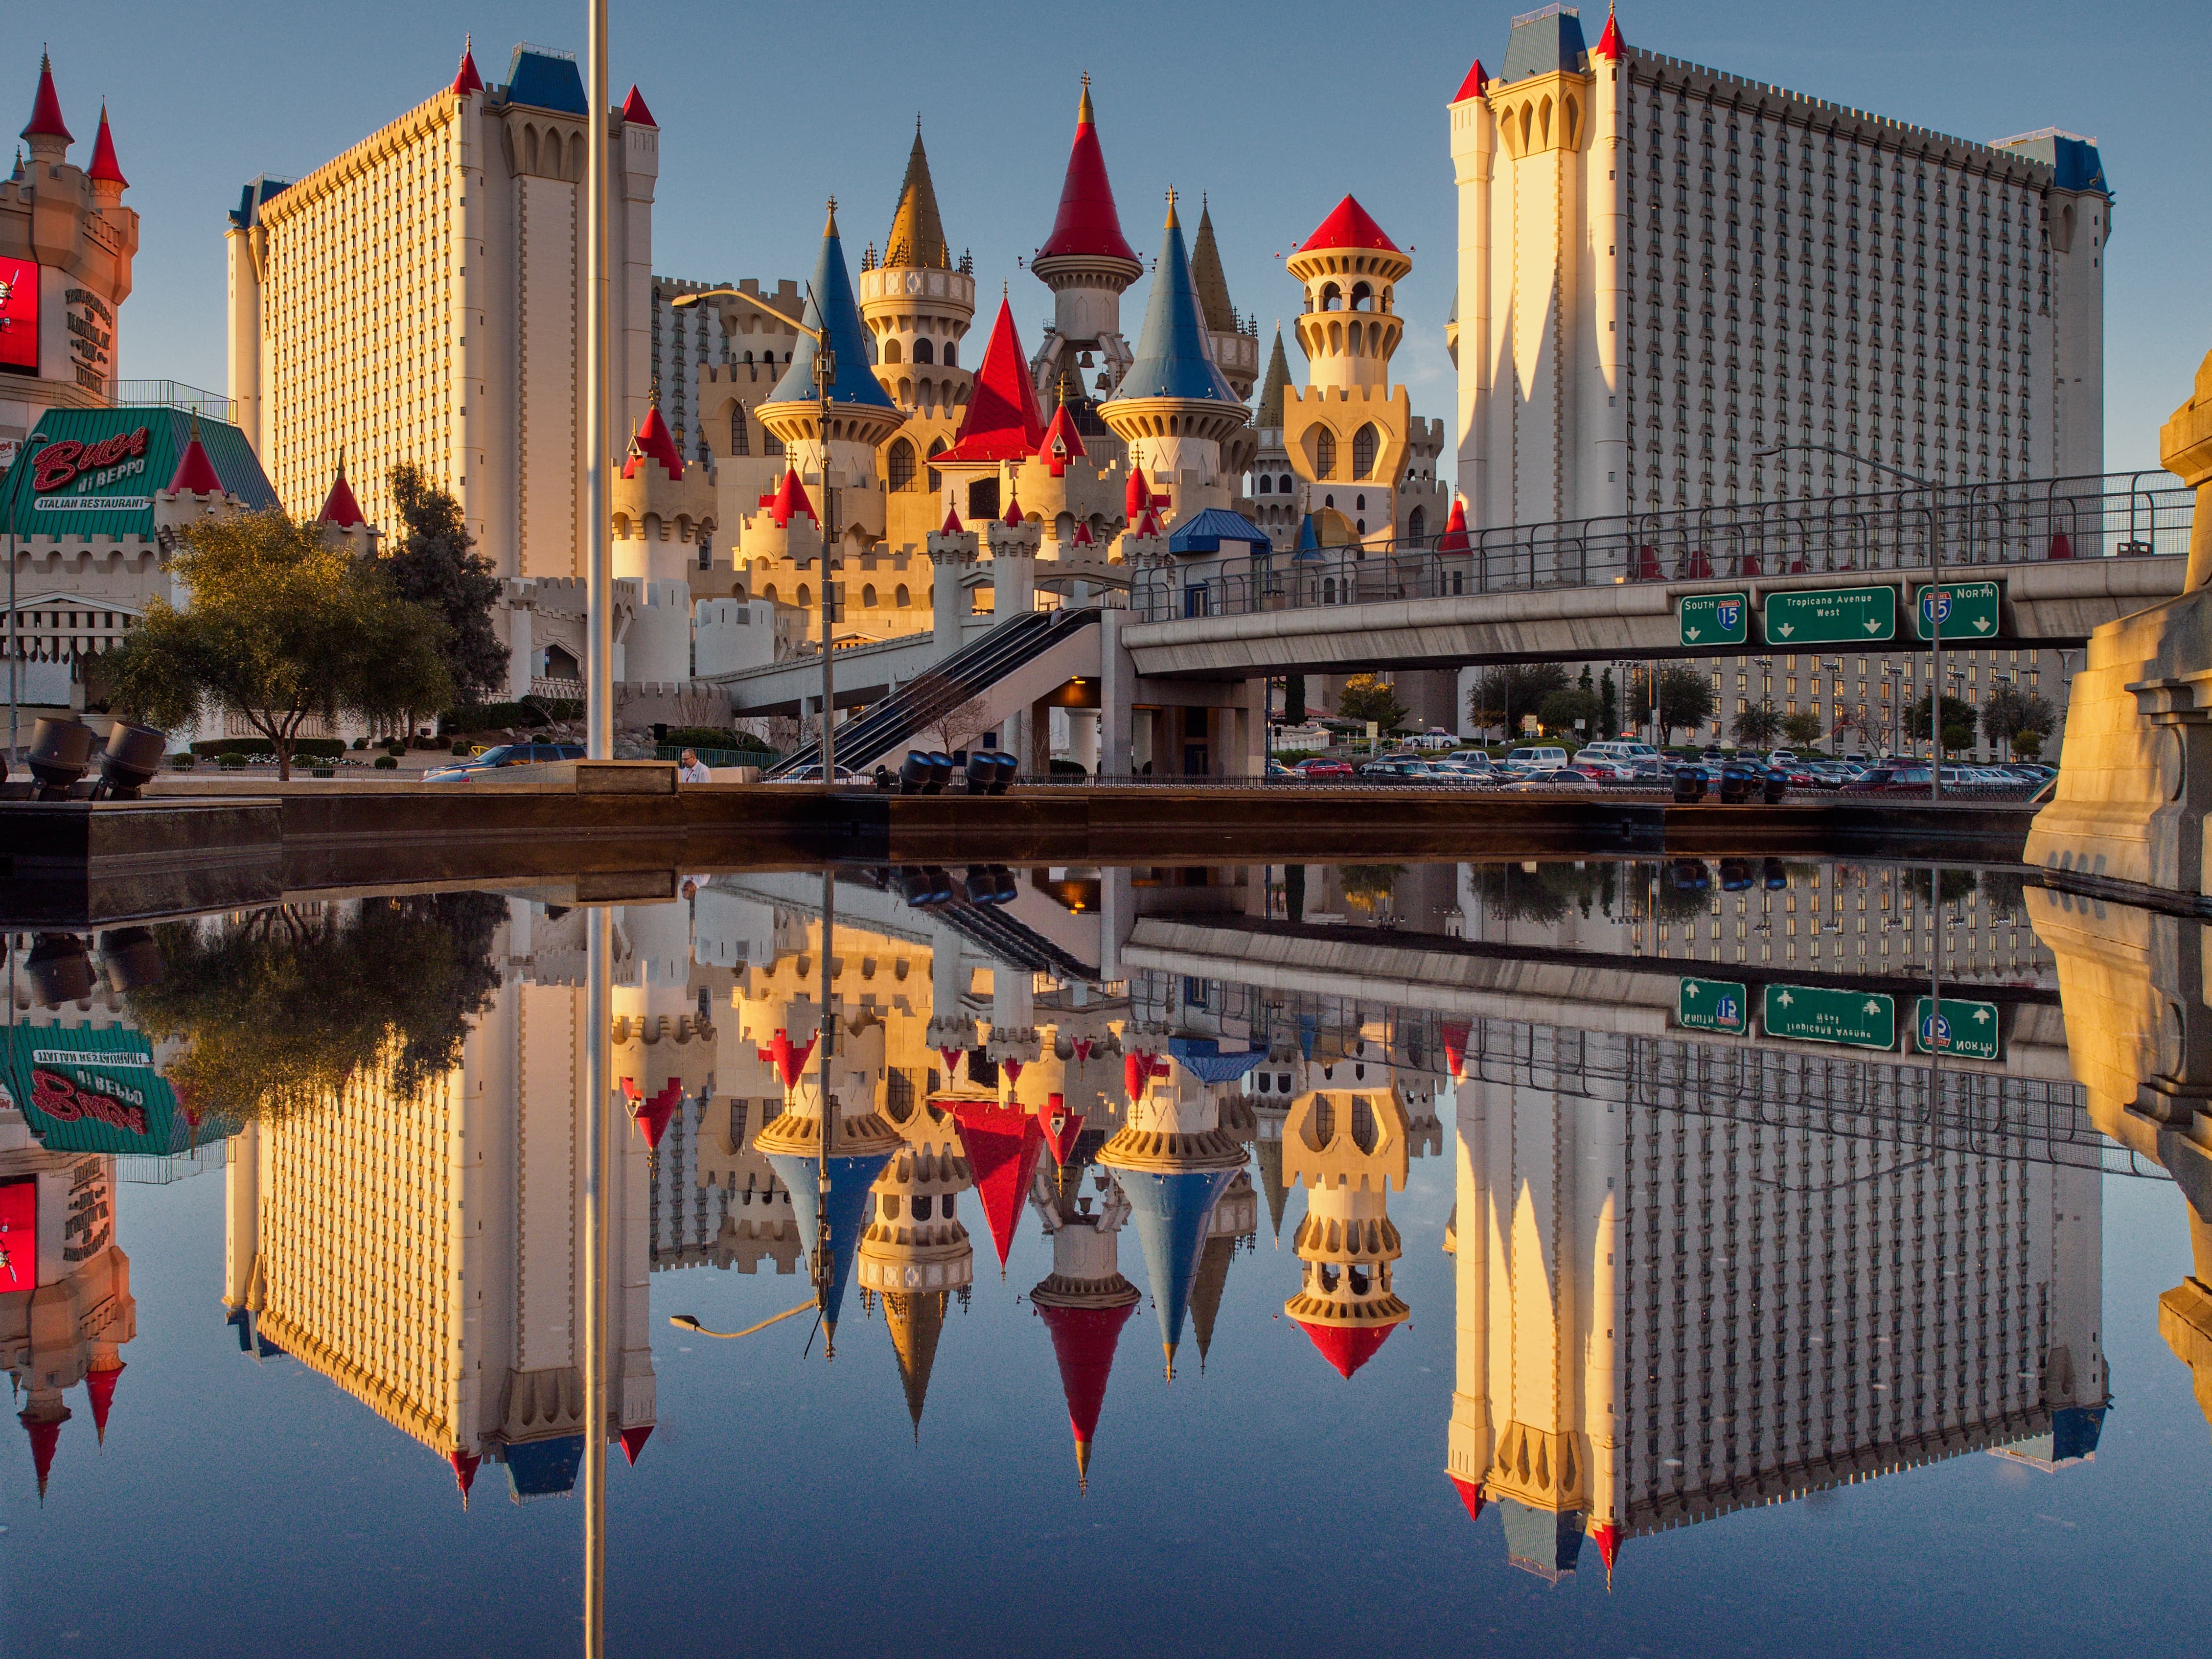
Clearly, the new Whites and Blacks controls are tailor-made for wedding photographers looking to balance a white dress against a dark suit. But they should be equally invaluable for landscape shooters who’d like to enhance bright sky and cloud detail while adding fill-light to deep shadows. Alternatively, they can readily balance the extremes of brightness you can get with night-time cityscapes. The possibilities are vast.

Here, I’ve used Whites to bring out detail in a bright sky, and Blacks to feed light into the shadows without brightening the beach
Once you get used to how they all work, having these four controls for Whites, Lights, Shadows and Blacks just gives that much more control than the usual Highlights and Shadows alone. They also provide considerably greater scope for adjustment than was previously available, meaning you can extract more detail from deep shadows and subtly feed detail into bright highlights (although as always, there’s nothing you can do about overexposed regions that are completely clipped).
But what’s perhaps most impressive is how these controls all work together to make massive tonality adjustments quickly and easily, without the results looking unnatural.
Zoner Photo Studio X is now able to make significant tonal adjustments without introducing an unnatural ‘HDR’ look. Fujifilm GFX100, GF32-64mm F4 R LM WR at 32mm, 1/40sec at f/11, ISO 200
You can see this in the example above, where I used Whites and Highlights to darken the sky, and Blacks to add detail to the rocks, without brightening the beach. The aim here is to convey the atmosphere of twilight, shortly after sunset. For comparison, you can see an unadjusted version here. (Warning – these are large files from the 100MP Fujifilm GFX100.)
Zoner’s new texture slider also works really well. It doesn’t bring any great surprises, but does a fine job of enhancing the contrast of fine detail, without impacting the tonality of the image as a whole. As tends to be the case in ZPS X, the slider’s response is really well-judged. Even at its maximum setting, the result shouldn’t look overcooked, which means there’s no need to be afraid of moving it a substantial way across its range.
The Texture slider is great for enhancing details, working on a larger scale than the pixel-level Sharpness controls
You can see the effect this has in the comparison below. Even viewing the image on a small scale, the Texture slider has done a great job of enhancing the folds of this elephant’s hide, without affecting the overall balance of tones.
Here setting Texture to 50 (right) has done a fine job of enhancing textural detail
If you’d like to make a more detailed comparison, you can download the unadjusted image here, and the version with the Texture slider set to 50 here.
Zoner Photo Studio X: Noise reduction
Perhaps the biggest improvement introduced by the 2021 Autumn update in terms of output quality lies with noise reduction. Previously this was Zoner’s Achilles Heel, with high-ISO conversions lacking in detail while suffering from chroma noise. But toggling between the old and new processes reveals dramatically improved noise handling, particularly regarding the suppression of colour noise. I’d probably turn up the Colors Strength slider a bit further than Zoner’s default setting, but this is very much a matter of personal preference.
Canon PowerShot G3 X, 600mm equivalent, 1/320sec at f/5.6, ISO 1000. Developed in Zoner Photo Studio X with colour NR set to 80
Not surprisingly, ZPS X is still no match for the very best AI-based noise reduction algorithms such as DxO’s DeepPRIME, as you can see from my DxO PureRAW review. But a much fairer comparison is against Adobe Camera Raw, and Zoner now gives pretty comparable results.

This 100% crop taken from the image above reveals substantially improved noise reduction compared to the previous 2020 process version
Previously, I wouldn’t have recommended ZPS X for users who regularly shot at high ISOs, but now, it’s not a bad choice at all.
Zoner Photo Studio X: Lens corrections
Many cameras now encode lens distortion correction metadata in their raw files, and Zoner is smart enough to apply it, so straight lines don’t appear bent. However, it’s worth noting that ZPS doesn’t include any lens-correction profiles to use with cameras that don’t include such metadata, for example most DSLRs, or Sony E-mount models.
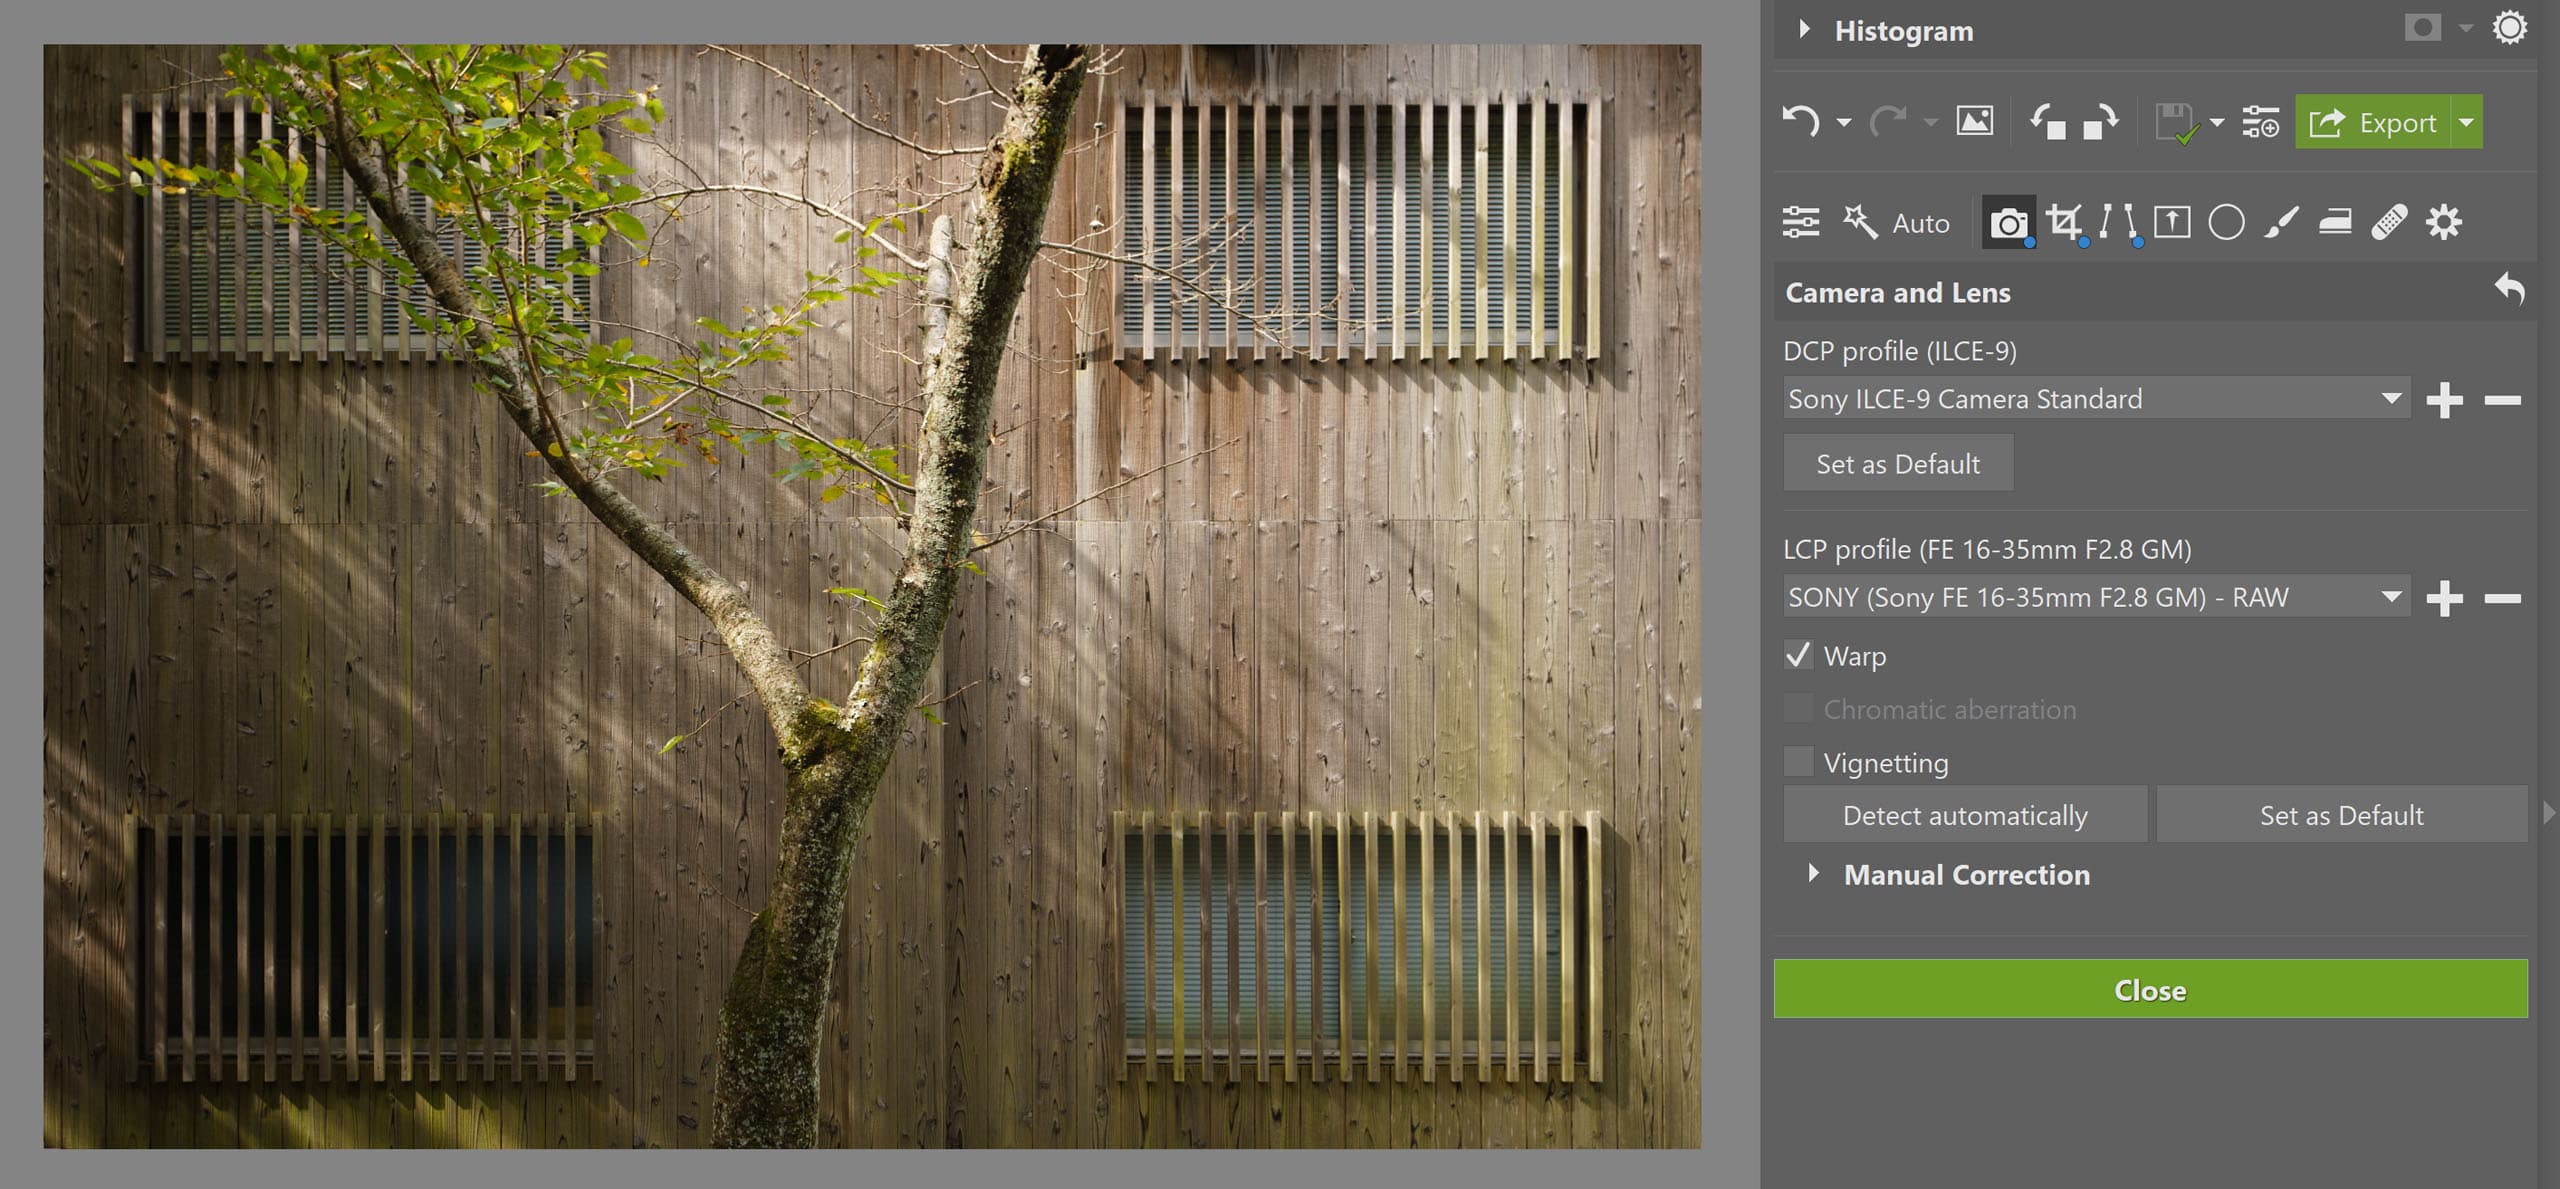
ZPS supports both DCP camera colour profiles, and LCP lens correction profiles. The latter allow you to correct the geometry of your images, which is often highly desirable when shooting buildings
Again, though, ZPS X does support standard LCP profiles, but you’ll have to source and install them manually (again, some come with Adobe DNG Converter). Alternatively, you can use its generic lens correction tools to combat distortion, vignetting and chromatic aberration manually.
Zoner Photo Studio X: Presets
If you’d like to be creative with your processing, a good number of presets are built-in for both colour and black & white. It’s also possible to create your own presets if you tend to work towards specific looks. Presets can be applied at different strengths using a simple slider, which allows you to to fine-tune the output to match your preference.
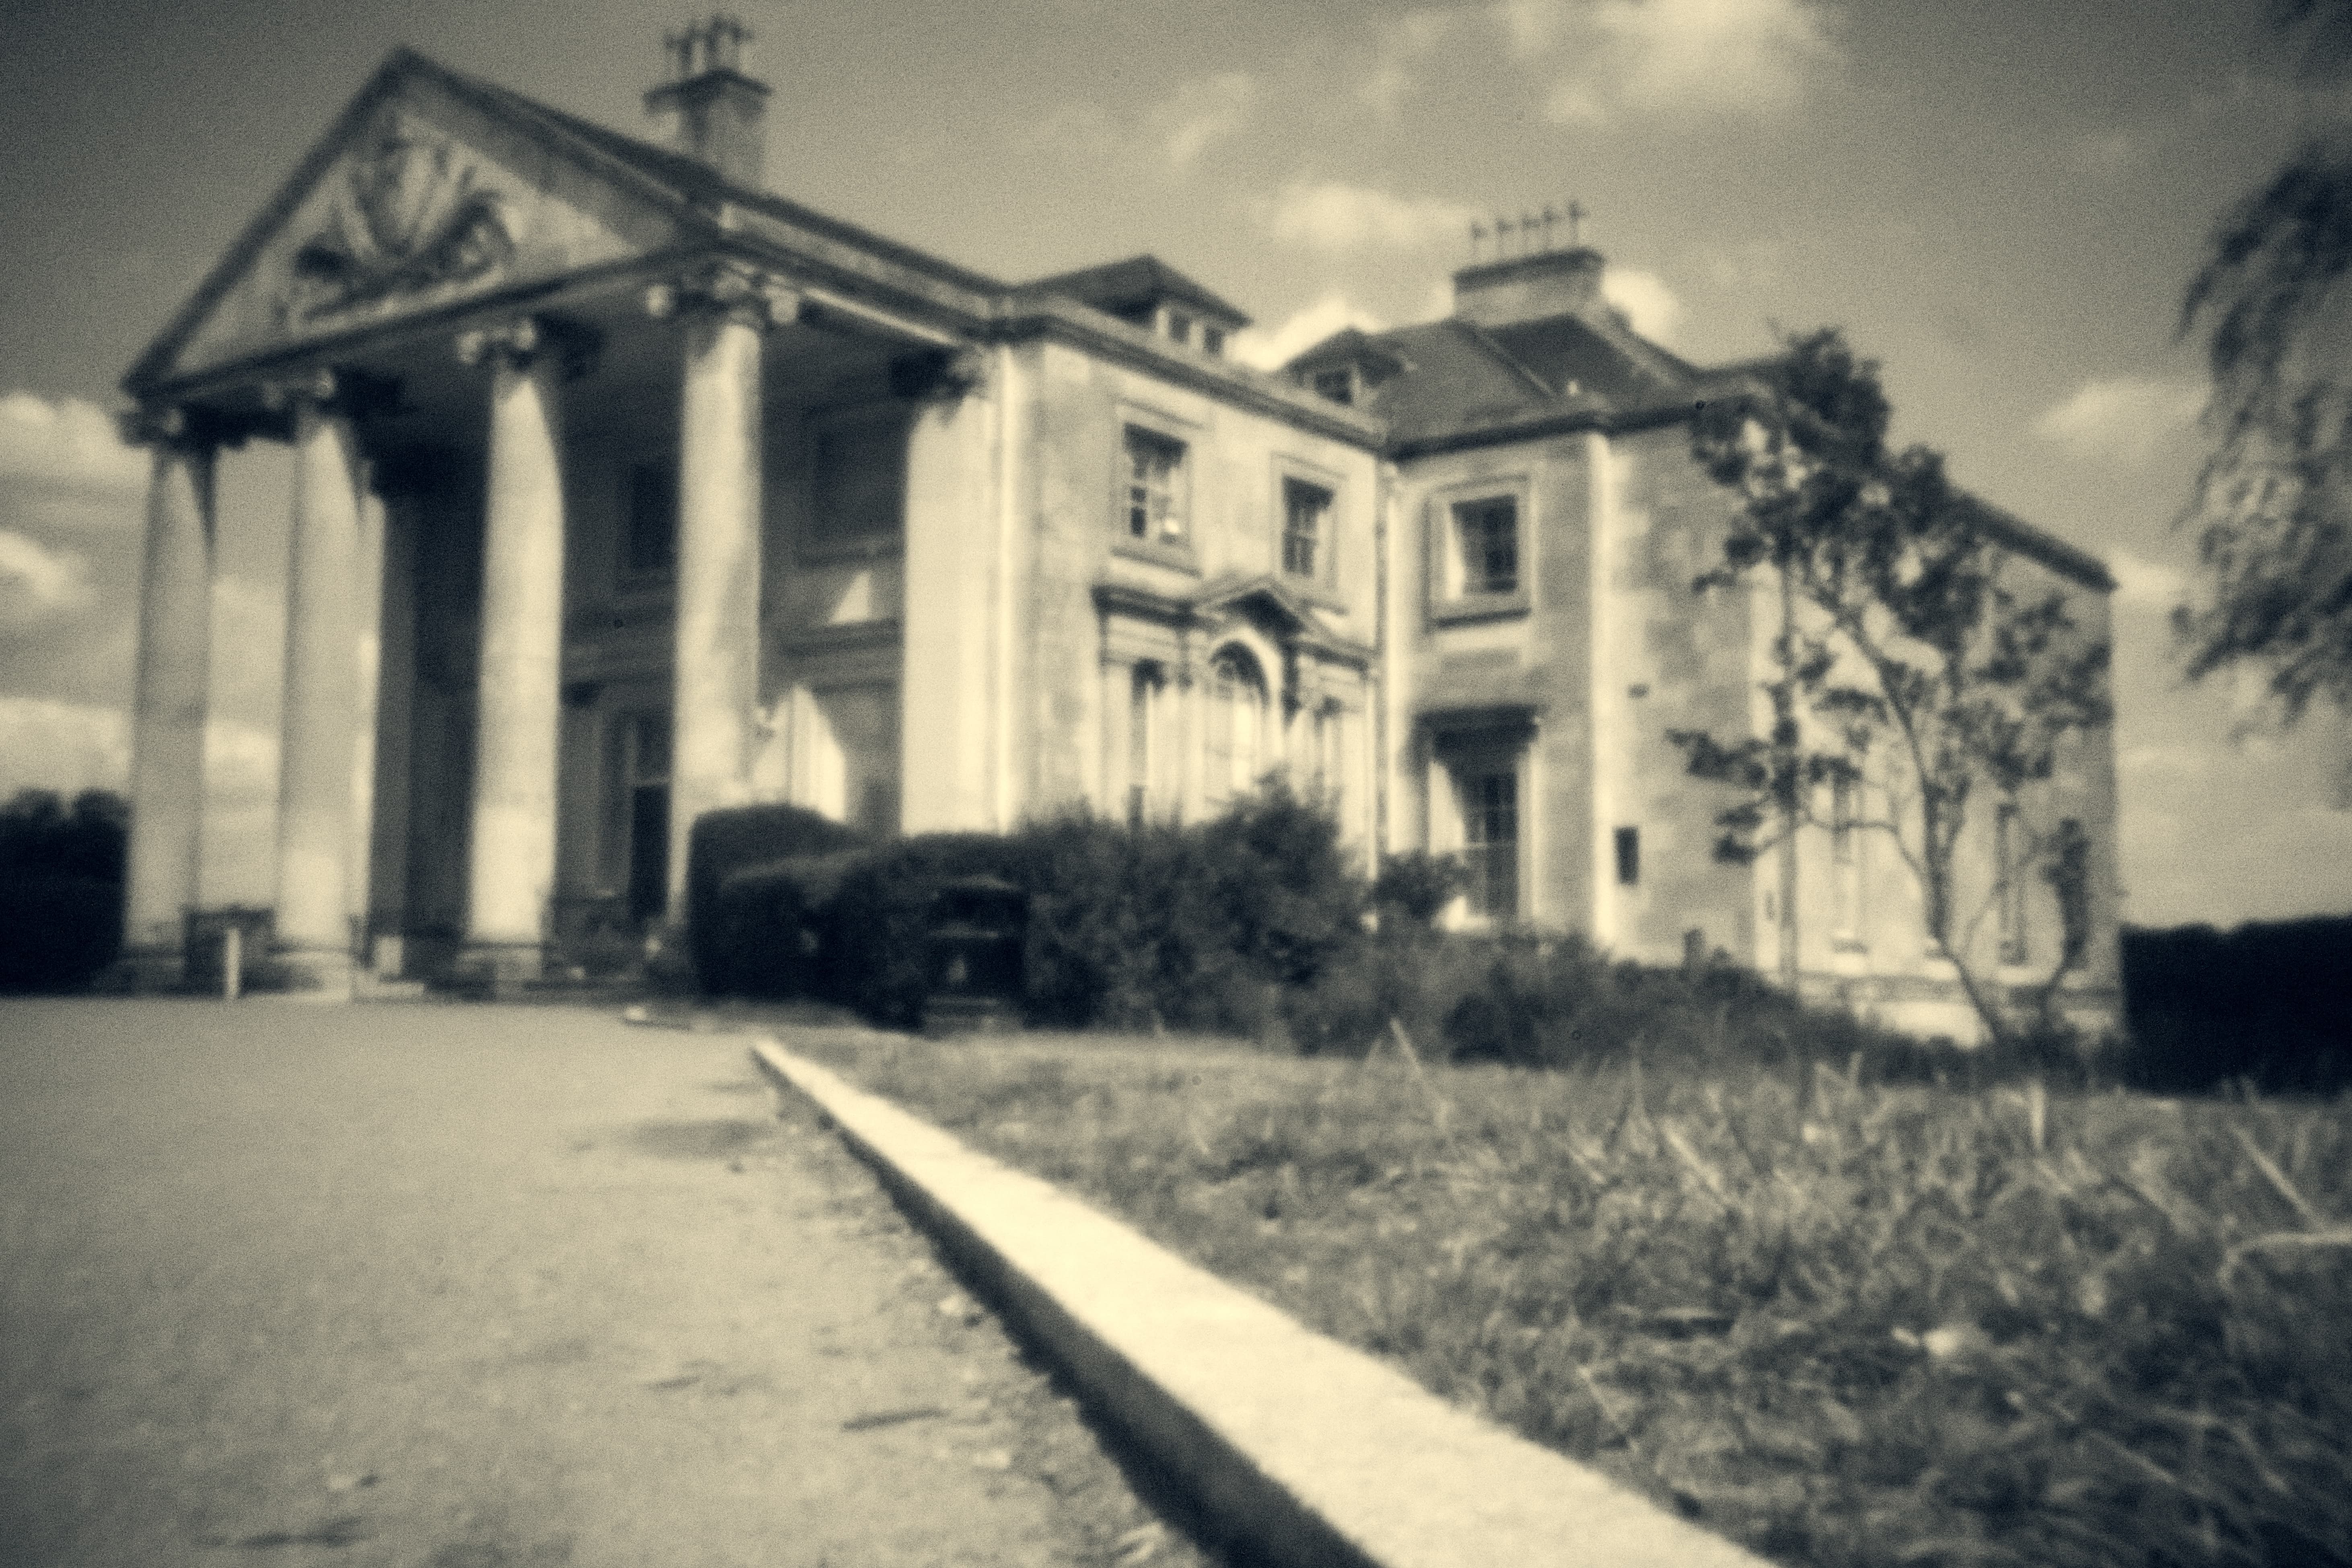
ZPS has a range of built-in presets; here I used the Split Tone option to complement a pinhole image. Sony A6000, Thingyfy Pro pinhole, 1/60sec at ISO 3200
There’s a handy set of auto enhancement options too, for those who’d like to get good-looking results with a single click and not spend too much time fiddling around with sliders.
Zoner Photo Studio X: Verdict
Windows users looking for a comprehensive image-editing solution will find a lot to like about Zoner Photo Studio X. It really does do it all, from copying your pictures off your memory card right through to creating prints and web galleries; I can’t think of anything else that provides such a complete set of features. Once you’ve familiarised yourself with how it works, it’s also reasonably easy to use, while providing an impressive range of options for advanced users to configure and work with it pretty much as they please.
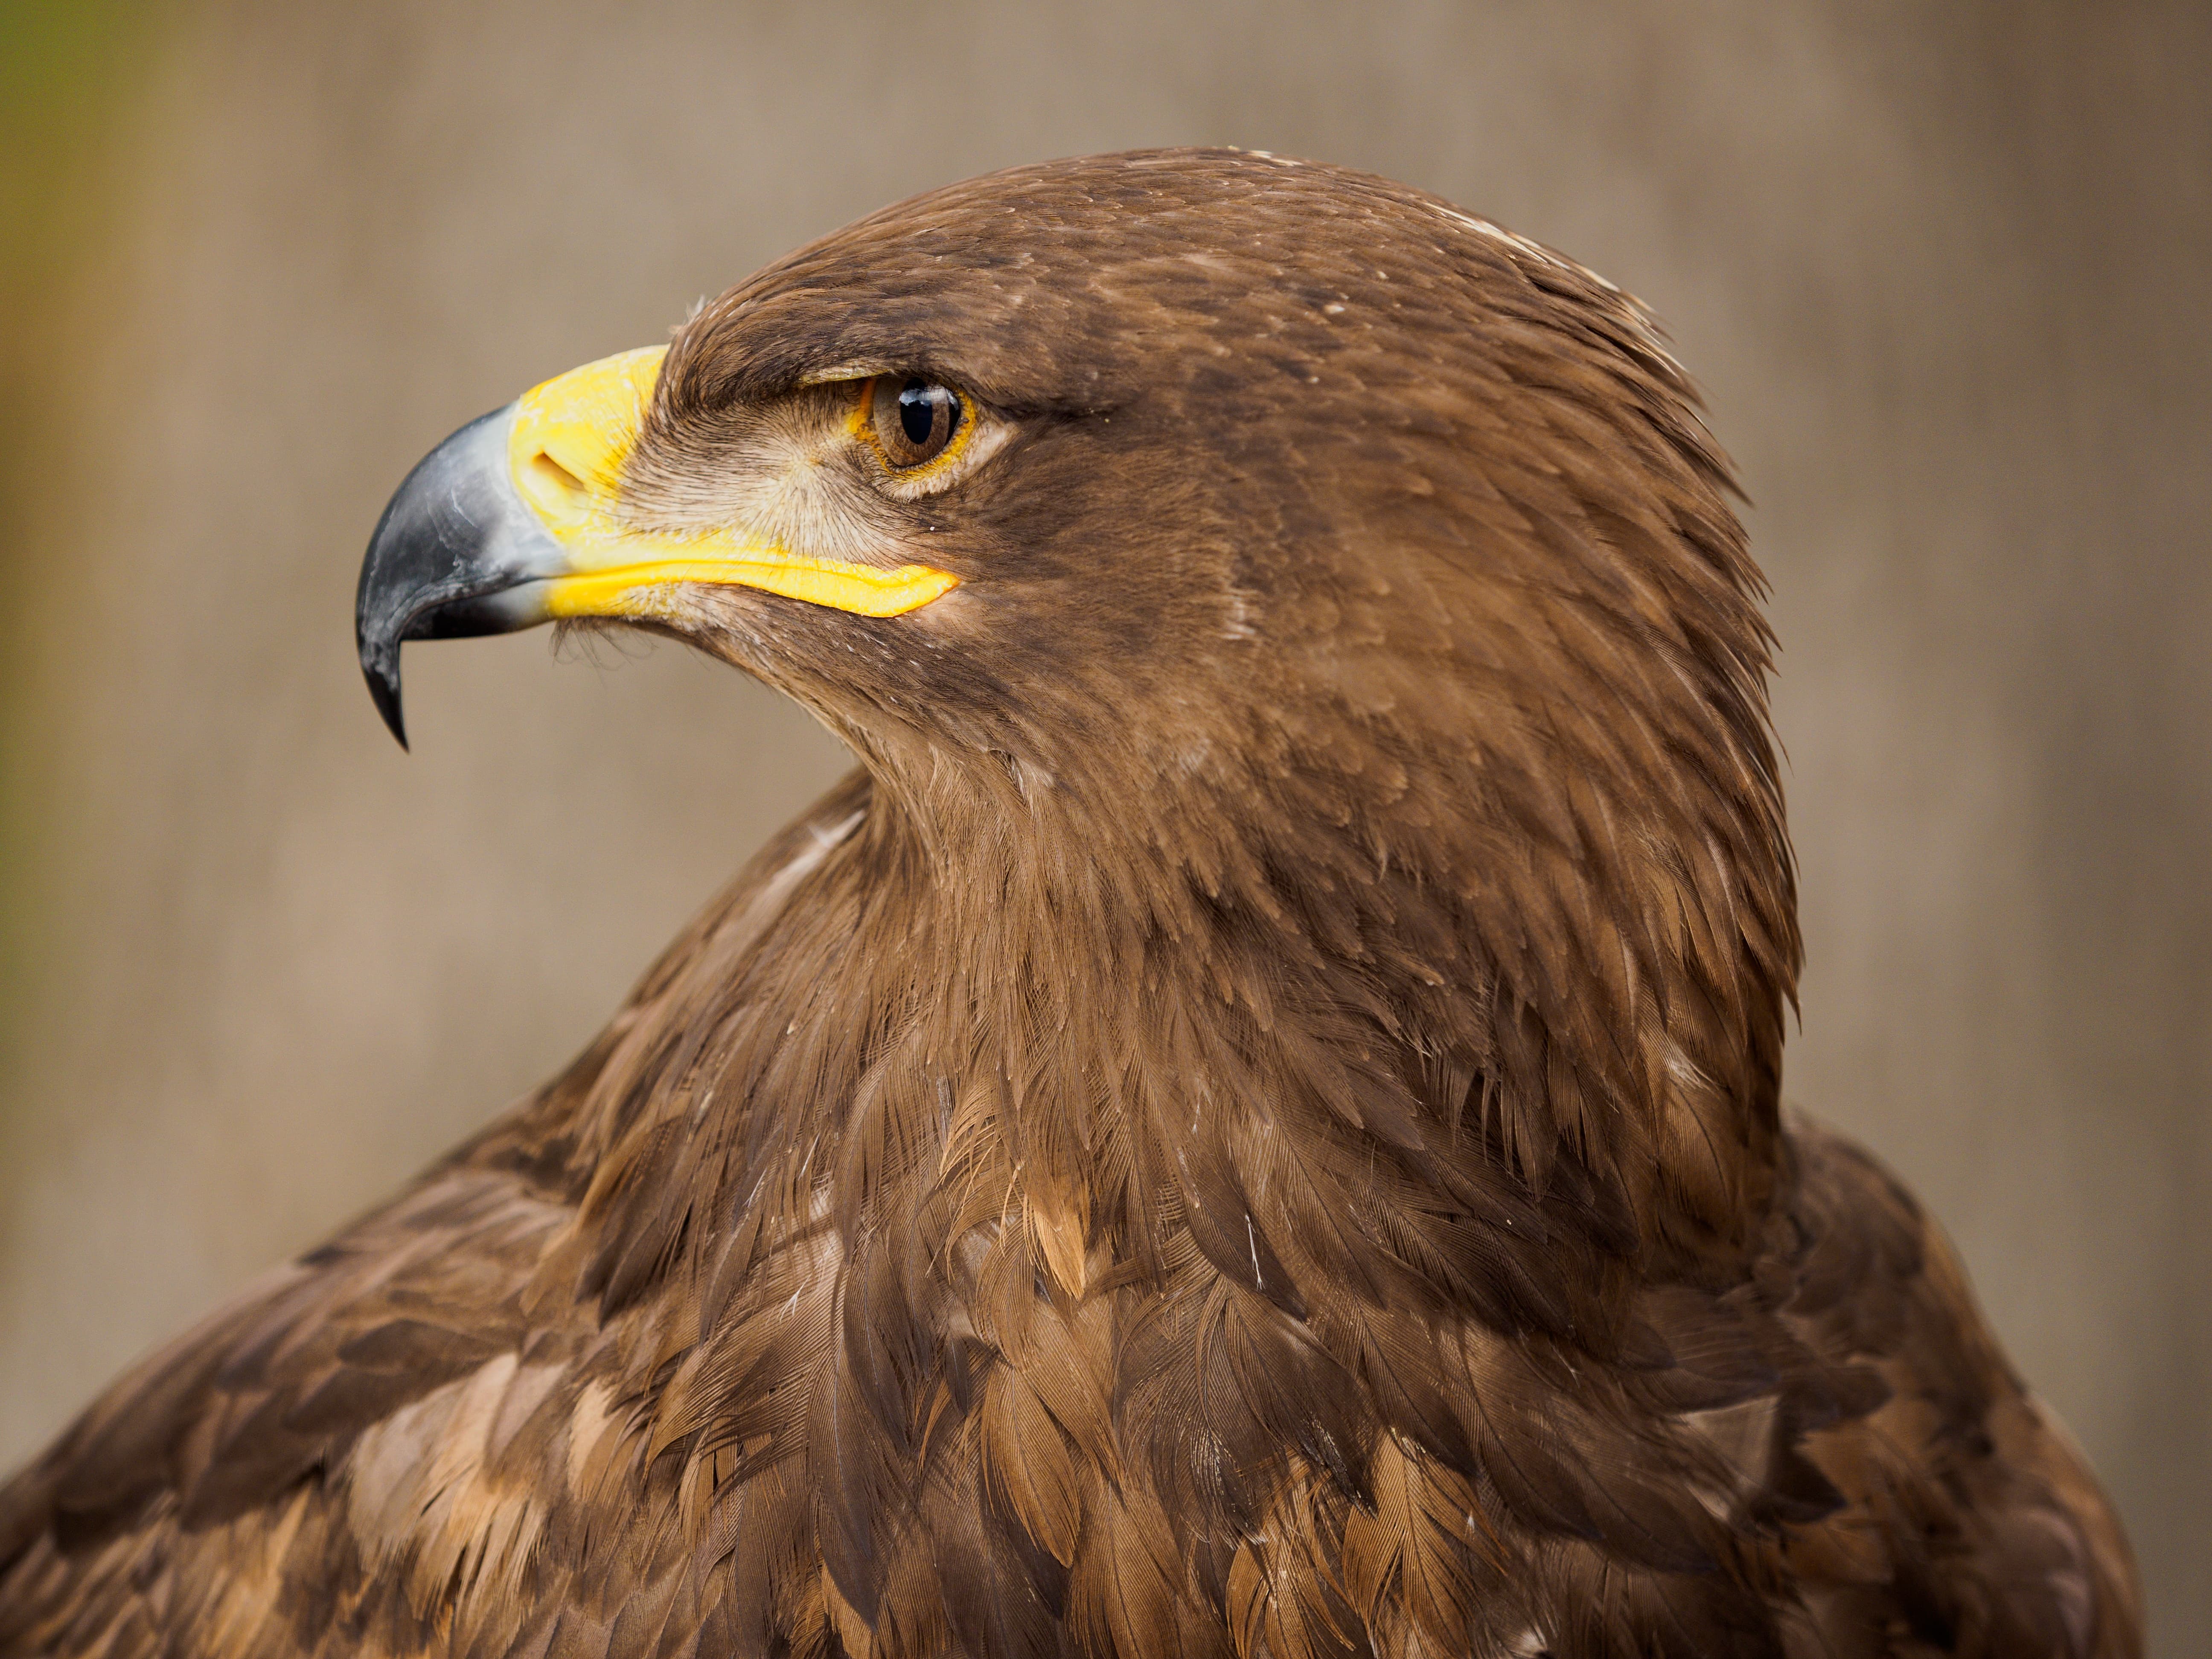
Olympus E-M1 Mark II, Olympus 40-150mm F2.8 Pro at 150mm, 1/250sec at f/2.8, ISO 320. Developed in Zoner Photo Studio X
Some photographers will object to subscribing to software on principle, but ZPS has the twin virtues of being both inexpensive, and nicely behaved if you decide to stop paying. Thanks to the Autumn 2021 update, it now also gives much better output than before, thanks to both its updated noise reduction, and its improved tonality controls. In fact, it’s now really only the lack of profiled lens corrections and camera colour matching that places it behind more expensive competitors.
As an all-in-one option for all your imaging needs, Zoner Photo Studio X is difficult to match, and well worth giving a try via its one-month free trial. It’s just a shame there’s no Mac version.